Advertisement
Advertisement
Table of Contents

Related Manuals for Mpio FL 350


Summary of Contents for Mpio FL 350
- Page 2 Always read this User’s Manual before using this product. MPIO will do our best to repay for our customer’s love via better products. In accordance with the Copyright Act, behaviors to simulate, copy, reproduce or translate all or some of software and documents of this product are prohibited without prior consent by MPIO Co., Ltd.
- Page 3 Using Environments * Avoid placing or using the player at the places mentioned below. Places of too high temperature Places of too low temperature (Operation temperature 5°C ~ 40°C) Humid places Places under danger of submersion Dusty places Places exposed to the direct rays of the sun In a vehicle Near a heat sources Places under severe vibration...
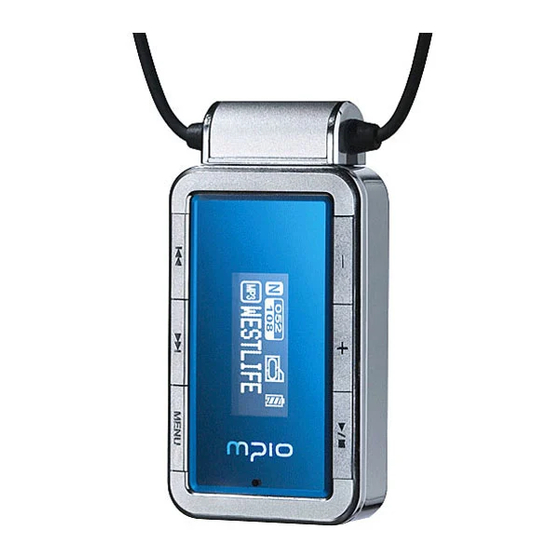
- Page 4 Features Mini, thin, high quality MP3 Player - Compact size of product desired to keep valuably as jewelry. USB Mass Storage - When the player is connected with a PC, it is easy for you to download and upload data without a separate program since the player is automatically recognized it as a mobile disk.
- Page 5 PC by using extension cords. Charging or communication may not be done when using no-power hub in a notebook computer. Be sure to use the MPIO Utility provided for formatting. Composition Basic components Product Warranty...
- Page 6 Part Name and how to use the buttons Earphone connection terminal RESET & USB connection terminal (Top View) REW button VOL (–) button Previous music, Volume reduce backward wind/menu move FF button VOL (+) button Next music, Volume increase/ backward wind/menu move Move to the upper menu or folder in searching MENU button...
-
Page 7: Basic Operation
15 degree clockwise. (Earphone locking status released) Either of necklace type of earphone or general high quality type of earphone (MPIO-OP200) is provided depending on sale area. How to assemble necklace type of earphone Catch earphone Insert the and main body... - Page 8 The PC using Windows ME, Windows 2000 and Windows XP supports USB 2.0 or 1.1 Storage Device basically and perceives the MP3 player as a portable storage device without installing a separate program. Thus, you can utilize the MP3 player by using a Windows Explorer. For a computer using Windows 98/98SE, a ‘Windows 98 Device Driver’...
- Page 9 If clicking the [Install] button, utility programs the user selected are installed sequentially. If clicking the [Finish] button, all installation precess are completed. The MPIO Utility icon is shown as below on the ground screen. For detailed information on MPIO Utility,...
- Page 10 You can finally check whether installation is normally done if entering into the next path. [Control Device] [System] [Device Manager] [Hard Disk Controller] Sub Device. It is normal only when a device called ‘MPIO FL350’ is displayed (See left figure).
- Page 11 Connecting the MPIO Player with a computer. For a PC using Windows 98/98SE, firstly install a 'Windows 98 Device Driver' in the supplied Utility CD (For detailed installation method, see page 15).
-
Page 12: Fm Tuner Mode
Turn on and connect the USB cable with a computer and the USB terminal (earphone terminal) of the player. Check a USB link message in the LCD screen of the player as below. Battery charging is automatically done in connection of USB. (Battery charging) (Bump of battery) Music and data file storage... - Page 13 Disconnecting product from a computer The followings are recommended for safe disconnection of the player. Note data loss or damage of player may result in if failing to follow instructions. Locate the mouse on the ‘Removal and Select ‘Hardware Disconnection or Disconnection of Player’...
- Page 14 Operating methods by function When setting all menu, press the Volume (+) button to return to the upper menu without setting values saved. (Menu escape function) Listening to music Press and hold the button to turn on. Search the next music or previous music by using the button, and then press the button to play the music.
- Page 15 Setup of A B sector repeat function (Usefully used for foreign language study) Select the SYSTEM icon after entering Select the A B icon after entering into the into the MENU screen by pressing sub menu by pressing the MENU button shortly. and holding the MENU button.
-
Page 16: Setup Equalizer
Setup EQUALIZER Select the EQUALIZER icon after Set a desired PRESET EQ after entering into entering into the MENU screen by the sub menu by pressing the MENU button. pressing and holding the MENU button. (Composed of NORMAL / POP / ROCK / JAZZ / CLASSIC / VOCAL) Setup SOUND EFFECT Select the SOUND EFFECT icon after entering into the MENU screen by pressing and... -
Page 17: Setup Alarm
Setup WATCH Select the WATCH icon after entering Select the WATCH SET UP icon after entering into the MENU screen by pressing into the sub menu by pressing the MENU and holding the MENU button. button shortly. Relevant values are saved if pressing the MENU button shortly after setting time by using the button. - Page 18 Setup DISPLAY (BACKLIGHT, CONTRAST, FILE INFO) Enter into the MENU screen by pressing and holding the MENU button. Select the DISPLAY icon by using the button and enter into the sub menu of Display by pressing the MENU button once again shortly. Setting values are saved if pressing the Menu button shortly after entering into desired munu among DISPLAY menus (BACKLIGHT, CONTRAST, FILE INFO) in above methods and the setting values by using...
- Page 19 [Definition of 2 functions of menu button while ERASE a function (Erase a file or all files) playing music] * OFF: Bit rate and playing time are displayed on the * Select the ERASE icon by using the LCD screen if pressing the Menu button shortly, and by pressing and holding the Menu button.
- Page 20 Detailed Information on FM TUNER Mode Button operation : Means pressing the button shortly. : Means to press and hold the button for more than a second. Operation SCAN Mode CHANNEL Mode FM Screen Watch Screen FM Screen Watch Screen Fast frequency Fast channel search search...
- Page 21 Setup SAVE CHANNEL (Searched Frequency Band Save) Search desired FM frequency band to save by using the Enter into the Menu screen by pressing and holding the MENU button and then select the SAVE CH icon. Select channel number (CH01~CH20) to save by using the and then press the Menu button shortly to move to the MENU screen.
- Page 22 Setup FM BAND (Frequency Band) Select the FM BAND icon after entering into the Menu screen by pressing and holding the MENU button. Setup frequency band receivable depending on every area in the world. America/ Europe/ Korea/ China (87.5 ~ 108MHz) Japan (76 ~ 92MHz) Common in the world...
-
Page 23: Format & Configuration
(For detailed installation method, see page 15 ‘Operation Software Installation'). Connect the pc and player with USB cables. Double click to execute the ‘MPIO Utility’ icon on the ground screen of the user’s PC. For No. , , proceed in the order as below: Click the [Format &... - Page 24 (For detailed information on installation, see page 15 ‘Operation Software Installation'). Connect the PC and player with USB cables. Double click to execute the ‘MPIO Utility’ icon on the ground screen of the user’s PC. For No. , proceed in the order as below: Click the [Setup Config] button.
- Page 25 USB cables while upgrading firmware. * How to fast upgrade firmware Download firmware from the MPIO website and unpack it, and then save them in the ground screen of the user’s PC. Connect the player with a computer.
Need help?
Do you have a question about the FL 350 and is the answer not in the manual?
Questions and answers