Download Print this page
Land Pride 706NT Operator's Manual

Land Pride 706NT Operator's Manual

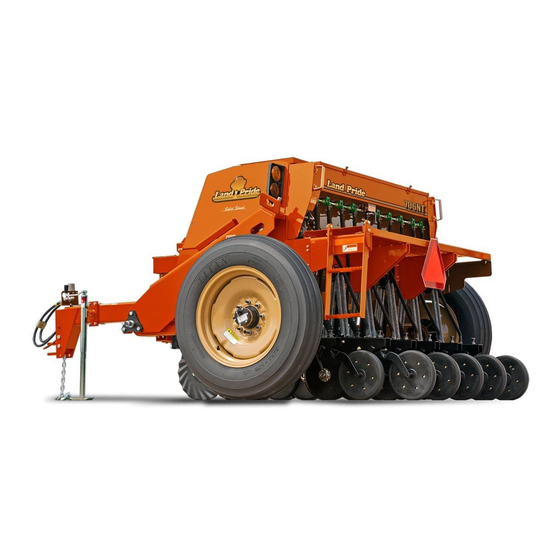
End-wheel, no-till drill

Advertisement

Quick Links

End-Wheel, No-Till Drill
706/1006NT
Operator Manual
Read the Operator's Manual entirely. When you see this symbol,
the subsequent instructions and warnings are serious - follow
without exception. Your life and the lives of others depend on it!
Cover photo may show optional equipment not supplied
with
standard
For an Operator's Manual and Decal Kit in another
language, please see your Land Pride dealer.
313-855M
unit.
Printed 2024-06-12

Advertisement

loading
Need help?

Need help?

Do you have a question about the 706NT and is the answer not in the manual?

Questions and answers

Summary of Contents for Land Pride 706NT

  • Page 1 Your life and the lives of others depend on it! Cover photo may show optional equipment not supplied with standard unit. For an Operator’s Manual and Decal Kit in another language, please see your Land Pride dealer. Printed 2024-06-12...
  • Page 2: Machine Identification

    Table of Contents Index Machine Identification Record your machine details in the log below. If you replace this manual, be sure to transfer this information to the new manual. If you or the dealer have added options not originally ordered with the machine, or removed options that were originally ordered, the weights and measurements are no longer accurate for your machine.
  • Page 3: Table Of Contents

    Land Pride assumes no responsibility for errors or omissions. Neither is any liability assumed for damages resulting from the use of the information contained herein. Land Pride reserves the right to revise and improve its products as it sees fit. This publication describes the state of this product at the time of its publication, and may not reflect the product in the future.
  • Page 4 The QR Code at left will link you to the front cover and to the left will take available dealers for Land Pride you to the Parts Manual for this products. Refer to Parts Manual QR equipment. Download the appropriate Locator for detailed instructions.
  • Page 5: Look For Safety Symbol

    Table of Contents Index Important Safety Information Look for Safety Symbol The SAFETY ALERT SYMBOL indicates there is a potential hazard to personal safety involved and extra safety precaution must be taken. When you see this symbol, be alert and carefully read the message that follows it.
  • Page 6: Wear Protective Equipment

    Table of Contents Index Wear Protective Equipment  Wear protective clothing and equipment.  Wear clothing and equipment appropriate for the job. Avoid loose-fitting clothing.  Because prolonged exposure to loud noise can cause hearing impairment or hearing loss, wear suitable hearing protection such as earmuffs or earplugs.
  • Page 7: Use Safety Lights And Devices

    Table of Contents Index Use Safety Lights and Devices Slow-moving tractors and towed implements can create a hazard when driven on public roads. They are difficult to see, especially at night.  Use flashing warning lights and turn signals whenever driving on public roads.
  • Page 8: Practice Safe Maintenance

    Table of Contents Index Practice Safe Maintenance  Understand procedure before doing work. Use proper tools and equipment. Refer to this manual.  Work in a clean, dry area.  Lower the drill, put tractor in park, turn off engine, and remove key before performing maintenance.
  • Page 9: Safety Decals

    Keep lights in operating condition. Keep all safety decals clean and legible. Replace all damaged or missing decals. Order new decals from your Land Pride dealer. Refer to this section for proper decal placement. When ordering new parts or components, also request corresponding safety decals.
  • Page 10: Reflectors: Amber

    Table of Contents Index Reflectors: Red (1006NT S/N 1136221+) 838-266C On rear face of light bracket, both ends; 2 total See “Transporting” on page 19. 68374E Reflectors: Amber 838-266C On side frames at walkboard ends, on front face of lower front tool bars, outside ends; 4 total See “Transporting”...
  • Page 11 Table of Contents Index Caution: Operation of Machine 818-587C CAUTION Read Owner’s Manual before using machine. Stand clear when folding and unfolding markers. Stand clear when raising and lowering machine. Keep all safety shields and devices in place. Keep hands, feet, and clothing away from moving chains and sprockets.
  • Page 12 Table of Contents Index Caution: Moving Chain 818-518C CAUTION MOVING CHAIN HAZARD To prevent serious injury from moving chain: DO NOT operate with enclosure missing 818-518C Dual Seed: On outside of box end wall, under both covers; 68373F 2 total Caution: Moving Chain (Option) 32763 818-518C...
  • Page 13 Table of Contents Index Caution: High Pressure Hazard 838-556C CAUTION To Avoid Inju ry or Ma chine Dam age from Imp roper Tire Inflation or Torquing of Wheel Bolts : Maxi mum inflation pressure of tires is 40 psi Torque wheel bolts to 90 - 105 ft - lb. 838-556C On each wheel;...
  • Page 14 Table of Contents Index Warning: Falling Hazard 838-102C WARNING To avoid serious injury or death: Watch your step when climbing ladder or walking on walkboard. 838-102C On left-hand side of frame at ladder; 1 total 68274F See “Field Operation” on page 18. Warning: Hand Crush (Option) 32763 838-611C...
  • Page 15: Section 1: Introduction

    Table of Contents Index Introduction Introduction Land Pride welcomes you to its growing family of new product owners. Your drill has been designed with care and built by skilled workers using quality materials. Proper setup, maintenance, and safe operating practices will help you get years of satisfactory use from the machine.
  • Page 16: Owner Assistance

    Serial Number: __________________________ Serial Number Location Further Assistance Your Land Pride dealer wants you to be satisfied with your new drill. If for any reason you do not understand any part of this manual or are otherwise dissatisfied with the product please contact: Land Pride Service Department P.O.
  • Page 17: Section 2: Preparation And Setup

    Table of Contents Index Preparation and Setup Preparation and Setup This section will help you prepare your tractor and drill for use. Before going to the field, you must hitch a tractor to the drill, hook up hydraulics and check that hydraulics have been bled.
  • Page 18: Hitch Height

    Table of Contents Index Preparation and Setup Hitch Height Refer to Figure 4 For proper field operation, drill tongue should run level in field position. a. With drill in field position, adjust tongue jack to level tongue. b. Measure tractor drawbar height to determine proper hitch height on drill.
  • Page 19: Hydraulic Hose Hookup

    Preparation and Setup Hydraulic Hose Hookup Refer to Figure 7 Land Pride hydraulic hoses are color coded to help you hook up hoses to your tractor outlets. Hoses that go to the same remote valve are marked with the same color.
  • Page 20: Bleeding Hydraulics

    Table of Contents Index Preparation and Setup Bleeding Hydraulics Escaping fluid under pressure can have sufficient pressure to penetrate the skin. Check all hydraulic lines and fittings before applying pressure. Fluid escaping from a very small hole can be almost invisible. Use paper or cardboard, not body parts, and wear heavy gloves to check for suspected leaks.
  • Page 21: Leveling Drill

    Table of Contents Index Preparation and Setup Leveling Drill Refer to Figure 8 1. Loosen locknuts (2) and adjust cylinder eyebolts (1). The eye bolts are factory pre-set at 4 3/4” of thread above mounting plate. 2. Raise drill with hydraulics until openers and coulters are 1 to 2 inches off the ground.
  • Page 22: Section 3: Operating Instructions

    Table of Contents Index Operating Instructions Operating Instructions This section covers general operating procedures. Experience, machine familiarity and the following information will lead to efficient operation and good Escaping fluid under pressure can have sufficient pressure to working habits. Always operate farm machinery with penetrate the skin.
  • Page 23: Opener Operation

    Table of Contents Index Operating Instructions Opener Operation Never back up with openers in the ground. To do so may cause damage or opener plugging. For information on opener adjustments, refer to page 26. For more information on troubleshooting opener problems, see “Troubleshooting”, page 30.
  • Page 24: Lock-Out Hub

    Table of Contents Index Operating Instructions Lock-out Hub Refer to Figure 10 Make sure drive lock-out hub on both sides of drill are disengaged before transporting. This will prevent excessive wear of drive system during transport. Figure 10 14741 Lock-out Hub Parking and Unhitching Perform the following steps when parking the drill.
  • Page 25: Acremeter Operation

    Table of Contents Index Operating Instructions Acremeter Operation Operating Instructions The electronic acremeter operates in two modes: A battery-operated electronic acremeter is supplied sleep and entry. In sleep mode, the display is blank, with the drill. The display module for the system is and the counter is accumulating acres.
  • Page 26: Acremeter Screens

    Table of Contents Index Operating Instructions Acremeter Screens Password Field Acre Count Displays the password screen. Entering your system password enables access configuration Displays the number of acres covered since the field parameters. acre counter was last reset. if there is an additional The default password screen shows a salted - **** - acre counting sensor on the machine, an A2 screen password.
  • Page 27 Table of Contents Index Operating Instructions Use the arrow buttons to increase or decrease the Pressing Select saves the unit selection, converts swath width. the swath width value, and navigates to the SENSOR screen. Pressing Select will save the configuration and navigate to the CAL1 screen.
  • Page 28: Section 4: Adjustments

    Table of Contents Index Adjustments Adjustments Coulter Adjustments Refer to Figure 12 A no-till coulter (1) is mounted directly ahead of each opener on the drill. The coulters cut through heavy trash and make a groove in the soil for the openers. The coulters are mounted on the drill frame so coulter cutting depth changes as the drill is raised and lowered.
  • Page 29: Coulter Down Pressure

    Table of Contents Index Adjustments Coulter Down Pressure Pounds Per Coulter Weights 7 inch 7.5 inch 8 inch If more weight is required for your soil conditions, add Empty Drill weights to weight brackets located on box frame. No more than 1100 pounds for the 706 (550 pounds per Drill with 300 side) and 1500 pounds for the 1006 (750 pounds per pounds added...
  • Page 30: Opener Adjustments

    Table of Contents Index Adjustments Opener Adjustments Opener Down Pressure Refer to Figure 17 Opener springs provide the down pressure necessary for opener disks to open a seed trench. The springs allow the openers to float down into depressions and up over obstructions.
  • Page 31: Gauge Wheel Idler Adjustment

    Table of Contents Index Adjustments Disk Scraper Adjustment Refer to Figure 20 To keep opener disks turning freely, dirt scrapers are mounted between disks to clean as the disks rotate. As field conditions vary, scrapers may need to be adjusted. In damp conditions, scrapers may need to be lowered.
  • Page 32: Drive Train Operation

    Table of Contents Index Adjustments Drive Train Operation Refer to Figure 23 Check all chain idlers at beginning of each season for proper adjustment. Check that each idler is taking up excess chain slack. The access door is located on the top side of the gage wheel arm near the pivot end.
  • Page 33: Spring Tine Harrow

    Table of Contents Index Adjustments Spring Tine Harrow Harrow Tine Angle Refer to Figure 25 The drawing on the right shows a successful harrow position for no-till and minimum-till conditions. Because of different soil moisture, trash levels and trash types, you may need to reposition the tube frame or tines.
  • Page 34: Section 5: Troubleshooting

    Table of Contents Index Troubleshooting Troubleshooting Problem Cause Solution Uneven seed spacing or Excessive field speed. Reduce field speed. uneven stand Feed cups plugging. Clean out feed cups. Seed tubes plugging. Clean out seed tubes. Opener disks not turning freely. See “Opener disks not turning freely”...
  • Page 35 Table of Contents Index Troubleshooting Problem Cause Solution Acremeter does not measure Incorrect tire size or air pressure. Correct tire size or air pressure, accurately. page 41. Excessive overlap or gaps between Avoid overlap or gaps. passes. Soil conditions. Loose soil and slippage will cause variations in acres registered.
  • Page 36 Table of Contents Index Troubleshooting Problem Cause Solution Coulters and drill going too Too much weight. See page 25 for correct weight. deep Incorrect depth control setting. Reset depth control, page 26. Incorrect press wheel adjustment. Set press wheels to a shallower depth.
  • Page 37: Section 6: Maintenance And Lubrication

    6. Replace any worn, damaged or illegible safety you can avoid costly maintenance, downtime and repair. decals. Order new decals from your Land Pride Always turn off and remove the tractor key before mak- dealer. See “Safety Decals”, page 41.
  • Page 38: Coulter Hub Bearings

    Table of Contents Index Maintenance and Lubrication Coulter Hub Bearings Seasonal One zerk per coulter; 15 total Type of Lubrication: Grease Quantity = Until resistance is felt 13879 Drive Chains Required Type of Lubrication: Chain Lube Quantity = Coat thoroughly. 12227 Feed Cup Drive Shaft Sprocket 50hrs...
  • Page 39: Felt Barrier Seals

    Table of Contents Index Maintenance and Lubrication Felt Barrier Seals 16381 30hrs 1 seal at each shaft end, 2 total Type of Lubrication: Oil Quantity: Soak seal If Small Seeds is also installed, access these seals from below or through the end wall gaps. Fertilizer Tray Bearings 15hrs Both ends of shaft...
  • Page 40 Table of Contents Index Maintenance and Lubrication Gearbox On Repair The gearbox is lubricated and sealed at the factory. Under normal conditions, it does not require maintenance or lubrication. If the gearbox has been opened for repair, repack all gears and around shaft bearings using at least 7 oz. of gear lube, part number 788067.
  • Page 41: Small Seeds Shaft Bearings (Option)

    Table of Contents Index Maintenance and Lubrication Small Seeds Feed Cup Drive Sprocket 50hrs Type of Lubrication: Oil Quantity = Coat sprocket bore thoroughly 12226 Small Seeds Shaft Bearings (Option) 15hrs 1 zerk total Type of Lubrication: Grease Quantity: Until grease emerges 18082 2024-06-12 706/1006NT 313-855M...
  • Page 42: Section 7: Options

    Table of Contents Index Options Options Seed Box Agitator The seed box agitator is designed to stir the seed directly above the metering cups. It is intended to cut down on the “bridging” of light fluffy seeds, and help to separate individual soybeans that become sticky from inoculant.
  • Page 43: Fertilizer Attachment

    Table of Contents Index Options Fertilizer Attachment The fertilizer attachment allows you to plant seed and apply fertilizer in the same field pass. The fertilizer box mounts on the rear of the main drill box. A fertilizer drive meters dry, granular fertilizer. For fertilizer meter rate calibrating and charts, refer to “Fertilizer Meter Rate”...
  • Page 44 Table of Contents Index Options Series II Native Grass Attachment The native grass attachment is designed to seed fluffy, hard-to-plant grasses. For seed rates and adjustments, refer to “Native Grass Attachment” in the seed rate book. To order the native grass attachment, contact your Great Plains dealer.
  • Page 45: Section 8: Appendix

    Table of Contents Index Appendix Appendix Torque Values Chart Bolt Head Identification Bolt Head Identification Bolt Bolt 10.9 Size Size Grade 2 Grade 5 Grade 8 Class 5.8 Class 8.8 Class 10.9 ft-lb ft-lb ft-lb ft-lb ft-lb in-tpi ft-lb mm x pitch M 5 X 0.8 M 6 X 1 M 8 X 1.25...
  • Page 46: Specifications And Capacities

    Table of Contents Index Appendix Specifications and Capacities 1006 Row Spacing, Inches Rows Per Drill Approx. Weight, Pounds 3,900 lb 3,800 lb 3,800 lb 4,500 lb 4,300 lb 4,200 lb (1769 kg) (1724 kg) (1724 kg) (2041 kg) (1950 lb) (1905 kg) Working Width 7 feet (2.1 m)
  • Page 47: Hydraulic Schematic

    Table of Contents Index Appendix Hydraulic Schematic 2024-06-12 706/1006NT 313-855M...
  • Page 48: Sprocket Configuration

    Table of Contents Index Appendix Sprocket Configuration Seed Box 21754 Seed Box Agitator 21753 706/1006NT 313-855M 2024-06-12...
  • Page 49: Dual Seed Box

    Table of Contents Index Appendix Dual Seed Box 38510 Small Grass Seeds 21755 2024-06-12 706/1006NT 313-855M...
  • Page 50: Native Grass

    Table of Contents Index Appendix Native Grass 21756 Fertilizer 21757 706/1006NT 313-855M 2024-06-12...
  • Page 51: Fertilizer With Small Grass Seeds Box

    Table of Contents Index Appendix Fertilizer with Small Grass Seeds Box 21758 2024-06-12 706/1006NT 313-855M...
  • Page 52 Table of Contents Index Appendix 706/1006NT 313-855M 2024-06-12...
  • Page 53 Table of Contents Index Index adjustments .........29 plastic hose holder chain ..........29 See hydraulics, plastic hose holder accident, hydraulic ....... 2 headphones ..........2 protective equipment ......2 acremeter operation ......21 hearing ..........2 amber reflector ........6 high pressure fluids ......2 QR Code ..........iv hitching ..........13 CAUTION, defined .......
  • Page 54 Table of Contents Index 313-526B, manual ......11 525, Loctite ........36 788067, gear lube ......36 818-055C, reflector ......5 818-518C, decal ........8 818-578C, high pressure hazard ..9 818-611C, decal ........ 10 838-265C, reflector ......6 838-266C, reflector ......5 706/1006NT 313-855M 2024-06-12...
  • Page 55: Warranty

    This warranty is not valid unless the unit is registered with Land Pride within 10 days from the date of the original purchase.
  • Page 56 Table of Contents Index Corporate Office: P.O. Box 5060 Salina, Kansas 67402-5060 USA www.landpride.com...

This manual is also suitable for:

1006nt