Table of Contents
Advertisement
Quick Links
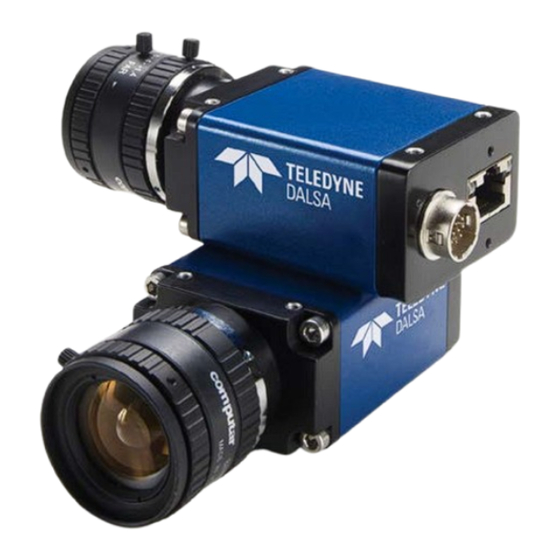
Teledyne Dalsa Genie M640-1/3
CCD Camera
A l l t r a d e m a r k s , b r a n d n a m e s , a n d b r a n d s a p p e a r i n g h e r e i n a r e t h e p r o p e r t y o f t h e i r r e s p e c t i v e o w n e r s .
• C r i t i c a l a n d e x p e d i t e d s e r v i c e s
• I n s t o c k / R e a d y - t o - s h i p
Artisan Scientific Corporation dba Artisan Technology Group is not an affiliate, representative, or authorized distributor for any manufacturer listed herein.
Limited Availability
Used and in Excellent Condition
Open Web Page
https://www.artisantg.com/90628-1
• We b u y y o u r e x c e s s , u n d e r u t i l i z e d , a n d i d l e e q u i p me n t
• F u l l - s e r v i c e , i n d e p e n d e n t r e p a i r c e n t e r
Advertisement
Table of Contents

Related Manuals for Teledyne Genie Monochrome M640-1/3


Summary of Contents for Teledyne Genie Monochrome M640-1/3
- Page 1 Teledyne Dalsa Genie M640-1/3 CCD Camera Limited Availability Used and in Excellent Condition Open Web Page https://www.artisantg.com/90628-1 A l l t r a d e m a r k s , b r a n d n a m e s , a n d b r a n d s a p p e a r i n g h e r e i n a r e t h e p r o p e r t y o f t h e i r r e s p e c t i v e o w n e r s .
- Page 2 ™ Genie Monochrome Series Camera User’s Manual Genie Framework 2.01 M640, M690, M1024, M1280, M1400, M1410, M1600 sensors | cameras | frame grabbers | processors | software | vision solutions P/N: CA-GENM-NM-MUM00 www.teledynedalsa.com...
- Page 3 All information provided in this manual is believed to be accurate and reliable. No responsibility is assumed by Teledyne DALSA for its use. Teledyne DALSA reserves the right to make changes to this information without notice. Reproduction of this manual in whole or in part, by any means, is prohibited without prior permission having been obtained from Teledyne DALSA.
-
Page 4: Table Of Contents
Contents GENIE MONOCHROME SERIES OVERVIEW ............. 7 ....................7 ESCRIPTION Genie Application Advantages ..............8 .................. 8 RODUCT UMBERS .............. 10 AMERA ERFORMANCE PECIFICATIONS Certifications ..................11 Vibration and Shock Certifications ............11 ..............12 UPPORTED NDUSTRY TANDARDS ................12 ENIE ENSOR VERVIEW... - Page 5 Access Via CamExpert ................36 Power-up Configuration (Saved User Settings) ......... 37 Camera Information via Sapera LT or GigE Vision Compliant Applications ..................40 ..................41 ENSOR ONTROLS Sensor Parameters: Controls Via CamExpert ..........41 Gain and Black Level Controls ..............43 Gain and Offset Control via Sapera LT or GigE Vision Compliant Applications ..................
- Page 6 Feature Type BOOL ................87 Feature Summary List by Function Group ..........89 Feature Interdependence Diagrams ............93 Accessing the Genie User Buffer ............. 97 NETWORK OVERVIEW & TOOLS ..............99 IP C ............99 ENIE ONFIGURATION ETAILS Link-Local Address (LLA) ............... 99 DHCP (Dynamic Host Configuration Protocol) .........
- Page 7 TROUBLESHOOTING .................. 129 ....................129 VERVIEW Problem Type Summary ..............130 Verifying Network Parameters .............. 131 ..........132 NSTALLATION SSUES AND UNCTIONAL ROBLEMS The Windows Firewall Service Can Not Start .......... 132 ............ 133 EVICE VAILABLE WITH PERATIONAL SSUES Firmware Updates ................133 Power Failure During a Firmware Update–Now What? ......
-
Page 8: Genie Monochrome Series Overview
(T2IR) framework to dependably capture and transfer images from the camera to the host All Genie cameras are supported by Teledyne DALSA Sapera™ LT software libraries featuring CamExpert for simplified camera set-up and configuration. Sapera LT is field proven in thousands of robust industrial applications. -
Page 9: Genie Application Advantages
Genie Application Advantages Available in a number of resolutions • Compact, rugged design • GigE Vision 1.0 compliant • Gigabit Ethernet (GigE) interconnection to a computer via standard CAT5e or CAT6 • cables Connection to the host computer NIC through a GigE network switch •... - Page 10 Sapera documentation in compiled HTML help, and Adobe Acrobat® (PDF) formats. Sapera Processing Imaging Development Library (sold separately): Contact Sales at Includes over 600 optimized image processing routines. Teledyne DALSA Genie Cables & Accessories (sold separately) Product number Genie I/O and Power breakout cable (Hirose to Euroconnector) CR-GENC-IOP00 Tripod mount bracket (mount to Genie top or bottom—provides ¼...
-
Page 11: Camera Performance Specifications
Camera Performance Specifications Specifications for each available sensor are listed after the general Genie camera specifications. Camera Controls Synchronization Modes Free running and Triggered Synchronous and Reset mode Software trigger (through Ethernet) Exposure Modes Programmable (1µs granularity, minimum (see sensor data) – maximum 16s) Pulse controlled Trigger Input... -
Page 12: Certifications
Certifications EN55022, class A, Radio Disturbance Characteristics EN61000-4-2, Electrostatic discharge immunity test EN61000-4-3, Radiated, radio-frequency, electromagnetic field immunity test EN61000-4-4, Electrical fast transient/burst immunity test EN61000-4-6, Immunity to conducted disturbances, induced by radio- frequency fields Part 15, class A see "EC & FCC Declaration of Conformity" on page 128 Compliancy as per European directive 2002/95/EC RoHS (applies to camera part numbers CR-GENx-xxxxx) -
Page 13: Supported Industry Standards
Supported Industry Standards Genie cameras are 100% compliant with the GigE Vision 1.0 specification which defines the communication interface protocol used by any GigE Vision device. The device description and capabilities are contained in an XML file. For more information see: http://www.machinevisiononline.org/public/articles/index.cfm?cat=1 Genie cameras implement a superset of the GenICam™... -
Page 14: Sensor
Genie M640-1/2 Specifications Item / Feature Specification Imager Format Full frame interline CCD area scan with square pixel (1/2 inch diagonal) Sensor Sony ICX414AL Resolution 640 x 480 pixels Minimum Frame Rate (free- 0.1 fps (one frame every 10 seconds) running) Maximum Frame Rate (free- 64 fps... -
Page 15: Genie M640/M690-1/3 Specifications
Genie M640/M690-1/3 Specifications Item / Feature Specification Imager Format Full frame interline CCD area scan with square pixel (1/3 inch diagonal) Sensor Sony ICX424AL Resolution 640 x 480 pixels Minimum Frame Rate (free- 0.1 fps (one frame every 10 seconds) running) Maximum Frame Rate (free- 64 fps (90 fps for M690) -
Page 16: Genie M1024 Specifications
Genie M1024 Specifications Item / Feature Specification Imager Format Full frame interline CCD area scan with square pixel (1/3 inch diagonal) Sensor Sony ICX204AL Resolution 1024 x 768 pixels Minimum Frame Rate (free- 0.1 fps (one frame every 10 seconds) running) Maximum Frame Rate (free- 20 fps... -
Page 17: Genie M1280 Specifications
Genie M1280 Specifications Item / Feature Specification Imager Format Full frame interline CCD area scan with square pixel (1/3 inch diagonal) Sensor Sony ICX445ALA Resolution 1280 x 960 pixels Minimum Frame Rate (free- 0.1 fps (one frame every 10 seconds) running) Maximum Frame Rate (free- 24.5 fps... -
Page 18: Genie M1400-1/2 Specifications
Genie M1400-1/2 Specifications Item / Feature Specification Imager Format Full frame interline CCD area scan with square pixel (1/2 inch diagonal) Sensor ICX267AL Resolution 1360 x 1024 pixels Minimum Frame Rate (free- 0.1 fps (one frame every 10 seconds) running) Maximum Frame Rate (free- 15 fps running) -
Page 19: Genie M1410-2/3 Specifications
Genie M1410-2/3 Specifications Item / Feature Specification Imager Format Full frame interline CCD area scan with square pixel (2/3 inch diagonal) Sensor ICX285AL Resolution 1360 x 1024 pixels Minimum Frame Rate (free- 0.1 fps (one frame every 10 seconds) running) Maximum Frame Rate (free- 21 fps running) -
Page 20: Genie M1600 Specifications
Genie M1600 Specifications Item / Feature Specification Imager Format Full frame interline CCD area scan with square pixel (1/1.8 inch diagonal) Sensor Sony ICX274AL Resolution 1600 x 1200 pixels Minimum Frame Rate (free- 0.1 fps (one frame every 10 seconds) running) Maximum Frame Rate (free- 15 fps... -
Page 21: Application Development Overview
Sapera LT Library with optional Processing Sapera LT is a powerful development library for image acquisition and control. Sapera LT provides a single API across current and future Teledyne DALSA hardware. Sapera LT delivers a comprehensive feature set including program portability, versatile camera controls, flexible display functionality and management, plus easy to use application development wizards. -
Page 22: Installing The Genie Camera
IP address. The DHCP server will then provide the Genie an IP address. The Teledyne DALSA Network Configuration tool, installed with the Teledyne DALSA Network Imaging Package, can also function as the DHCP server (refer to the Teledyne DALSA Network Imaging Package user’s manual). -
Page 23: Installation Overview & Preparations
Genie also can connect through a Gigabit Ethernet switch. When using VLAN groups, • the Genie and controlling computer must be in the same group (refer to the Teledyne DALSA Network Imaging Package user’s manual). If Genie is to be used in a Sapera development environment, Sapera LT needs to be •... -
Page 24: Installation Overview
Installation Overview Before connecting power to the camera, test all power supplies. Power supplies must • meet the requirements defined in section "Genie Signal Electrical Details" on page 113. Apply power to the camera. Connect Genie to the computer GigE network adapter or to the Ethernet switch via a •... -
Page 25: Preventing Operational Faults Due To Esd
0 volt return line is not necessarily connected to earth ground. Teledyne DALSA has performed ESD testing on Genie cameras using an 8 kilovolt ESD generator without any indication of operational faults. The two following methods, either individually or together will prevent ESD problems. -
Page 26: Nstallation
When upgrading the Genie Framework from a previous version, there is no need to • uninstall the older version. The new installation will correctly update all framework files. Insert the Teledyne DALSA Genie CD-ROM. If AUTORUN is enabled on your computer, • the Genie installation menu is presented. -
Page 27: Connect The Genie Camera
LLA IP address as described in section "Genie IP Configuration Sequence" on page 28, or a DHCP IP address if a DHCP server is present on your network. Note that the Network Configuration tool can enable the Teledyne DALSA smart DHCP server. -
Page 28: Status Led Codes
Status LED Codes The camera is equipped with a LED to display the operational status of the camera. When more than one condition is active, the LED color indicates the condition with the highest priority (such as an acquisition in progress has more priority than a valid IP address assignment). -
Page 29: Genie Ip Configuration Sequence
Genie attempts to assign an IP address as follows. For any GigE Vision device, the IP configuration protocol sequence is: • Persistent IP (if enabled) DHCP (if a DHCP server is present such as the Teledyne DALSA smart DHCP server) • Link-Local Address (always enabled) •... -
Page 30: Optimizing The Network Adapter Used With Genie
Most Gigabit network interface controllers (NIC) allow user modifications to parameters such as Adapter Buffers and Jumbo Frames. These should be optimized for use with the Genie during the installation. Refer to the Teledyne DALSA Network Imaging Package user’s manual for optimization information. -
Page 31: Updating Genie Firmware
Important: Make sure that no Sapera application (such as CamExpert) is controlling the • Genie camera. Start the Teledyne DALSA Device Manager program from the windows start menu: • Start•All Programs•Teledyne DALSA•Genie•Firmware Update. The right hand column shows whether a firmware update is Required or Not Required. - Page 32 The firmware update is complete when the lower message output area says "Device • reset complete". Close the Device Manager program. • Wait for the GigE Server to find the Genie again, then run CamExpert to test the Genie operation (as described below). Important: If the Genie power is accidentally cut off during the firmware update (such as a electrical source power failure or human error), the Genie is easily recovered.
-
Page 33: Quick Test With Camexpert
Quick Test with CamExpert When the Genie camera is directly connected to a Gigabit network adapter on a host computer or via a network switch, testing the installation with CamExpert is a straightforward procedure. Start Sapera CamExpert by double clicking the desktop icon created during the Genie •... -
Page 34: About The User-Defined Camera Name
About the User-Defined Camera Name The Genie can be programmed with a user-defined name to aid identifying multiple cameras connected to the network. For instance, on an inspection system with 4 cameras, the first camera might be labeled “top view”, the second “left view”, the third “right view” and the last one “bottom view”. -
Page 35: Silent Installation Of Genie Framework
Silent Installation of Genie Framework The Genie Framework installation can be integrated within a developer's installation procedure. The silent installation mode allows the Genie Framework installation to proceed without the need for mouse clicks from a user. Two steps are required: •... -
Page 36: Windows Embedded 7 Installation
Windows Embedded 7 Installation Windows Embedded 7 is not officially supported by Teledyne DALSA due to the number of possible configurations. However, Sapera LT and other Teledyne DALSA products should function properly on the Windows Embedded 7 platform provided that the required components are installed. -
Page 37: Operational Reference
Operational Reference Camera and Sensor Information Camera and sensor information can be retrieved via a controlling application. Parameters such as camera model, firmware version, sensor characteristics, etc. are read to uniquely identify the connected Genie device. All these features, with the exception of the DeviceUserId, are read-only. Sapera LT or GigE Vision Compliant calls are used to retrieve this information and correctly identify the camera along with its characteristics. -
Page 38: Read Only Parameters
Read Only Parameters Parameter Description Device Vendor For the Genie Monochrome series, this is always DALSA. Device Model Name Displays the device model name (for example, Genie M640). Device Version Displays the device version which includes the firmware release and build.. Firmware Version Displays the currently loaded firmware version manufacturer's code. -
Page 39: Power-Up Parameter List
Power-up Parameter List The user-defined Camera Configuration saves in camera memory features that can be configured by the user. The following table lists most of these parameters. Parameter Description Region of interest used to crop the image Pixel Format Defines the pixel format (MONO8) Frame Rate Defines the frame rate for free run mode. -
Page 40: Power-Up Control Via Sapera Lt Or Gige Vision Compliant Applications
Power-up Control via Sapera LT or GigE Vision Compliant Applications Genie Sapera parameters for Power-up Configuration: Power-upConfig = {Factory Default = 0, Camera Configuration 1 = 1} SaveCameraConfigurationSelector = {Camera Configuration 1 = 1} SaveCameraConfiguration = Write to save selected camera configuration LoadCameraConfigurationSelector = {Factory Default = 0, Camera Configuration 1 = 1} LoadCameraConfiguration = Write to load selected camera configuration... -
Page 41: Camera Information Via Sapera Lt Or Gige Vision Compliant Applications
Camera Information via Sapera LT or GigE Vision Compliant Applications Genie Sapera parameters for Camera and Sensor Information: Interface = {GigE Vision} DeviceVendorName = “DALSA” DeviceModelName = “Genie M640” for Genie M640 DeviceVersion = String representing the version of the camera FirmwareVersion = String representing the version of the camera firmware DeviceID = String representing the camera serial number... -
Page 42: Sensor Controls
Sensor Controls Genie provides a number of sensor controls to optimize image acquisitions for most imaging solutions. Following is an overview of the CamExpert controls displaying this information, followed by individual control function descriptions and tables indicating the feature name associated to Sapera LT and to GigE Vision Compliant development environments. - Page 43 User Set Parameters Parameter Description Frame Rate (in Hz) Specifies the internal trigger frame rate for free run mode, in Hz. Possible values range from 0.1 to 64.0 Hz for Genie M640 in full scan mode. (Note: the Sapera SDK specifies the frame rate in milliHertz). The maximum frame rate increases by using binning (see below) or partial scan (see "Partial Scan—Window ROI"...
-
Page 44: Gain And Black Level Controls
Gain and Black Level Controls The Genie series of monochrome cameras provide gain and black level adjustments for the analog signal from each CCD pixel, before the analog to digital conversion. The software gain and black level controls can make small compensations to the acquisition in situations where lighting varies and the lens iris can not be easily adjusted. -
Page 45: Partial Scan-Window Roi
Partial Scan—Window ROI Partial Scan (vertical cropping) The Partial Scan mode, also know as vertical cropping, reduces the number of video lines grabbed for a frame. By not scanning the full vertical area of the sensor, the maximum possible acquisition frame rate is proportionately increased (for examples see table below). Partial Scan Illustration Maximum Frame Rate Examples with Vertical Cropping Vertical... -
Page 46: Frame Rates
The following chart is generated using the frame rate value examples above and allows the user to visually estimate frame rates for a chosen vertical crop value. Frame Rates 900.0 800.0 M640 700.0 M690 600.0 M1024 500.0 M1280 400.0 M1400 300.0 200.0 M1410... -
Page 47: Partial Scan (Horizontal Cropping)
Partial Scan (horizontal cropping) Genie also can crop the acquisition horizontally by grabbing less pixels on each horizontal line. Additionally a horizontal offset value will start the grab from any pixel count, as shown in the following figure. Note that horizontal cropping does not increase the maximum frame rate due to the CCD readout architecture. -
Page 48: Window Roi Control Via Sapera Lt Or Gige Vision Compliant Applications
Window ROI Control via Sapera LT or GigE Vision Compliant Applications Genie Sapera parameters for Partial Scan and Window ROI: Width = Buffer width in pixels (must be an even value) Height = Buffer height in lines OffsetX = Horizontal Offset of the leftmost pixel relative to the sensor (must be an even value) OffsetY = Vertical offset in lines of the uppermost pixel relative to the sensor... -
Page 49: Camexpert Image Buffer And Roi Parameters
CamExpert Image Buffer and ROI Parameters CamExpert provides controls to configure acquisitions via the Image Buffer and ROI Parameters tab. The image buffer can be easily cropped as desired. Below is the CamExpert dialog and parameter descriptions follow. Parameter Description Pixel Format For the Genie Monochrome series, the image buffer format is Monochrome 8-bit or 10-bit. -
Page 50: Binning
Binning Binning is the process where the charge on two (or more) adjacent pixels is combined. This results in increased light sensitivity since there is twice the sensor area to capture photons. The sensor spatial resolution is reduced but the improved low-light sensitivity plus lower signal-noise ratio may solve a difficult imaging situation. -
Page 51: Binning Control Via Sapera Lt Or Gige Vision Compliant Applications
Binning Control via Sapera LT or GigE Vision Compliant Applications Genie Sapera parameters for Binning: BinningHorizontal = {Disabled = 1, 2 pixels = 2} BinningVertical = {Disabled = 1, 2 lines = 2} In CamExpert, these parameters are available under the “Sensor” tab. See "Accessing Features with Sapera++ LT"... -
Page 52: Exposure Controls
Exposure Controls Exposure Control modes define the method and timing of how to control the sensor integration period. The integration period is the amount of time the sensor is exposed to incoming light before the video frame data is transmitted to the controlling computer. Exposure control is defined as the start of exposure and exposure duration. -
Page 53: External Trigger Programmable Exposure
Free-running Programmable Exposure Timing External Trigger Programmable Exposure • Also known as “Edge Pre-select” exposure. See the timing diagram below. The external trigger edge initiates the exposure process. The active external trigger edge • can be selected as either the low-high or high-low transition. The delay from active trigger edge to start of exposure is programmable from 1μs to 16 •... - Page 54 Programmable Synchronous Mode Exposure Timing Programmable Reset Mode Exposure Timing Operational Reference • 53 Genie Monochrome Series-GigE Vision Camera...
-
Page 55: External Trigger Level-Controlled Exposure
External Trigger Level-controlled Exposure Also known as “Pulse Width Control” exposure. See the timing diagram below. • The external trigger edge initiates the exposure process. The active external trigger edge • can be selected as either the low-high or high-low transition. No delay from active trigger edge to start of exposure. -
Page 56: Exposure Controls Via Sapera Lt Or Gige Vision Compliant Applications
Exposure Controls via Sapera LT or GigE Vision Compliant Applications Genie Sapera parameters for Exposure Control: FrameRate = 0.1 Hz up to max. frame rate supported by sensor in current mode of operation. Only available with Trigger disabled. ExposureMode = {Programmable = 1, Pulse Controlled = 2} ExposureTime = Exposure duration in µs NoiseReductor = {Enable = 1 (default), Disable = 0} Disable to maximize MTF. -
Page 57: Synchronization Timing
Synchronization Timing Genie supports two types of sensor synchronization used to align the exposure to sensor timing: Synchronous Mode: Exposure is synchronous to the line timing of the sensor. Exposure • granularity is 1µs and the readout can be concurrent to the exposure for the fastest possible frame rate. -
Page 58: Reset Mode
Reset Mode Exposure starts immediately after a valid trigger. There is no jitter on the start of • exposure. Exposure time is programmable or controlled by the trigger pulse width. • Minimum exposure is the sensor minimum (see Genie Sensor Overview) – maximum is •... -
Page 59: Camexpert I/O Controls Dialog
CamExpert I/O Controls Dialog CamExpert groups the Genie I/O Controls Parameters in one group. These parameters allow configuring the Genie inputs and outputs for type of signal and signal polarity. The screen capture below shows the CamExpert I/O parameters dialog and is followed by a descriptive overview. -
Page 60: Inputs
Input Settings Click on Setting to open the Input Settings dialog box, which allows you to specify the trigger input settings. For more information, see "General Inputs: Settings Via CamExpert" on page 60. Click on Setting to open the Output Settings dialog box, which allows you Output Settings to specify the trigger output settings. -
Page 61: General Inputs: Settings Via Camexpert
General Inputs: Settings Via CamExpert CamExpert provides control of inputs via the I/O Controls Parameters tab. The Input Settings dialog box allows you to view the signal and status for each pin on the Hirose connector. The Polarity drop-down list boxes, located in the INPUT Settings area, allow you to specify the polarity of the Input 1 and Input 2 as either Active High or Active Low. -
Page 62: Input Controls Via Sapera Lt Or Gige Vision Compliant Applications
Input Controls via Sapera LT or GigE Vision Compliant Applications Genie Sapera parameters for Trigger Modes, Time Stamp and General Inputs: TriggerDelayToIntegration = Delay in µs from trigger to exposure TriggerEnable = {FALSE, TRUE} TriggerSource = {Input 1 = 0, Input 2 = 1, Software = 2} TriggerSoftware = {FALSE, TRUE} FramesPerTrigger = Frame count 1 to 64k TimestampResetSource = {Off = 0, Input 1 = 1, Input 2 = 2}... -
Page 63: Strobe And General Outputs
Strobe and General Outputs Genie provides two sets of opto-coupled outputs (see "External Outputs" on page 115). These can be used as a strobe signal to control lighting or to generate programmable pulses when specific events are generated by the camera. They can also be set to a static state (close or open) by the application. - Page 64 Open and Close Output Settings You can open and close the output circuit using software rather than hardware events, to control external devices. To control the output setting with Sapera LT see "Output Control via Sapera LT or GigE Vision Compliant Applications" on page 67. Strobe On Start of Exposure Event Mode The Strobe On Start of Exposure event mode is used when controlling a strobe light using the Genie output pin.
- Page 65 Pulse On Valid Trigger Event Mode The Pulse On Valid Trigger event mode generates an output signal when a valid input trigger is received. Pulse On Invalid Trigger Event Mode This event mode generates an output signal when an invalid input trigger is received. An invalid trigger is any trigger received while the camera is engaged in frame acquisition (exposure and readout) and cannot accept trigger inputs.
- Page 66 Pulse On Start of Readout Event Mode The Pulse On Start of Readout event mode generates an output signal when the camera begins a readout operation from the sensor. Pulse On End of Readout Event Mode The Pulse On End of Readout event mode generates an output signal when the camera finishes a readout operation from the sensor.
- Page 67 Pulse On End of Acquisition Event Mode The Pulse On End of Acquisition event mode generates an output signal when the acquisition process is terminated using software. Pulse On Input 1 or Input 2 Event Modes The Pulse On Input 1 or Input 2 event modes generate an output signal when the specified input signal is asserted.
-
Page 68: Output Control Via Sapera Lt Or Gige Vision Compliant Applications
Output Control via Sapera LT or GigE Vision Compliant Applications Genie Sapera parameters for Strobe and General Outputs. See "Accessing Features with Sapera++ LT" on page 83. OutputSelectorOutput_x = {Open = 0, Close = 1, Strobe On: Start of Exposure = 2, Pulse On: Valid Trigger = 4, Pulse On: Invalid Trigger = 5, Pulse On: Start of Readout = 6, Pulse On: End of Readout = 7, Pulse On: End of Acquisition = 8, Pulse On: Input 1 = 9, Pulse On: Input 2 = 10} PulseDelayOutput_x = Delay in µs to assert pulse output... -
Page 69: Lut Control Via Sapera Lt Or Gige Vision Compliant Applications
Simplified Genie LUT Block Diagram (8-bit example) Pixel Sensor & Data Output Circuit Circuit Programmed as Invert Function Simplified 8-bit LUT Block Diagram LUT Control via Sapera LT or GigE Vision Compliant Applications Genie Sapera parameters for LUT control: LUTEnable = {FALSE, TRUE} LUTFormat = {Mono 8, Mono 10 –... -
Page 70: Flat Field (Image Shading) Correction
Flat Field (Image Shading) Correction Image Shading correction, also known as Flat Field Correction is the process of eliminating small gain differences between pixels in a sensor, eliminate sensor hotspots by automatically doing pixel replacement, and also to compensate for light distortion caused by a lens. That sensor when exposed to a uniformly lit field will have no gray level differences between pixels when calibrated flat field correction is applied to the image. -
Page 71: Verify A Dark Acquisition
Verify a Dark Acquisition Close the camera lens iris and cover the lens with a lens cap. Using CamExpert, click on the grab button and then the histogram button. The following figure shows a typical histogram for a Genie grabbing a very dark image. Important: In this example, the average pixel value for the frame is close to black. -
Page 72: Flat Field Correction Calibration Procedure
Important: In this example, the average pixel value for the frame is bright gray. Also note that sensors may show a much higher maximum or a much lower minimum pixel value due to one or more "hot or dead pixels". The sensor specification accounts for a small number of hot, stuck, or dead pixels (pixels that do not react to light over the full dynamic range specified for that sensor). - Page 73 Flat Field Calibration Window The Flat Field calibration window provides a three step process to acquire two reference images and then save the flat field correction data for the Genie used. To aid in determining if the reference images are valid, a histogram tool is provided so that the user can review the images used for the correction data.
-
Page 74: Flat Field Correction Control Via Sapera Lt Or Gige Vision Compliant Applications
Click on Acquire White Image. The flat field demo will grab video frames, analyze the • pixel gray level spread, and present the statistics. The captured gray level for all pixels should be greater than 128 but not saturated. If the histogram shows a good grab accept the image as the white reference. -
Page 75: Image Flip
Image Flip Horizontal The Genie supports a software controlled horizontal flip function as shown in the following figure. The process is done in hardware with no loss of acquisition frame rate. Horizontal Flip Vertical As shown in the following figure, a vertical flip function is simply accomplished by mounting the Genie camera upside down and by programming the camera to do a horizontal flip. -
Page 76: Internal Image Test Patterns
Internal Image Test Patterns The Genie camera includes a built in test pattern generator that can be used to confirm camera Ethernet connections or driver installations, without the need for a camera lens or proper lighting. The pattern generator inserts video just after the sensor A/D converter, therefore Genie processing such as the LUT act on the generator images or on sensor images. -
Page 77: Test Image Select Via Sapera Lt Or Gige Vision Compliant Applications
Test Image Select via Sapera LT or GigE Vision Compliant Applications Genie Sapera parameters for Image Test Patterns: TestImageSelector = {Off = 0, Grey Horizontal Ramp = 1, Grey Vertical Ramp = 2, Grey Diagonal Ramp Moving = 3, Purity = 4} In CamExpert, these parameters are available in the “Sensor”... -
Page 78: Event Selection Via Gige Vision Compliant Applications
Feature Event Name Description (case sensitive strings) Start of Trigger Trigger is valid based on the programmed trigger parameters Start of Exposure Exposure has started End of Exposure Exposure is complete End of Acquisition Transfer of image is terminated from camera. This does not mean that the host PC has received all data packets. -
Page 79: Using Camexpert To Set Network & Gige Vision Parameters
Genie GigE Vision parameters can be manually modified directly from CamExpert as described below. Note that a number of parameters (IP Configuration Mode, IP Address, Packet Size, etc.), can also be modified by the Teledyne DALSA Network Configuration Tool described in the Teledyne DALSA Network Imaging package manual. - Page 80 576 to 1500, in increments of 4 bytes when the NIC does not support jumbo packet. The maximum is currently 9000 bytes when jumbo packets are supported (refer to the Teledyne DALSA Network Imaging package manual to enable jumbo packets on the NIC). In most situations, use the largest possible packet size supported by your network elements.
- Page 81 Image Timeout (in sec) Specifies the timeout period for an image acquisition used by the GigE server running on the host computer (in seconds – max=60). The Image timeout value is the amount of time the GigE server will wait for an image to be transferred from the camera to the host buffer memory.
-
Page 82: Network Controls Via Sapera Lt Or Gige Vision Compliant Applications
Network Controls via Sapera LT or GigE Vision Compliant Applications Genie Sapera parameters for Network Configuration: NetworkConfigurationMode = {Automatic = 0, Manual = 1, Optimize = InterPacketDelay = Minimum delay in µs between image packets PacketSize = Image packet size in bytes HeartbeatTimeout = Heartbeat period (watchdog) in ms before camera disconnect MaximumPacketResend = Sets percentage of packets that can be resent... - Page 83 GevSupportedOptionalCommandsUserDefinedName = Indicates if the User-defined Name register is supported. GevSupportedOptionalCommandsSerialNumber = Indicates if the Serial Number register is supported. GevSupportedOptionalCommandsEVENTDATA = Indicates if EVENTDATA_CMD and EVENTDATA_ACK are supported. GevSupportedOptionalCommandsEVENT = Indicates if EVENT_CMD and EVENT_ACK are supported. GevSupportedOptionalCommandsPACKETRESEND = Indicates if PACKETRESEND_CMD is supported.
-
Page 84: Sapera Supported Features List
Sapera Supported Features List The Genie features and its currently set values can be read by a Sapera application. The Sapera tool CamExpert is an example of an application that reads and writes Genie parameters to control its operation. The following tables group the Genie features by their feature type—STRING, ENUM, INT32, BOOL, and describe their possible values and limits. -
Page 85: Feature Type String
Feature Type STRING Feature Name Access W-Mode Type Value Server Name Invalid STRING Genie_M640_1 (example) Number of Features Invalid STRING (number dependent on firmware version) DeviceVendorName Invalid STRING DALSA DeviceModelName Invalid STRING Genie M640 (example) DeviceVersion Invalid STRING 1452 (example) FirmwareVersion Invalid STRING... - Page 86 TestImageSelector Always ENUM Off = 0 Grey Horizontal Ramp = 1 Grey Vertical Ramp = 2 Grey Diagonal Ramp Moving = 3 Purity = 4 LUTFormat Invalid ENUM Mono 8 – Unsigned = 16844800 (dependent on camera model) Mono 8 – Signed = 285280256 Mono 9 –...
-
Page 87: Feature Type Int32
TimestampCounter Always ENUM Internal Clock (1µs resolution) = Input 1 = 1 Input 2 = 2 End of Readout = 3 SaveCameraConfigurationSelector N.conn ENUM Camera Configuration 1 = 1 LoadCameraConfigurationSelector N.conn ENUM Factory Default = 0 Camera Configuration 1 = 1 IPConfigurationMode N.acq ENUM... -
Page 88: Feature Type Bool
min=100, PulseDurationOutput_2 (μS) Always EXP10: 6 max=16777215, inc=1 Width N.conn EXP10: 0 min=8, max=sensor width, inc=4 Height N.conn EXP10: 0 min=1, max=sensor height, inc=1 OffsetX N.conn EXP10: 0 min=0, max=sensorwidth-8, inc=4 OffsetY N.conn EXP10: 0 min=0, max=sensorheight-1, inc=1 SaperaBufferFormat Invalid EXP10: 0 1684480 PixelSize... - Page 89 LUTEnable N.conn BOOL True/False TriggerEnable N.acq BOOL True/False TriggerSoftware Always BOOL True/False AcquisitionArm N.acq BOOL True/False (see note 2) FlatFieldEnable N.conn BOOL True/False FlatFieldCalibrationEnable N.conn BOOL True/False (see note 3) TimestampReset Always BOOL True/False SaveCameraConfiguration N.conn BOOL True/False LoadCameraConfiguration N.conn BOOL True/False Note 2: Prepares the Genie for an optimal acquisition start with minimal delay.
-
Page 90: Feature Summary List By Function Group
Feature Summary List by Function Group This section lists Genie features by function group. This simplifies identifying which features are involved with specific Genie operations (an example would be configuring and activating external trigger). For details about each feature, refer to the previous section where features are listed by data type. -
Page 91: Acquisition Roi
Sensor Exposure Feature Type ExposureMode ENUM ExposureTime INT32 ExposureAlignment ENUM Acquisition ROI Feature Type Width INT32 Height INT32 OffsetX INT32 OffsetY INT32 ImageFlip ENUM Binning Control Feature Type BinningHorizontal ENUM BinningVertical ENUM LUT Control Feature Type LUTEnable BOOL LUTFormat ENUM LUTNumberEntries INT32 LUTData... -
Page 92: Trigger Control
Trigger Control Feature Type TriggerEnable BOOL TriggerSource ENUM FramesPerTrigger INT32 TriggerSoftware BOOL TriggerDelayToIntegration INT32 AcquisitionArm BOOL I/O Control Feature Type PolarityInput_1 ENUM DebounceInput_1 INT32 InputPinStatusInput_1 INT32 PolarityInput_2 ENUM DebounceInput_2 INT32 InputPinStatusInput_2 INT32 OutputSelectorOutput_1 ENUM PulseDelayOutput_1 INT32 PulseDurationOutput_1 INT32 PolarityOutput_1 ENUM OutputSelectorOutput_2 ENUM PulseDelayOutput_2... -
Page 93: Network Parameters
Network Parameters Feature Type NetworkConfigurationMode ENUM IPConfigurationMode ENUM IPAddress STRING SubnetMask STRING DefaultGateway STRING InterPacketDelay INT32 PacketSize INT32 HeartbeatTimeout INT32 MaximumPacketResend INT32 InterPacketTimeout INT32 ImageTimeout INT32 User Options Feature Type Power-upConfig ENUM SaveCameraConfigurationSelecto ENUM SaveCameraConfiguration BOOL LoadCameraConfigurationSelector ENUM LoadCameraConfiguration BOOL 92 •... -
Page 94: Feature Interdependence Diagrams
Feature Interdependence Diagrams The following diagrams describe operational feature availability which are dependent on user selected modes. These diagrams show what features are set to a value, and they show which feature parameters remain as user variables. Each diagram uses the following symbol set to indicate the dependent action type. gray box User Action Function Enabled... - Page 95 Trigger Enable - TRUE Trigger Enable Trigger Source TRUE Exposure Mode Software Input 1 Programmable Exposure Time Input 2 Exposure Alignment Synchronous Reset Exposure Mode Programmable Pulse Controlled Exposure Time Exposure Alignment-Reset Trigger Delay to Integration Frame Rate Exposure Time Software Trigger Frame Per Trigger Trigger Enable - FALSE...
-
Page 96: Output Selector
Output Selector Output X Selector Output X Pulse Delay Open Close Output X Pulse Duration Strobe On: Start of Exposure Pulse On: End of Exposure Output X Polarity Pulse On: Valid Trigger Pulse On: Invalid Trigger Pulse On: Start of Readout Pulse On: End of Readout Output X Pulse Delay Pulse On: End of Acquisition... -
Page 97: Pixel Format
Pixel Format Pixel Format SaperaBufferFormat 8-Bit 10-bit PixelSize LUTFormat LUTNumberEntries FlatFieldEnable Frame Rate Exposure Time Network Configuration Mode Network Configuration Mode Automatic Packet Size Optimize Heartbeat Timeout Manual Inter-Packet Delay Max Packet Resend Inter-Packet Timeout Image Timeout Packet Size Heartbeat Timeout Inter-Packet Delay Max Packet Resend Inter-Packet Timeout... -
Page 98: Accessing The Genie User Buffer
Accessing the Genie User Buffer Genie cameras have unallocated memory available to the user for random data storage. This user buffer is a feature of type SapFeature::TypeBuffer. Any type of Sapera buffer is valid as long as the buffer size in bytes is less than 4k. Access to this user buffer is by the same API as any Genie feature access. - Page 99 printf("Error during feature creation!\n"); return FALSE; if( !pAcqDevice->GetFeatureInfo("UserBuffer", &feature)) printf("Error during GetFeatureInfo(\"UserBuffer\")!\n"); return FALSE; // Get max only works with 1.40.01.0192 or higher. #if 0 if( !feature.GetMax( &userBufferSize) ) printf("Error during GetMax!\n"); return FALSE; printf("User Buffer size = %d", userBufferSize); #else userBufferSize = 4*1024;...
-
Page 100: Network Overview & Tools
NIC to forward an IP packet on the 169.254 segment. Limit the number of NIC configured using LLA to one interface. It is preferable that the Teledyne DALSA DHCP server is used instead of LLA mode (see next section). -
Page 101: Dhcp (Dynamic Host Configuration Protocol)
Use the Teledyne DALSA Network Configuration Tool to change the Genie from the • default DHCP/LLA mode to Persistent IP mode when required, such as when there are multiple NIC devices with Genie connected to each. Note that Teledyne DALSA recommends DHCP/LLA as the mode of operation where a switch is used to connect multiple Genie devices. -
Page 102: Persistent Ip
If the Genie camera is connected to a network with a different subnet, it cannot be • accessed. • The Teledyne DALSA Network Configuration Tool is used to set a persistent IP address. Refer to the Teledyne DALSA Network Imaging manual. An example of a Persistent IP address assignment on a class B network: •... - Page 103 102 • Network Overview & Tools Genie Monochrome Series-GigE Vision Camera...
-
Page 104: Sapera Camexpert Guide
Sapera CamExpert Guide Using CamExpert with Genie Monochrome Cameras CamExpert is the camera interfacing tool supported by the Sapera library. When used with a Genie camera, CamExpert allows a user to test all Genie operating modes. Additionally CamExpert saves the Genie user settings configuration to the camera or saves multiple configurations as individual camera parameter files on the host system (*.ccf). -
Page 105: Camexpert Panes
CamExpert Panes The CamExpert application uses 5 windows to simplify choosing and configuring camera files or acquisition parameters for the installed device. Device Selector pane: View and select from any installed Sapera acquisition device. • Once a device is selected CamExpert will only present acquisition parameters applicable to that device. -
Page 106: Camexpert Lut Controls
Acquisition control button: Click once to start live grab, click again to stop. Single frame grab: Click to acquire one frame from device. Software trigger button: With the I/O control parameters set to Trigger Enabled / Software Trigger type, click to send a single software trigger command. - Page 107 10-bit Invert LUT CamExpert available LUT examples are briefly described below. The LUT function graphic simplifies understanding the operation especially when user settings modify the LUT function. Normal (default): modifies all LUT entries using a linear mapping such that a gray •...
-
Page 108: Technical Specifications
Technical Specifications Mechanical Specifications The following sections show 3D views and the mechanical dimensions for Genie with C- mount or CS-mount, and also for Genie with right-angled lens mounts. Additional notes follow the figures. Genie 3D View with C-mount and CS-mount Technical Specifications •... -
Page 109: Genie C-Mount And Cs-Mount Mechanical Specifications
Genie C-mount and CS-mount Mechanical Specifications Note: Overall length tolerance is ± 0.35mm 108 • Technical Specifications Genie Monochrome Series-GigE Vision Camera... -
Page 110: Genie 3D View With Right-Angle C-Mount And Cs-Mount
Genie 3D View with Right-angle C-mount and CS-mount Technical Specifications • 109 Genie Monochrome Series-GigE Vision Camera... -
Page 111: Genie Right-Angle C-Mount And Cs-Mount Mechanical Specifications
Genie Right-angle C-mount and CS-mount Mechanical Specifications Note: Overall length tolerance is ± 0.35mm 110 • Technical Specifications Genie Monochrome Series-GigE Vision Camera... -
Page 112: Additional Notes On Genie Mechanical
Additional Notes on Genie Mechanical Genie supports a screw lock Ethernet cable (see "Ruggedized RJ45 Ethernet Cables" on page 123). For information on Genie lens requirements see "Optical Considerations" on page 117. Lens flange focal distance = 17.52 mm. Lens flange focal distance = 12.52 mm for CS-mount. The camera top also has four mounting holes in identical locations. -
Page 113: 12-Pin Hirose Connector Signal Details
Connectors A single RJ45 Ethernet connector for control and video data to the host Gigabit NIC. • Genie supports a screw lock Ethernet cable (see "Ruggedized RJ45 Ethernet Cables" on page 123). A single 12-pin Hirose male connector for power, trigger and strobe signals. The •... -
Page 114: Genie Signal Electrical Details
Genie Signal Electrical Details Power Supply (pin 2): +12V DC nominal at 0.5 Amp minimum. • (see Camera Performance Specifications) Over voltage and reverse voltage protection circuit built in. The protection circuit is reset by shutting down or disconnecting the power supply. The 12-pin Hirose male connector shell and cable shield should connect to the supply •... - Page 115 3.3V Genie 4.7K Event Buffer Trigger Signal driver Debounce .01µf example 74HC244 Fairchild HMHA281R Hirose 12 connector TTL External Signal Example 3.3V Genie 4.7K Trigger Debounce Event Buffer .01µf Signal driver example Fairchild SN75179B HMHA281R Hirose 12 connector RS-422 External Signal Example 3.3V Genie 4.7K...
-
Page 116: External Outputs
External Outputs Programmable output mode such as strobe, event notification, etc. (see "Output • Control via Sapera LT or GigE Vision Compliant Applications" on page 67). Genie Output Signal Example 74LS14 PS2805-1 Hirose 12 connector Output Driving a TTL User Circuit The opto-coupler is typically a NEC PS2805-1 with the following characteristics. -
Page 117: Rj45 Lan Ethernet Connector Details
RJ45 LAN Ethernet Connector Details The RJ45 LAN connector has two LEDs for network status conditions. The LED color codes are as follows. Network Connection Network Activity Green 100Mbps no network activity Orange 1000Mbps Yellow typically blinking – active Network Connection Network Activity The Genie LAN connector is a standard Ethernet socket. -
Page 118: Optical Considerations
Factors include the nature, speed, and spectral characteristics of objects being imaged, exposure times, light source characteristics, environmental and acquisition system specifics, and more. The Teledyne DALSA Web site, www.teledynedalsa.com/imaging, provides an introduction to this potentially complicated issue. Click on Knowledge Center and then select Application Notes and Technology Primers. -
Page 119: Magnification And Resolution
The focal point is the point at which the image of an infinitely distant object is brought to ′ focus. The effective focal length (f ) is the distance from the second principal point to the second focal point. The back focal length (BFL) is the distance from the image side of the lens surface to the second focal point. -
Page 120: Lens Selection Overview
Lens Selection Overview Vision component suppliers and system integrators will have detailed information on lens products at different price points, relative to quality and for different imaging situations. This section provides a general overview to selecting a lens for the Genie cameras. The first two lens parameters are based on correctly matching the lens to the Genie model. -
Page 121: Additional Lens Parameters (Application Specific)
12.80 8.80 7.20 6.40 4.80 Comparison of Standard Sensor Sizes (dimensions in mm) Additional Lens Parameters (application specific) There are other lens parameters that are chosen to meet the needs of the vision application. These parameters are independent of the Genie model (assuming that the Lens Mount and Lens Sensor Size parameters are correct, as previously covered in this section). -
Page 122: Sensor Handling Instructions
Sensor Handling Instructions This section reviews proper procedures for handling, cleaning, or storing the Genie camera. Specifically the Genie CCD sensor needs to be kept clean and away from static discharge to maintain design performance. Electrostatic Discharge and the CCD Sensor Cameras contain charge-coupled device (CCD) image sensors, which are metal oxide semiconductor (MOS) devices and are susceptible to damage from electrostatic discharge (ESD). -
Page 123: Cleaning The Sensor Window
Condensation, even when left to dry naturally, will deposit more particles on the sensor. When compressed air cannot clean the sensor, Teledyne DALSA recommends using lint- • free ESD-safe cloth wipers that do not contain particles that can scratch the window. The Anticon Gold 9”x 9”... -
Page 124: Rj45 Ethernet Cables
Ruggedized RJ45 Ethernet Cables Components Express Inc. has available an industrial RJ45 CAT6 cable that on one end has a molded shroud assembly with top/bottom thumbscrews, while the other end has a standard RJ45. This cable is recommended when Genie is installed in a high vibration environment. All Genie versions support this secure Ethernet cable. -
Page 125: C/Cs-Mount Nir And Uv Filter
C/CS-Mount NIR and UV Filter Midwest Optical Systems has available a C-mount NIR/UV filter. This filter screws into the Genie camera before mounting the lens. The figures below show the filter before mounting into the Genie, followed by the filter physical specifications and pass spectrum. Contact Midwest Optical Systems directly for technical information and pricing. -
Page 126: Back Focal Variance When Using A Filter
Back Focal Variance when using a Filter Inserting a filter between a lens and sensor (as when using a C-mount filter), changes the focal point of the lens used. A variable focus lens simply needs to be adjusted, but in the case of a fixed focus lens, the changed focal point needs correction. -
Page 127: Computer Requirements For Genie Cameras
Older laptop computers with built in GigE network adapters may still not be able to • stream full frame rates from Genie. Thorough testing is required with any laptop computer to determine the maximum frame rate possible (refer to the Teledyne DALSA Network Imaging package manual). Ethernet Switch Requirements When there is more than one device on the same network or a camera-to-PC separation greater than 100 meters, an Ethernet switch is required. -
Page 128: Ethernet To Fiber-Optic Interface Requirements
Ethernet to Fiber-Optic Interface Requirements In cases of camera-to-PC separations of more than 100 meters but an Ethernet switch is not desired, a fiber-optic media converter can be used. The FlexPoint GX from Omnitron Systems (http://www.omnitron-systems.com/) converts GigE to fiber transmission and vice versa. -
Page 129: Ec & Fcc Declaration Of Conformity
EC & FCC Declaration of Conformity 128 • Technical Specifications Genie Monochrome Series-GigE Vision Camera... -
Page 130: Troubleshooting
Troubleshooting Overview In rare cases an installation may fail or there are problems in controlling and using the Genie camera. This section highlights issues or conditions which may cause installation problems and additionally provides information on computers and network adapters which have caused problems with Genie. -
Page 131: Problem Type Summary
In multiple NIC systems where the NIC for the Genie is using LLA mode, ensure that no other NIC is in or switches to LLA mode. It is preferable that the Teledyne DALSA DHCP server is enabled on the NIC used with the Genie instead of LLA mode, which prevents errors associated with multiple NIC ports using LLA mode. -
Page 132: Other Problems
• a report.txt file automatically generated on firmware updates. From the Start menu, go to All Programs • Teledyne DALSA • Sapera LT • Tools • and run the Log Viewer program. From its File menu click on Save Messages to generate a log text file. -
Page 133: Issues And Functional Problems
Installation Issues and Functional Problems This section covers issues that are apparent after installation or are indicated by the GigE server tray icon showing a warning symbol. The Windows Firewall Service Can Not Start After installing Windows XP Service Pack 2 or 3, the Windows Firewall service will not start. Problems with the Genie camera or Framework may include: The Genie camera cannot acquire a DHCP address •... -
Page 134: Available With Operational Issues
Device Available with Operational Issues This section considers issues with cabling, Ethernet switches, multiple cameras, and camera exposure. All information concerning the Teledyne DALSA Network Configuration Tool and other networking considerations, is available in the Teledyne DALSA Network Imaging manual. -
Page 135: Cabling And Communication Issues
Minimum recommended Ethernet cable length is 3 feet (1 meter). • Use the Log Viewer tool (see point below) to check on packet resend conditions. Run the Sapera Log Viewer: Start•All Programs•Teledyne DALSA•Sapera • LT•Tools•Log Viewer. Start the Genie acquisition program, such as CamExpert. There should not be any "packet resend"... -
Page 136: Acquisition Error Without Timeout Messages
Streaming video problems range from total loss of image data to occasional loss of random video data packets. The following section describes conditions identified by Teledyne DALSA engineering while working with Genie in various computers and setups. See the Teledyne DALSA Network Imaging manual for information on network optimizations. -
Page 137: Other Problems Or Issues
Other Problems or Issues This section describes problems that do not fit any of the categories above. Typically these are issues found in the field under specific or unusual conditions. Random Invalid Trigger Events Do not change the exposure time while grabbing, else an Invalid Trigger Event may be generated. -
Page 138: Contact Information
Genie Sales Information Visit our web site: http://www.teledynedalsa.com/imaging Email: mailto:info@teledynedalsa.com Canadian Sales Teledyne DALSA — Head office Teledyne DALSA — Montreal office 605 McMurray Road 880 McCaffrey Waterloo, Ontario, Canada, N2V 2E9 St. Laurent, Quebec, Canada, H4T 2C7 Tel: 519 886 6000... -
Page 139: Genie Technical Support
In the folder [installation drive]\Teledyne DALSA\Genie\bin a report.txt file is • automatically generated on firmware updates. From the Start menu, go to All Programs • Teledyne DALSA • Sapera LT • Tools • and run the Log Viewer program. From its File menu click on Save Messages to generate a log text file.
Need help?
Do you have a question about the Genie Monochrome M640-1/3 and is the answer not in the manual?
Questions and answers