Table of Contents
Advertisement
Quick Links
+
Directions for Use
Software Version 2.1 and higher
st
Status of Information February 21
, 2003
All parts of these directions for use are copyrighted. Copying or circulating the whole or partial text is only allowed with a written
©
permission of Dentsply DeTrey DeTech GmbH. Violation obliges to compensation. MULTIMAT
is a registered trademark of
Dentsply DeTrey DeTech GmbH. Subject to technical and design alterations.
© Dentsply DeTrey DeTech GmbH, Hanau-Wolfgang
Advertisement
Table of Contents

Related Manuals for DENTSPLY MULTIMAT Touch


Summary of Contents for DENTSPLY MULTIMAT Touch
- Page 1 All parts of these directions for use are copyrighted. Copying or circulating the whole or partial text is only allowed with a written © permission of Dentsply DeTrey DeTech GmbH. Violation obliges to compensation. MULTIMAT is a registered trademark of Dentsply DeTrey DeTech GmbH.
-
Page 2: Introduction
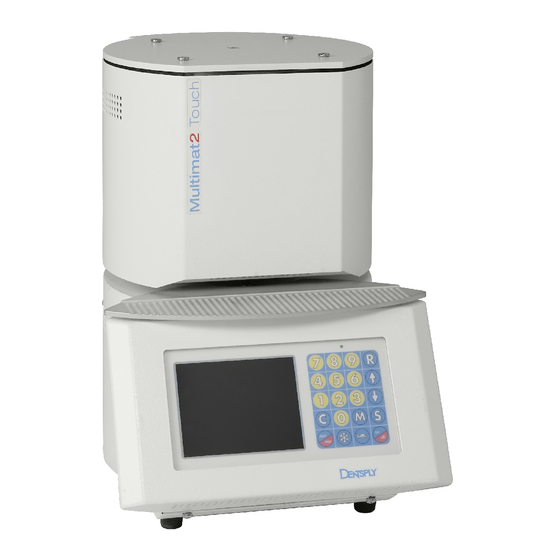
The Multimat Touch is equipped with 300 freely programmable programs. 62 preset programs of Dentsply’s ceramics come on top, meaning that they do not lower the amount of individual programs. The Touch Screen allows direct interaction and a quick selection of functions. -
Page 3: Table Of Contents
Contents INTRODUCTION ......................2 MEANING OF WARNING AND CAUTION NOTES:..........6 1. DESCRIPTION OF PARTS ..................7 1.1 Description of parts.....................8 1.2 Technical data ......................9 1.3 Environmental conditions ..................9 2. SAFE USE......................10 2.1 Use within specifications ..................10 2.2 Hazards and safety notes ..................11 3. - Page 4 4.5.3 Smart Card ........................26 4.5.4 Delete programs ........................ 26 4.5.4.1 Single program ......................... 26 4.5.4.2 Delete all individual programs ....................27 4.5.4.3 Delete all preset / all special programs..................27 4.5.5 Online Diagnosis System (ODS optional) ................. 26 5. CREATE AN OWN PROGRAM ................27 5.1 Firing Modes ......................28 5.2 Program type ......................28 5.3 Program list .......................28...
- Page 5 7. Service and maintenance ....................42 7.1 Lift..........................42 7.2 Firing platform complete with firing platform carrier..........42 7.3 Vacuum pump......................42 7.4 Replacement of firing muffle ..................43 7.5 Replacement of control unit ..................44 7.6 Inspections ........................45 7.7 Cleaning notes......................45 8. ERRORS AND REMEDIES .................. 46 9.
-
Page 6: Meaning Of Warning And Caution Notes
Meaning of Warning and Caution Notes Warning! This symbol indicates particularly important notes and instructions in respect of which any non-compliance may cause injury or accident hazards. Caution! Hot surface This symbol is placed everywhere you could get in contact with a hot surface. Text in Italics means that this part only refers to the furnace version ®... -
Page 8: Description Of Parts
1. Description of parts 1.1 Description of parts Press hood Cover Cooling jacket Support Firing platform Firing platform carrier Work storage platform Control casing Smart card slot Interface RS 232 (Printer/PC port) Interface RJ 485 (for PC network) Touch Screen Control section ( Controller) Equipment fuses Mains socket... -
Page 9: Technical Data
1.2 Technical data ® Multimat Touch Height: closed approx. 441 mm Open approx. 585 mm Width: approx. 320 mm Depth: approx. 425 mm Voltage: approx. 220/230 V for countries with 220/230 V approx. 100 V for countries with 100 V approx. -
Page 10: Safe Use
Touch has been designed and is exclusively intended for firing/ pressing dental ceramics. Dentsply will not be liable for any damage resulting from any other use that is not within our specifications. Programs with temperatures above 1000 °C reduce the life span of the muffle, the press cylinder and the press valve. -
Page 11: Hazards And Safety Notes
2.2 Hazards and safety notes Caution! In order to ensure risk-free operation the following notes must be observed and fully complied with: Do not set up furnace and vacuum pump in the immediate vicinity of heat sources. The current consumption of the vacuum pump should not be more than 2.5 A. The muffle and pump power are added and can lead to overload of the equipment fuse. -
Page 12: Setup And First Use
" Place the firing platform onto the firing platform carrier. " Connect the mains plug of the Dentsply vacuum pump to the vacuum pump socket on the furnace, and push the vacuum hose onto the hose adapter on the furnace. The arrow on the filter must be in the direction of the vacuum pump. -
Page 13: Start Screen Display
3.4.1 Start screen display The start screen display showing the Dentsply logo, the version number of the software as well as the serial number of the control unit will appear for 6 seconds on screen. The firing chamber with a possibly vacuum will be filled with air. -
Page 14: Installation And Safety Notes
3.4.4 Installation and safety notes On the screen the most important installation notes appear as well as the compliance note to follow the installation and safety information in the Directions for Use. Confirm with the OK button and touch the Right Arrow key. -
Page 15: Basic Settings
3.4.6 Basic settings Note: Several basic settings are preset at the factory. You may touch the sensor button "#" to accept these basic settings or change them as described below. 3.4.6.1 Temperature mode Touch the yellow sensor button to change between °C and °F. 3.4.6.2 Night/Standby-Temperature Press yellow sensor button to select the Night/standby temperature (furnace is turned off but... -
Page 16: Date
3.4.6.5 Date 1. Touch the yellow sensor button "Date" 2. Enter a 8-digit number for day/month/year using the numeric keypad 3.4.6.6 Acoustic signal Touch the yellow sensor button to activate or deactivate the signal. 3.4.6.7 Idle temperature This function is used to save energy and to reduce the surface temperature of the furnace. Note: The idle temperature is preset to 400 °C and cannot be set higher than 600 °C. -
Page 17: Porcelain Type
(DeTrey/ Ceramco/ External) lies in the method of how the parameters are being set. If you already own a Dentsply DeTrey (Dentsply Ceramco) furnace you will recognize the way the programs are being handled. When the required test program has been selected, the furnace will switch over automatically... -
Page 18: Test Programs
The firing chamber will move from its last drying position into the preheating position, and the preheating time period will be visibly counted down to zero. Vacuum time controlled (Dentsply DeTrey firing method) When the preheating time period has expired, the firing chamber will close, the vacuum pump will be activated and evacuate the firing chamber until the preset vacuum pressure is reached. - Page 19 Vacuum temperature controlled (Ceramco firing method) Vacuum on and off is controlled by temperature. Rate of temperature rise When the preset vacuum pressure has been reached, the temperature will rise to the firing temperature level at the preset rate of temperature rise. Underneath this program section, the preheating time period will be visibly counted down to zero.
-
Page 20: Practical Application: An Introduction
4. Practical application: an introduction 4.1 Firing parameter limit values Parameter Lower Limit Upper Limit Night/Standby temperature 101 °C (214 °F) 300 °C (572 °F) Basic/Idle temperature 30 °C (86 °F) 600 °C (1112 °F) Nom. value firing temp. 30 °C (86 °F) 1200 °C (2192 °F) Act. -
Page 21: Screen Display Functions
4.3 Screen display functions 1. Help (?) The help function is filled with text which assists the operator to retrieve specific information when malfunction information appears. The text is limited to the most important information only. 2. Program name Screen display for the program name. The program name is taken from the text input field. 3. -
Page 22: Keyboard Functions
4.4 Keyboard functions numeric input muffle (lift) up mains recall muffle (lift) down clear start/stop night mode on/off quick cooling menu save Mains LED This LED is illuminated, when the furnace is connected to mains. Numeric input This is used to enter numeric values. Recall "R"... -
Page 23: Main Menu
Night mode sensor button This function activates the automatic final shutdown of the furnace following a firing sequence. This function will be connected as desired with the current program by touching the sensor button "bed". The symbol for night mode "Bed" will be displayed in the firing data view and in program sequence view. -
Page 24: Furnace Parameters
Sort progr. : Number/name sorting Programs can be sorted either by their program number, therefore numerically, or according to the program name, therefore alphabetically. (Cf. Section 6.12) Note: This function can be used only for Latin letters. Job number “on” (not yet activated) Designed to assign “Job”... -
Page 25: Reset Temperature Offset
The temperature offset, muffle hours and the language can be reset. All other displays in this menu have only an informative character and can not be changed. 4.5.2.1 Restore temperature offset Note: Before beginning the silver test sequence, the temperature offset must be reset to “0°... -
Page 26: Reset Muffle Operating Hours
When ordering a replacement heating muffle, always state the voltage on the nameplate of the furnace. 100 – 240 V 100 V Muffle 100; 110; 115; 125 V = 100 V Muffle 230 V 230 V Muffle 4.5.2.5 Reset Muffle Operating Hours After changing the muffle the muffle operating hours can be reset to Zero. -
Page 27: Delete All Individual Programs
4.5.4.2 Deleting Individual programs 1. Press sensor button "M" 2. Press Sensor button "Delete programs" 3. Press sensor button "All individual programs" 4. Confirm safety request by pressing sensor button "C". All individual programs are deleted. 4.5.4.3 Deleting Fixed and Special programs The sensor buttons belonging to fixed and special programs are deactivated and therefore the programs cannot be deleted. -
Page 28: Create An Own Program
Use this screen display to select the firing procedure by touching the relevant sensor button. After the required firing procedure has been selected, e.g. Dentsply DeTrey or Dentsply Ceramco, the furnace will switch over to the next screen. 5.2 Program type Select from the options shown. -
Page 29: Text Input
5.4 Text input Note: Only program names in Latin letters will be accepted. Use these letters and characters to enter the desired program name, e.g. "test". The text entered will appear in the text window. Touch the enter button “↵“ to be able to write in a second row. -
Page 30: Setting Vacuum Level
Press the respective yellow touch button. Use the numeric keypad 0-9 to enter for example the value 940. 5.5.8 Setting Vacuum time a) time controlled (e.g. Dentsply DeTrey Mode) Press the respective yellow touch button. Use the numeric keypad 0-9 to enter for example the value 0100 for 1 minute. -
Page 31: Setting The Cooling Stage
5.5.12 Setting the cooling stage ® The 3 cooling stages of the Multimat Touch allow to decrease stress within the ceramics. If programmed, cooling will start on completion of the firing time period. Cooling will continue until low temperature is reached again. Touch the respective yellow touch button. -
Page 32: Start A Program
5.7 Start a program Open the firing chamber with the Up key "$" on the right-hand control panel (if it is not already opened). Touch the button "start/stop". The furnace will switch over to the firing curve screen. The firing curve visualizes all firing sections. Initially, the firing curve will be shown empty underneath which, starting on the left, is being filled up during the firing sequence with color. -
Page 33: Changing A Program
5.8.3 Changing a program Change your program by direct selection of the firing parameter and subsequent input of the new value by means of the numeric input block. The new value will be accepted by: a. renewed selection of the firing parameter b. -
Page 34: Pressing
5.9 Pressing In order to press an all-ceramic you need to place the pressing platform on the platform carrier. After having chosen „Pressable ceramics“ in the screen „Porcelain type“ the furnace directly switches over to the program list for pressable ceramics. The press program for FINESSE ALL-CERAMIC (FAC) is preset under 301. -
Page 35: Special Functions
6. Special functions 6.1 Night/Standby-Temperature This function is used to prevent humidity from entering into the firing chamber. Night/standby temperature can be preset in the basic settings. This function allows to pre-select a temperature between 100 and 300°C to be maintained within the firing chamber in the "Off"... -
Page 36: Voltage Loss Bridging (Power Failure Recovery)
Procedure: Let the furnace warm up for approx. 1 hour at 600° C. Place the piece of silver wire in the Dentsply sample carrier. Reset the calibrating offset (see 4.5.2.1) Following data are saved as “Silver wire calibration”, Program number 375 under “Special Program”:... -
Page 37: Night Mode
Cooling stage 1. Open firing chamber and place sample carrier with silver wire centrally onto the firing platform. 2. Start test program "Silver wire calibration" (#375). 3. If - after completion of the program - the silver wire has started to melt along its upper third, that is, a bead has formed on the wire surface, then the temperature is correct (with an accuracy of +/-2°C). -
Page 38: Vacuum Test
6.8 Vacuum test (Furnace Parameters submenu Section 4.5.2.2) Only for Service use. 6.9 Print/PC (PC program optional) You will get firing protocols, if data output has been set to "Printer" in the basic settings, or a data transmission to the PC, if data output is set to PC. The nominal and actual values will be printed out automatically after firing if the printer has been chosen in the basic settings. -
Page 39: Program Sorting According To Name Or Program Number
6.12 Program sorting according to name or program number (Main menu Section 4.5.1) This function enables the programs to be sorted according to name or program number. This function is very helpful if the programs are prefixed by a letter for identification. Program sorting 1. -
Page 40: Display Time And Date
before the start. All other programs remain unaffected by this. Do not change temper positions for ceramics without consulting the manufacturer. 6.15 Display time and date This function enables the optional display of the time or of the date in the program. The date is preset in the factory. -
Page 41: Program Transfer Furnace → Smart Card
1. Insert the Smart Card into the slot on the right hand side of the furnace (Chip towards the rear). 2. Touch the sensor button “M” on the numeric pad 3. Choose the option “Smart Card”. 4. Choose the option “Format Smart Card”. 5. -
Page 42: Program Transfer Smart Card → Furnace
Touch can be operated with all efficient vacuum pumps that have a grounded plug connector (current consumption 2.5A max.), preferably with Dentsply vacuum pumps. The vacuum pump should have a suction capacity of at least 30 l/min and should reach a minimum end pressure of 30 hPa. -
Page 43: Replacement Of Firing Muffle
7.4 Replacement of firing muffle Caution! This product contains ceramic fibers; it may release fiber dusts; these have proven carcinogenic in animal experiments. Follow EC safety data sheet. The heat insulation of the firing chamber in this unit consists of ceramic fibers. Following extended use of ceramic fibers at temperatures above 900°C, silicon type substances (cristobalite) may occur. -
Page 44: Replacement Of Control Unit
® Multimat Touch: Unscrew cover and lift off in an upward direction (until the press stamp is freely accessible). Disconnect protective conductor from cover. 3. Remove insulating disk. 4. Disconnect thermo element from the two rear terminal studs. 5. Remove thermo element complete with hole bar, then remove terminal insulation. 6. -
Page 45: Inspections
Packaging can be obtained from your nearest representative. 7.6 Inspections We recommend an inspection after 15,000 lift cycles in which the essential functions are checked or components are replaced if necessary. For service please contact your Dentsply dealer. 7.7 Cleaning notes ®... -
Page 46: Errors And Remedies
8. Errors and remedies The information provided below is intended to assist you in identifying and evaluating simple errors and to fix them by appropriate remedial action. An Error message, its likely cause and the appropriate remedial action will be shown in a text format on the display. - Page 47 No.: Error: Cause: Remedy: E 04 Control unit is too Extremely high standby Disconnect mains plug and hot. temperature with open firing allow furnace to cool down for a Program chamber. period of 5 minutes cancellation, approximately. If not in use, continuous sound.
- Page 48 Error: Cause: Remedy: E 10 Battery is weak Battery on the control board Call service engineer to replace is flat. battery. E 11 Excess temperature The actual temperature is Call service engineer and ask 25°C above the nominal him/her to check the value.
-
Page 49: Preset Programs
9. Preset programs 9.1 Firing Table for Ceramco 3- Metal Ceramics (DeTrey Mode) (Use honey comb) Prog Cycle Preheat Drying Preheat Vacuum Heating Firing/ Vacuum Firing Cooling Temp. time min. Level rate Temp. holding time stage °C (min) (hPa) (°C) time min. -
Page 50: Firing Table For Finesse Metal Ceramics (Detrey Mode)
9.2 Firing table for Finesse metal ceramics (DeTrey Mode) (Use honey comb) Prog #. Program Preheat/ Drying Preheat. Vacuum Rate of Firing / Vacuum Firing Description time min. Level Temp. High Time time Temp. min. Rise Temp.: Min. min. °C °C/Min. -
Page 51: Firing Table For Finesse All Ceramic (Detrey Mode)
9.3 Firing table for Finesse All Ceramic (DeTrey Mode) Caution! Use the pressing platform Prog #. Press Start Vacuum Rate of Press holding Press time temp. level hPa temp. temp.: time min. °C Rise °C min. °C/Min. D-FAC 20:00 10:00 Press D-FAC- Repair... -
Page 52: Firing Table For Finesse; Fac And Ceramco Ii (Ceramco Mode)
9.4 Firing table for Finesse; FAC and Ceramco II (Ceramco Mode) (Use honey comb and for pressing the pressing platform.) Time (min.) Temperature Vacuum Stages Prog Program Pre- Vac. Firing Preheat/ Firing/ High Heat rate / Cool- Description Heat. Hold time Low Temp. -
Page 53: Software
10. Software We recommend to install always the latest software version on your ® ® Multimat Touch or Multimat Touch&Press. Please ask your Sales Rep or download it from the website www.digitux.de/dentsply, password “tech”. -
Page 54: Subsidiaries
11. Dentsply Subsidiaries Hersteller/Manufacturer: Dentsply Industria e Comercio Ltda. Dentsply Taiwan Rua Alice Hervé 86 7F-11, 351, DeguDent GmbH Bengen Sec.2 Chung Shan Road Rodenbacher Chaussee 4 25665-010 Petropolis, R.J. Chung-Ho, Taipei County 63457 Hanau-Wolfgang Brazil Taiwan R.O.C. Germany Dentsply Dental Co., Ltd. -
Page 55: Index
Date Format..............24 Lift cycles ..............26 Date/time............... 21 Lift position ..............21 Delete programs ............26 Dentsply Subsidiaries............ 54 Description of parts ............8 Display ................20 Display time and date............ 40 Main menu ..............23 Drying ................18 Max-Temp .............. - Page 56 Notes ................6 Setting Preheating time ..........29 Number/name sorting............ 24 Setting Tempering temperature........30 Numeric input.............. 22 Setting the cooling stage ..........31 Setting the firing parameters......... 29 Setting the tempering time ..........30 Setting Vacuum level............ 30 Setting Vacuum time ............ 30 Setup ................
Need help?
Do you have a question about the MULTIMAT Touch and is the answer not in the manual?
Questions and answers