Download Print this page

Advertisement

Quick Links

Instructions manual – WD 2200
Before you start using your new appliance, please read these operating instructions
carefully. It contains important information for your safety as well as for the use and care
of the appliance.
Keep the operating instructions for future use. If this appliance is passed on to a third
party, these operating instructions must also be handed over. These instructions can
also be downloaded from our website as a pdf file:
www  .   t echnotrade-berlin  .   d e
Introduction
You have purchased a weather station with the innovative DirektWetter technology.
Weather specialist developed this world first, which helps your station to receive region-
al weather forecasts produced professional meteorologists.
In addition, the local outdoor temperature is transmitted to the base station via a radio
transmitter with 433.92 MHz and a range of up to 60 meters. This gives you a compre-
hensive picture of the current and future weather situation.
Thanks to the latest technology, the weather station is easy to operate with just a few
buttons.
For your safety
Intended use
This weather station is used to display and carry out the functions men-
tioned in the operating instructions.
The unit consists of a receiver (base station) and a transmitter. The receiver
and the transmitter are battery-operated and can therefore be set up inde-
pendently of power sources. A smartphone with internet access is required
to use the station with the free app.
The base station may only be used in dry indoor areas and the outdoor transmitter only
in protected outdoor areas.
This appliance can be used by children aged from 8 years and above and persons with
reduced physical, sensory or mental capabilities or lack of experience and knowledge if
they have been given supervision or instruction concerning use of the appliance in a
safe way and understand the hazards involved.
Children must not play with the appliance.

Advertisement

loading
Need help?

Need help?

Do you have a question about the WD 2200 and is the answer not in the manual?

Questions and answers

HENRY ANDRE
February 24, 2025

comment télécharger le mode d'emploi en français ?

1 comments:
Mr. Anderson
February 24, 2025

The Technoline WD 2200 manual can be downloaded as a PDF file from the website www.technotrade-berlin.de. However, the available languages for download are not specified in the provided information.

This answer is automatically generated

Subscribe to Our Youtube Channel

Summary of Contents for Technoline WD 2200

  • Page 1 Instructions manual – WD 2200 Before you start using your new appliance, please read these operating instructions carefully. It contains important information for your safety as well as for the use and care of the appliance. Keep the operating instructions for future use. If this appliance is passed on to a third party, these operating instructions must also be handed over.
  • Page 2 The appliance is intended for domestic use only and not for commercial use. This appli- ance must not be used for medical purposes or for providing information to the public. Use the device only for its intended purpose. It must not be modified or technically altered.
  • Page 3  Cleaning and user maintenance must not be carried out by children without supervi- sion. Danger of explosion!!  Never expose batteries to extreme temperatures such as direct sunlight or fire. Do not place the unit on a radiator. Leaking battery acid can cause damage. ...
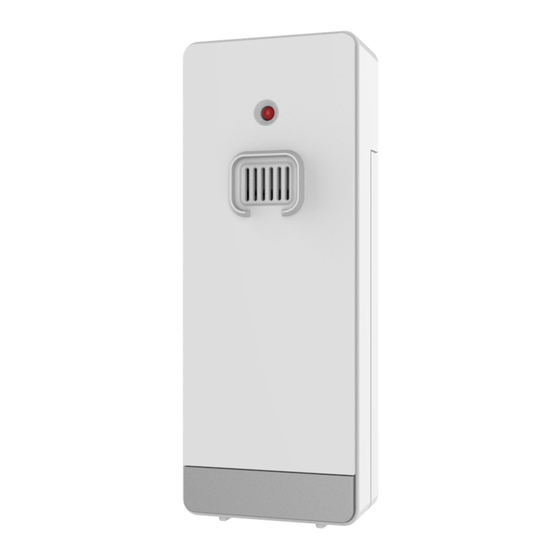
  • Page 4 Do not let children play with the packaging.  Keep children away from small parts. Scope of delivery: 1 Base station WD 2200 1 Outdoor sensor TX205DTH USB cable for base station 1 Operating instructions 1. Remove all parts from the packaging and check that they are complete and undam-...
  • Page 5 2. If any parts are damaged or missing, contact the address indicated on the package and product. Base station, Display Part A-Positive LCD A1: Time A2: Date and month...
  • Page 6 A3: Weekday A4: Indoor humidity A5: Indoor temperature A6: Weekday for the next third days A7: Weather forecast for the next third days A8: Maximum temperature forecasts for the next third days A9: Minimum temperature forecast for the next third days A10: Minimum temperature forecast for the next second days A11: Weather forecast for the next second days A12: Maximum temperature forecasts for the next second days...
  • Page 7 Base station, Buttons Part B – Back button and power B1: “ ” (SNOOZE/LIGHT) touch field B2: “ALARM” button B3: “ /SET”(WEATHER/SET) button...
  • Page 8 B4: “+” button B5: “-/WIFI” button B6: “MEM” button B7: Hanging hole B8: Battery compartment B9: Support frame B10: DC-POWER input jack Outdoor sensor Part C –Wireless outdoor sensor: C1: Transmit signal LED C2: “RESET” button C3: Channel selector switch C4: Battery compartment C5: Hanging hole...
  • Page 9 Commissioning WARNING Choking hazard! Children can put batteries in their mouths.  Keep batteries away from children. Seek medical attention immediately if a battery is swallowed.  Open the wireless outdoor sensor battery compartment cover and push the chan- nel selector switch in the battery compartment of the wireless outdoor sensor. Set the correct channel and insert 2 x AA batteries observing polarity [ “+”...
  • Page 10 DirektWetter: Playstore Appstore WeatherSense: Playstore Appstore User registration: After downloading and opening the app, the program will jump out of a registration EN10...
  • Page 11 interface, according to the registration shown below. After registration is completed, open the mailbox for account activation. Account login interface -> Account registration interface -> Prompt mailbox account activation -> Pairing with weather station device Login user account Make sure your phone is connected to a 2.4GHz Wi-Fi network. and Bluetooth function is turned on.
  • Page 12 station device will automatically exit AP mode. If not please press and hold “WIFI” button for 3 seconds to exit it. Confirm the city of your current location: Make sure your phone’s location service are turned on and allowed for this App. Make sure that your current location city can be successfully located in the map.
  • Page 13 Bind the device -> Device binding successful -> Confirm your location Note: The weather station has dual power supplies. It uses 4 AA batteries and a USB power supply. The WIFI function can work normally, but in order to ensure the stability of the coupling connection, USB power supply is recommended The base station will now start to make a connection to the outdoor remote sensor.
  • Page 14 If the base station cannot receive the outdoor values, "- -" appears on the display. 1. Check the batteries and try again. Note that you must always insert the batteries in the transmitter and receiver within one minute for the restart. 2.
  • Page 15 The reception strength symbol shows you the strength of the reception signal at the installation location: If reception is weak, transmission problems may occur. In this case, we recommend a different installation location (see "Transmission problems"). Connecting multiple outdoor sensors ...
  • Page 16  Press the “ /SET” button to confirm your setting, the minute displays starts to flash. Press the “+” or the “-/WIFI” button to set the correct minute.  Press the “ /SET” button to confirm your setting, the month and date icon dis- play starts to flash.
  • Page 17 Thursday Friday Saturday Weekday Dutch (DU) Italian (IT) Spanish (SP) Sunday Monday Tuesday Wednesday Thursday Friday Saturday Weekday Danish (DA) Russian (RU) Sunday ПН Monday Tuesday Wednesday ЧТ Thursday ПТ Friday СБ Saturday Setting the daily alarm:  Press and hold down the “ALARM” button for 2 seconds until hour display of the alarm time is flashing.
  • Page 18  The snooze time setting range is 5 ~ 60 MIN or OFF, when set to OFF, means no snooze function. Snooze time unit is in minutes. Activating and deactivating the alarm  Press the “ALARM” button and the alarm time is displayed. In the alarm time display mode, press the “ALARM”...
  • Page 19  Once to show the maximum temperature and humidity values.  Twice to sow the minimum temperature and humidity values.  Three times to return to the current temperature and humidity levels. To reset the maximum and minimum temperature and humidity, press and hold down the “MEM”...
  • Page 20 Weather forecast icon that can be displayed on the base station: Sunny Mostly sunny Partly Cloudy Mostly Cloudy Cloudy Patchy Rain Mostly Rain Showers EN20...
  • Page 21 Heavy Rain Thunder and rain Rain and hail Hail Snow and hail Patchy snow Mostly snow Snow shower EN21...
  • Page 22 Heavy snow Rain and snow Foggy Windy Haze EN22...
  • Page 23 App interface specification: Front page data display: Start screen data display 1 -> Start screen data display 2 D1: Main menu bar D2: Bar diagram view D3: Location City D4: Temperature and humidity data of the base station and weather today D5: Quick setting of temperature and humidity alert for the base station D6: Feel-like temperature value D7: Today's barometer pressure...
  • Page 24 D12: Weather forecast for the next four days D13: Weather forecast for the following day D14: Today's wind speed and direction D15: Today's sunrise and sunset tomorrow Data chart display:  Click on the bar diagram icon “D2” of < Start screen data display 1> and the APP automatically jumps to <...
  • Page 25 Data chart presentation - Daily EN25...
  • Page 26 EN26...
  • Page 27 Data chart presentation – Weekly EN27...
  • Page 28 Data chart presentation – Monthly Temperature and humidity alert setting  Click on the "D5" in the home page, you can quickly enter the temperature and humidity alert settings interface of the base station.  Set up wireless sensor for temperature and humidity alert. Click on the channel selected by “D8”, and then click “D11”...
  • Page 29 Temperature and humidity alert setting for main station (left) and outdoor sensor (right) Temperature and humidity alert  After the temperature and humidity alarm setup is complete, click on the "V" checking icon for confirmation. The alert setting will be shared with the base station via the WiFi connection.
  • Page 30 EN30...
  • Page 31 E1: Device management menu E2: Account password changing menu E3: Settings menu E4: Re-bonding base station E5: Re-positioning base station E6: Change device name of station/sensor E7: Open the temperature and humidity alert function of the station/sensor E8: Setting the temperature display of the unit E9: Setting the air pressure display of the unit E10: Logging off from account E11: Setting the wind speed display of the unit...
  • Page 32 5. Dispose of empty batteries in an environmentally friendly way as described in the chapter 'Disposal' on page EN33. Please note: After changing the batteries in the transmitter or receiver, your device must always "re-learn" the transmitter. Cleaning Penetration of water into the housing and the use of corrosive and sharp cleaning agents can damage or destroy the unit.
  • Page 33 Check if the app is using the correct WLAN-Key Only WiFi letters are blinking on the station display, which means the base station has no connection to the WLAN. Please check if your WiFi connection is online and working. Check if the app is using the correct WLAN-Key Disposal Packaging The unit packaging consists of recyclable materials.
  • Page 34 Community harmonization legislation concerning its affixing. We hereby declare that the WD 2200 (base station) and TX205DTH (transmitter) de- scribed below are in compliance with the essential requirements and other relevant provisions of Directive 2014/53/EU and 2011/65/EU.

This manual is also suitable for:

Tx205dth