Table of Contents
Advertisement
Quick Links
GC
245 MARINE CAMERA
™
INSTALLATION INSTRUCTIONS
Important Safety Information
WARNING
See the Important Safety and Product Information guide in the product box for product warnings and other
important information.
When connecting the power cable, do not remove the in-line fuse holder. To prevent the possibility of personal
injury or product damage caused by fire or overheating, the appropriate fuse must be in place as indicated in
the product specifications. Connecting the power cable without the appropriate fuse in place voids the product
warranty.
CAUTION
To avoid possible personal injury, always wear safety goggles, ear protection, and a dust mask when drilling,
cutting, or sanding.
To avoid possible personal injury or damage to the device and vessel, disconnect the vessel's power supply
before beginning to install the device.
NOTICE
For the best possible performance, the device must be installed according to these instructions.
When drilling or cutting, always check what is on the opposite side of the surface to avoid damaging the vessel.
You must use the cables and connectors provided by Garmin
when installing the system. Using any cables or
®
connectors other than those supplied by Garmin will void your warranty.
You must not cut, terminate, or splice the coaxial cable. Modifying the coaxial cable may cause the system to
malfunction. Failures caused by an extended coaxial cable are not covered under warranty.
The camera comes with mounting screws, but they may not be appropriate for your hull material. You must use
the appropriate screws for your hull material to avoid damaging the hull.
You must tighten the SMA connectors on the cameras and the GVAM 10 black box to the specified torque
measurement in these instructions. Failures caused by improperly tightened connectors are not covered under
warranty.
Read all installation instructions before proceeding with the installation. If you experience difficulty during the
installation, contact Garmin Support.
September 2024
GUID-94C3982C-D7DB-40D0-8F6D-B1A6E8FB6DF1 v1
Advertisement
Table of Contents

Related Manuals for Garmin GC 245


Summary of Contents for Garmin GC 245
- Page 1 Using any cables or ® connectors other than those supplied by Garmin will void your warranty. You must not cut, terminate, or splice the coaxial cable. Modifying the coaxial cable may cause the system to malfunction. Failures caused by an extended coaxial cable are not covered under warranty.
-
Page 2: Tools Needed
Installation Support Videos You can view videos online for assistance when installing this device. You can access the videos by going to garmin.com/videos/gc245 in your web browser or by scanning this QR code with your smartphone. Tools Needed • 2.8 mm ( in.) drill bit suitable for the camera mounting surface... -
Page 3: Camera Overview
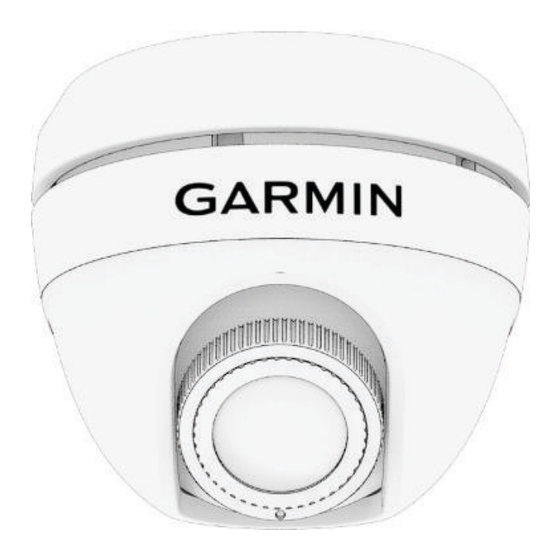
When the camera is installed correctly, the red dot on the lens module must point away from the Garmin logo on the enclosure. Is some cases, you must install the camera with the red dot... -
Page 4: Mounting Considerations
Extreme-temperature-induced damage and related consequences are not covered by the warranty. Before selecting the mounting location for the GC 245 camera and GVAM 10 black box, observe these considerations. • You must mount the camera above the waterline. -
Page 5: Networking Considerations
4 Secure the black box to the mounting surface using the appropriate screws. If a Garmin Marine Network adapter cable is not supplied in the product box, you can purchase one from your local Garmin dealer (part number 010-12531-01) or go to garmin.com/accessories/GMNAdapterCable. -
Page 6: Connecting To The Network
(Attaching the Camera to the Base Plate, page 8). If a Garmin Marine Network adapter cable is not supplied in the product box, you can purchase one from your local Garmin dealer (part number 010-12531-01) or go to garmin.com/accessories/GMNAdapterCable. -
Page 7: Mounting The Camera
Mounting the Camera Mounting the Camera with the Cable Routed through the Mounting Surface 1 Apply marine sealant around the back of the base plate. 2 Apply marine sealant to the mounting screws. 3 Secure the base plate to the mounting surface, making sure the cable pass-through hole on the base plate lines up with the hole you drilled through the mounting surface. -
Page 8: Connecting To Power
Attaching the Camera to the Base Plate 1 Place the camera housing over the base plate and rotate it counterclockwise until it fits evenly over the base plate. NOTICE Avoid cross-threading the locking ring into the base plate to prevent damaging the enclosure. 2 Rotate the camera enclosure clockwise until the mark on the base plate aligns with the mark on the camera enclosure. - Page 9 Power Cable Extensions If necessary, the power cable can be extended using the appropriate wire gauge for the length of the extension. Use only wire with an insulation rating of 105° C or higher. Splice • Up to 18 m (60 ft.): 20 AWG (0.51 mm ) extension wire •...
- Page 10 90 degrees so you can lock the adjustable lens module into the intended orientation. When the camera is installed correctly, the red dot on the lens module must point away from the Garmin logo on the enclosure. Is some cases, you must install the camera with the red dot pointing down and rotate the camera image on the...
-
Page 11: Configuring The Camera
It is your obligation to ensure safe operation of your vessel and to remain aware of your surroundings while operating your vessel. You can access a step-by-step video tutorial on garmin.com/videos/gc245. 1 Select >... -
Page 12: Open Source Software License
LED Color LED State Status Solid The system is powering up. Green Solid The system is booting. Green Flashing The system is operating normally. Open-Source Software License To view the open-source software license(s) used in this product, go to developer.garmin.com/open-source /linux/. - Page 13 聯絡地址:新北市汐止區樟樹二路 68 號 電 話:(02)2642-8999 客服專線:(02)2642-9199 © 2024 Garmin Ltd. or its subsidiaries Garmin ® and the Garmin logo are trademarks of Garmin Ltd. or its subsidiaries, registered in the USA and other countries. ActiveCaptain ® , Garmin BlueNet ™ , GC ™...
- Page 14 © 2024 Garmin Ltd. or its subsidiaries support.garmin.com...
Need help?
Do you have a question about the GC 245 and is the answer not in the manual?
Questions and answers