Table of Contents
Advertisement
Quick Links
GC
12 MARINE CAMERA
™
INSTALLATION
INSTRUCTIONS
Mounting Considerations
You can mount the camera upside-down or sideways. You can
reverse the camera image to use in rearview mode. See your
chartplotter owner's manual for instructions.
You should mount the camera in a location where it is
• not an obstacle in doorways or walkways.
• not exposed to extreme temperatures.
• not exposed to gas or oil.
• not exposed to radioactivity.
• not facing into direct sunlight or a direct reflection of sunlight.
Tools Needed
• 1 A fuse or circuit breaker
1
• Drill and 2 mm (
/
in.) drill bit
16
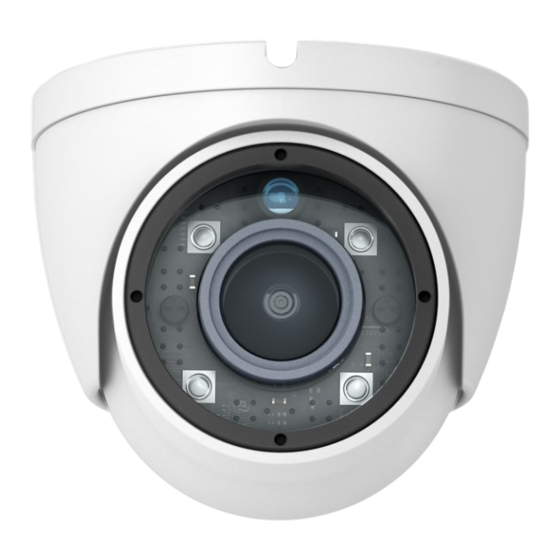
Mounting the Camera
1
Secure the template
to the mounting location.
1
2
Using a 2 mm (
/
in.) drill bit, drill the pilot holes.
16
3
Adjust the dome base
desired camera tilt.
4
Secure the dome base to the mounting location using the
included tapping screws
5
Insert the camera
into the dome base.
6
Secure the set screws
included wrench.
Installation Considerations
You must connect the camera power wire to the battery through
a 1 A fuse or circuit breaker. If you do not use a fuse or circuit
breaker, the camera can malfunction.
Some Garmin
GPSMAP
chartplotters have a built-in CVBS
®
®
video encoder. Video from the camera or cameras appears on
all chartplotters on the network when plugged into a single
CVBS IN port. Go to
www.garmin.com/manuals/gc12
compatible GPSMAP chartplotters.
If you want to use more than one camera or the chartplotter
does not have a CVBS IN port, you must use an encoder.
You can add up to four cameras to one encoder and up to two
encoders to the Garmin Marine Network.
to the correct orientation for your
.
into the dome front
using the
for a list of
Installation Diagram
GC 12 Marine Camera
1 A fuse or circuit breaker (not included)*
12 Vdc Power source
BNC to BNC Coax Video Cable (not included)
Compatible Garmin chartplotter
*You must connect the camera power wire to the battery through
a 1 A fuse or circuit breaker. If you omit a fuse or circuit breaker,
the camera can malfunction.
Installation With Encoder Diagram
You can add more than one camera to your network when you
use an encoder.
GC 12 Marine Camera
1 A fuse or circuit breaker (required, not included)*
12 Vdc Power source
BNC to BNC Coax Video Cable (not included)
Network cable
Power-over-Ethernet isolation coupler (GPN 010-10580-10)
Garmin Marine Network cable
Axis
Q7424 Encoder (optional/not included)
®
Compatible Garmin chartplotter
*You must connect the camera power wire to the battery through
a 1 A fuse or circuit breaker. If you omit a fuse or circuit breaker,
the camera can malfunction.
Troubleshooting
Video Does Not Appear on the Chartplotter Screen
• Verify all cables are firmly connected.
• Verify the video cable is connected to the camera video
output port.
Image on the Chartplotter Screen is Dim or Dark
• Verify the lens is clean. If necessary, wipe the lens with a
soft, clean cloth.
• If the camera is exposed to too much direct light, change the
camera position or location.
August 2018
190-01087-01_0A
Advertisement
Table of Contents

Related Manuals for Garmin GC 12


Summary of Contents for Garmin GC 12
- Page 1 • If the camera is exposed to too much direct light, change the You can add up to four cameras to one encoder and up to two camera position or location. encoders to the Garmin Marine Network. August 2018 190-01087-01_0A...
-
Page 2: Specifications
10 m (33 ft.) Video output CVBS PAL Effective pixels Vertical: 582 Horizontal: 976 © 2018 Garmin Ltd. or its subsidiaries Garmin ® , the Garmin logo, and GPSMAP ® are trademarks of Garmin Ltd. or its subsidiaries, registered in the USA and other countries. GC ™...
Need help?
Do you have a question about the GC 12 and is the answer not in the manual?
Questions and answers