
Related Manuals for Asko DWC6433FIXXL


Summary of Contents for Asko DWC6433FIXXL
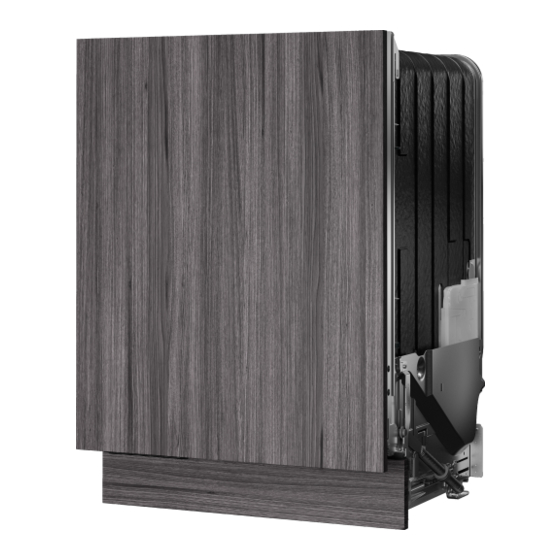
- Page 1 USER MANUAL DWC6433FIXXL Dishwasher Read the instructions before using the appliance.
-
Page 2: Table Of Contents
Contents Your dishwasher ........ASKO Connect Pro & ConnectLife ... Safety instructions ........ASKO Connect Pro ........Sani lock ............ConnectLife ..........Lock ............. Remote control the dishwasher ....Installation ............ Remote start the dishwasher ....... Overflow guard ..........Settings ............ -
Page 3: Your Dishwasher
"Welcome to your new ASKO dishwasher. This is a first time setup." is shown on the display the first time the dishwasher is switched on. It is important that you choose the right settings to ensure good dishwashing results. -
Page 4: Safety Instructions
Safety instructions Read the user manual and keep it in a safe place! Number of standard place settings: 14 Never use the dishwasher for any purpose other than that specified in these operating instructions. Do not load the dishwasher door or dishwasher baskets with anything other than dishes. -
Page 5: Sani Lock
Safety instructions Some detergent may remain inside! After adding detergent, always start the dishwasher immediately. For repairs and maintenance, original spare parts must be used. WARNING! Knives and other pointed items must be placed with the points down in the cutlery basket or horizontally in other baskets. WARNING! Children must be supervised –... -
Page 6: Disposal
Safety instructions Disposal The dishwasher is manufactured and labelled for recycling. When the dishwasher has reached the end of its service life and is to be disposed of, it should immediately be made unusable. Pull out the power cable and cut it as short as possible. Remove the light source/light sources. Contact your local authority for information about where and how your dishwasher should be correctly recycled. -
Page 7: Before Washing For The First Time
Before washing for the first time Water hardness In order to achieve good dishwashing results, the dishwasher needs soft water (water with low mineral content). Hard water leaves a white coating on dishes and the dishwasher. Checking water hardness Water hardness is specified using German degrees of water hardness (°dH), French degrees of water hardness (°fH), English degrees of water hardness (°eH) or millimoles per litre (mmol/l). -
Page 8: Basic Settings
Basic settings Open the door. Press "Welcome to your new ASKO dishwasher. This is a first time setup." is shown on the display. It is important that you choose the right settings to ensure good dishwashing results. Select setting with or . - Page 9 Before washing for the first time Settings WiFi connection On/Off After connecting the dishwasher to your local network, you can select WiFi connection Off to deactivate the connection. Select WiFi connection On to reconnect to the same network. Connection setup Connect the dishwasher to your wireless network and pair with your smartphone/tablet.
-
Page 10: Top Up Rinse Aid
Before washing for the first time Top up rinse aid Add rinse aid to the container for rinse aid (if the dishwasher has not been connected to a system for the automated dosage of rinse aid). Top up the rinse aid compartment with rinse aid if you have selected Rinse aid 1 - 5. Press to open Press to close 1. -
Page 11: Automated Dosage
Before washing for the first time Automated dosage The dishwasher can be connected to one or more systems for the automated dosage of commercial detergent and rinse aid, which simplifies everyday operation and reduces the risk of overdosing. Step by step Connect the external cables for the automated dosage of commercial detergent and rinse aid. -
Page 12: Greener Dishwashing
Greener dishwashing Save energy and water When using a dishwasher in a residential setting, less energy and water are generally used compared to washing the dishes by hand. Do not rinse under running water Do not rinse the dishes under running water as this will lead to increased energy and water consumption. -
Page 13: Loading The Dishwasher
Loading the dishwasher Fragile dishes Some cookware is not dishwasher safe. This can be for several reasons. Some materials cannot withstand high heat, others can be damaged by dishwasher detergent. Exercise caution with, for example, handmade items, fragile decoration, crystal/glassware, silver, copper, tin, aluminium, wood and plastic. -
Page 14: The Dishwasher's Baskets
Loading the dishwasher The dishwasher's baskets The dishwasher is equipped with an upper basket, a middle basket and a lower basket with a cutlery basket. The appearance of the baskets may differ depending on the dishwasher setup. Upper basket Place glasses, cups, bowls, side plates and saucers in the upper basket. All dirty surfaces should face inwards and downwards! Wine glasses are placed on the wine glass shelf and knives are placed in the knife stand on the right. -
Page 15: Middle Basket
Loading the dishwasher Middle basket The middle basket is fitted with two cutlery inserts. Place ladles, whisks, serving cutlery and similar items in the middle basket. Washing larger items If large items are to be washed in the lower basket, either the middle basket’s two inserts can be removed or the entire middle basket can be lifted out. -
Page 16: Lower Basket
Loading the dishwasher Lower basket Place plates, side plates, serving dishes, pots and cutlery (in the cutlery basket) in the lower basket. Place pots and pans in the rear of the lower basket to best utilise dishwashing performance from the two spray nozzles. Adjustable plate supports The adjustable plate supports can be adjusted to suit the dishes. -
Page 17: Cutlery Basket
Loading the dishwasher Vase and bottle holder Install the vase and bottle holder above the left spray nozzle. (Found in the enclosed plastic bag.) Washing large plates You can adjust the lower basket for plates with a diameter of 25-29 cm by moving the adjustable plate supports and their fixtures to increase the distance between the tine rows. - Page 18 Loading the dishwasher Fold-down section for small items The cutlery basket has a fold-down section in the middle for small items or small shafts (such as electric whisk attachments). Accessory Buy a mini cutlery basket. The extra cutlery basket is flexible and can be dismantled and attached to the lower basket or the large cutlery basket to make an extra large cutlery basket.
-
Page 19: Using The Dishwasher
Using the dishwasher Add detergent Add detergent to the detergent compartment (if the dishwasher has not been connected to a system for the automated dosage of commercial detergent). Detergent compartment Follow the instructions on the detergent packaging. This dishwasher is fitted with a water softener, so use detergent and rinse aid doses suitable for soft water. -
Page 20: On/Off
Using the dishwasher On/Off Start/Stop Select a pre-selected program Navigation buttons for selecting from more programs On/Off Open the door and press . Also turn on the water tap if it is turned off. Select program Eco is always pre-selected. To select another program, press , or . You can also select a program by pressing until the desired program is shown on the display. -
Page 21: Start/Stop
If the dishwasher is not started or the door is not closed within 2 minutes of the last time the control panel was pressed, the machine switches off. To remote start the dishwasher, see the chapter ASKO Connect Pro & ConnectLife. Stopping or changing a program If you want to change program after starting the dishwasher, open the door then press and hold for three seconds. -
Page 22: Status Light Floor Projection
Using the dishwasher During the first run of each program, the remaining time displayed can be slightly misleading, as the dishwasher is estimating the time. When you run the program a second time, the dishwasher will calculate the remaining time based on the previous duration of the program. Status light floor projection The remaining time and temperature of the cleaning cycle and whether the machine is locked are projected onto the floor. -
Page 23: Power Failure
Using the dishwasher Power failure If the dishwasher is turned off due to a power failure when a dishwashing program is running, the program continues when power is restored. If the power is cut during drying, the program is interrupted. If the dishwashing program was remote started and has not ended, the program will continue once the power is restored. -
Page 24: Unloading The Dishwasher
Using the dishwasher Angle dishes with hollows, such as cups, so that the rinse water will run off. This is also important for plastic items. Top up with rinse aid or increase the rinse aid dosage setting. Activate the Automatic door opening option. Activate the Automatic door opening setting. -
Page 25: Program Chart
Program chart... -
Page 26: Asko Connect Pro & Connectlife
ASKO Connect Pro is a web-based platform that enables you to organise, manage and monitor all your professional ASKO appliances regardless of where they are installed. Once you have connected a professional appliance in the ConnectLife app, a link to ASKO Connect Pro is shown. For more information, please see https://professional.asko.com/. - Page 27 ASKO Connect Pro & ConnectLife NOTE! The dishwasher can always be used without the app. When the dishwasher's control panel is pressed, commands from the ConnectLife app are blocked for 10 seconds. If you have any questions, please visit us at www.connectlife.io.
-
Page 28: Settings
Settings Open the door and press To open the Settings, press until Settings is shown on the display and confirm your selection with Select setting Confirm current setting Settings Alternatives Lock On/Off To prevent children or persons with reduced mental capabilities from starting the dishwasher, the Lock setting can be activated. - Page 29 Settings Settings Alternatives Auto dose Detergent: Activate this setting if you want Off, 1-40 ml to connect an automatic dosing system for detergent. This dishwasher is fitted with a water softener, so use detergent and rinse aid doses suitable for soft water.
- Page 30 Settings To open the Advanced Settings, press until Advanced Settings is shown on the display and confirm your selection with Press: , , , Advanced Settings Alternatives Language You can choose the language used for the display. WiFi The current WiFi status is shown on the display. WiFi status Connect the dishwasher to your wireless network to be able to remote control the dishwasher using the ConnectLife app.
- Page 31 Settings Advanced Settings Alternatives Display Logotype On/Off Setting to hide the logo shown on the display. Display Brightness 1/2/3/4 For adjusting the brightness of the display. Notification volume 0/1/2/3 The buzzer indicates when a dishwashing program has ended. Error messages are always indicated by a loud buzzer.
- Page 32 Settings Advanced Settings Alternatives Push to open On/Off The dishwasher door can be opened without a handle. Power 10 Amp/16 Amp This dishwasher has been designed to be able to be connected to an electrical supply network with fuses for 10 Amp or 16 Amp.
- Page 33 Settings Advanced Settings Alternatives Exit Select Exit to exit the menu for Settings, press...
-
Page 34: Care And Cleaning
Care and cleaning Top up rinse aid When the rinse aid needs topping up, the symbol lights on the display. See the chapter Before washing for the first time. Top up salt When the salt needs topping up, the symbol lights on the display. See the chapter Before washing for the first time. - Page 35 Care and cleaning Fine filter Debris that collects on the fine filter is automatically rinsed away during each wash. Clean the fine filter when necessary. It should be cleaned at regular intervals depending on how often the dishwasher is used. Fine filter 1.
-
Page 36: Cleaning The Spray Arms And Spray Pipes
Care and cleaning Cleaning the spray arms and spray pipes Holes and bearings can sometimes become blocked. Remove any debris using a pin or the like. The spray arms also have holes underneath. To facilitate cleaning you can remove the spray arms. Remember to fit them firmly back into place afterwards. -
Page 37: Clean The Outside Of The Dishwasher
Care and cleaning Clean the outside of the dishwasher Door and door seal Open the door. Clean the sides of the door and the door seal regularly with a slightly damp cloth. Clean the door seal at the lower front edge of the dishwasher with a washing-up brush. Control panel Keep the control panel clean. -
Page 38: Winter Storage/Transport
Care and cleaning 6. Refit the drainage pump stop along with the fine and coarse filters. 7. Plug the machine in again. Drainage pump stop NOTE! Do not forget to refit the drainage pump stop. Unblocking the inlet hose filter If the water supply contains small particles, the outer filter on the inlet hose may become blocked, which results in the Water inlet fault error message. - Page 39 Care and cleaning Before transporting a used dishwasher, or before prolonged storage, water must first be removed from the machine.
-
Page 40: Troubleshooting
Troubleshooting Error messages Action Overfilling water 1 Unblocking the drainage pump. See the chapter Care and cleaning. If the problem persists, contact your nearest service centre. Water outlet fault See "Water remains in the dishwasher" under "Problem" in the table below. If the problem persists, contact your nearest service centre. -
Page 41: General
Troubleshooting General Problem Possible causes Action The control panel does not react You have pressed the control Wait a moment then try again. when pressed. panel too soon after opening the door. Lock is activated. See the chapter Safety instructions. The door is closed. - Page 42 Troubleshooting Problem Possible causes Action The dishwasher does not start. has not been pressed. Press until the display shows "Program started, close door". The door is not properly closed. Check. Salt compartment empty. Top up with salt. See the chapter Care and cleaning. The dishwasher has been Close the door and wait.
- Page 43 Troubleshooting Problem Possible causes Action The dishes are not clean. The spray arms are not rotating Check that the dishes are not freely. blocking the spray arms. Spray arm holes or bearings Clean the spray arms and the blocked. middle basket's spray pipes. See the chapter Care and cleaning.
- Page 44 Troubleshooting Problem Possible causes Action Spots or films on the dishes. Incorrect rinse aid dosage See the chapter Settings. setting. The setting TAB is activated and Switch all-in-one detergents or all-in-one detergent with deactivate the setting TAB and insufficient drying effect is being top up with salt and separate used.
- Page 45 Troubleshooting Problem Possible causes Action Water remains in the The filters are clogged. Clean the coarse and fine filters. dishwasher. The filters are not fitted correctly. Check that the filters are fitted correctly. See the chapter Care and cleaning. Debris in the drainage pump. Clean the drainage pump.
- Page 46 Troubleshooting Problem Possible causes Action The dishes are not dry enough. The Automatic door opening Activate the Automatic door option is not activated. opening option. The Automatic door opening Activate the Automatic door setting has not been activated. opening setting. The dishwasher is not fully Fully load the dishwasher.
-
Page 47: Wifi
Connect the dishwasher to your connected to your wireless wireless network. See the symbol does not appear on network. chapter ASKO Connect Pro & the display. ConnectLife. WiFi connection is deactivated. Activate WiFi connection. See WiFi connection On/Off in the chapter Settings. -
Page 48: Installation
Installation It is important that you read through and follow the instructions and directions below. Other directions for installation and connection can be found in the separate installation instructions. [mm] *Remove the locking nuts when installing in a recess measuring 860-861 mm. Cover door length. -
Page 49: Setup
Installation Setup The recess and connection dimensions are included in the separate installation instructions. Check that all dimensions are correct before starting the installation. Note that the height of the cover door can be adjusted to match other fittings. Handle the front corners of the dishwasher with care so that they do not get bent, which can affect door opening. - Page 50 Installation 2. Connect the external cables for detergent to the auto dose connector. A Connection for earth B Connection for level sensor C Connection for impulse of detergent (230 V) 3. Connect the external cables for rinse aid to the auto dose connector. A Connection for earth B Connection for level sensor C Connection for impulse of rinse...
- Page 51 Installation 2. Attach the nipple and connect the hose for detergent. Connection for detergent (hose diameter 6 mm). 3. Attach the nipple and connect the hose for rinse aid. Connection for rinse aid (hose diameter 4 mm). Activate Auto dose. See the chapter Settings. Use the Vent the hose function to vent the system.
-
Page 52: Drainage Connection
Installation Drainage connection This dishwasher is suitable for installing in a raised recess (to attain an ergonomic working height). This means that the dishwasher can be placed so that the drainage hose runs to a lower level than the bottom of the dishwasher, such as by routing it directly to a floor drain. The drainage hose can also be connected to a connection nipple on the sink unit's water trap. -
Page 53: Electrical Connection
Installation Connection for cold water when connecting both hot and cold water. Connection for hot or cold water. 4. Refit the protective cover. Electrical connection Information about the electrical connection can be found on the serial number plate. This specification must match the electricity supply. -
Page 54: Service
Read the chapter Troubleshooting before contacting the service centre. If you have encountered a problem that you cannot resolve, please contact your nearest service centre for professional help, see www.asko.com. Our website also has information about spare part availability and what you can repair yourself. -
Page 55: Technical Data And Energy Labelling
In accordance with the EN 60436 standard. Information for consumers Information about your appliance can be found at https://global.asko.com/energy-label. You can also find information in the EU Product Registration database for Energy Labelling, EPREL. Scan the QR code on the energy label supplied with the dishwasher (or go to https://eprel.ec.europa.eu and search for the model name). - Page 56 WWW.ASKO.COM 931343 Translation of the original instructions. We reserve the right to make changes.
Need help?
Do you have a question about the DWC6433FIXXL and is the answer not in the manual?
Questions and answers