Table of Contents
Advertisement
Dear Customer,
Thank you for choosing this quality product from ASKO.
We hope it will meet your expectations and fulfil your needs for many years to
come. Scandinavian design combines clean lines, everyday functionality and
high quality. These are key characteristics of all our products and the reason
they are greatly appreciated throughout the world.
To get the most from your new dishwasher, we recommend that you read the
operating instructions before using the dishwasher. The operating instructions
also include information on how you can help protect the environment.
Operating Instructions
Dishwasher
ASKO DWC5926 XL
Read the instructions before using this machine.
Advertisement
Table of Contents

Related Manuals for Asko DWC5926 XL


Summary of Contents for Asko DWC5926 XL
-
Page 1: Operating Instructions
Dear Customer, Thank you for choosing this quality product from ASKO. We hope it will meet your expectations and fulfil your needs for many years to come. Scandinavian design combines clean lines, everyday functionality and high quality. These are key characteristics of all our products and the reason they are greatly appreciated throughout the world. -
Page 2: Table Of Contents
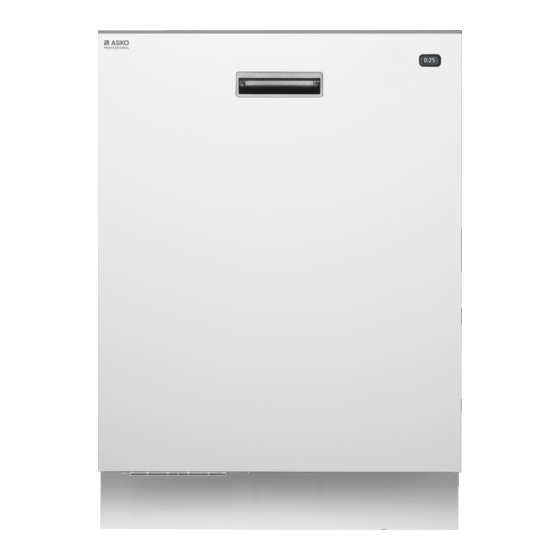
Contents Front panel Care and cleaning Safety instructions Troubleshooting Before washing for the first time Technical information Loading the dishwasher Installation Using the dishwasher Service Settings Program chart Front panel To start the machine, press and hold the main power switch until the display lights up. 0:25 1 Program selector 2 Option Drying... -
Page 3: Safety Instructions
Safety instructions Do not allow children to use or play with the dishwasher. Be General especially vigilant when the door is open. Read the operating instructions and keep them in a safe place! WARNING! Never use the dishwasher for any purpose other than that specified in these operating instructions. -
Page 4: Before Washing For The First Time
Before washing for the first time Automatic dosing system Fill up the salt The dishwasher can be connected to an automatic dosing system Before you begin using a dishwasher with a water softener, you for commercial detergent and rinse aid, making day-to-day use must fill the salt compartment with salt. -
Page 5: Loading The Dishwasher
Loading the dishwasher Top up with rinse aid Economic dishwashing Add rinse aid to the rinse aid compartment if the dishwasher is Run programs only with a full load not connected to an automatic dosing system for commercial Wait to run a program until the dishwasher is full. This way you rinse aid. -
Page 6: Upper Basket
Upper basket Middle basket Place glasses, cups, bowls, side plates and saucers in the upper The middle basket's wire basket with spray pipes is suitable for basket. All dirty surfaces should face inwards and downwards! low objects. The middle basket's utensils basket has space for Wine glasses are placed on the wine glass shelf and knives are ladles, whisks, serving cutlery and similar items. -
Page 7: Using The Dishwasher
Using the dishwasher Washing large plates Automatic dosing system Move the foldable tines and their mounts to widen the distance The dishwasher can be connected to an automatic dosing system between the tine rows to adapt the lower basket to plates with a for commercial detergent and rinse aid, making day-to-day use diameter greater than 25 cm. -
Page 8: Program Selection
Normal NOTE! Use to wash normally soiled load, and even dishes with dried Only use powder and liquid dishwasher detergent in the dish- leftovers, such as plates, serving dishes, cups, glasses and so washer’s detergent compartment. Dishwasher tablets are not recommended. -
Page 9: Once The Program Has Finished
Start the dishwasher Stopping or changing a program Press and hold Start/Stop until the display shows “Program A program should only be interrupted if it is absolutely necessary. started”. This indicates that the dishwasher is ready to start. Close Open the door, press and hold the Start/Stop for three seconds the door properly, or the dishwasher will not start. -
Page 10: Settings
Settings 1. Function Menu Open the Function Menu: Button press Description Turn off the machine. Open the door. Press and hold the main power switch until the display lights up. Within 20 seconds: - press the button Drying 5 times. - press the button Delayed start 5 times. - Page 11 You can change the following settings in the Function Menu: Settings Options 1. Language English/Svenska/Dansk/Norsk/ You can choose the language used for the display. Suomi/Français/Deutsch/Italiano/ Español/Nederlands/Русский 2. Temp. in last program The washing water’s highest temperature in the last run pro- gram is shown in the display.
- Page 12 Settings Options 12. Water connection Water connection: Single/Mix Select Single if the dishwasher is connected to cold or hot water. Select Mix if the dishwasher is connected to both cold and hot water. 13. Create program Design your own dishwashing program (Program A, Program B and Program C) according to your business’s specific needs.
-
Page 13: Care And Cleaning
Care and cleaning NOTE! WARNING! The dishwasher must not be used without the filter in place! The building’s main power switch must be switched off or power to the socket turned off while work is being carried out! Diswashing efficiency can be affected if the course filter is in- correctly fitted. -
Page 14: Cleaning The Outside Of The Machine
Spray arms and spray zones Cleaning the outside of the machine Holes and bearings can sometimes become blocked. Remove Clean the outside of the machine and the program panel with a any debris using a pin or something similar. The spray arms also mild cleaner. -
Page 15: Troubleshooting
Troubleshooting Front display Type of fault on the Action display Overfilling 1 Clear the drainage pump. See the section Care and cleaning. If the problem persists, call the service department. Water outlet fault See “Water remains in the dishwasher” in the table “Problem” below. If the problem persists, call the service department. - Page 16 Problem Possible causes Action The dishes are not clean. The spray arms do not rotate. Remove the arms and clean them. Check that the dishes are not blocking the spray arms. Old detergent. Detergent is a perishable Avoid large packages. product.
- Page 17 Problem Possible causes Action Residue from the detergent remains in the The Function Menu is set incorrectly. Check that the Spray pressure setting under dishwasher. Automatic dosing system is correct. Check that the Spray pressure settings under Program A, Program B and Program C are correct.
- Page 18 Problem Possible causes Action The dishes are not dry enough. The dishwasher is not fully loaded. Fully load the dishwasher. Rinse aid needs topping up or dosage is set Top up or increase the rinse aid dosage. See too low. section Before washing for the first time and “Rinse aid”...
-
Page 19: Technical Information
Technical information Technical data Brand: ASKO Height: 817-872 mm Width: 596 mm Depth: 559 mm Weight: 52 kg Capacity: 14 Place settings Water pressure: 0.03–1.0 MPa 0.3–10 kp/cm 3–100 N/cm Electrical connection: See compliance plate Rated power: See compliance plate... -
Page 20: Installation
Installation 1198 [mm] 30-94 *Remove locking nuts for an installed height of 820-821 mm. Safety instructions Transport protection for the door Connections to electricity, water and drainage must be per- Do not forget to remove the transport protection for the door when formed by a qualified professional. -
Page 21: Suggested Machine Installations
C. Partially built-in Suggested machine installations If the dishwasher is located so that one of its sides is visible, a The dishwasher can be installed built-in, completely freestanding side panel must be fitted. Accessories can be purchased where or partially built-in. Check that there is an air gap of 3 mm between you bought the dishwasher. -
Page 22: Drainage Connection
6 Slide the dishwasher into place. Figure 1 Pull through the drainage and supply hoses when the ma- chine has been slid into place. Also pull through the hoses Min. 14 mm and wiring for the automatic dosing system, if one is con- nected. -
Page 23: Electrical Connection
Once the installation is complete, the stopcock should be opened [mm] for a while to allow the pressure to equalise and to check that all connections are sealed. NOTE! Connecting a dishwasher to the water supply via certain types of pressure limiting valves may restrict the water supply! This may cause F12 error code/ Water inlet fault to be dis- played. -
Page 24: Screwing The Dishwasher Into Place
Screwing the dishwasher into place Adjusting the plinth (only when using toe kick accessory) (Applicable only to built-in dishwashers.) After fastening the machine, check that the front feet still touch The dishwasher is supplied with one or two toe kicks depending the floor. - Page 25 Set the correct plinth depth as follows...
-
Page 26: Service
Service Read chapter Troubleshooting before contacting the service department. Note down the details on the compliance plate posi- tioned on the right inside the dishwasher. Note down the item number (1) and serial number (2). ART. NO. SERIAL NO. -
Page 27: Program Chart
Program chart... -
Page 28: Add Detergent
Quick guide Asko DWC5926 XL Load the baskets Check that the spray arms can rotate freely Add detergent The detergent compartment has one smaller compartment for the prewash and one for the main wash. Check/add rinse aid and salt Replenish salt and rinse aid to achieve good washing and drying results.
Need help?
Do you have a question about the DWC5926 XL and is the answer not in the manual?
Questions and answers