Table of Contents
Advertisement
Quick Links
Upright Freezer
SINGLE DOOR SERIES
USER MANUAL
MRU07M3ASL
MRU07M3AWW
MERU07M3AWW
Warning notices: Before using this product, please read this manual carefully and keep it for future reference.
The design and specifications are subject to change without prior notice for product improvement.
Consult with your dealer or manufacturer for details.
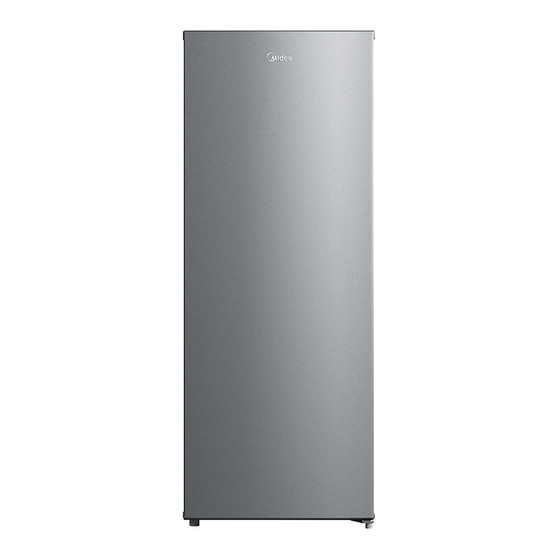
The diagram above is just for reference. Please take the appearance of the actual product as the standard.
Advertisement
Table of Contents

Related Manuals for Midea MRU07M3ASL


Summary of Contents for Midea MRU07M3ASL
- Page 1 Upright Freezer SINGLE DOOR SERIES USER MANUAL MRU07M3ASL MRU07M3AWW MERU07M3AWW Warning notices: Before using this product, please read this manual carefully and keep it for future reference. The design and specifications are subject to change without prior notice for product improvement.
- Page 3 LANGUAGE English Free 3 months extension of the original limited warranty period!* Simply text a picture of your proof of purchase to: 1-844-224-1614 *The warranty extension is for the three months immediately following the completion of the product’s original warranty period.
-
Page 5: Table Of Contents
THANK YOU LETTER Thank you for choosing Midea! Before using your new Midea product, please read this manual thoroughly to ensure that you know how to operate the features and functions that your new appliance offers in a safe way. -
Page 6: Safety Instructions
SAFETY INSTRUCTIONS Intended use Before switching on the appliance for the first time read the following safety hints! This appliance is intended to be used in household and similar applications such as staff kitchen areas in shops, offices and other working environments; farm houses and by clients in hotels, motels and other residential type environments;... -
Page 7: General Safety
WARNING • DANGER mechanical devices to defrost refrigerator.Do not puncture refrigerant tubing. • DANGER only by trained service personnel. Use only manufacturer authorized service refrigerants. Follow all manufacturer repair instructions. Do not puncture refrigerant tubing. CAUTION • CAUTION accordance with the applicable federal or local regulations. Flammable refrigerant used. -
Page 8: Electrical Safety
WARNING Electrical safety Incorrect electrical installation or excessive mains voltage can lead to electric shocks! • Only connect your fridge-freezer to a properly installed earthed socket if the label*. • Do not use extension cords or ungrounded (two-pin) adapters. • Make sure that all electrical cables outside the appliance are protected from damage (e.g. - Page 9 CAUTION Risk of injury and damage! • Never put frozen food in your mouth immediately after taking it out of the freezer. • Avoid prolonged skin contact with frozen food, ice and the pipes in the freezer compartment. • product. •...
-
Page 10: Before The First Use
Before The First Use The packaging must be undamaged. Check the device for transport damage. Do not connect a damaged device under any circumstances. In case of damage, please contact the supplier. Remove transport cover The unit and parts of the interior are protected for transport. You can remove all adhesive tapes on the right and left side of the device door as well as any adhesive residues with cleaning solvent. - Page 11 CAUTION Notes For Cleaning Disconnect the appliance from the power supply before cleaning. • Dust behind the product and on the floor must be cleaned to improve the cooling effect and energy saving. • Check the door gasket regularly to make sure there is no debris. Clean the door gasket with a soft cloth dampened with soapy water or diluted detergent.
-
Page 12: Specifications
SPECIFICATIONS Product model MRU07M3ASL/MRU07M3AWW/MERU07M3AWW Volume 196L(6.9cu.ft.) Rated Voltage 115V~ Rated Frequency 60 Hz Rated Current 1.5A Refrigerant R600a Amount 2.12 oz(60g) Dimension (H x W x D) 56.3*21.7*22.4in(1430*550*570(mm)) -
Page 13: Product Overview
PRODUCT OVERVIEW Names of components Thermostat knob Glass shelf Drawer (optional) Levelling foot Door ATTENTION on the physical product or statement by the distributor... -
Page 14: Product Installation
PRODUCT INSTALLATION Install Instruction Finding a suitable location • This freezer is designed to be free standing only, and should not be recessed or built-in. • The freezer should be placed in a well-ventilated indoor place; the ground shall be flat and sturdy . - Page 15 Space requirement diagram (when the door is open and when the door is closed) 135 ° Overall Width Depth Width Depth Height doors open 135 doors open 135 1430 Notice: All dimensions in mm...
- Page 16 Door right-left change ( (optional) Based on the location where you plan to use your refrigerator, you may find it more convenient to reverse the position of the door. CAUTION CAUTION: To avoid injury to yourself or your property, we recommend that someone assist you during the door reversal process.
- Page 17 3. Remove the door; 4. Dismantle the door stopper, and install it on other side; 5. Dismantle the lower hinge and leveling foot; 6. Install the lower hinge and leveling foot on lower left side of cabinet; Leveling foot Hinge Leveling foot Hinge 7.
-
Page 18: Leveling Feet
Leveling feet To avoid vibration, the unit must be leveled. If required, adjust the leveling screws to compensate for the uneven floor. The front should be slightly higher than the rear to aid in door closing. Leveling screws can be turned easily by tipping the cabinet slightly. Turn the leveling screws counterclockwise to raise the unit, clockwise lower it. -
Page 19: Tips For Energy Saving
Tips for energy saving • Do not place the appliance near cookers, radiators or other heat sources. If the ambient temperature is high, the compressor will run more frequently and for longer, resulting in increased energy consumption. • Ensure that there is sufficient ventilation at the base of the appliance, on the sides of the appliance and at the back of the appliance. -
Page 20: Operation Instructions
OPERATION INSTRUCTIONS Control panal • After the upright freezer is powered on, when the temperature control knob rotates clockwise, the temperature in the freezer will gradually decrease, and when it rotates counterclockwise, the temperature will gradually increase; when knob is adjusted within the scope of “COOLING”, the box is refrigerator, when knob is adjusted within the scope of “FREEZING”, the box is frozen. -
Page 21: Cleaning And Maintenance
CLEANING AND MAINTENANCE Defrosting Upright freezer shall be manually defrosted. Disconnect the plug from the wall socket, open the door and remove all the food to a cool place. It is recommended to remove the frost by a plastic scraper, or let the temperature rise naturally until the frost melts. -
Page 22: Troubleshooting
TROUBLESHOOTING The following simple issues can be handled by the user. Please call the after-sale service department if the issues are not solved. Problem Possible reason • Check whether the appliance is connected to power or whether the plug is in well contact. Failed operation •... - Page 23 Problem Possible reason • Remove foreign matters on the door seal. Door seal fails to be tight • Heat the door seal and then cool it for restoration (or blow it with an electrical drier or use a hot towel for heating). •...
-
Page 24: Trademarks, Copyrights
Midea Group and/or its affiliates (“Midea”), to which Midea owns trademarks, copyrights and other intellectual property rights, and all goodwill derived from using any part of an Midea trademark. Use of Midea trademark for commercial purposes without the prior written consent of Midea may constitute trademark infringement or unfair competition in violation of relevant laws. -
Page 25: Disposal And Recycling
DISPOSAL AND RECYCLING Important instructions for environment Compliance with the WEEE Directive and Disposing of the Waster Product: This product complies with EU WEEE Directive (2012/19/EU). This product bears a This symbol indicates that this product shall not be disposed with other household wastes at the end of its service life. -
Page 26: Data Protection Notice
Further information are provided on request. You can contact our Data Protection Officer via . To exercise your rights such as right to object MideaDPO@midea.com your personal date being processed for direct marketing purposes, please contact us via To find further information, please follow the QR MideaDPO@midea.com. -
Page 27: Warranty
WARRANTY...
Need help?
Do you have a question about the MRU07M3ASL and is the answer not in the manual?
Questions and answers