
Related Manuals for Haier HDC2406TW


Summary of Contents for Haier HDC2406TW
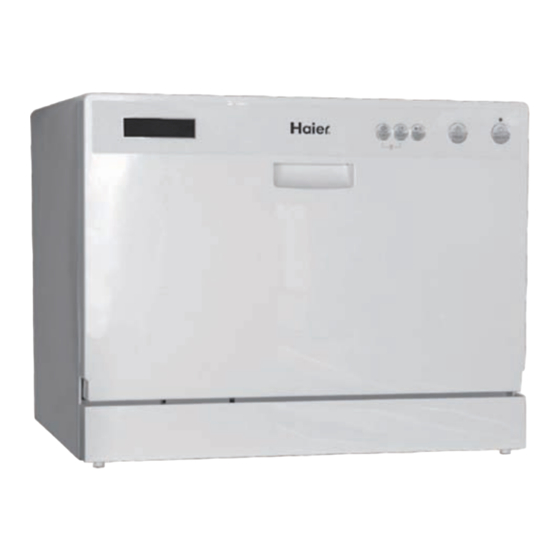
- Page 1 Counter Top, 6 Place Setting, Dishwasher Lavavajillas para la encimera con capacidad para 6 cubiertos User Manual Manual del Usuario HDC2406TW / TB/ TS Quality Innovation Style...
-
Page 2: Important Safety Instructions
English ImPORTANT SAFETy INSTRUCTIONS READ ALL INSTRUCTIONS BEFORE USE. WARNING - To reduce the risk of fire, electric shock, or injury to persons when using your appliance, follow the basic precautions, including the following: 1. Read all of the instructions before using this appliance. 2. -
Page 3: Save These Instructions
1. Inspect and remove all packing materials. This includes the foam and any adhesive tape both inside and outsiide of the unit. 2. Inspect and remove any remains of packing, tape, or printed materials before powering on your Haier appliance. DANGER Risk of child entrapment. Before you throw away your old appliance, take off the door so that children may not easily get trapped inside. -
Page 4: Safety Requirements / Electrical Requirements
English SAFETy REqUIREmENTS Electrical Requirements Grounding Instructions This appliance must be plugged into at least a 15 AMP 120 Volt 60 Hz Grounded Outlet. This appliance must be grounded. It is equipped with a 3-Wire cord having a grounding plug. The plug must be plugged into an outlet that is properly installed and grounded. -
Page 5: Table Of Contents
At the End of the Wash Cycle ............18 CHILD LOCk FUNCTION .............. 18 CARE AND CLEANING GUIDE ............. 19 TROUBLESHOOTING ..............21 WARRANTy .................. 23 Specification Table Model HDC2406TW / TB / TSS Power input 680W Outer dimension(LxWxH) 21.7" x 19.7" x 17.2" Weight 48.4 LBS Max. -
Page 6: Parts And Features
English PARTS AND FEATURES Front View Control Panel A. 3 In 1 F. Child Lock Function Function B. Heavy G. Rinse C. Normal H. Rapid D. Eco I. Pre-Wash E. Rinse Aid 1. Door Handle 7. Power Button (ON / OFF) 2. - Page 7 English PARTS AND FEATURES Inside View Back View Quick Faucet Adapter Drain Hose for Premanent Installation 1. CupShelf 10. Power Cord 2. Detergent Dispenser 11. Quick Faucet Adapter 3. Cutlery Basket 12. Quick connect fitting; Fits standard 4. Filter System 7/8"...
-
Page 8: Installation Instructions
English INSTALLATION INSTRUCTIONS Proper location 1. First determine the best location for your new Countertop Dishwasher. It must be close to a 120 Volt (15 Amp) outlet and a sink with a water supply and drain. 2. The minimum height clearance required to install your dishwasher on a countertop surface with overhead cupboards/ Kitchen cabinets is 17.8”... -
Page 9: Quick Faucet Adaptor Connection
English qUICk FAUCET ADAPTER CONNECTION The Quick Faucet Adapter easily connects to the sink faucet A. First remove aerator from your faucet nozzle and attach the quick connect threaded adapter to the faucet. The quick connect faucet adapter allows Faucet Water easy snap-on/snap-off connection to standard Connection (7/8”... -
Page 10: Permanent Installation
English G. With all the fittings connected, open the tap to test to make sure there are no leaks. Connect the A/C power cord and use the dishwasher as outlined in the manual. H. When finished using the dishwasher, you need to close the water supply to the tap and disconnect the power supply cord.. - Page 11 English Drain hose: This unit has a special grey drain hose included. If you choose a permanent installation you must connect this hose to the dishwasher drain threaded connector. Use one hose clamp supplied. Hose connections for permanent installation Hose connections for permanent installation Back of Dishwasher Sink Drain Back of Dishwasher...
-
Page 12: Recommendations For Use
English RECOmmENDATIONS FOR USE Water, Pressure and Temperature For best operating results, incoming water should be HOT and the pressure should be between 0.03~1Mpa. Incoming water supply for the dishwasher is controlled by a ‘low water switch’ application, so if household water ceases, dishwasher will stop. We recommend for maximum efficiency and optimum results use HOT WATER ONLY. -
Page 13: Loading Your Dishwasher
English Tips to avoid stains and films: The following suggestions are recommended to prevent stains and films from dishware and utensils items: • You must rinse all dishware, silverware, glassware and food containers right a way after use. Some citric based food products, coffee, tea and iron deposits in water can cause yellow or brown film on inside surfaces when left on for a long time and not rinsed immediately. -
Page 14: Cutlery Basket
English Note: The standard plate is 10" inches. For ease of lading/unloading large size dinner plates from the dish rack, it maybe necessary to (temporarily) remove the cutlery basket. When loading/unloading is complete, return the cutlery basket to its original position. How to load items: •... -
Page 15: Proper Use Of Detergent
English PROPER USE OF DETERGENT NOTE: Use ONLY detergent specifically made for automatic dishwashers. Check product packaging to be certain. Keep your detergent fresh and dry. Do not put powder detergent into the dispenser until you’re ready to wash dishes. The amount of detergent to use depends on whether your water is hard or soft. -
Page 16: Using The 3-In-1 Agent
English Rinse Aid Setting The amount of rinse agent released into the final wash can be adjusted. The factory setting is at the midpoint. If there are rings of calcium (hard water) spots on dishes, try a higher setting. To Adjust the Rinse Aid Setting Remove the dispenser knob;... -
Page 17: Cycle Sequence
English CyCLE SEqUENCE NOTE: Cycle times listed are for reference only as they can change based on conditions such as inlet water temperature, whether dishwasher is partially or fully loaded, and the heating element power rating. Cycle Water (Approx) Time (Approx) Sequence Pre-wash Pre-wash (122ºF/50ºC) -
Page 18: Pausing The Wash Cycle / Program
English OPERATING INSTRUCTIONS Operating your Dishwasher 1. Ensure that all electrical, water, and drain connections have been installed correctly before proceeding. 2. Load the dishwasher (See the “Loading your Dishwasher” section). 3. Make sure that the water supply is turned on to full pressure. 4. -
Page 19: At The End Of The Wash Cycle
English Changing the Wash Program / Cycle: If at any time during the washing process you would like to change the selected wash program /cycle; 1. Press and hold the START / RESET button for approximately 3 seconds. (The START / RESET indicator light will be ON indicating that the unit is in PAUSE mode.) 2. -
Page 20: Care And Cleaning Guide
English Using The Delay Feature The start of the HDC2406 can be delayed between 1 and 24 hours in one hour increments. To utilize this feature: 1. Press “ON/OFF” button to “on” position 2. Press “PROGRAM” button 3. Press “DELAY” button once for each hour of delay (i.e. press 3 times to delay start 3 hours) To cancel the delay feature: 1. -
Page 21: Cleaning The Spray Arm
English Remarks: - Inspect the filters for blocking every time the dishwasher has been used. - By unscrewing the coarse filter you can remove the filter system. Remove any food remnants and clean the filters under running water. WARNING: ·Never run the dishwasher without the filters in place.The dishwasher must never be used without the filters.Improper replacement of the filter may reduce the performance level of the appliance and damage dishes and utensils.The entire filter system should be cleaned once a week... -
Page 22: Troubleshooting
English TROUBLESHOOTING Problem Possible Causes Possible Solution: Dishwasher does Fuse is blown or the Replace the fuse or reset the circuit breaker. Remove not start circuit breaker has any other appliances sharing the same circuit with the tripped. dishwasher. Power supply is not •... -
Page 23: Error Codes
English Problem Possible Causes Possible Solution: The dishes are The dishes were not loaded correctly See “Loading the Dishwasher Rack” section not clean. of this manual. The program selected was not the Select a more intense program. appropriate cycle for the condition of the dishes. -
Page 24: Warranty
This warranty does not during the specified warranty period cover incidental or consequential damages, will be repaired or replaced at Haier’s so the above limitations may not apply to discretion. ALL WARRANTy ALL WARRANTy... - Page 25 ImPORTANT Do Not Return This Product To The Store If you have a problem with this product, please contact the "Haier Customer Satisfaction Center" at 1-877-337-3639. DATED PROOF OF PURCHASE REqUIRED FOR WARRANTy SERVICE ImPORTANT Ne pas Réexpédier ce Produit au magasin Pour tout problème concernant ce produit, veuillez contacter le service des...
Need help?
Do you have a question about the HDC2406TW and is the answer not in the manual?
Questions and answers