Advertisement
Quick Links
ASSEMBLY INSTRUCTIONS
ASSEMBLY INSTRUCTIONS
included in door handle
1
2
3
4x
4x
6x
A
B
2x
1x
D
1x
Roof
F
1x
Back Wall
H
1x
Left Wall with glass panel
J
1x
Bench
6
1
sunlighten.com.au
sunlighten.com.au
Community
4
5
6
1x
4x
1x
Allen wrench
Philips Screw
Driver
C
1x
E
1x
Floor
G
1x
Right Wall
I
1x
Front Wall
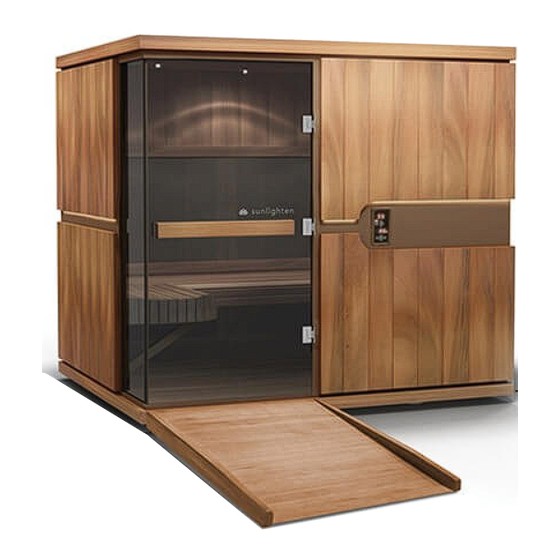
K
1x
Glass Front Door
711x1750mm
L
1x
Ramp
Advertisement

Subscribe to Our Youtube Channel
Related Manuals for Sunlighten Community


Summary of Contents for Sunlighten Community
- Page 1 Community ASSEMBLY INSTRUCTIONS ASSEMBLY INSTRUCTIONS included in door handle Allen wrench Philips Screw Driver Roof Floor Back Wall Right Wall Left Wall with glass panel Front Wall Bench Glass Front Door Ramp 711x1750mm sunlighten.com.au sunlighten.com.au...
- Page 2 STEP 2 The following walls will be inserted the same way • STEP 1 Make sure the wires coming out from the bottom • hatches don’t pinch when you mount the walls. sunlighten.com.au sunlighten.com.au...
- Page 3 STEP 4 The front wall will be the last to install. • If you ever have trouble getting a U-clip to NOTE: slide in, this can be resolved by tapping it with a hammer. sunlighten.com.au sunlighten.com.au...
- Page 4 The roof will also reinforce the walls in position • along with the clips. STEP 6 Remove the roof cover panels (see illustration 6.1 below). • The roof may require some slight manipulation to fall into • place on top of the wall panels. sunlighten.com.au sunlighten.com.au...
- Page 5 Next is the bench . Make sure the heater • frames are not mounted otherwise they will prevent the bench from resting on the supports. The triangle supports will need to be inserted • underneath as shown in STEP 9 sunlighten.com.au sunlighten.com.au...
- Page 6 Make sure the rough-texture side of the gasket is • against the glass door as your insert it. This will give it the grip needed to hang it. Likewise make sure the gaskets touching the • hinges also are doing so by the rough side. sunlighten.com.au sunlighten.com.au...
- Page 7 The bolts & washers will come with • the handles. Be sure to have a second person hold the handle • in place while the other inserts the bolt. STEP 12 Last step is to put the ramp in place. • sunlighten.com.au sunlighten.com.au...
- Page 8 CONGRATULATIONS your sauna is now ready to enjoy! If you have any queries please call Sunlighten Customer Support at 1800 786 544. sunlighten.com.au sunlighten.com.au...
Need help?
Do you have a question about the Community and is the answer not in the manual?
Questions and answers