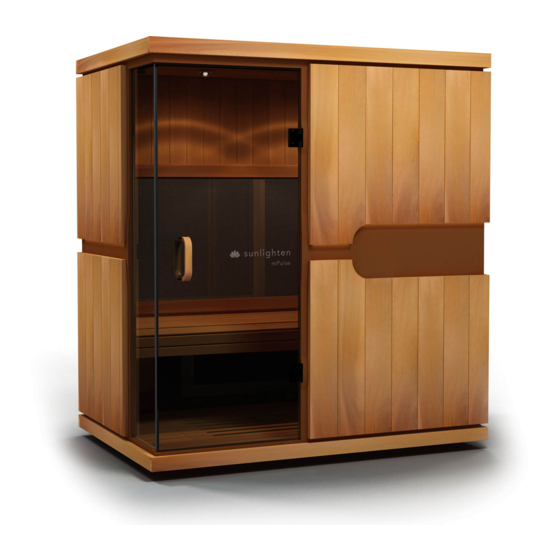
Sunlighten mPulse Aspire User Manual
Mpulse series
Hide thumbs
Also See for mPulse Aspire:
- User manual (26 pages) ,
- Owner's manual (20 pages) ,
- Assembly instructions manual (8 pages)
Table of Contents
Advertisement
Advertisement
Table of Contents

Related Manuals for Sunlighten mPulse Aspire


Summary of Contents for Sunlighten mPulse Aspire
- Page 1 mPulse® Series User Manual...
- Page 2 Congratulations! You are now the owner of an mPulse™ sauna. With Sunlighten infrared heat, you are empowered to improve your quality of life. Just follow our assembly instructions and sauna protocol to begin your wellness journey with the very best in infrared therapy.
-
Page 3: Table Of Contents
T A B L E O F C O N T E N T S P R E - I N S TA L L AT I O N Specifications Pre-installation Information I N S TA L L AT I O N G U I D E Parts List Ass e m b ly Inst r uc tio ns O P E R AT I N G I N S T R U C T I O N S... - Page 4 M P U L S E S E R I E S S P E C I F I C AT I O N S a S P IR E Dimensions 43.6 in x 41.6 in x 78.6 in 110.7 cm × 105.6 cm × 199.6 cm (Width x Depth x Height) 5-15R Power...
-
Page 5: P R E - I N S Ta L L At I O N
INTERNATIONAL ELECTRICAL SPECIFICATIONS Region Voltage/Ampe Exterior Power Cord Europe Aspire: 230V-7.5A Aspire: H07RN-F,250V-16A,Plug type: MT-32 or NS-13 Believe: 230V-10A Believe: H07RN-F,250V-16A,Plug type: MT-32 or NS-13 Conquer: 230V-15A Conquer: H07RN-F,250V-16A,Plug type: MT-32 or NS-13 Discover: 230V-18A Discover: H07RN-F,250V-20A,No Plug Empower: 230V-20A Empower: H07RN-F,250V-20A,No Plug Singapore Aspire: 230V-7.5A Aspire: H07RN-F,250V-16A,Plug type: NS-17... -
Page 6: I N S Ta L L At I O N G U I D E
Double check to ensure that all pieces arrived undamaged in transit. If damaged, please call Sunlighten Customer Service immediately at 913.754.0831 x7 or your local Sunlighten representative. Photos of any damage are required to process any replacement request. Please do not discard any loose parts or fabric. -
Page 7: Parts List
PA R T S L I S T QUANTITY PART Front panel Back panel Left side panel Right side panel Roof panel Floor panel (base) Tempered Glass door (2 doors for dISCOVER) Door hinge gaskets Bench panel (2 for dISCOVER, 3 for eMPOWER) Door handle w/2 screws, 4 plastic washers, 2 round washers, (double for dISCOVER) C clips... -
Page 8: Ass E M B Ly Inst R Uc Tio Ns
S A U N A A S S E M B LY The following pictures are for your reference. The dISCOVER and eMPOWER models have additional steps. Please review before assembling your sauna. 1 . INSTAL LI N G T H E FE E T Install screw through wooden feet into designated holes on the bottom of the floor panel. - Page 9 3. P LA CE TH E BA C K PA N EL Begin by removing the small wooden wiring covers at the bottom of each panel before you assemble the wall panels. (A) Place the back panel into the groove in base. Center its location with the raised area on interior floor. One person should hold the wall while the other person continues to the next step.
- Page 10 5 . CO NN E CTI N G T H E FR O N T PANE L Place the front panel into the groove on the front of the base. DO NOT lift by the thin horizontal pieces that become the top and bottom of the door frame. Pay careful attention to the power cords, making sure they are safely out of the way.
- Page 11 9. I NSTALL THE B EN CH *If you purchsed the Acoustic Resonance Therapy (SO Sound) accessory, refer to A.R.T. manual at this time: www.sunlighten.com/customer-care First, remove the magnetic heater covers on the side and back walls to install the bench.
- Page 12 10. PLACE T HE R O OF PAN E L *If you purchsed the Chromotherapy accessory, refer to Chromotherapy manual at this time: www.sunlighten.com/customer-care Before putting the roof in place, ensure wires are accessible from the top of the front wall (3 wires should be visible). Using a screwdriver or drill, remove front right dust cover on top of the roof to access light connections.
- Page 13 ** Use extra caution when moving and mounting the glass door. This is an expensive replacement item and is not covered by warranty if shattered. Sunlighten is not liable for incidental injury or damages during installation. a. First, attach the door handles to the glass to assist with holding the door during installiation.
- Page 14 c. Carefully, insert glass door onto open hinge. One person will hold door in place while the other person attaches the top hinge plate and gaskets. Use the wooden shims included to help level door. One person holds door while other installs top hinge plate d. Before attaching the top hinge, adjust door so 1/8”-1/4” of glass is on the inside of the hinge.
- Page 15 1 2 . P L U G I N M A I N P O W E R C A B L E The sauna should be on a true dedicated circuit that runs from the wall outlet to the breaker box with its own switch in the breaker box and nothing else on that line.
-
Page 16: O P E R At I N G I N S T R U C T I O N S
To turn On: Press and hold the power button in the lower right corner for 5 seconds, until the screen turns on. The screen will be blank for a few seconds before the Sunlighten logo appears. If left on, the tablet will go into sleep mode and can be woken by touching anywhere on the screen. -
Page 17: Sauna Settings
3 . S E T T I N G S / S E T- U P In the Settings tab, you will be able to adjust initial set up options. • Change initial set-up options • Set up a wireless internet connection •... - Page 18 Standard: Default setting that allows for full use of all sauna features 6 . D U R AT I O N A N D T E M P E R AT U R E S E T T I N G Standard: Rotate the time or temperature dials to your desired temperature.
- Page 19 If Wifi is not available, you can update using a USB storage device. You can purchase USB drive at:: http://www.sunlighten.com/shop/mpulse-anywhere-access/ 1 1 . S Y S T E M R E S E T The System Reset option will allow you to completely reset and erase all data on your sauna (Full Reset,) or reset all software but keep your information (System Reset.) The System Reboot option will restart the sauna and maintain...
-
Page 20: Health Programs
1 3 . H E A LT H P R O G R A M S The wellness programs are designed to emit the optimal blend of infrared wavelengths - based on 56 clinical studies - to achieve the desired result. To begin a program: •... - Page 21 P R E S E T H E A LT H P R O G R A M G U I D E program duration infrared detoxification 37 min Mid and Far Starts at a high intensity to increases the body’s core temperature then reduces to a low, comfortable intensity level.
- Page 22 1 4 . C R E AT E A P R O G R A M To create a program: • Select Create Program • Enter a name, duration and set heaters to desired output. • Heaters can be set individually in segments adding up to 60 minutes •...
-
Page 23: Scheduling Sauna Sessions
1 6 . S C H E D U L I N G A S E S S I O N Use the Schedule feature to set a program to run automatically at a future time. The Android panel can not be ‘Shutdown’ as the scheduler will not power on the tablet to run a future program. -
Page 24: Media Apps
2. The radio must be in “AUX” mode to have sound output from the running application. 3. With the latest Sunlighten App version on the ‘Settings and Setup Screen’ you will have the ability to download and install additional applications as they are released for installiation. - Page 25 1 8 . H O W T O P L AY A M O V I E F R O M U S B F L A S H D R I V E Using the front USB port, plug in your USB flash drive and navigate to Media/Applications button.
-
Page 26: Warm Up Time & Usage Guidelines
& room. REMEMBER, you are required to have an authorized Sunlighten cover over your sauna if it is outside or exposed to the weather in order to maintain your warranty. -
Page 27: Sauna Protocol
• Every six months, clean wood and glass with our Natural Sauna Cleaning Kit. Available at www.sunlighten.com/shop/ *Listen to your body. Be aware of excessive detoxifying. If you begin to feel symptoms such as nausea, fatigue, or flu-like symptoms during your sauna session, discontinue use immediately. If these... -
Page 28: Health & Safety
Altering or tampering with any electrical connections on the power supply is dangerous and will void the warranty • Do not attempt a repair without consulting Sunlighten first. Unauthor- ized repair attempts will void the warranty Precautions If any of the below apply to you, consult your physician prior to sauna use: •... -
Page 29: F Requ E Ntly As Ked Q Ues Tions
A S S E M B LY Can I assembly my sauna outdoors? Yes, if you protect it with a Sunlighten canvas sauna cover. If you place your sauna outdoors without a Sunlighten cover, your warranty will be void. The sauna covers are custom made and may not arrive until after you receive your sauna. - Page 30 What is the best temperature to use my sauna? First, it is important to understand that health benefits are a result of efficient infrared emissivity, not air temperature. Sunlighten saunas are 95-99% emissive to deliver the highest concentration of infrared. With that, the optimal sauna experience occurs between 100-130°F. During your first few sessions, start at a lower temperature of 100°F and...
- Page 31 Do not use chemical cleaners on your sauna. Light sandpaper can be used to treat stains on the inside of the sauna. Sunlighten Natural Sauna Cleaning Kit can be purchased at store.sunlighten.com.
-
Page 32: T Roub Le S H Oo T I Ng
T R O U B L E S H O O T I N G G U I D E IS SUE S O L U T I O N An electrical com- Check all connections - see pg. 11. A newly assembled unit with a non-func- ponent is not work- tioning electrical component (control panel, heater panels, lights, speakers) ing after assembling... - Page 33 D iag n ost ic R e sul t Cod es No Error! No errors detected. The Control Panel cannot communicate with the Power Control Box. After unplugging your sauna, remake the connection of the computer cable(RS232) at the bottom of your front wall and the left side of the power box.
-
Page 34: Warr Ant Y
Sunlighten Corp. shall not be liable for the loss of use of the sauna or other incidental or consequential damages. Under no circumstances shall Sunlighten Corp. - Page 35 ATTENTION: Shipping damage must be notated on the Bill of Lading (BOL). Sunlighten must be notified of any damage to your sauna within three (3) business days of signing the BOL. Failure to notify Sunlighten within the established time frame will result in the owner taking full responsibility for cost of ALL REPLACEMENT PARTS including shipping and handling fees.
- Page 36 0 8 0 9 1 7 7373 W. 107th St., Overland Park, KS 66212 U S / C A N phone 913.754.0831 online: www.sunlighten.com/customer-care INTERNATIONAL: support@sunlighten.com or contact your local Sunlighten representative...
Need help?
Do you have a question about the mPulse Aspire and is the answer not in the manual?
Questions and answers
how do I address an E9 error message?