Advertisement
Quick Links
TRACK 1101 Battery replacement manual
The TRACK 1101 ships with a standard battery pack BAT 8206.
Please order these battery packs and replace with these battery packs.
Step 1
Make sure that the serial
number and logo are facing
the right way up. Then turn
the tracker face down.
Unscrew the 6 screws.
Tip: If using a power drill, use power
setting 7, on low. (Note: not all power
drills have the same settings!)
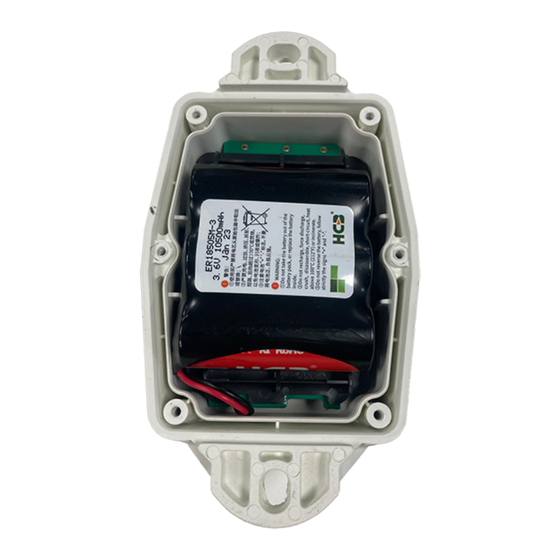
Step 5
Lift the module and move the
battery pack from the insert to
the side.
Step 9
Move the battery pack back
under the insert and PCB and
flip the module.
www.sensolus.com | info@sensolus.com
Step 2
Remove the back plate and
the 6 screws.
Step 6
Align the battery pack next to
the PCB and insert.
Step 10
Align the battery pack onto
the insert.
Step 3
Take the module (Battery pack
+ battery holder + PCB) out of
the casing.
You might need to tilt the
casing a bit
Step 7
Disconnect the battery pack
from the PCB. Be carefull in
disconnecting the battery
pack.
Step 11
Place the module in the
tracker. Use the alignment
marks on the casing. Do not
use force. There is only one
way to put the module back in
the tracker.
Step 4
Turn around the module
(Battery pack + battery holder
+ PCB) so the PCB is on top.
Step 8
Connect the new the battery
pack to the PCB. A green LED
will flash for some seconds.
Step 12
Close the tracker carefully.
Your tracker is ready to use
again.
September 10, 2024 4:54 PM
Advertisement

Related Manuals for sensolus TRACK 1101


Summary of Contents for sensolus TRACK 1101
- Page 1 TRACK 1101 Battery replacement manual The TRACK 1101 ships with a standard battery pack BAT 8206. Please order these battery packs and replace with these battery packs. Step 1 Step 2 Step 3 Step 4 Make sure that the serial...
- Page 2 You can search for this tracker or find in in the asset list or asset map. • Click ont the settings button on the far right • Go to the battery tab • Click replace battery www.sensolus.com | info@sensolus.com September 10, 2024 4:54 PM...
Need help?
Do you have a question about the TRACK 1101 and is the answer not in the manual?
Questions and answers