
Related Manuals for GreenWorks MO80L416


Summary of Contents for GreenWorks MO80L416
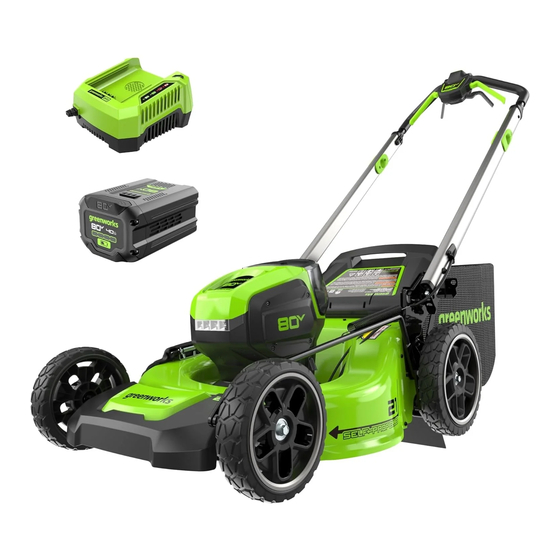
- Page 1 MO80L416 LAWN MOWER OPERATOR MANUAL TONDEUSE MANUEL D’OPÉRATEUR CORTACÉSPED MANUAL DEL OPERADOR LMB412 www.greenworkstools.com...
-
Page 3: Table Of Contents
English Introduction......4 Start the product......11 4.10 Activate Turbo Boost Product description......4 (Temporarily Increased Intended use........4 Cutting Speed)......11 Overview......... 4 4.11 Operate the self-propelled Symbols on the product....4 drive system........11 California Proposition 65....4 4.12 LED Headlights......12 Safety........ -
Page 4: Introduction
English INTRODUCTION SYMBOLS ON THE PRODUCT PRODUCT DESCRIPTION Symbol Explanation This product is a battery-powered self-propelled rotary lawn mower that features a mulching function and is equipped with a detachable grass catcher. Precautions that involve your safety. We are committed to continuously improving our products, and reserve the right to modify the design and appearance without prior notice. - Page 5 English changing accessories. Inspect lawn mower cord WARNING periodically and if damaged, have it repaired by an authorized service facility. Keep handles dry, clean, Used if there is a risk of injury or death for the and free from oil and grease. operator or bystanders, if the instructions in the •...
-
Page 6: Operation
English • Follow all charging instructions and do not mower housing, and before making any repairs or charge the battery or product outside of the inspections. temperature range specifier in the instructions. • Shut the motor off and wait until the blade comes to Charging improperly or at temperatures outside of a complete stop before removing the grass catcher the specifier range may damage the battery and... -
Page 7: Grass Catcher
English • To ensure safe operation of the mower, it's important • When not in use, store the product, battery, and to inspect the cutting deck for any damages, such battery charger in a dry, indoor, and locked area. as cracks. Keep the product, battery, and battery charger out of the reach of children and unauthorized persons. -
Page 8: Remove The Battery Pack
English Remove the battery pack from the machine. OPERATION This section describes how to operate the product. WARNING CAREFULLY READ AND UNDERSTAND THE SAFETY CHAPTER AND OPERATION INSTRUCTIONS BEFORE YOU OPERATE THE PRODUCT. BEFORE USING THE PRODUCT 4.1.1 BATTERY CAPACITY INDICATOR Carefully guide the control cable through the shafts while inserting the upper handle into the The product has LED lights to indicate the battery... -
Page 9: Charge The Battery
English 4.1.3 CHARGE THE BATTERY Refer to the Battery Charger Operator Manual for information about how to use the battery charger. 4.1.4 BATTERY INFORMATION Refer to the Battery Operator Manual for information about how to use the battery. ADJUST THE HANDLEBAR POSITION Simultaneously pull the 2 handlebar latches to release the handlebar lock. -
Page 10: Switch To Mulching Mode
English SWITCH TO MULCHING MODE Mulching mode cuts grass clippings into smaller pieces and disperses them back onto the lawn. The smaller grass clippings break down and provide natural fertilizer for the lawn. This mode eliminates the need to collect and dispose of grass clippings, making mowing more efficient and environmentally friendly. -
Page 11: Start The Product
English Release the turbo button to operate at the default cutting speed. Note: When using the turbo boost button, the battery will drain faster. Therefore, it is recommended to use the turbo boost button only when necessary. 4.11 OPERATE THE SELF-PROPELLED DRIVE SYSTEM 4.11.1 SELF-PROPELLED DRIVING SYSTEM... -
Page 12: Led Headlights
English Note: Complete the two consecutive actions within the results. If the grass is very long, mow slowly and 5 seconds. consider making 2 passes if necessary. • Vary the cutting direction each time you mow to 4.12 LED HEADLIGHTS prevent creating visible lines or stripes in the lawn. -
Page 13: Maintenance
English MAINTENANCE IMPORTANT Carefully read and understand the safety regulations and the maintenance instructions before you clean, repair, or do any maintenance on the product (Reference Safety regulations and maintenance instructions). WARNING • REMOVE BATTERY OR BATTERIES FROM THE PRODUCT BEFORE YOU DO ANY MAINTENANCE. •... -
Page 14: Clean The Battery And Battery Charger
English CAUTION • KEEP WATER AWAY FROM BATTERY COMPARTMENT WHILE WASHING TO AVOID DAMAGING THE ELECTRICAL COMPONENTS. • DO NOT CLEAN WITH ALCOHOL, GASOLINE, ACETONE, OR OTHER CORROSIVE/VOLATILE SOLVENTS. THESE SUBSTANCES MAY DAMAGE THE EXTERNAL AND INTERNAL STRUCTURE OF YOUR MOWER. •... -
Page 15: Transportation, Storage, And Disposal
English Remove the mounting screw and spacer with a wrench or socket. Carefully remove the blade. Inspect the blade support and blade bolt for any damage. Examine the motor shaft to make sure that it is not bent. Install the New Blades Reinstall the fan, followed by the new blade, positioning the angled ends downward. -
Page 16: Transportation
English Pull the handlebar latch to fold the handles. • Make sure to adequately cover any exposed electronic parts if transportation in adverse weather conditions is unavoidable. • Use tape on open contacts of the battery and ensure it is securely stowed to prevent movement. •... -
Page 17: Troubleshooting
English TROUBLESHOOTING Problem Possible cause Solution The handle is not in position. The bolts are not engaged correctly. Adjust the height of the handle and make sure that the bolts and nuts are aligned correctly. The product does not start. The battery capacity is low. -
Page 18: Limited Warranty
GARANTIE OUTIL & BATTERIE • GARANTÍA PARA HERRAMIENTAS Y BATERÍAS Greenworks hereby warranties this product, to the original purchaser with proof of purchase, for a period of four (4) years against defects in materials, parts or workmanship. Greenworks, at its own discretion... - Page 19 Français Introduction......20 Connexion de la batterie au produit........... 27 Description du produit....20 Démarrage du produit....27 Utilisation conforme...... 20 4.10 Activation du Turbo (coupe Aperçu...........20 accélérée temporairement)... 28 Symboles figurant sur la 4.11 Fonctionnement du système machine........20 d’entraînement autopropulsé..
-
Page 20: Introduction
Français INTRODUCTION SYMBOLES FIGURANT SUR LA MACHINE DESCRIPTION DU PRODUIT Symbole Explication Ce produit est une tondeuse à gazon rotative autopropulsée sur batterie qui offre une fonction de Précautions destinées à assurer la sé- mulching et un collecteur d'herbe amovible. curité. -
Page 21: Sécurité
Français • Ne forcez pas la tondeuse à gazon - elle fera mieux SÉCURITÉ le travail et sera plus sûre au rythme pour lequel elle a été conçue. DÉFINITIONS DE SÉCURITÉ • Ne vous penchez pas trop, gardez un bon équilibre Les avertissements, précautions et notes mettent en tout temps. - Page 22 Français de connecter la batterie, voire de soulever ou • Garder la zone d'opération à l'écart de toute transporter le produit. Le transport du produit avec personne, en particulier les jeunes enfants et les votre doigt sur l’interrupteur ou la mise sous tension animaux domestiques.
-
Page 23: Entretien
Français l’inspecter régulièrement pour détecter les dommages 2.1.5 ENTRETIEN comme les déchirures ou orifices. En cas de dommages, remplacez-le immédiatement par un Les points de maintenance suivants doivent être collecteur d'herbe agréé par le fabricant. effectués : • Vérifiez fréquemment que la lame et les boulons de LEVIER D’ACTIVATION DE LAME fixation du moteur (du produit) sont bien serrés. -
Page 24: Assemblage
Français à l’intérieur et verrouillé. Maintenez le produit, la batterie et le chargeur de batterie hors de portée des enfants et des personnes sans autorisation. Conservez ces instructions ASSEMBLAGE Cette section décrit la méthode d’assemblage et de réglage du produit. AVERTISSEMENT N'UTILISEZ PAS DE PIÈCES OU D’ACCESSOIRES QUI NE SONT PAS... -
Page 25: Utilisation
Français Poussez et maintenez enfoncé le bouton de 4.1.2 CONNEXION DU CHARGEUR DE déblocage de la batterie (21). BATTERIE Retirez le bloc-batterie de la machine. Connectez le chargeur de batterie uniquement à UTILISATION la tension et la fréquence spécifiées sur la plaque signalétique. -
Page 26: Régler La Hauteur De Coupe
Français RÉGLER LA HAUTEUR DE COUPE Le produit peut être réglé à différentes hauteurs de coupe. Déplacez le levier de hauteur de coupe vers l’extérieur et en arrière pour augmenter la hauteur de coupe. Relâchez la porte arrière de sorte qu’elle repose sur le cadre du collecteur d’herbe. -
Page 27: Passage En Mode Décharge Latérale
Français Fermez le cache de décharge latérale. PASSAGE EN MODE DÉCHARGE TONTE SANS COLLECTEUR D'HERBE OU LATÉRALE INSERT MULCHING • Examinez la porte arrière pour vous assurer de ATTENTION l’absence de dommages, comme des fissures. En cas d’usage de la goulotte de décharge latérale : •... -
Page 28: Activation Du Turbo (Coupe Accélérée Temporairement)
Français Appuyez et maintenez enfoncé le bouton de mise en marche. Ensuite, serrez l’un ou l’autre des leviers d’activation de lame en direction du guidon pour engager les lames. Note : Effectuez les deux actions consécutives dans les 5 secondes. TURBO Relâchez l’une ou l’autre des paires de poignée de démarrage et de levier de commande du... -
Page 29: Arrêt Du Produit
Français • Maintenez propre le cache arrière de la tondeuse. 4.13 ARRÊT DU PRODUIT L'accumulation d’herbe et de crasse sur la face intérieure du cache de coupe peut réduire l’efficacité Relâchez le ou les leviers d’activation de lame de la tonte. pour arrêter le produit. -
Page 30: Entretien
Français ENTRETIEN IMPORTANT Vous devez avoir lu attentivement et compris les règles de sécurité et les instructions de maintenance avant de nettoyer, de réparer ou d'effectuer des travaux de maintenance sur le produit (Référence Règles de sécurité et instructions de maintenance). AVERTISSEMENT •... -
Page 31: Nettoyage Du Produit
Français NETTOYAGE DU PRODUIT Nettoyez le produit après chaque utilisation avec de l’eau, un détergent neutre et un chiffon doux. ATTENTION • MAINTENEZ L’EAU À L’ÉCART DU COMPARTIMENT DE BATTERIE PENDANT LE NETTOYAGE POUR ÉVITER D'ENDOMMAGER LES COMPOSANTS ÉLECTRIQUES. • NE NETTOYEZ PAS AVEC DE L’ALCOOL, DE L’ESSENCE, DE L’ACÉTONE OU D’AUTRES SOLVANTS CORROSIFS /VOLATILS. - Page 32 Français Retirez la vis de fixation et l'entretoise à l'aide d'une clé ou d'une douille. Retirez prudemment la lame. Vérifiez l’état du support de lame et du boulon de lame. Examinez l’arbre du moteur pour vous assurer qu’il n’est pas déformé. Installation de nouvelles lames Remettez le ventilateur, puis la nouvelle lame, en positionnant les extrémités inclinées vers le bas.
-
Page 33: Transport, Entreposage Et Mise Au Rebut
Français Tournez prudemment la lame à la main pour vous assurer de la fluidité de rotation. Démarrez le produit et testez la lame pour vérifier son installation correcte. Une installation incorrecte peut causer des vibrations ou des performances de coupe insatisfaisantes. TRANSPORT, ENTREPOSAGE ET MISE AU REBUT RÉGLAGE DU PRODUIT EN POSITION DE... -
Page 34: Mise Au Rebut De La Batterie, Du Chargeur De Batterie Et Du Produit
Français les pièces sécher à l’air libre une fois arrivé à destination. MISE AU REBUT DE LA BATTERIE, DU CHARGEUR DE BATTERIE ET DU PRODUIT Les symboles sur le produit ou son emballage signifient que le produit n'est pas un déchet ménager. Recyclez-le auprès du point de recyclage destiné... -
Page 35: Dépannage
Français DÉPANNAGE Problème Cause possible Solution Le guidon n'est pas bien installé. Les écrous ne sont pas bien en- Ajustez la hauteur du guidon et as- clenchés. surez-vous que les écrous et les boulons sont alignés correctement. Le produit ne démarre pas. La capacité... -
Page 36: Garantie Limitée
GARANTIE OUTIL & BATTERIE • GARANTÍA PARA HERRAMIENTAS Y BATERÍAS Greenworks garantit par la présente ce produit, à l'acheteur original avec preuve d'achat, pour une période de quatre (4) ans contre tout défaut de matériaux, de pièces ou de main-d'œuvre. - Page 37 Español Introducción......38 Conexión de la batería al producto........45 Descripción del producto....38 Arranque del producto....45 Uso previsto........38 4.10 Activación del impulso turbo Perspectiva general...... 38 (aumento temporal de la Símbolos en el producto....38 velocidad de corte)....... 46 Propuesta 65 de California...
-
Page 38: Introducción
Español INTRODUCCIÓN SÍMBOLOS EN EL PRODUCTO DESCRIPCIÓN DEL PRODUCTO Símbolo Explicación Este producto es un cortacésped rotativo autopropulsado a batería que incorpora una función Precauciones que afectan a su seguri- de mulching y está equipado con un recogehierba dad. desmontable. Nos comprometemos a mejorar continuamente nuestros productos y nos reservamos el derecho a Este aparato incorpora piezas de es-... -
Page 39: Seguridad
Español • Manténgase alerta – Observe lo que está haciendo SEGURIDAD en todo momento. Utilice el sentido común. No utilice el producto cuando esté cansado. DEFINICIONES DE SEGURIDAD • Desconexión del cortacésped – Desconecte el Las advertencias, precauciones y notas se utilizan cortacésped de la batería cuando no lo utilice, antes para señalar partes especialmente importantes del de realizar tareas de mantenimiento o al cambiar... -
Page 40: Mantenimiento
Español riesgo de que el producto se ponga en marcha • No utilice el producto si está descalzo o lleva accidentalmente. sandalias abiertas. Lleve siempre calzado sólido. • Cuando la batería no esté en uso, manténgala • Nunca intente hacer un ajuste de altura de la rueda alejada de otros objetos metálicos como clips, mientras el motor esté... -
Page 41: Funciones De Seguridad Del Producto
Español de repuesto cumplan las recomendaciones o • Es importante realizar comprobaciones periódicas especificaciones del fabricante original. de la palanca de activación de la cuchilla. Para ello, encienda el motor y suelte la palanca. Si el • Sustituya la cuchilla si está doblada o agrietada. motor no se para en 3 segundos, es posible que Una cuchilla desequilibrada provoca vibraciones haya un problema con la palanca. -
Page 42: Montaje
Español MONTAJE Esta sección describe cómo montar y ajustar el producto. AVISO NO UTILICE PIEZAS O ACCESORIOS QUE NO SEAN LOS RECOMENDADOS POR EL FABRICANTE. AVISO ASEGÚRESE DE QUE TODAS LAS PIEZAS ESTÉN CORRECTAMENTE MONTADAS ANTES Guíe con cuidado el cable de control por los ejes DE INSERTAR LA BATERÍA. -
Page 43: Funcionamiento
Español Retire la batería de la máquina. Consulte el manual del operario del cargador de batería para obtener información sobre su uso. FUNCIONAMIENTO 4.1.3 CARGA DE LA BATERÍA Esta sección describe el funcionamiento del producto. Consulte el manual del operario del cargador de batería para obtener información sobre su uso. -
Page 44: Uso Del Producto Con El Recogehierba
Español CAMBIO AL MODO DE MULCHING El modo de mulching corta los recortes de hierba en trozos más pequeños y los dispersa de nuevo sobre el césped. Los recortes de hierba más pequeños se descomponen y proporcionan fertilizante natural para el césped. -
Page 45: Segado Sin Recogehierba Ni Tapón De Mulching
Español Con la otra mano, fije el conducto de descarga lateral alineando las ranuras del conducto de descarga lateral con la articulación situada en la parte inferior de la cubierta. Cuando escuche un clic, la batería está instalada. Cierre la puerta de la batería. ARRANQUE DEL PRODUCTO Baje el conducto hasta que los ganchos de la plataforma del cortacésped queden fijados en las... -
Page 46: Activación Del Impulso Turbo (Aumento Temporal De La Velocidad De Corte)
Español 4.10 ACTIVACIÓN DEL IMPULSO TURBO (AUMENTO TEMPORAL DE LA VELOCIDAD DE CORTE) Pulse el botón turbo para aumentar la velocidad a TURBO 3200 RPM. TURBO TURBO Suelte las palancas de transmisión para desacoplar el sistema de transmisión autopropulsada. 4.11.2 FUNCIONAMIENTO SIN SEGADO Suelte el botón turbo para funcionar a la velocidad de corte predeterminada. -
Page 47: Recomendaciones Para Un Corte De Césped Eficaz
Español AVISO ESPERE A QUE LA CUCHILLA SE HAYA DETENIDO POR COMPLETO ANTES DE VOLVER A PONER EN MARCHA EL PRODUCTO. NO APAGUE NI ENCIENDA EL PRODUCTO RÁPIDAMENTE. AVISO SAQUE SIEMPRE LA BATERÍA TRAS FINALIZAR LA TAREA. 4.14 RECOMENDACIONES PARA UN CORTE DE CÉSPED EFICAZ •... -
Page 48: Mantenimiento
Español MANTENIMIENTO IMPORTANTE Debe leer detenidamente y entender los reglamentos de seguridad y las instrucciones de mantenimiento antes de limpiar, reparar o realizar tareas de mantenimiento en el producto (referencia a los reglamentos de seguridad y las instrucciones de mantenimiento). AVISO •... -
Page 49: Limpieza Del Producto
Español LIMPIEZA DEL PRODUCTO Limpie el producto después de cada uso con agua, detergente neutro y un paño suave. PRECAUCIÓN • MANTENGA EL AGUA ALEJADA DEL COMPARTIMENTO DE LA BATERÍA DURANTE LA LIMPIEZA PARA EVITAR DAÑAR LOS COMPONENTES ELÉCTRICOS. • NO LIMPIE CON ALCOHOL, GASOLINA, ACETONA U OTROS DISOLVENTES CORROSIVOS/VOLÁTILES. ESTAS SUSTANCIAS PUEDEN DAÑAR LA ESTRUCTURA EXTERNA E INTERNA DE SU CORTACÉSPED. - Page 50 Español Retire el tornillo de montaje y el espaciador con una llave o una llave de tubo. Retire la cuchilla con cuidado. Inspeccione el soporte de la cuchilla y el perno de la cuchilla para detectar posibles daños. Examine el eje del motor para asegurarse de que no esté doblado. Instalación de las cuchillas nuevas Vuelva a instalar el ventilador, seguido de la cuchilla nueva, colocando los extremos en ángulo hacia abajo.
-
Page 51: Transporte, Almacenamiento Yeliminación
Español Gire con cuidado la cuchilla manualmente para garantizar un giro suave. Ponga en marcha el producto y pruebe la cuchilla para verificar su correcta instalación. Una instalación incorrecta puede provocar vibraciones o un rendimiento de corte insatisfactorio. TRANSPORTE, ALMACENAMIENTO Y ELIMINACIÓN AJUSTE DE LA POSICIÓN DE TRANSPORTE DEL PRODUCTO... -
Page 52: Eliminación De La Batería, El Cargador De Baterías Y El Producto
Español batería y deje que todas las piezas se sequen al aire cuando llegue a su destino. ELIMINACIÓN DE LA BATERÍA, EL CARGADOR DE BATERÍAS Y EL PRODUCTO Los símbolos en el producto o en el embalaje del producto significan que el producto no es un desecho doméstico. -
Page 53: Solución De Problemas
Español SOLUCIÓN DE PROBLEMAS Problema Posible causa Solución El asa no está en posición. Los pernos no se han acoplado cor- Ajuste la altura del asa y asegúrese rectamente. de que los pernos y las tuercas se hayan alineado correctamente. El producto no se pone en marcha. -
Page 54: Garantía Limitada
GARANTIE OUTIL & BATTERIE • GARANTÍA PARA HERRAMIENTAS Y BATERÍAS Por la presente Greenworks garantiza este producto, al comprador original con el comprobante de compra, durante un periodo de cuatro (4) años frente a defectos en materiales, piezas o mano de obra. A su entera discreción Greenworks reparará... - Page 56 www.greenworkstools.com P0805346-00 Rev B...
Need help?
Do you have a question about the MO80L416 and is the answer not in the manual?
Questions and answers
Self propelled function not engaging?
The self-propelled function on the GreenWorks MO80L416 may not engage if the user does not perform two actions within 5 seconds: (1) press and hold the blade activation lever, and (2) pull one of the drive levers toward the handlebar. Both actions must be completed in sequence within the time limit to activate the self-propelled system.
This answer is automatically generated