
Related Manuals for CDA HNE81FR


Summary of Contents for CDA HNE81FR
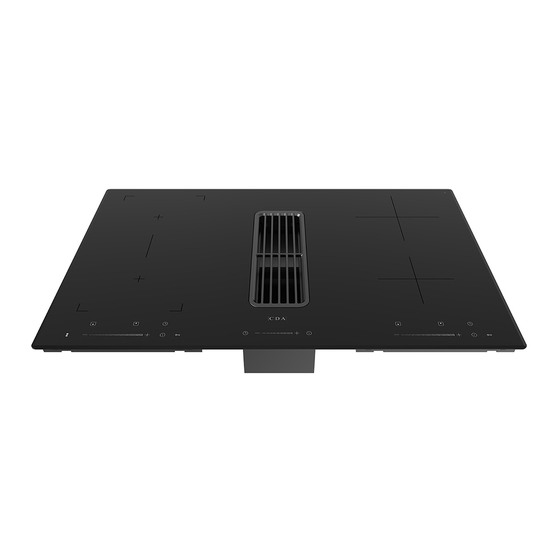
- Page 1 HNE81FR Indu-air downdraft induction hob Installation, use and maintenance www.cda.co.uk...
-
Page 2: Table Of Contents
Contents: Important information Important safety information Important safety instructions Safety warnings Hob layout Using your induction hob Using the touch controls Choosing the right cookware Starting to cook Locking the controls Auto shutdown protection Using the timer Using the bridge zone 20 Heat settings 20 Care and maintenance 22 Installation... -
Page 3: Appliance Information
Appliance information: Please enter the details on the appliance rating plate below for reference, to assist CDA Customer Care in the event of a fault with your appliance and to register your appliance for guarantee purposes. Appliance Model... -
Page 4: Important Information
(EMC) 2014/30/EU. Parts intended to come into contact with food conform to 1935/2004/EC. IMPORTANT INFORMATION FOR CORRECT DISPOSAL OF THE PRODUCT IN ACCORDANCE WITH EC DIRECTIVE 2012/19/EU. At the end of its working life, the product must be taken to a special local authority waste collection centre or to a dealer providing appliance recycling services. - Page 5 • The performance of your extractor will vary depending on a number of factors including: type of extraction, length of ducting, room volume, ventilation available and cleanliness of the filters. • Check and empty the water retainer regularly to avoid it overflowing.
- Page 6 purposes only. Do not use pans with jagged edges or drag pans across the induction glass surface as this can scratch the glass. • Do not use scourers or any other harsh abrasive cleaning agents to clean your hob as these can scratch the induction glass. •...
-
Page 7: Important Safety Instructions
avoid the possibility of an electric shock. The appliance is not intended to be operated by means of an external timer or separate remote-control system. WARNING: In order to prevent movement of the appliance, it must be stabilised prior to installation. Please refer to the installation instructions. -
Page 8: Safety Warnings
• This appliance should be connected to a circuit which incorporates an isolating switch, providing full disconnection from the power supply. Failure to install the appliance correctly could invalidate any warranty or liability claims. Safety warnings Your safety is important to us. Please read this information before using the appliance. - Page 9 Operation and maintenance Electrical shock hazard • Do not cook on a broken or cracked hob. If the hob surface should break or crack, immediately switch off the appliance at the mains power supply (wall switch) and contact a qualified technician. •...
- Page 10 To avoid interference between your hob and a pacemaker, your pacemaker must be designed and programmed in compliance with the regulations that apply to it. As such, CDA guarantee only that our product is compliant. With regard to the compliance of the pacemaker or any potential incompatibility, you should obtain information from the manufacturer or your attending physician.
-
Page 11: Hob Layout
Hob layout 2000W 2000W 1500W 1500W Induction hob Heating zone selection controls 2. Power / Timer regulating key 3. Keylock control ON/OFF control 5. Timer control 6. Slider controller Bridge zone selection Downdraft extractor 7.-8. Extraction speed adjustment Power ON/OFF Delay... -
Page 12: Using Your Induction Hob
Using your induction hob Before using your new hob • Read this guide, taking special note of the ‘Safety Warnings’ section. • Remove any protective film that may still be on your induction hob. Using the touch controls • The controls respond to touch so you don’t need to apply any pressure. -
Page 13: Saving Energy
stainless steel, aluminium or copper without a magnetic base, glass, wood, porcelain, ceramic and earthenware. • Do not use cookware with jagged edges or a curved base. • Make sure that the base of your pan is smooth, sits flat on the glass and is the same size as the cooking zone. - Page 14 Be sure to recycle all of the packaging. All packaging materials used are 100% recyclable. Important • Do not use the hob if the glass surface is cracked or damaged to prevent the risk of electric shock. Disconnect it from the power supply.
- Page 15 will automatically switch off. You will need to start again at step 1. You can touch the heating zone selection again and modify the heat setting at any time during cooking. Slider controller Switch on the induction hob, press the optional key to select heating zone, the indicator next to the key will flash for 5 seconds, during this period, during this period, it’s power can be adjusted from level...
-
Page 16: Locking The Controls
2. Turn the cooking zone off by scrolling down to ”0” . Make sure the display shows“0” and then “H”. 3. Turn the hob off by touching the ON/OFF control. 4. Beware of hot surfaces indicator “H” will show which cooking zone is hot to touch. It will disappear when the surface has cooled down to a safe temperature. -
Page 17: Overheating Protection
Overheating protection The appliance is equipped with a temperature sensor which can monitor the temperature inside the induction hob. When an excessive temperature is monitored, the induction hob will stop operation automatically. Detection of small articles When an unsuitably sized or non-magnetic pan (e.g. aluminium), or some other small item (e.g. -
Page 18: Using The Timer
Using the timer • You can set it to turn one cooking zone off after the set time is up. • You can set the timer up to 99 minutes. Setting the timer to turn off one cooking zone 1. Touch the heating zone selection control that you want to set the timer for. -
Page 19: Using The Bridge Zone
Using the bridge zone (maximum power 3000W) To turn on the bridging zone: 1. Touch the bridge selection key to turn this zone on. The indicator to the right of the bridge zone selection key will be illuminated. The heat setting levels for the cooking zones within the bridge will default to “0”... -
Page 20: Heat Settings
Heat settings The settings below are guidelines only. The exact setting will depend on several factors, including your cookware and the amount you are cooking. Experiment with the induction hob to find the settings that best suit you. Heat setting Suitability •... - Page 21 When the power to the hob is switched off, there will be no hot surface indication but the cooking zones may still be hot! Take extreme care. Heavy-duty or some nylon scourers and harsh/abrasive cleaning agents may scratch the glass surface, so please do check that they are suitable for induction hob care before use.
-
Page 22: Installation Information
Installation information Accessory list Downdraft 1. ST4*10 screws 3. Connecting tube 4. Straight tube 5. Adaptor 2. Aluminium tape 6. Inlet grille 7. Grease filter 8. Extraction box 9. Water retainer 10. Motor 11. Adaptor Induction Hob 12. Induction hob 13. - Page 23 Overall installation size MAX 872 Induction hob installation Cut out the work surface according to the sizes shown in the drawing. For the purpose of installation and use, a minimum of 5cm space should be preserved around the hole. Ensure the thickness of the work surface is at least 35mm.
- Page 24 Note: There must be a 560x5mm opening in >2cm the front (position E) to dissipate the air. A (mm) Air intake Air exit >5mm >35mm <50mm After installation, ensure the airflow opening is not blocked by the worktop. Before you install the hob, make sure that: •...
- Page 25 • The isolating switch must be of an approved type and provide a 3mm air gap contact separation in all poles (or in all active [phase] conductors if the local wiring rules allow for this variation of the requirements). • The isolating switch will be easily accessible after installation.
- Page 26 Caution! • The induction hob must be installed by qualified personnel or technicians. • The hob must not be installed directly above a dishwasher, fridge, freezer, washing machine or a dryer as the humidity may damage the hob electronics. • The induction hob must be installed in a way that better heat radiation can be ensured to enhance its reliability.
- Page 27 Installation of the adaptor and ducting channel Align the four claws of the extraction box with the long holes of the adaptor. Lift the extraction box upwards to lock the claws in position and secure the box to the adaptor with a ST4 * 10 screw.
- Page 28 Ducting tube installation Aluminum Foil Tape Adaptors and straight duct installation Match the adaptors and straight pipe to the round holes of the airbox and secure them using aluminum foil tape. The height of the straight pipe is cut and adjusted according to the height of the cabinet.
-
Page 29: Hob Installation
Hob installation Aluminum Foil Tape Fig.12... - Page 30 Electrical wiring instructions • Plug the extractor power supply into the corresponding junction box socket and tighten. • Connect the power supply of the extractor. • Connect the fan system signal line to the extractor switch on the underside of the induction hob. •...
- Page 31 Cleaning the extractor grate Grease filter and inlet grille installation Position the charcoal filter as well as the grease filter on the brackets inside the extraction box and then cover the opening with the inlet grille. To ensure the best performance from your extractor, the charcoal filter should be replaced every 3-6 months, dependent on use.
-
Page 32: Finish Installation
Water retainer installation Insert the water retainer horizontally from the right hand side, ensure it’s aligned with the extraction box and it is stable. The water retainer needs to be checked and emptied regularly. Finish installation The method of connection is shown below, replace the cabinet drawer(s) or door(s). -
Page 33: Mains Electricity Connection
Mains electricity connection Warning! This appliance must be earthed. The appliance must be connected by qualified electrician, who is a member of the N.I.C.E.I.C. and who will comply with the I.E.T. and local regulations. When installing this product we recommend you seek the help of another individual. - Page 34 Caution! Voltage of heating elements 220-240V Recommended Caution! In the event type of connection N1 N2 of any connection the safety wire lead must be connected to the terminal. For 220-240V earthed one-phase connection, bridges connect L1-L2 N1 N2 H07RN-F3G4mm² terminals and N1-N2 terminals, safety wire to •...
-
Page 35: Troubleshooting
Troubleshooting Induction hob troubleshooting If an abnormality comes up, the induction hob will automatically enter the protective state and display corresponding protective codes Problem Possible causes Possible remedy Check that power supply is turned on at the socket. If there is a neon light on the socket, check that this is illuminated. -
Page 36: Induction Hob Troubleshooting
IGBT PCB sensor, a service is required. IGBT thermistor open circuit In the event of a fault with the hob please advise CDA Customer Care. Contact CDA Customer Care A: Customer Care Department, The CDA Group Ltd, Harby Road,... - Page 37 Troubleshooting Extractor troubleshooting Problem Possible causes Possible remedy There is a power outage. Check power supply. The hood does not work Wire connectors are faulty or have Check orientation and security of disconnected. connectors. Setting is insufficient for fumes present. Try a more powerful speed setting.
- Page 38 Check whether there is a power outage in your home or local area. If you’ve checked everything and the problem persists, call a qualified technician. 2. The touch controls are unresponsive. The controls are locked: Unlock the controls. See section “Using Your Induction Hob”...
- Page 39 you’ve turned the induction hob off: This is normal and needs no action. Do not switch the power to the induction hob off at the wall while the fan is running. 8. Pans do not become hot and “ ” appears in the display. The induction hob cannot detect the pan because it is not suitable for induction cooking.
-
Page 40: Technical Data
(mm) front left rear left rear right right (180mm) (180mm) (180mm) (180mm) AC 220- HNE81FR 240V 1500W 2000W 2000W 1500W 800x520x62 780x500 50Hz The Manufacturer hereby declares that this product complies with the general requirements pursuant to the following European Directives and analogus UK requirements: •... - Page 41 01949 862 012 or email customer.care@cda. co.uk For more information please contact: The Sales Department on 01949 862 010 or email sales@cda.co.uk Customer Care Department. The CDA Group Ltd, Harby Road, Langar, Nottinghamshire, NG13 9HY 01949 862 012 01949 862 003 customer.care@cda.co.uk...
Need help?
Do you have a question about the HNE81FR and is the answer not in the manual?
Questions and answers