
Related Manuals for CDA HN6860FR


Summary of Contents for CDA HN6860FR
- Page 1 HN6860FR HoodConnect induction hob Installation, use and maintenance www.cda.co.uk www.cda.co.uk...
-
Page 2: Table Of Contents
Contents: Important information Important safety warnings/notes Important notes for safety, use and care Pacemaker and active implants information Cooking on induction Important safety warnings Saving energy Using your hob(s) Hob layout Selecting suitable cookware (pan compatibility) Child lock Residual heat indicators 20 Booster function 22 Maximum operating time 22 Timer... - Page 3 Appliance information: Please enter the details on the appliance rating plate below for reference, to assist CDA Customer Care in the event of a fault with your appliance and to register your appliance for guarantee purposes. Appliance Model...
-
Page 4: Important Information
Electromagnetic compatibility Directive, 2014/30/EU ErP Directive, 2009/125/EC RoHS Directive, 2011/65/EU and has been marked with the following symbols IMPORTANT INFORMATION FOR CORRECT DISPOSAL OF THE PRODUCT IN ACCORDANCE WITH EC DIRECTIVE 2012/19/EU. At the end of its working life, the product must be taken to a special local authority waste collection centre or to a dealer providing appliance recycling services. - Page 5 Warning: Unattended cooking on a hob with fat or oil can be dangerous and may result in fire. NEVER try to extinguish a fire with water, but switch off the appliance and then cover flame e.g. with a lid or a fire blanket. Warning: Danger of fire: do not store items on the cooking surfaces.
- Page 6 (2004/108/CE directives). To avoid interference between your hob and a pacemaker, your pacemaker must be designed and programmed in compliance with the regulations that apply to it. As such, CDA guarantee only that our product is compliant.
-
Page 7: Cooking On Induction
With regard to the compliance of the pacemaker or any potential incompatibility, you should obtain information from the manufacturer or your attending physician. Cooking on Induction The principle of induction cooking is based on magnetic effect. When you put your cookware on an induction zone and switch it on, the electronic boards in the hob produce induced currents in the base of the cookware and instantly raise its temperature. -
Page 8: Saving Energy
Important • Do not use the hob if the glass surface is cracked or damaged to prevent the risk of electric shock. Disconnect it from the power supply. • Ensure that the power cable of a connected electrical appliance near the hob is not in contact with the cooking zones. Saving energy Using energy in a responsible way not only saves money but also helps the environment. -
Page 9: Using Your Hob(S)
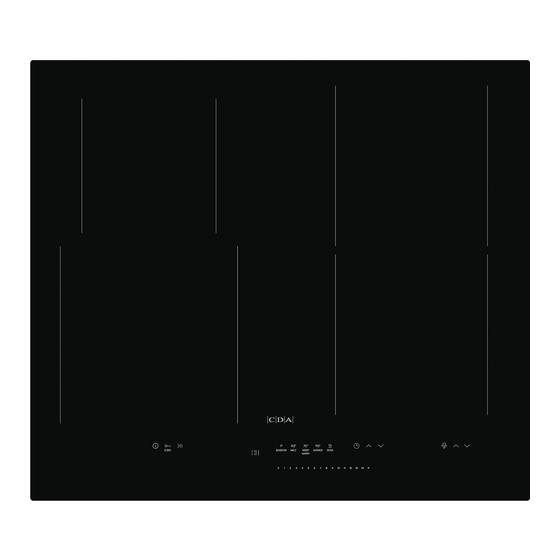
Using your hob Zones: 1. Front left Power Booster induction cooking zone 2. Back left Booster induction cooking zone 3. Back right Booster induction cooking zone 4. Front right Booster induction cooking zone Control Panel 10 11 14 15 16 1. - Page 10 Operation Before using the appliance for the first time • Thoroughly clean your induction hob first. The induction hob should be treated with the same care as a glass surface. • Switch on the ventilation in the room or open a window, as the appliance could emit an unpleasant smell during first use.
- Page 11 • High-frequency whizz. This noise arises in cookware made of multiple layers of different materials at maximum heat setting. The noise intensifies when using two or more cooking zones at maximum heat setting. The noise will stop or reduce when heat setting is reduced.
- Page 12 The twin display will show the previous setting or — if there was no previous setting — the default setting of 7.4kW shown as “74”. to select the desired setting: Within 10 seconds of selecting the desired setting, touch and hold for 3 seconds to confirm.
- Page 13 Hob Protection If the hob has been installed correctly and is used properly, any protec- tive devices are rarely required. Fan: Protects and cools controls and power components. It can operate at two different speeds and is activated automatically. Fan runs until the electronic system has sufficiently cooled down regardless of the appli- ance or the cooking zones being turned on or off.
- Page 14 Switch off the cooking zone using the touch control sensor field rather- than by removing the pan. Pan detector does not operate as the on/off sensor. The induction hob is equipped with electronic touch control sensor fields, which are operated by touching the marked area with a finger. Each time a sensor field is touched, an acoustic signal can be heard.
- Page 15 soiling the surface of the hob. Pan lids prevent heat from escaping and thus reduce heating time • and lowers energy consumption. To determine if cookware is suitable, make sure that its base attracts • a magnet. Cookware base has to be flat for optimal temperature control by the •...
- Page 16 Check for marking indicating that the cookware is suitable for induction cooking. Use magnetic cookware (enamelled steel, ferrite Marking of kitchen stainless steel, cast iron). The easiest way to deter- cookware mine if your cookware is suitable is to perform the “magnet test”.
- Page 17 Control panel Immediately after the appliance is connected to electrical mains, • all displays will light up briefly. Your appliance is then ready for use. The induction hob is equipped with electronic touch control • sensors, which are operated by touching with a finger for at least 1 second.
-
Page 18: Child Lock
If there are two or more pans on the hob when it is turned on, the hob will not activate the cooking zones automatically. You need to touch the sensor corresponding to your desired cooking zone. Use the heat setting touch sensors to set the heat setting •... -
Page 19: Residual Heat Indicators
Disconnecting the appliance from the mains electrical supply deactivates the Child Lock. Residual heat indicator “h”, “H” When you have finished cooking, the induction hob glass within the cooking zone is still hot, this is called residual heat. If the glass temperature is higher than 60°C*, display of the cooking zone shows “H”. -
Page 20: Booster Function
Deactivate cooking zones Deactivate a cooking zone by doing one of the following: Turn off the hob with the sensor. • Touch and hold the sensor for 3 seconds. • Activate the cooking zone - simultaneously touch and hold the heat •... - Page 21 Turn off the Booster function: Touch the Booster sensor or touch to reduce the heat setting. • The booster function can be activated for up to 5 minutes. Then the power will be reduced to level 14 (nominal power). The power will also be reduced to the nominal power if any hob components overheat.
-
Page 22: Maximum Operating Time
Maximum operating times Cooking heat Maximum setting operating time In order to ensure the safety of users, the induction hob is fitted with an operating time limiter for each of the cooking zones. The maximum operating time is determined individually depending on the heat setting when cooking. - Page 23 Touch to add time and to reduce time. • To set the Time for the next cooking zone, follow the above steps by selecting a different cooking zone. Keep in mind that the Timer function can be set for each cooking zone. If more than one timer is set, the shortest duration is displayed.
-
Page 24: Minute Minder
Minute minder Use the Minute Minder to count down time. The Minute Minder does not affect the operation of cooking zones. To set the Minute Minder: Turn on the hob. • Touch and set the Minute Minder duration by touching to add •... - Page 25 the letter “H” or “h”, depending on cooking zone temperature (residual heat indicator). To deactivate the Stop’n’go function touch the sensor again. Cooking zone displays will show the heat setting that was previously set before activation of the Stop’n’go function. The Stop’n’go function pauses the Timer countdown •...
-
Page 26: Maintain Temperature
You can always enable and disable the Bridge function manually. To enable the Bridge function, touch the sensor (6). The rear cooking zone display will show “ “, while the front cooking zone display will show “00”. The desired heat setting is selected by sliding your finger across the heat setting selection sensor. - Page 27 Place the pot with the food on the cooking zone and activate the programme. This programme maintains a temperature of 90°C. Sear 200 • A programme intended for searing dishes that require high temperature. Place a pan or a dedicated grill tray on the cooking zone and activate the Sear programme.
- Page 28 Practical Everyday Tips Table of example hob settings. Time Function Dish Portion size [min] Brownie / chocolate Melt 40* Melt chocolate 300g fondant 1 piece Melt 40* Defrost Meat approx. 800g Proof yeast Melt 40* Yeast dough dough Parboil meats Simmer 70* Pork loin with spices and sausages...
-
Page 29: Fitting The Hob (Ventilation, Furniture Requirements Etc.)
Fitting the hob Unpacking the hob: Take care not to lose, drop or mishandle any parts. Fitting position of the hob: This appliance must be, when installed, a minimum of 50mm from any back wall and a minimum of 180mm away from any adjacent vertical surfaces, e.g. -
Page 30: Installation
Installation Making the worktop aperture • The worktop must be flat and level. Edge of the worktop near the wall must be sealed to prevent ingress of water or other liquids. • There should be sufficient spacing around the opening, in particular, at least 50 mm distance to the wall. - Page 31 Do not install the hob above an oven without ventilation. If fitting a cooker hood above the hob: If a cooker hood is to be installed above the hob, the height of the hood above the hob must be at least 600mm (650mm is recommended) (Fig.6).
- Page 32 Wall furniture requirements: The minimum height of any cabinet immediately above the hob is 900mm. The minimum height of any adjacent units (including light pelmets) is 400mm, unless they are manufactured from a material resistant to fire (steel, for example). Important notes: Do not position this appliance above a refrigeration unit.
-
Page 33: Mains Electrical Connection
Mains electrical connection Warning! This appliance must be earthed. The appliance must be connected by a qualified electrician, who is a member of the N.I.C.E.I.C. and who will comply with the I.E.T. and local regulations. This appliance is intended to be connected to fixed wiring and is not 230V 1N~ 50Hz suitable for connection to a 13A plug... - Page 34 Assembly and electrical connection should be carried out by • specialised personnel. When installing this product, we recommend you seek the help of • another individual. Should the mains cable be damaged or need to be replaced, it • should only be done so by a qualified electrician or engineer. The connections to the hob are shown below;...
-
Page 35: Troubleshooting
Troubleshooting In the event of any fault: • Turn off the appliance • Disconnect the power supply • Have the appliance repaired • Based on the instructions given in the table below, some minor issues can be corrected by the user. Please check the consecutive points in the table before you refer the repair to customer service. - Page 36 Problem Possible Cause Remedy Residual heat indicator Residual heat indicator will A power outage or the extinguished even be shown again the next appliance has been discon- though the cooking time the appliance is turned nected zones are hot on and off again Danger! Immediately unplug the appliance or switch Hob cooking surface is off the main circuit breaker.
- Page 37 Troubleshooting If your hob does not appear to be working well: Check with your installer, if you are at all unsure, as to what power level the hob is configured to. Any power setting lower than 7.4kW will implement the power management feature whereby the hob limits zones used and/or powers zones in bursts to try and ensure even peformance between all active zones.
- Page 38 Specification Rated voltage: 220-240V / 380-415 V ~50/60 Hz 2N Rated power: Type: PB*4VI542FTB4SACUUt HN6860FR Induction cooking zone power: 7.35kW - induction cooking zone: Ø 160mm 1400W - induction cooking zone: Ø 180mm 1600W - induction cooking zone: Ø 210mm 2000W - booster induction cooking zone: Ø...
- Page 39 Household electric hobs HN6860FR PBP4VI542FThB4SACUUt Model identifier 21692 V / O / O Hob type (electric / gas / gas-electric) Number of cooking zones Heating technique (induction cooking zones or heat- V / O / O ing areas, radiant heating zones, solid hobs) Ø...
-
Page 40: Care And Maintenance
Always use a soft sponge or cloth where possible. Utensils such as scouring sponges and some brushes could cause scratches to the hob top. Contacting CDA Customer Care A: Customer Care Department, The CDA Group Ltd, Harby Road, Langar, Nottinghamshire, NG13 9HY T: 01949 862 012 F: 01949 862 003 E: customer.care@cda.co.uk... -
Page 41: Cleaning Advice
Cleaning advice Type of residue Clean with Cleaning advice Wipe over the zone to be cleaned with Cleaning sponge Light a sponge and hot water, and then wipe and soft cloth off with a soft dry cloth. Wipe over the zone to be cleaned Accumulated baked- Cleaning sponge with a sponge and hot water, using a... - Page 44 For more information please contact: 01949 862 010 sales@cda.co.uk The Sales Department on or email Customer Care Department. The CDA Group Ltd, Harby Road, Langar, Nottinghamshire, NG13 9HY 01949 862 012 F: 01949 862 003 E: customer.care@cda.co.uk IO-HOB-1963 v2 / 8517170 www.cda.co.uk...
Need help?
Do you have a question about the HN6860FR and is the answer not in the manual?
Questions and answers