Table of Contents
Advertisement
Quick Links
Advertisement
Table of Contents

Related Manuals for Planet VR-100 Series


Summary of Contents for Planet VR-100 Series
- Page 1 5-Port VPN Security Router VR-100 & VR-300 Series Quick Installation Guide...
-
Page 2: Table Of Contents
Table of Contents 1. Package Contents ..................3 2. Hardware Installation ..................5 2.1 Wireless Antennas Installation ..............5 2.2 SIM Card Installation ................6 2.3 5G NR Antenna Installation ..............7 3. Setup of The VPN Router ................8 3.1 Requirements ..................8 3.2 Logging in to the VPN Router .............. -
Page 3: Package Contents
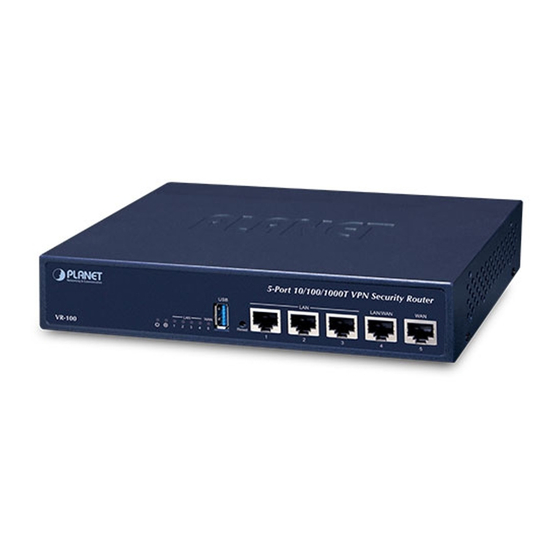
1. Package Contents Thank you for purchasing PLANET VPN Router, VR-100 or VR-300 Series. The descriptions of these models are as follows: VR-100 5-Port 10/100/1000T VPN Security Router VR-300 Enterprise 5-Port 10/100/1000T VPN Security Router Enterprise 4-Port 10/100/1000T 802.3at PoE + 1-Port... - Page 4 Open the box of the VPN Router and carefully unpack it. The box should contain the following items for each of the above models: z VPN Router x 1 z Quick Installation Guide (QR code) x 1 z Power Cord x 1 z Rubber Feet x 4 z Rack-mounting Kit x 1 z SFP Dust Cap x 1 (VR-300F/VR-300FP/VR-300FW-NR)
-
Page 5: Hardware Installation
2. Hardware Installation Refer to the illustration and follow the simple steps below to quickly install your VPN router. 2.1 Wireless Antennas Installation Step 1: For wireless models, fasten the 2.4G/5G antennas to the 2.4G/5G antenna connectors. And you can bend the antennas to fit your actual needs. VR-300W/VR-300PW Series Rear View: POWER 100-240V , 1A max. -
Page 6: Sim Card Installation
Step 4: Connect your VPN Router to hub/switch. A. Connect one end of a standard network cable to the LAN port (port 1) on the front panel of the VPN router. B. Connect the other end of the cable to the hub/switch. The UTP Category 5e/6 network cabling with RJ45 tips is recommended. -
Page 7: Nr Antenna Installation
B. Pull out the tray gently from the tray slot. Place the SIM card on the tray with the gold-colored contacts facing upwards. C. Insert the tray back into the tray slot. z A mini SIM card with 5G NR and 4G LTE subscription 2.3 5G NR Antenna Installation For VR-300FW-NR only Step 1: Connect 5G NR antennas to the 5G NR antenna extender. -
Page 8: Setup Of The Vpn Router
3. Setup of The VPN Router 3.1 Requirements Please confirm the following items before configuration: 1. Test your network connection by connecting your computer directly to ISP. 2. Suggested operating systems: Windows 7/8/11. 3. Recommended web browsers: Edge/Firefox/Chrome. 3.2 Logging in to the VPN Router Then refer to the steps to configure the VPN Router: Step 1: Connect the IT administrator’s PC and VPN router’s LAN port (port 1) to the same hub/switch, and then launch a browser to link the management interface address which is set to https://192.168.1.1 by default. - Page 9 Step 2: The browser prompts you for the login credentials. (Both are “admin” by default.) The following password is based on firmware versions before v1.2102b240829. Default IP address: 192.168.1.1 Default user name: admin Default password: admin Default DHCP Server: ON <Wireless Router>...
- Page 10 (1) This device may not cause harmful interference and (2) This device must accept any interference received, including interference that may cause undesired operation. PLANET Technology Corp. Made in Taiwan Figure 3-3: VPN Router MAC ID Label Figure 3-4: Login Screen...
- Page 11 The following web screen based on the VR-100 is the same as the VR-Series. After logging in, you will be prompted to change the initial password to a permanent one. Figure 3-5: Create a New Password Enter the default username and password, then set a new password according to the rule-based prompt and confirm it. Upon success, press any key to return to the login prompt.
- Page 12 Step 3: After entering the password, the main screen appears as shown in Figure 3-3. Figure 3-6: Web-based Main Screen of Cellular Gateway Now, you can use the Web management interface to continue the VPN Router management. Please refer to the user’s manual for more. Administrators are strongly suggested to change the default password and Wi-Fi SSID on the first login to safeguard system security.
-
Page 13: Recovering Back To Default Configuration
4. Recovering Back to Default Configuration IP address has been changed or admin password has been forgotten To reset the IP address to the default IP address “192.168.1.1” or reset the login password to default value, press the hardware-based reset button on the front panel for about 10 seconds. After the device is rebooted, you can log in the management Web interface within the same subnet of 192.168.1.xx. -
Page 14: Appendix
Default Login Password admin Default DHCP Server Default LAN Port Ethernet Ports 1~4 Default WAN Port Ethernet Port 5 Default SSID (2.4G) PLANET 2.4G Default SSID (5G) PLANET_5G Appendix B: User’s Manual VR-100 VR-300 VR-300P VR-300W5 VR-300PW5 User’s Manual... -
Page 15: Further Information
Thank you for purchasing PLANET VPN Router. The above steps introduce the simple configuration of the VPN Router. If you have other questions, please contact the local dealer where you purchased this product or you can contact PLANET directly at the following email address: support@planet.com.tw.
Need help?
Do you have a question about the VR-100 Series and is the answer not in the manual?
Questions and answers