Table of Contents
Advertisement
Quick Links
Advertisement
Table of Contents

Subscribe to Our Youtube Channel
Related Manuals for Phytec i.MX 8M Plus BSP


Summary of Contents for Phytec i.MX 8M Plus BSP
- Page 1 8M Plus BSP Manual PD24.1.1 PHYTEC Messtechnik GmbH Nov 06, 2024...
-
Page 3: Table Of Contents
..........PHYTEC i.MX 8M Plus BSP Device Tree Concept . - Page 4 I²C Bus ..........7.10 EEPROM .
- Page 5 The code examples lines begin with “host:~$”, “target:~$” or “u-boot=>”. This describes where the commands are to be executed. Only after these keywords must the actual command be copied. PHYTEC provides a variety of hardware and software documentation for all of our products. This includes any or all of the following: •...
- Page 6 8M Plus BSP Manual PD24.1.1 Documentation Rev.: imx9-pd24.2.0 On top of these standard manuals and guides, PHYTEC will also provide Product Change Notifications, Application Notes, and Technical Notes. These will be done on a case-by-case basis. Most of the documen- tation can be found on the https://www.phytec.de/produkte/system-on-modules/phycore-imx-8m-plus/...
-
Page 7: Supported Hardware
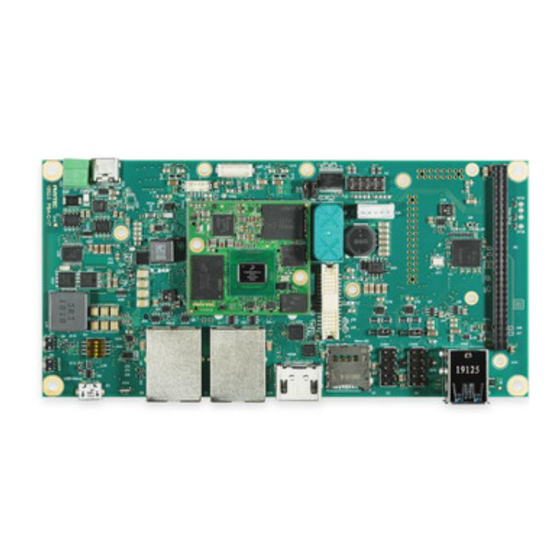
CHAPTER SUPPORTED HARDWARE On our web page, you can see all supported Machines with the available Article Numbers for this release: BSP-Yocto-Ampliphy-i.MX8MP-PD24.1.1 download. If you choose a specific Machine Name in the section Supported Machines, you can see which Article Numbers are available under this machine and also a short description of the hardware information. - Page 8 8M Plus BSP Manual PD24.1.1 Documentation Rev.: imx9-pd24.2.0 Fig. 2: phyBOARD-Pollux Components (bottom) Supported Hardware...
-
Page 9: Getting Started
CHAPTER GETTING STARTED The phyCORE-i.MX8M Plus Kit is shipped with a pre-flashed SD card. It contains the phytec-qt6demo- image and can be used directly as a boot source. The eMMC is programmed with only a U-Boot by default. You can get all sources from the PHYTEC download server. - Page 10 8M Plus BSP Manual PD24.1.1 Documentation Rev.: imx9-pd24.2.0 Selecting the wrong device may result in data loss and e.g. could erase your currently running system on your host PC! 2.2.1 Finding the Correct Device To create your bootable SD card, you must first find the correct device name of your SD card and possible partitions.
- Page 11 2.2.4 Using After having unmounted all SD card’s partitions, you can create your bootable SD card. Some PHYTEC BSPs produce uncompressed images (with filename-extension *.wic), and some others pro- duce compressed images (with filename-extension *.wic.xz). To flash an uncompressed images (*.wic) use command below: host:~$ sudo dd if=phytec-qt6demo-image-phyboard-pollux-imx8mp-3.rootfs.wic of=/dev/<your_device>...
-
Page 12: First Start-Up
8M Plus BSP Manual PD24.1.1 Documentation Rev.: imx9-pd24.2.0 2.3 First Start-up • To boot from an SD card, the bootmode switch (S3) needs to be set to the following position: • Insert the SD card • Connect the target and the host with mirco USB on... -
Page 13: Building The Bsp
Yocto Reference Manual (scarthgap). 3.1 Basic Set-Up If you have never created a Phytec BSP with Yocto on your computer, you should take a closer look at the chapter BSP Workspace Installation in the Yocto Reference Manual (scarthgap). 3.2 Get the BSP There are two ways to get the BSP sources. - Page 14 • Build your image: host:~/yocto/build$ bitbake phytec-qt6demo-image Note For the first build we suggest starting with our smaller non-graphical image phytec-headless-image to see if everything is working correctly. host:~/yocto/build$ bitbake phytec-headless-image The first compile process takes about 40 minutes on a modern Intel Core i7. All subsequent builds will use the filled caches and should take about 3 minutes.
- Page 15 8M Plus BSP Manual PD24.1.1 Documentation Rev.: imx9-pd24.2.0 3.2.2 BSP Images All images generated by Bitbake are deployed to . The following ~/yocto/build/deploy*/images/<machine> list shows for example all files generated for the phyboard-pollux-imx8mp-3 machine: • u-boot.bin: Binary compiled U-boot bootloader (U-Boot). Not the final Bootloader image! •...
- Page 16 8M Plus BSP Manual PD24.1.1 Documentation Rev.: imx9-pd24.2.0 Building the BSP...
-
Page 17: Installing The Os
CHAPTER FOUR INSTALLING THE OS 4.1 Bootmode Switch (S3) Hardware revision baseboard: 1552.2 The phyBOARD-Pollux features a boot switch with four individually switchable ports to select the phyCORE-i.MX 8M Plus default bootsource. -
Page 18: Flash Emmc
8M Plus BSP Manual PD24.1.1 Documentation Rev.: imx9-pd24.2.0 Fig. 1: eMMC Fig. 2: Internal Fuses Fig. 3: SPI NOR Fig. 4: USB Serial Download Fig. 5: SD Card Fig. 6: Test Mode 4.2 Flash eMMC To boot from eMMC, make sure that the BSP image is flashed correctly to the eMMC and the... - Page 19 8M Plus BSP Manual PD24.1.1 Documentation Rev.: imx9-pd24.2.0 4.2.1 Flash eMMC from Network i.MX 8M Plus boards have an Ethernet connector and can be updated over a network. Be sure to set up the development host correctly. The IP needs to be set to 192.168.3.10, the netmask to 255.255.255.0, and a TFTP server needs to be available.
- Page 20 8M Plus BSP Manual PD24.1.1 Documentation Rev.: imx9-pd24.2.0 A working network is necessary! Setup Network Host Take a compressed or uncompressed image on the host and send it with ssh through the network (then uncompress it, if necessary) to the eMMC of the target with a one-line command: target:~$ ssh <USER>@192.168.3.10...
- Page 21 Flash eMMC from USB in Linux These steps will show how to flash the eMMC on Linux with a USB stick. You only need a complete image saved on the USB stick and a bootable WIC image. (e.g. phytec-qt6demo-image-phyboard-pollux-imx8mp- 3.rootfs.wic). Set the bootmode switch (S3) to SD Card.
- Page 22 8M Plus BSP Manual PD24.1.1 Documentation Rev.: imx9-pd24.2.0 (continued from previous page) 61.528509] sd 0:0:0:0: [sda] No Caching mode page found 61.533889] sd 0:0:0:0: [sda] Assuming drive cache: write through 61.665969] sda: sda1 61.672284] sd 0:0:0:0: [sda] Attached SCSI removable disk...
- Page 23 #0, OK mmc2(part 0) is current device • Flash your WIC image (for example phytec-qt6demo-image.rootfs.wic) from the SD card to eMMC. This will partition the card and copy imx-boot, Image, dtb, dtbo, and root file system to eMMC.
-
Page 24: Rauc
The RAUC (Robust Auto-Update Controller) mechanism support has been added to meta-ampliphy. It controls the procedure of updating a device with new firmware. This includes updating the Linux kernel, Device Tree, and root filesystem. PHYTEC has written an online manual on how we have intergraded RAUC into our BSPs: L-1006e.A6 RAUC Update &... -
Page 25: Development
-R o+r /srv/tftp • You also need to configure a static IP address for the appropriate interface. The default IP address of the PHYTEC evaluation boards is 192.168.3.11. Setting a host address 192.168.3.10 with netmask 255.255.255.0 is a good choice. - Page 26 8M Plus BSP Manual PD24.1.1 Documentation Rev.: imx9-pd24.2.0 • Set TFTP_ADDRESS to the host address the server is listening to (set to 0.0.0.0:69 to listen to all local IPs) • Set TFTP_OPTIONS, the following command shows the available options:...
-
Page 27: Booting The Kernel From A Network
8M Plus BSP Manual PD24.1.1 Documentation Rev.: imx9-pd24.2.0 (continued from previous page) Warning Be careful when creating subnets as this may interfere with the company network policy. To be on the safe side, use a different network and specify that via the configuration option. -
Page 28: Working With Uuu-Tool
8M Plus BSP Manual PD24.1.1 Documentation Rev.: imx9-pd24.2.0 5.2.2 Booting from an Embedded Board Boot the board into the U-boot prompt and press any key to hold. • To boot from a network, call: u-boot=> run netboot 5.3 Working with UUU-Tool The Universal Update Utility Tool (UUU-Tool) from NXP is a software to execute on the host to load and run the bootloader on the board through SDP (Serial Download Protocol). -
Page 29: Standalone Build Preparation
8M Plus BSP Manual PD24.1.1 Documentation Rev.: imx9-pd24.2.0 you want to change the boot command permanently for UUU-boot, you need to change this in U-Boot code. 5.3.5 Flashing U-boot Image to eMMC via UUU-Tool Warning flashes U-boot into eMMC... - Page 30 Documentation Rev.: imx9-pd24.2.0 5.4.1 Git Repositories • Used U-Boot repository: https://github.com/phytec/u-boot-phytec.git • Our U-Boot is based on the u-boot-phytec and adds board-specific patches. • Used Linux kernel repository: https://github.com/phytec/linux-phytec.git • Our i.MX 8M Plus kernel is based on the linux-phytec kernel.
-
Page 31: U-Boot Standalone Build
→ 5.5.2 Get the needed binaries To build the bootloader, you need to copy these files to your u-boot-phytec build directory and rename them to fit with mkimage script: • ARM Trusted firmware binary (mkimage tool compatible format bl31.bin): bl31-imx8mp.bin •... -
Page 32: Kernel Standalone Build
8M Plus BSP Manual PD24.1.1 Documentation Rev.: imx9-pd24.2.0 5.5.4 Flash the bootloader to a block device The flash.bin can be found at u-boot-phytec/ directory and now can be flashed. A chip-specific offset is needed: Offset User Area Offset Boot Partition eMMC Device i.MX 8M Plus... -
Page 33: Accessing The Development States
8M Plus BSP Manual PD24.1.1 Documentation Rev.: imx9-pd24.2.0 • The dtb can be found at ~/linux-phytec/arch/arm64/boot/dts/freescale/imx8mp-phyboard-pollux- rdk.dtb • For (re-)building only Devicetrees and -overlays, it is sufficient to run host:~/linux-phytec$ make dtbs Note If you are facing the following build issue: scripts/dtc/yamltree.c:9:10: fatal error: yaml.h: No such file or directory... -
Page 34: Accessing The Latest Upstream Support
8M Plus BSP Manual PD24.1.1 Documentation Rev.: imx9-pd24.2.0 5.8 Accessing the Latest Upstream Support We have a vanilla manifest that makes use of the Yocto master branches (not an NXP release), Linux, and U-Boot. This can be used to test the latest upstream kernel/U-Boot. - Page 35 8M Plus BSP Manual PD24.1.1 Documentation Rev.: imx9-pd24.2.0 Expand rootfs Warning Running gparted on host systems which are using resize2fs version 1.46.6 and older (e.g. Ubuntu 22.04) are not able to expand the ext4 partition created with Yocto Mickledore and newer. This is due to a new default option in resize2fs which causes a incompatibility.
- Page 36 8M Plus BSP Manual PD24.1.1 Documentation Rev.: imx9-pd24.2.0 • Drag the slider as far as you like or enter the size manually. Development...
- Page 37 8M Plus BSP Manual PD24.1.1 Documentation Rev.: imx9-pd24.2.0 • Confirm your entry by clicking on the “Change size” button. • To apply your changes, press the green tick. Development...
- Page 38 8M Plus BSP Manual PD24.1.1 Documentation Rev.: imx9-pd24.2.0 • Now you can mount the root partition and copy e.g. the phytec-qt6demo-image-phyboard-pollux- imx8mp-3.rootfs.wic image to it. Then unmount it again: host:~$ sudo cp phytec-qt6demo-image-phyboard-pollux-imx8mp-3.rootfs.wic /mnt/ ; sync host:~$ umount /mnt Create the Third Partition •...
- Page 39 8M Plus BSP Manual PD24.1.1 Documentation Rev.: imx9-pd24.2.0 • Click “Add” • Confirm your changes by pressing the green tick. Development...
- Page 40 8M Plus BSP Manual PD24.1.1 Documentation Rev.: imx9-pd24.2.0 • Now you can mount the new partition and copy e.g. phytec-qt6demo-image-phyboard-pollux-imx8mp- 3.rootfs.wic image to it. Then unmount it again: host:~$ sudo mount /dev/sde3 /mnt host:~$ sudo cp phytec-qt6demo-image-phyboard-pollux-imx8mp-3.rootfs.wic /mnt/ ; sync...
-
Page 41: Device Tree (Dt)
6.2 PHYTEC i.MX 8M Plus BSP Device Tree Concept The following sections explain some rules PHYTEC has defined on how to set up device trees for our i.MX 8M Plus SoC-based boards. - Page 42 8M Plus BSP Manual PD24.1.1 Documentation Rev.: imx9-pd24.2.0 Device Tree (DT)
-
Page 43: Accessing Peripherals
Please read section PHYTEC i.MX 8M Plus BSP Device Tree Concept to get an understanding of our i.MX 8 BSP device tree model. The following sections provide an overview of the supported hardware components and their operating system drivers on the i.MX 8 platform. -
Page 44: Rs232/Rs485
8M Plus BSP Manual PD24.1.1 Documentation Rev.: imx9-pd24.2.0 The first part of the string MX8MP_IOMUXC_UART1_RXD_UART1_DCE_RX names the pad (in this example UART1_RXD). The second part of the string (UART1_DCE_RX) is the desired muxing option for this pad. The pad setting value (hex value on the right) defines different modes of the pad, for example, if internal pull resistors are activated or not. -
Page 45: Network
8M Plus BSP Manual PD24.1.1 Documentation Rev.: imx9-pd24.2.0 You can show the current config with: target:~$ rs485conf /dev/ttymxc1 You can show all options with: target:~$ rs485conf /dev/ttymxc1 -h Documentation for calling the IOCTL within c-code is described in the Linux kernel documentation: https: //www.kernel.org/doc/Documentation/serial/serial-rs485.txt... -
Page 46: Sd/Mmc Card
8M Plus BSP Manual PD24.1.1 Documentation Rev.: imx9-pd24.2.0 • Set up path for NFS. A modification could look like this: u-boot=> setenv nfsroot /home/user/nfssrc Please note that these modifications will only affect the bootloader settings. Kernel network-environment • Find the ethernet settings for eth0 in the target kernel:... -
Page 47: Emmc Devices
Documentation Rev.: imx9-pd24.2.0 7.5 eMMC Devices PHYTEC modules like phyCORE-i.MX 8M Plus is populated with an eMMC memory chip as the main storage. eMMC devices contain raw Multi-Level Cells (MLC) or Triple-Level Cells (TLC) combined with a memory controller that handles ECC and wear leveling. They are connected via an SD/MMC interface to the i.MX 8M Plus and are represented as block devices in the Linux kernel like SD cards, flash drives, or... - Page 48 8M Plus BSP Manual PD24.1.1 Documentation Rev.: imx9-pd24.2.0 The JEDEC standard v5.1 introduces a new automatic BKOPS feature. It frees the host to trigger the background operations regularly because the device starts BKOPS itself when it is idle (see the description of bit AUTO_EN in register BKOPS_EN (Reg: 163)).
- Page 49 8M Plus BSP Manual PD24.1.1 Documentation Rev.: imx9-pd24.2.0 The first Reliable Write option is mostly already enabled on the eMMCs mounted on the phyCORE-i.MX 8M Plus SoMs. To check this on the running target: target:~$ mmc extcsd read /dev/mmcblk2 | grep -A...
- Page 50 8M Plus BSP Manual PD24.1.1 Documentation Rev.: imx9-pd24.2.0 (continued from previous page) Sect[ 1799.850385] mmcblk2: p1 p2 or size (logical/physical): 512B/512B Partition Table: msdos Disk Flags: Number Start Size Type File system Flags 4194kB 72.4MB 68.2MB primary fat16 boot, lba 72.4MB...
- Page 51 8M Plus BSP Manual PD24.1.1 Documentation Rev.: imx9-pd24.2.0 Warning When enabling the enhanced attribute on the device, all data will be lost. The following sequence shows how to enable the enhanced attribute. • First obtain the current size of the eMMC device with:...
- Page 52 Do not confuse eMMC partitions with partitions of a DOS, MBR, or GPT partition table. The current PHYTEC BSP does not use the extra partitioning feature of eMMC devices. The U-Boot is flashed at the beginning of the user partition. The U-Boot environment is placed at a fixed location after the U-Boot.
- Page 53 8M Plus BSP Manual PD24.1.1 Documentation Rev.: imx9-pd24.2.0 They are located right after the U-Boot and the U-Boot environment. The FAT32 boot partition contains the kernel and device tree. With eMMC flash storage it is possible to use the dedicated boot partitions for redundantly storing the bootloader.
- Page 54 8M Plus BSP Manual PD24.1.1 Documentation Rev.: imx9-pd24.2.0 7.5.9 Resizing ext4 Root Filesystem fdisk can be used to expand the root filesystem. The example works for any block device such as eMMC, SD Card, or hard disk. • Get the current device size:...
-
Page 55: Spi Master
8M Plus BSP Manual PD24.1.1 Documentation Rev.: imx9-pd24.2.0 (continued from previous page) Win95 FAT32 (LBA) → Command (m for help): n Partition type primary partition (1-4) extended Partition number (1-4): 2 First sector (32-14876671, default 32): 141456 Last sector or +size{,K,M,G,T} (141456-14876671, default 14876671):... - Page 56 8M Plus BSP Manual PD24.1.1 Documentation Rev.: imx9-pd24.2.0 Linux GPIO number: <N> = (<X> - 1) * 32 + <Y> Accessing GPIOs from userspace will be done using the libgpiod. It provides a library and tools for interacting with the Linux GPIO character device. Examples of some usages of various tools: •...
- Page 57 8M Plus BSP Manual PD24.1.1 Documentation Rev.: imx9-pd24.2.0 (continued from previous page) -p, --hold-period <period> the minimum time period to hold lines at the requested values -s, --strict abort if requested line names are not unique -t, --toggle <period>[,period]...
-
Page 58: Leds
7.9 I²C Bus The i.MX 8M Plus contains several Multimaster fast-mode I²C modules. PHYTEC boards provide plenty of different I²C devices connected to the I²C modules of the i.MX 8M Plus. This section describes the basic device usage and its DT representation of some I²C devices integrated into our phyBOARD-Pollux. - Page 59 The I2C EEPROM, populated on the phyCORE-i.MX8MP, has a separate ID page that is addressable over I2C address 0x59 on bus 0 and a normal area that is addressable over I2C address 0x51 on bus 0. PHYTEC uses this data area of 32 Bytes to store information about the SoM. This includes PCB revision and mounting options.
-
Page 60: Rtc
Documentation Rev.: imx9-pd24.2.0 7.11 RTC RTCs can be accessed via . Because PHYTEC boards have often more than one RTC, there might /dev/rtc* be more than one RTC device file. • To find the name of the RTC device, you can read its sysfs entry with:... - Page 61 8M Plus BSP Manual PD24.1.1 Documentation Rev.: imx9-pd24.2.0 (continued from previous page) target:~$ hwclock -s target:~$ date Wed Mar 2 10:45:01 UTC 2022 7.11.1 RTC Parameters RTCs have a few abilities which can be read/set with the help of tool.
-
Page 62: Usb Host Controller
8M Plus BSP Manual PD24.1.1 Documentation Rev.: imx9-pd24.2.0 7.12 USB Host Controller The USB controller of the i.MX 8M Plus SoC provides a low-cost connectivity solution for numerous consumer portable devices by providing a mechanism for data transfer between USB devices with a line/bus speed of up to 4 Gbit/s (SuperSpeed ‘SS’). -
Page 63: Video
8M Plus BSP Manual PD24.1.1 Documentation Rev.: imx9-pd24.2.0 can0 Interface Name NOARP CAN cannot use ARP protocol Maximum Transfer Unit RX packets Number of Received Packets TX packets Number of Transmitted Packets RX bytes Number of Received Bytes TX bytes Number of Transmitted Bytes errors…... -
Page 64: Display
8M Plus BSP Manual PD24.1.1 Documentation Rev.: imx9-pd24.2.0 target:~$ gst-launch-1.0 -v filesrc location=/usr/share/qtphy/videos/caminandes_3_llamigos_720p_ vp9.webm ! decodebin name=decoder decoder. ! videoconvert ! waylandsink fullscreen=true → • Or: target:~$ gst-play-1.0 /usr/share/qtphy/videos/caminandes_3_llamigos_720p_vp9.webm --videosink␣ waylandsink → Note The mainline BSP currently only supports software rendering. -
Page 65: Backlight Control
Documentation Rev.: imx9-pd24.2.0 7.15.3 Backlight Control If a display is connected to the PHYTEC board, you can control its backlight with the Linux kernel sysfs interface. All available backlight devices in the system can be found in the folder /sys/class/backlight. - Page 66 8M Plus BSP Manual PD24.1.1 Documentation Rev.: imx9-pd24.2.0 target:~$ cat /sys/devices/system/cpu/cpu0/cpufreq/scaling_available_frequencies In case you have, for example, i.MX 8MPlus CPU with a maximum of approximately 1,6 GHz, the result will be: 1200000 1600000 • To ask for the current frequency type:...
-
Page 67: Thermal Management
8M Plus BSP Manual PD24.1.1 Documentation Rev.: imx9-pd24.2.0 • This will show, for example: cpu0 cpu1 cpu2 cpu3 cpufreq [...] Here the system has four processor cores. By default, all available cores in the system are enabled to get maximum performance. -
Page 68: Watchdog
7.18 Watchdog The PHYTEC i.MX 8M Plus modules include a hardware watchdog that is able to reset the board when the system hangs. The watchdog is started on default in U-Boot with a timeout of 60s. So even during early kernel start, the watchdog is already up and running. -
Page 69: On-Chip Otp Controller (Ocotp_Ctrl) - Efuses
8M Plus BSP Manual PD24.1.1 Documentation Rev.: imx9-pd24.2.0 OFF without SW intervention are not configured. Triggering a power off with systemd when pushing the ON/OFF button can be configured under and set using: /etc/systemd/logind.conf HandlePowerKey=poweroff 7.20 On-Chip OTP Controller (OCOTP_CTRL) - eFuses The i.MX 8M Plus provides one-time programmable fuses to store information such as the MAC address,...
Need help?
Do you have a question about the i.MX 8M Plus BSP and is the answer not in the manual?
Questions and answers