Brink Flair 225 Enthalpy Installation Regulations
Hide thumbs
Also See for Flair 225 Enthalpy:
- Operation manual by user (12 pages) ,
- Installation regulations (64 pages) ,
- Installation regulations (60 pages)
Table of Contents
Advertisement
Quick Links
Advertisement
Table of Contents

Subscribe to Our Youtube Channel
Related Manuals for Brink Flair 225 Enthalpy


Summary of Contents for Brink Flair 225 Enthalpy
- Page 1 Installation regulations Flair 225 Enthalpy English...
-
Page 3: Installation Regulations
Children may not play with the appliance. If you need a new power cable, always order the replacement from Brink Climate Systems B.V. To prevent dangerous situations, a damaged mains connection must only... -
Page 4: Table Of Contents
19 Recycling and disposal ....72 9.3 Create Brink Home account ... . . 33 9.4 Add appliance in Brink Home Portal . -
Page 5: About This Document
Contractors trained and or authorized by Brink Climate Systems B.V. must also have the following qualifications: ▪ Product training for this appliance provided by Brink Climate Systems B.V. ▪ The user is defined as somebody who has been trained to use the Flair 225 Enthalpy by a specialist. Flair 225 Enthalpy 617567-A Brink / 5... -
Page 6: Warnings
Situations that may result in potential equipment or property damage accidents. The warnings are laid out as follows: Warning Possibilities : Danger / Warning / Caution / Note Type and source of risk. Explanation of risk 1. Action to prevent the risk Brink / 6 Flair 225 Enthalpy 617567-A... -
Page 7: Safety
▪ Only qualified electricians are permitted to work on electrical components. ▪ ▪ The appliance may only be serviced or repaired by the Brink Climate Systems B.V. customer service team or a ▪ specialist authorized by Brink Climate Systems B.V.. -
Page 8: General Safety Information
▪ Brink Climate Systems B.V. recommends concluding an inspection and maintenance contract with a ▪ contractor trained by Brink Climate Systems B.V.. ▪ The appliance may only be serviced or repaired by the Brink Climate Systems B.V. customer service team ▪ or a specialist authorised by Brink Climate Systems B.V.. -
Page 9: Scope Of Delivery
Before installation of the heat recovery appliance is started,check that it has been supplied in complete and undamaged condition. The delivery size of the heat recovery appliance type Flair 225 Enthalpy consists of the following components: 1. Heat recovery appliance 2. -
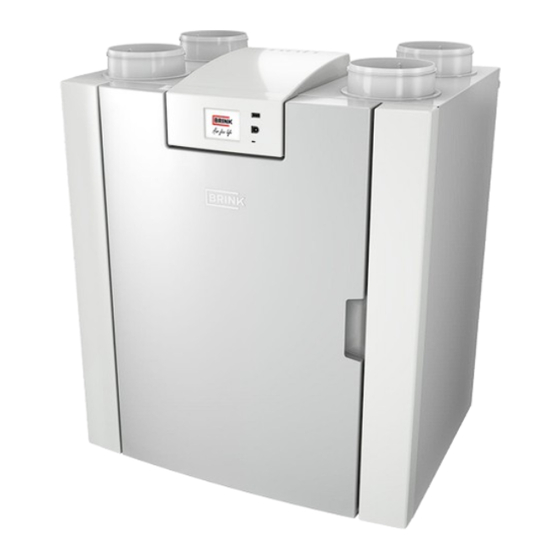
Page 10: General
4 General The Flair 225 Enthalpy is a ventilation unit with heat recovery for the balanced ventilation of dwellings. Features: ▪ Maximum capacity 225 m³/h ▪ ▪ High efficiency heat exchanger ▪ ▪ Filters ISO Coarse 60% ▪ ▪ Modular electric preheater ▪... -
Page 11: Technical Specifications
In practice the value may differ by 1dB(A) through measurement tolerances. Resistance of duct Note: system The stated value in the [Pa] circle is the capacity (in Watt) per fan. Flow rate [m Flair 225 Enthalpy 617567-A Brink / 11... -
Page 12: Connections And Dimensions
“warm” connections (1 & 3) are on the right-hand side of the appliance. Left-hand version All dimensions in millimeters. Diameter of all collars is 125 mm Supply air Exhaust air Extract Outdoor air Electrical connections Sealing cap Sealing cap Extract air filter Supply air filter Brink / 12 Flair 225 Enthalpy 617567-A... - Page 13 Right-hand version All dimensions in millimeters. Diameter of all collars is 125 mm Supply air Exhaust air Extract Outdoor air Electrical connections Sealing cap Sealing cap Extract air filter Supply air filter Flair 225 Enthalpy 617567-A Brink / 13...
-
Page 14: Appliance Parts
Relay output (X19) ) Temperature sensor 24 volt connector (X18) Supply filter eBus connector (X17) Exhaust fan 24 volt connector (X16) Sealing cap Modbus/ Internalbus connector (X15) Supply ventilator Multiple position switch connector (X14) Brink / 14 Flair 225 Enthalpy 617567-A... -
Page 15: Operation
There are several options for external control : ▪ 4-way switch ( ® Connecting multi-position switch with filter indication -> page 49 ), ▪ ▪ Brink Air Control ( ® Connecting Air Control -> page 54 ) ▪ ▪ Brink Touch Control ( →... -
Page 16: Frost Protection
When X14 is used by a multi-position switch, the ''fire automation'' function can be activated with the use of a Brink RJ12 splitter (article number 510472). Install the splitter between X14 on the appliance and the multi-position switch to maintain the use of the multi- position switch. -
Page 17: Plus Version
Mounting is possible, for example, against the wall in the installation room. An extra long connection cable is included with the Plus print extension set for this setup. 1 = Flair 225 Enthalpy appliance 2 = Plus pcb mounting plate... -
Page 18: Installation
7.2 Placing the appliance The Flair 225 Enthalpy appliance can be mounted onto the wall with the supplied mounting bracket. For a vibration-free installation, the appliance must be mounted to a solid wall with a minimum mass of 170 kg/m gypsum block or metal stud wall does not suffice! Additional measures such as double panelling or extra studs are required in that case. - Page 19 4. Install the 2 self adhesive protective caps (C) on the backside of the appliance, aprox. 50mm from the side and bottom edges. 5. Install the 2 rubber strips (D) in the back slots of the appliance. Flair 225 Enthalpy 617567-A Brink / 19...
-
Page 20: Connecting Air Ducts
▪ The location of the exhaust air outlet and the sewer stack vent must be chosen in such a way that noise ▪ nuisance is prevented as much as possible. Brink / 20 Flair 225 Enthalpy 617567-A... - Page 21 1 = Flair 225 Enthalpy right-hand version (place level) 2 = Preferred ventilation air supply 3 = Sewer release 4 = Preferred location of ventilation air discharge; Use Brink Climate Systems B.V. insulated ventilation roof sleeve 5 = Thermally insulated piping 6 = Sound absorber(s)
-
Page 22: Electrical Connections
For connecting an eBus accessory, use the 2-pole detachable (green) connector X17 located at the rear of PCB. The eBus protocol can be used to connect: ▪ Brink Air Control ( ® Connecting Air Control -> page 54 ). -
Page 23: Humidity Sensor Connection
Electrical diagram -> page 47 for correct connections and correct settings of the jumpers on the PCB. For more information and the correct modBus settings, please consult the Modbus manual on the website. Flair 225 Enthalpy 617567-A Brink / 23... -
Page 24: Coupling Appliances With Internal Bus
"Master". The fault messages of all appliances will be shown on the display of the master appliance as well as on the display of the relevant appliance. When using a Brink Air Control or the BrinkHome, always connect this to the Master. -
Page 25: Display
From factory, the menu language is set to English. The desired language/date and time can be set in the setting menu; to do this, go to the table of setting values ( ® ) step number 15.1 to step number 15.10. Flair 225 Enthalpy 617567-A Brink / 25... -
Page 26: Display Layout
-> page 41 ) for more information. This symbol is shown if a fault has occurred in the appliance; see chapter Faults ( Storingsanalyse Fault analysis -> page 37 ) for more information. Brink / 26 Flair 225 Enthalpy 617567-A... - Page 27 This appliance is set as Primary appliance if a number of appliances are connected (cascade) Appliance is set as secondary appliance; a maximum of 9 appliances can be connected to a Primary appliance. Control via eBus for example Brink Touch Control . Control via ModBus or Internal Bus. Bypass boost is active.
- Page 28 Zone Symbol on display Description Internet connection/Network connection Signal strength USB connection active. 11:07 Current set time of the device. 02.01.2020 Current date. Brink / 28 Flair 225 Enthalpy 617567-A...
-
Page 29: Display Information
- after which it will go back to it's prior flow (flow 1 or 0). ▪ If the display is set as "manual" 4 position switch; The appliance will keep running in the selected mode until ▪ another mode is chosen. Flair 225 Enthalpy 617567-A Brink / 29... -
Page 30: Brink Home Connecting Instructions
Add appliance in Brink Home Portal -> page 34 . Consult the complete Brink Home manual in the download section on the Brink Climate Systems website as well. Note Connecting a appliance to Brink Home is only possible if the UWA-2E is installed and connected. - Page 31 Press << to confirm WLAN (Wi-Fi) Go to menu 13.2 and enter SSID (Wi-Fi network) Go directly to step 3: (Brink-Guests is used as example here) ''Enter Brink Home password and confirm..'' Note Press << to confirm Flair 225 Enthalpy 617567-A...
- Page 32 ▪ Wi-Fi Protected Access (WPA)/WPA2/WPA2- ▪ Enterprise/Wi-Fi Protected Setup (WPS) 3 Go to menu 13.4 and create and enter a Brink Home password. Password requirements: At least 8 characters, with at least one lower-case and one upper-case letter as well as one number or special character.
-
Page 33: Create Brink Home Account
3. Enter your e-mail address twice . 4. Select the desired language. 5. Choose a password you want to use for Brink Home and enter this twice Write down the password to remember it as well. 6. Accept the Terms and conditions and the Privacy statement. -
Page 34: Add Appliance In Brink Home Portal
Make sure the appliance is connected to internet and registered in Brink Home → Connect appliance to internet -> page 30 and that a user account is created in the Brink Home portal → Create Brink Home account -> page 33 . -
Page 35: Setting To Work
1 and 3 depending on the measured PPM values: for a connected humidity sensor the air flow will be switched to mode 3 when this is needed. Flair 225 Enthalpy 617567-A Brink / 35... -
Page 36: Other Settings For Installer
Changes can be carried out in the settings menu. Warning Incorrect settings affect the performance of the appliance. Changes of settings not described in this manul require consultation with Brink Climate Systems B.V. 10.4 Factory settings Warning After resetting to the factory setting, step number 14.1 must be reset to internal Bus in the settings menu! -
Page 37: Fault
After resolving the fault the appliance will reset itself (Auto reset) and start up again; The display will be showing the actual running status again. Contact the installer when a locking fault occurs. 1. Supply fan defective. Flair 225 Enthalpy 617567-A Brink / 37... -
Page 38: Fault Codes
Check wiring to touchscreen; replace wiring general fault message visible when if damaged; replace touchscreen, if fault still occurs using service tool replace UWA2-B Fault is automatically reset when solved and power is put back on appliance Brink / 38 Flair 225 Enthalpy 617567-A... - Page 39 Internal Bus general fault Brink Air Control Check wiring to accessories/ Brink Air Control message and other Check accessories/ Brink Air Control and replace if accessories do defective not work. If there is still a fault after this: Take voltage from...
-
Page 40: Maintenance
To ensure correct functioning of the appliance it is important to regularly perform maintenance. A well maintained appliance has a positive influence on air quality, efficiency, noise level and life span. Brink Climate systems recommends concluding a maintenance contract for the appliance with your installer. 12.2 Maintenance intervals Required maintenance items of the appliance are indicated below. -
Page 41: User Maintenance
▪ Go to step number 4.2 in the settings menu to manually start the filter wizard and follow the instructions. ▪ Direct reset of Filter message timer: ▪ Go to step number 4.3 in the settings menu to reset the filter timer directly without opening the filter wizard. ▪ Flair 225 Enthalpy 617567-A Brink / 41... -
Page 42: Installer Maintenance
▪ Run the appliance at full speed for 5 minutes to inspect for noises and/or vibrations. ▪ ▪ Test the functioning of the bypass. ▪ ▪ Test the functioning of the preheater. ▪ Brink / 42 Flair 225 Enthalpy 617567-A... - Page 43 Flair 225 Enthalpy 617567-A Brink / 43...
-
Page 44: Appliance Internal Maintenance
-> page 42 2. Clean the internal housing of the appliance with a soft brush and a vacuum cleaner to remove all dust and pollution. 3. Check for damages or other anomalies inside the appliance. Brink / 44 Flair 225 Enthalpy 617567-A... -
Page 45: Fan Maintenance
7. Allow the exchanger to air dry until it is completely dry. 8. Thoroughly rinse the heat exchanger with water after cleaning. 9. Let the heat exchanger dry as much as possible before reinstalling. Flair 225 Enthalpy 617567-A Brink / 45... -
Page 46: Bypass Maintenance
1. Remove all internal parts of the appliance → Removing and installing components -> page 42 2. Clean the preheater with a soft brush and a vacuum cleaner to remove all dust and pollution. 3. Check for damages or other anomalies. Brink / 46 Flair 225 Enthalpy 617567-A... -
Page 47: Electrical Diagram
13 Electrical diagram Flair 225 Enthalpy 617567-A Brink / 47... - Page 48 X18 = 24V (max 5VA) or USB transceiver for wireless controller/sensor (option) X19 = Signal output = Service connector = Laptop with installed Brink service tool (not supplied) (Plus) pcb (option) = Touchscreen on appliance = Valve motor bypass valve...
-
Page 49: Electrical Connections Accessories
For the modular cable that is used, the “tab” of both modular connectors must be mounted facing the mark on the modular cable. Wire colors C1 - C6 may vary dependent on the type of modular cable used. Flair 225 Enthalpy 617567-A Brink / 49... -
Page 50: Connecting Wireless Remote Control (Without Filter Indication)
For the modular cable that is used, the “tab” of both modular connectors must be mounted facing the mark on the modular cable. Wire colors C1 - C6 may vary dependent on the type of modular cable used. Brink / 50 Flair 225 Enthalpy 617567-A... -
Page 51: Connecting Extra Multi-Position Switch With Filter Indication
For the modular cable that is used, the “tab” of both modular connectors must be mounted facing the mark on the modular cable. Wire colors C1 - C6 may vary dependent on the type of modular cable used. Flair 225 Enthalpy 617567-A Brink / 51... -
Page 52: Connecting Extra Multiple-Position Switch With Filter Indication
For the modular cable that is used, the “tab” of both modular connectors must be mounted facing the mark on the modular cable. Wire colors C1 - C6 may vary dependent on the type of modular cable used. Brink / 52 Flair 225 Enthalpy 617567-A... -
Page 53: Connection Wireless Controllers & Sensors
14.2 Connection wireless controllers & sensors Brink offers a series of 5 remote controls/sensors (A-E) that can be connected to a heat recovery system (G) by means of a USB transmitter/receiver(F). An optional signal amplifier (H) is available as well. -
Page 54: Connecting Air Control
14.3 Connecting Air Control Note The wire from Brink Air Control connector pin 1 goes into connector pin 2 on X17 and the wire from Brink Air Control connector pin2 goes into connector pin 1 on X17. Connect a Brink Air Control as described below. Consult the Brink Air Control manual as well. -
Page 55: Connecting Touch Control
14.4 Connecting Touch Control Connect a Brink Touch Control as described below. Consult the Brink Touch Control manual as well. The Brink Touch Control will work immediately when connected, no Flair Parameter changes are required. A = Flair 4-0 appliance (example) -
Page 56: Connecting Humidity Sensor
A = Flair 4-0 appliance (example) B = Basis pcb C = Cover D = RH sensor cable (supplied in RH sensor set) E = RH (humidity) sensor F = Duct from dwelling Brink / 56 Flair 225 Enthalpy 617567-A... -
Page 57: Connecting Co₂ Sensor(S)
B = 2-pole control cable for 24V power supply (black connectors) C = 2-core control cable for eBus connection (green connectors) D = CO sensor(s); connect a maximum of 4 E = Connection X17 (eBus) and X18 (24V) on Flair appliance Flair 225 Enthalpy 617567-A Brink / 57... -
Page 58: Demand-Controlled Ventilation 2.0
A = Zone valve demand-driven ventilation C1 = brown B = Power 24 VDC C2 = blue C = Brink Air Control C3 = green/yellow D = Valve motor zone valve C5 = white E = EBus connection X17 on Flair appliance... -
Page 59: Connecting Preheater
C = 2-pole eBus connection X17 on Flair appliance C3 = green/yellow D = Temperature sensor C4 = black E = PCB UVP1 C5 = white F = Airflow direction G = Dipswitch setting Flair preheater Flair 225 Enthalpy 617567-A Brink / 59... -
Page 60: Connecting Postheater
C = 2-pole eBus connection X17 on Flair appliance C3 = green/yellow D = Temperature sensor C4 = black E = PCB UVP1 C5 = white F = Airflow direction G = Dipswitch setting Flair postheater Brink / 60 Flair 225 Enthalpy 617567-A... -
Page 61: Connecting Geo-Heat Exchanger
Switch temperature 2 25°C 15.0°C / 40.0 °C 11.4 Mode valve 10 volt control Closed Open / Closed Relay output 1/Relay output 2/ 11.5 Valve control Relay output 1 Analogue output 1/Analogue output 2 Flair 225 Enthalpy 617567-A Brink / 61... -
Page 62: Service Parts
The power cable is fitted with a circuit board connector. When replacing it, always order a replacement mains cable from Brink. To prevent dangerous situations, a damaged mains connection can only be replaced by a qualified expert. Brink / 62 Flair 225 Enthalpy 617567-A... -
Page 63: Service Articles
Note Appliance type, serial number and year of production are stated on the identification plate behind the plastic front panel on the appliance. Example Appliance type Flair 225 Enthalpy (Plus) Serial number 428000241101 Year of production 2024 Part... -
Page 64: Settings
0 °C -1,5 °C /1,5 °C Minimum intake temperature 10 °C 7 °C /17°C Filter message Number of days until filter 1 / 365 days message Start of filter wizard Yes / No Brink / 64 Flair 225 Enthalpy 617567-A... - Page 65 On / Off Network 13.1 Set up WiFi network 13.2 Sign up Brink Home Enter password IP address Default gateway Subnet Mask Primary DNS 13.3 Secundary DNS Name Home Module Destination Server-IP Destination Server-port Flair 225 Enthalpy 617567-A Brink / 65...
- Page 66 Signal output 16.1 Signal output External Off / Only filter condition / Only fault condition / Connector X19 contact 24V Filter and fault condition/ External contact Standby 17.1 Switch off appliance Yes / No Brink / 66 Flair 225 Enthalpy 617567-A...
-
Page 67: Setting Values Appliance With (Plus) Pcb
Fan runs at absolute minimum Fan at setting 1 Fan at setting 2 Fan at setting 3 Fan at step 0 Fan according to multi-position switch Fan runs at absolute maximum No exhaust fan control Flair 225 Enthalpy 617567-A Brink / 67... - Page 68 25 °C 15.0°C / 40.0 °C 11.4 Mode valve 24 volt control Closed Open / Closed 11.5 Valve control Relay output 1 Relay output 1/ Relay output 2/ Analogue output 1/ Analogue output 2 Brink / 68 Flair 225 Enthalpy 617567-A...
-
Page 69: Conformity Declaration
Brink Climate Systems B.V. P.O. box 11 Address: NL-7950 AA, Staphorst, The Netherlands Product: Flair 225 Enthalpy Flair 225 Enthalpy Plus The product described above complies with the following directives: ¨ 2014/35/EU (OJEU L 96/357; 29-03-2014) (OJEU L 96/79; 29-03-2014) ¨ 2014/30/EU ¨... -
Page 70: Erp Values
18 ERP values Technical information sheet Flair 225 Enthalpy in accordance with Ecodesign (ErP), no. 1254/2014 (Annex IV) Manufacturer: Brink Climate Systems B.V. Model: Flair 225 Enthalpy Climate Type of control SEC Value in Annual Annual heating zone kWh/m²/a Class... - Page 71 A+ (Most efficient) SEC < -42 -42 ≤ SEC < -34 -34 ≤ SEC < -26 -26 ≤ SEC < -23 -23 ≤ SEC < -20 G (Least efficient) -20 ≤ SEC < -10 Flair 225 Enthalpy 617567-A Brink / 71...
-
Page 72: Recycling And Disposal
1. Dispose of packaging made of cardboard, recyclable plastics and synthetic filler materials in an environmentally compatible manner through appropriate recycling systems or a recycling center. 2. Please observe the applicable national and local regulations. Brink / 72 Flair 225 Enthalpy 617567-A... - Page 76 Brink Climate Systems B.V. Wethouder Wassebaliestraat 8, NL-7951SN Staphorst T: +31 (0) 522 46 99 44 E. info@brinkclimatesystems.nl www.brinkclimatesystems.nl...
Need help?
Do you have a question about the Flair 225 Enthalpy and is the answer not in the manual?
Questions and answers