
Related Manuals for Toshiba MR-3031


Summary of Contents for Toshiba MR-3031
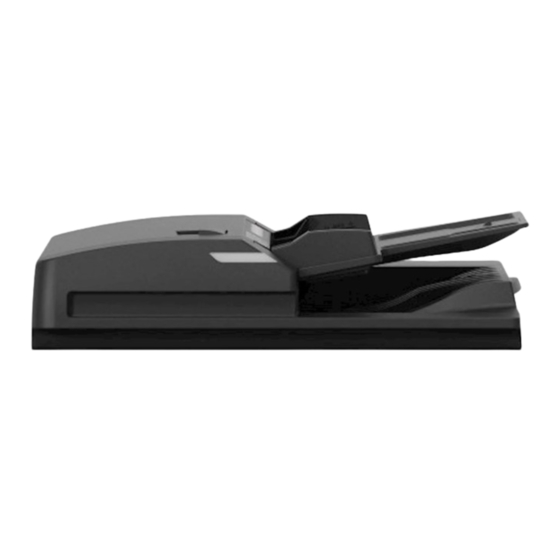
- Page 1 SERVICE MANUAL REVERSING AUTOMATIC DOCUMENT FEEDER MR-3031 Model: MR-3031 Publish Date: March 2016 File No. SME150025B0 R150921R4802-TTEC Ver02 F-_2018-06...
- Page 2 Other company names and product names in this manual are the trademarks of their respective companies. © 2016 - 2018 TOSHIBA TEC CORPORATION All rights reserved Under the copyright laws, this manual cannot be reproduced in any form without prior written permission...
- Page 3 General Precautions for Installation/Servicing/Maintenance for the equipment The installation and service shall be done by a qualified service technician. 1. When installing the equipment to the MFP, be sure to follow the instructions described in the "Unpacking/Set-Up Procedure for the equipment" booklet which comes with each unit of the equipment.
- Page 4 19.Check the procedures and perform as described in the Service Manual. 20.Make sure you do not lose your balance. 21.Avoid exposure to your skin and wear protective gloves as needed. 22.Do not leave plastic bags where children can get at them. This may cause an accident such as suffocation if a child puts his/her head into a bag.
-
Page 5: Table Of Contents
Rewriting ROM (Firmware Updating) ................7-3 8. CIRCUIT DIAGRAM / HARNESS DIAGRAM ............... 8-1 Circuit Diagram ......................... 8-1 Control PC Board Circuit....................8-2 8.2.1 MR-3031 ......................8-2 REVISION RECORD....................... 1 © 2016 - 2018 TOSHIBA TEC CORPORATION All rights reserved MR-3031 CONTENTS... - Page 6 MR-3031 © 2016 - 2018 TOSHIBA TEC CORPORATION All rights reserved CONTENTS...
-
Page 7: Specifications
5005AC 5005AC e-STUDIO2008A/2508A/3008A/3508A/4508A/ e-STUDIO2008A/2508A/3008A/3508A/4508A/ 5008A 5008A e-STUDIO3508LP/4508LP/5008LP e-STUDIO3508LP/4508LP/5008LP e-STUDIO 2010AC/2510AC e-STUDIO 2015AC/2515AC/3015AC/3515AC/ 4515AC/5015AC e-STUDIO2018A/2518A/3018A/3518A/3518A/ 4518A/5018A Notes Purchasing this is not possible after June, 2019. © 2016 - 2018 TOSHIBA TEC CORPORATION All rights reserved MR-3031 SPECIFICATIONS 1 - 1... - Page 8 MR-3031 © 2016 - 2018 TOSHIBA TEC CORPORATION All rights reserved SPECIFICATIONS 1 - 2...
-
Page 9: General Description
Read motor (M2) Original exit/reverse motor (M3) Fan motor (M4) Original pickup solenoid (SOL1) Jam access cover opening/closing switch (SW1) RADF control PC board (RADF) © 2016 - 2018 TOSHIBA TEC CORPORATION All rights reserved MR-3031 GENERAL DESCRIPTION 2 - 1... -
Page 10: Sectional View
Original exit tray Intermediate transfer roller FLP1 Exit gate Pre-reading roller Pickup roller Post-reading roller Feed roller Reverse registration roller Separation roller Exit/reverse roller MR-3031 © 2016 - 2018 TOSHIBA TEC CORPORATION All rights reserved GENERAL DESCRIPTION 2 - 2... -
Page 11: Electric Parts Layout
Electric Parts Layout RADF SOL1 Fig. 2-3 © 2016 - 2018 TOSHIBA TEC CORPORATION All rights reserved MR-3031 GENERAL DESCRIPTION 2 - 3... -
Page 12: Symbols And Functions Of Various Components
Drives up and down the original pickup roller. 4. PC board Symbol Name Function RADF RADF control PC board Controls the RADF. (RADF board) LED board Controls the lighting of LED. MR-3031 © 2016 - 2018 TOSHIBA TEC CORPORATION All rights reserved GENERAL DESCRIPTION 2 - 4... -
Page 13: Diagram Of Signal Blocks
Original exit/reverse sensor ( S10 ) Jam access cover sensor ( S11 ) Downlad jig Jam access cover opening/closing switch ( SW1 ) Fig. 2-4 © 2016 - 2018 TOSHIBA TEC CORPORATION All rights reserved MR-3031 GENERAL DESCRIPTION 2 - 5... -
Page 14: Description Of Interface Signals
RADF Equipment DF-ACK DF-REQ Fig. 2-5 MR-3031 © 2016 - 2018 TOSHIBA TEC CORPORATION All rights reserved GENERAL DESCRIPTION 2 - 6... -
Page 15: Description Of Operations
The original exit/reverse motor also rotates reversely when the originals are being reversed and transported, compared to its rotational direction when they are being exited. The read motor always rotates in a constant direction. © 2016 - 2018 TOSHIBA TEC CORPORATION All rights reserved MR-3031 DESCRIPTION OF OPERATIONS... -
Page 16: Original Feed Motor Drive Section
OFF and the pickup roller is raised. The original pickup solenoid is the one can operate both suction and recovery. MR-3031 © 2016 - 2018 TOSHIBA TEC CORPORATION All rights reserved DESCRIPTION OF OPERATIONS 3 - 2... -
Page 17: Read Motor Drive Section
When the data of the original have been scanned, the original is then transported to the original exit tray side by the post-reading roller. © 2016 - 2018 TOSHIBA TEC CORPORATION All rights reserved MR-3031 DESCRIPTION OF OPERATIONS 3 - 3... -
Page 18: Original Exit/Reverse Motor Drive Section
The reversed original is aligned with the reverse registration roller, and then the other side of the original is scanned. When the scanning is completed, the original is exited to the original exit tray. MR-3031 © 2016 - 2018 TOSHIBA TEC CORPORATION All rights reserved DESCRIPTION OF OPERATIONS 3 - 4... -
Page 19: Original Size Detection
8.5 x 8.5 / LT-R / LG / 13"LG A4-R / FOLIO COMPUTER B4 / B5 H (= high level): Open L (= low level): Short © 2016 - 2018 TOSHIBA TEC CORPORATION All rights reserved MR-3031 DESCRIPTION OF OPERATIONS 3 - 5... -
Page 20: Original Width Detection Sensors-1 And -2 / Original Length Detection Sensor
A4 series (width sizes mixed at B5-R standard) Original length Original width Original width Size determined Original tray width detection sensor sensor-1 sensor-2 B5-R B5-R A5-R MR-3031 © 2016 - 2018 TOSHIBA TEC CORPORATION All rights reserved DESCRIPTION OF OPERATIONS 3 - 6... - Page 21 Original width Original width Size determined Original tray width detection sensor sensor-1 sensor-2 LT-R / LG / 8.5x8.5 / 13”LG LD / LT ST-R © 2016 - 2018 TOSHIBA TEC CORPORATION All rights reserved MR-3031 DESCRIPTION OF OPERATIONS 3 - 7...
- Page 22 MR-3031 © 2016 - 2018 TOSHIBA TEC CORPORATION All rights reserved DESCRIPTION OF OPERATIONS 3 - 8...
-
Page 23: Disassembly And Assembly
Open the RADF and remove the 2 screws [1] and 1 screw [2]. Fig. 4-1 Close the RADF. Open the jam access cover and remove 2 screws. Fig. 4-2 © 2016 - 2018 TOSHIBA TEC CORPORATION All rights reserved MR-3031 DISASSEMBLY AND ASSEMBLY 4 - 1... - Page 24 Disconnect 1 connector [4] from the LED board. Take off the front cover. Fig. 4-4 [B] Rear cover Open the jam access cover and remove 4 screws. Fig. 4-5 MR-3031 © 2016 - 2018 TOSHIBA TEC CORPORATION All rights reserved DISASSEMBLY AND ASSEMBLY 4 - 2...
- Page 25 Remove 1 clip and then the dial and pin. Dial Clip Fig. 4-7 Remove 1 screw and the hinge pin. Hinge pin Fig. 4-8 © 2016 - 2018 TOSHIBA TEC CORPORATION All rights reserved MR-3031 DISASSEMBLY AND ASSEMBLY 4 - 3...
- Page 26 Take off the jam access cover by sliding it. Jam access cover Fig. 4-9 [D] Left cover Remove 2 screws and take off the left cover. Left cover Fig. 4-10 MR-3031 © 2016 - 2018 TOSHIBA TEC CORPORATION All rights reserved DISASSEMBLY AND ASSEMBLY 4 - 4...
- Page 27 Remove 2 screws. Lift up the feeder upper guide [1] by sliding it to the right. Notes: Do not pull the harness too strong. Fig. 4-11 Disconnect 1 connector from the RADF control PC board. Fig. 4-12 © 2016 - 2018 TOSHIBA TEC CORPORATION All rights reserved MR-3031 DISASSEMBLY AND ASSEMBLY 4 - 5...
- Page 28 Remove 1 screw and take off the bushing. Take off the original tray. Original tray Bushing Screw Fig. 4-13 MR-3031 © 2016 - 2018 TOSHIBA TEC CORPORATION All rights reserved DISASSEMBLY AND ASSEMBLY 4 - 6...
-
Page 29: Roller
When installing, be sure to lock the shaft by pushing the release lever [2] to the end. Fig. 4-15 Take off the paper feeder unit [3]. Fig. 4-16 © 2016 - 2018 TOSHIBA TEC CORPORATION All rights reserved MR-3031 DISASSEMBLY AND ASSEMBLY 4 - 7... - Page 30 Move the roller holder [1] to the direction indicated by the arrow and then turn it by 90 degrees counterclockwise. Fig. 4-17 Remove the pickup roller [2] or the feed roller [3] from each shaft respectively. Fig. 4-18 MR-3031 © 2016 - 2018 TOSHIBA TEC CORPORATION All rights reserved DISASSEMBLY AND ASSEMBLY 4 - 8...
- Page 31 Take off the paper feeder unit. ( P. 4-7 "[A] Paper feeder unit") Remove 2 screws and take off the stay. Stay Fig. 4-21 © 2016 - 2018 TOSHIBA TEC CORPORATION All rights reserved MR-3031 DISASSEMBLY AND ASSEMBLY 4 - 9...
- Page 32 Remove the cable clamp [1] from the frame. Release the harness [2] from the harness clamp [3]. Fig. 4-23 Disconnect the joint connect [4]. Release the harness [5] from the harness clamp [6]. Fig. 4-24 MR-3031 © 2016 - 2018 TOSHIBA TEC CORPORATION All rights reserved DISASSEMBLY AND ASSEMBLY 4 - 10...
- Page 33 1 pulley, 2 E-ring and 1 bushing from the rear side of the shaft, and then take off the registration roller. Bushing Registration roller E-ring Bushing Pulley Bushing E-ring Fig. 4-26 © 2016 - 2018 TOSHIBA TEC CORPORATION All rights reserved MR-3031 DISASSEMBLY AND ASSEMBLY 4 - 11...
- Page 34 Remove 1 clip and 1 bushing from the front side of the exit/reverse roller shaft. Leaf spring Clip Bushing Fig. 4-28 Take off the jam access guide. Jam access guide Fig. 4-29 MR-3031 © 2016 - 2018 TOSHIBA TEC CORPORATION All rights reserved DISASSEMBLY AND ASSEMBLY 4 - 12...
- Page 35 Take off the left cover. ( P. 4-4 "[D] Left cover") Remove 1 screw and take off the hinge pin. Hinge pin Fig. 4-32 © 2016 - 2018 TOSHIBA TEC CORPORATION All rights reserved MR-3031 DISASSEMBLY AND ASSEMBLY 4 - 13...
- Page 36 Remove 1 bushing from the front side of the intermediate transport roller shaft. Take off the intermediate transport roller. Screw Bushing Bushing Pulley Intermediate transport roller Bushing Fig. 4-34 MR-3031 © 2016 - 2018 TOSHIBA TEC CORPORATION All rights reserved DISASSEMBLY AND ASSEMBLY 4 - 14...
- Page 37 Remove 1 clip and 1 bushing from the front side of the pre-reading roller shaft. Take off the pre-reading roller. Pre-reading roller Bushing Clip Fig. 4-36 © 2016 - 2018 TOSHIBA TEC CORPORATION All rights reserved MR-3031 DISASSEMBLY AND ASSEMBLY 4 - 15...
- Page 38 Bushing E-ring Fig. 4-38 Remove 1 clip and 1 bushing from the front side of the post-reading roller shaft. Bushing Clip Fig. 4-39 MR-3031 © 2016 - 2018 TOSHIBA TEC CORPORATION All rights reserved DISASSEMBLY AND ASSEMBLY 4 - 16...
- Page 39 Remove 2 screws. Open the post-reading lower guide and take off the post-reading upper guide. Post-reading upper guide Fig. 4-41 Take off the post-reading roller. Post-reading roller Fig. 4-42 © 2016 - 2018 TOSHIBA TEC CORPORATION All rights reserved MR-3031 DISASSEMBLY AND ASSEMBLY 4 - 17...
- Page 40 Remove 1 clip and 1 bushing from the front side of the reverse registration roller shaft. Bushing Clip Fig. 4-44 Open the RADF. Take off the reverse registration roller. Reverse registration roller Fig. 4-45 MR-3031 © 2016 - 2018 TOSHIBA TEC CORPORATION All rights reserved DISASSEMBLY AND ASSEMBLY 4 - 18...
-
Page 41: Motor / Motor Drive Section
Disconnect 1 connector, and then remove 1 spring. (Spring: Outside diameter of coil - ø10.2 mm, active coils - 12.5) Connector Spring Fig. 4-47 © 2016 - 2018 TOSHIBA TEC CORPORATION All rights reserved MR-3031 DISASSEMBLY AND ASSEMBLY 4 - 19... - Page 42 (3). Then fully tighten these screws. Read motor Fig. 4-48 Remove 2 screws, and then take off the read motor. Read motor Bracket Fig. 4-49 MR-3031 © 2016 - 2018 TOSHIBA TEC CORPORATION All rights reserved DISASSEMBLY AND ASSEMBLY 4 - 20...
- Page 43 When the unit is being assembled, temporarily tighten the screws removed at step (4), and then attach the spring removed at step (3). Then fully tighten these screws. Read motor Fig. 4-51 © 2016 - 2018 TOSHIBA TEC CORPORATION All rights reserved MR-3031 DISASSEMBLY AND ASSEMBLY 4 - 21...
- Page 44 Remove 3 screws and then take off the bracket. Bracket Fig. 4-53 Take off 1 timing belt and 4 bushings. Timing belt Bushing Bushing Fig. 4-54 MR-3031 © 2016 - 2018 TOSHIBA TEC CORPORATION All rights reserved DISASSEMBLY AND ASSEMBLY 4 - 22...
- Page 45 Disconnect 1 connector, and then remove 1 spring. Notes: Spring color and form Color: Black, Outside diameter of coil: ø8 mm, acceptable turns of coil: 12.5 Connector Spring Fig. 4-56 © 2016 - 2018 TOSHIBA TEC CORPORATION All rights reserved MR-3031 DISASSEMBLY AND ASSEMBLY 4 - 23...
- Page 46 (C) Tighten the 2 screws [2] of the sub bracket. Fig. 4-58 Remove 2 screws and then take off the original feed motor. Original feed motor Bracket Fig. 4-59 MR-3031 © 2016 - 2018 TOSHIBA TEC CORPORATION All rights reserved DISASSEMBLY AND ASSEMBLY 4 - 24...
- Page 47 When the unit is being assembled, temporarily tighten the screws removed at step (3) and then attach the spring removed at step (2). Then fully tighten these screws. Original feed motor Fig. 4-61 © 2016 - 2018 TOSHIBA TEC CORPORATION All rights reserved MR-3031 DISASSEMBLY AND ASSEMBLY 4 - 25...
- Page 48 (B) Temporarily tighten the screws removed in step (3) and then attach the spring [1] removed in step (2). Then fully tighten these screws. (C) Tighten the 2 screws [2] of the sub bracket. Fig. 4-64 MR-3031 © 2016 - 2018 TOSHIBA TEC CORPORATION All rights reserved DISASSEMBLY AND ASSEMBLY 4 - 26...
- Page 49 Take off the original feed motor drive section. ( P. 4-25 "[E] Original feed motor drive section") Disconnect 1 connector from the RADF control PC board. Fig. 4-67 © 2016 - 2018 TOSHIBA TEC CORPORATION All rights reserved MR-3031 DISASSEMBLY AND ASSEMBLY 4 - 27...
- Page 50 Remove 2 screws, and then take off the original exit/reverse motor by sliding it from the bracket. Original exit/reverse motor Bracket Fig. 4-70 MR-3031 © 2016 - 2018 TOSHIBA TEC CORPORATION All rights reserved DISASSEMBLY AND ASSEMBLY 4 - 28...
-
Page 51: Solenoid
When installing the original pickup solenoid, be sure to align the edge of the original pickup solenoid with the mark-off line on the frame. Mark-off line Fig. 4-73 © 2016 - 2018 TOSHIBA TEC CORPORATION All rights reserved MR-3031 DISASSEMBLY AND ASSEMBLY 4 - 29... -
Page 52: Sensor/Switch
If washers (3 pcs) and a pinion come off, assemble them in the order as shown in the illustration. Washer ( Black: t= 0.25 ) Washer ( Gold ) Washer ( Black: t= 0.13 ) Pinion Fig. 4-76 MR-3031 © 2016 - 2018 TOSHIBA TEC CORPORATION All rights reserved DISASSEMBLY AND ASSEMBLY 4 - 30... - Page 53 Remove 2 screws and take off the holder. Holder Fig. 4-78 Release 2 latches and take off the original tray sensor. Original tray sensor Fig. 4-79 © 2016 - 2018 TOSHIBA TEC CORPORATION All rights reserved MR-3031 DISASSEMBLY AND ASSEMBLY 4 - 31...
- Page 54 [D] Original empty sensor (S3) Open the jam access cover. Remove 1 screw and take off the metal plate cover. Metal plate cover Fig. 4-82 MR-3031 © 2016 - 2018 TOSHIBA TEC CORPORATION All rights reserved DISASSEMBLY AND ASSEMBLY 4 - 32...
- Page 55 ( P. 4-9 "[D] Feeder lower guide") Disconnect 1 connector. Release 2 latches and take off the original length detection sensor[1]. Fig. 4-85 © 2016 - 2018 TOSHIBA TEC CORPORATION All rights reserved MR-3031 DISASSEMBLY AND ASSEMBLY 4 - 33...
- Page 56 Take off the actuator. Disconnect 1 connector. Release 2 latches and take off the original width detection sensor-1. Original width detection sensor-1 Actuator Fig. 4-87 MR-3031 © 2016 - 2018 TOSHIBA TEC CORPORATION All rights reserved DISASSEMBLY AND ASSEMBLY 4 - 34...
- Page 57 ( P. 4-13 "[G] Pre-reading guide") Release 2 latches and take off the read sensor from the pre-reading upper guide. Read sensor Fig. 4-89 © 2016 - 2018 TOSHIBA TEC CORPORATION All rights reserved MR-3031 DISASSEMBLY AND ASSEMBLY 4 - 35...
- Page 58 Fig. 4-91 Open the RADF. Remove 2 screws, and then take off 2 holders and platen guide. Holder Platen guide Holder Fig. 4-92 MR-3031 © 2016 - 2018 TOSHIBA TEC CORPORATION All rights reserved DISASSEMBLY AND ASSEMBLY 4 - 36...
- Page 59 When connecting the terminal, make sure that the color of the harness is correct. Jam access cover opening/closing switch Bracket White Black Fig. 4-95 © 2016 - 2018 TOSHIBA TEC CORPORATION All rights reserved MR-3031 DISASSEMBLY AND ASSEMBLY 4 - 37...
-
Page 60: Pc Board
( P. 4-1 "[A] Front cover") Disconnect 1 connector [1]. Remove 1 screw and take off the LED board (LED) [2]. Fig. 4-98 MR-3031 © 2016 - 2018 TOSHIBA TEC CORPORATION All rights reserved DISASSEMBLY AND ASSEMBLY 4 - 38... -
Page 61: Others
Fig. 4-100 [B] Front resist roller sheet Open the jam access cover. Peel off 3 registration roller front sheets [1]. Fig. 4-101 © 2016 - 2018 TOSHIBA TEC CORPORATION All rights reserved MR-3031 DISASSEMBLY AND ASSEMBLY 4 - 39... - Page 62 Attach them securely and check that they do not lift up or become unstuck. [ 1 ] [ 1 ] 0.2mm to 0.8mm 0.2mm to 0.8mm 0.2mm to 0.8mm Fig. 4-102 MR-3031 © 2016 - 2018 TOSHIBA TEC CORPORATION All rights reserved DISASSEMBLY AND ASSEMBLY 4 - 40...
-
Page 63: Adjustment
Open the RADF and install 2 positioning pins (the positioning pins are installed to the back side of the hinge which is on the left side of the RADF). Fig.5-1 Remove the platen sheet. Fig.5-2 © 2016 - 2018 TOSHIBA TEC CORPORATION All rights reserved MR-3031 ADJUSTMENT 5 - 1... - Page 64 If the pins cannot be fitted into the holes, perform the adjustment according to the following procedure. Remove the right-hand hinge screw at the rear side. Fig.5-4 Remove the bracket on the left-hand hinge. Fig.5-5 MR-3031 © 2016 - 2018 TOSHIBA TEC CORPORATION All rights reserved ADJUSTMENT 5 - 2...
- Page 65 Position the pins with the holes on the RADF by moving it so that the pins fit into the holes when the RADF is closed. Fig.5-8 © 2016 - 2018 TOSHIBA TEC CORPORATION All rights reserved MR-3031 ADJUSTMENT 5 - 3...
- Page 66 Turn it clockwise: It moves toward the rear side. Turn it counterclockwise: It moves toward the front side. Fig.5-10 Install the right-hand hinge screw at the rear side. Fig.5-11 MR-3031 © 2016 - 2018 TOSHIBA TEC CORPORATION All rights reserved ADJUSTMENT 5 - 4...
- Page 67 (11) Place the platen sheet on the original glass and align it to the top left corner. Close the RADF gently and open it to check if the platen sheet is attached properly. Fig.5-14 © 2016 - 2018 TOSHIBA TEC CORPORATION All rights reserved MR-3031 ADJUSTMENT...
-
Page 68: Adjustment Of Height
"B" from the left hand side of the equipment. If the value is not within the tolerance, perform the adjustment according to the following procedure. [Tolerance of the gap] Rear side: 0 - 0.5 mm Front side: 0 mm Fig.5-15 MR-3031 © 2016 - 2018 TOSHIBA TEC CORPORATION All rights reserved ADJUSTMENT 5 - 6... - Page 69 Adjust the gap on the front side by means of the screw on the hinge on the exit side of the RADF. Turn it clockwise Lowered Turn it counterclockwise Heightened Fig.5-17 © 2016 - 2018 TOSHIBA TEC CORPORATION All rights reserved MR-3031 ADJUSTMENT 5 - 7...
-
Page 70: Adjustment Of Skew
[Sort] and [2 -> 2 Duplex] and then press the [START] button. Superimpose the chart on the copy and check the inclination of the copy image. MR-3031 © 2016 - 2018 TOSHIBA TEC CORPORATION All rights reserved ADJUSTMENT 5 - 8... - Page 71 "+", and if "D", shift it to "-". Fig.5-20 Fig.5-21 Shift the aligning plate in the direction of "+". Shift the aligning plate in the direction of "-". © 2016 - 2018 TOSHIBA TEC CORPORATION All rights reserved MR-3031 ADJUSTMENT 5 - 9...
- Page 72 ", and if "D", shift it to "+". Fig.5-23 Fig.5-24 Shift the aligning plate in the direction of "-". Shift the aligning plate in the direction of "+". MR-3031 © 2016 - 2018 TOSHIBA TEC CORPORATION All rights reserved ADJUSTMENT 5 - 10...
-
Page 73: Adjustment Of The Leading Edge Position
Superimpose the chart on the copy and check the leading edge E of the chart and F of the copy. Fig.5-25 Chart (Original) Fig.5-26 Copy © 2016 - 2018 TOSHIBA TEC CORPORATION All rights reserved MR-3031 ADJUSTMENT 5 - 11... - Page 74 If the leading edge (F) margin of the copy image is smaller than the (E) margin of the chart, enter a value larger than the current one. Notes: Changing one value shifts the copy image by 0.1 mm. Press the [OK] button. MR-3031 © 2016 - 2018 TOSHIBA TEC CORPORATION All rights reserved ADJUSTMENT 5 - 12...
-
Page 75: Adjustment Of Horizontal Position
If the center line of the copy image is shifted to the rear side of the equipment, enter a value smaller than the current one. Notes: Changing one value shifts the copy image by 0.042 mm. Fig.5-28 Press the [ENTER] button. © 2016 - 2018 TOSHIBA TEC CORPORATION All rights reserved MR-3031 ADJUSTMENT 5 - 13... -
Page 76: Adjustment Of Copy Ratio
When the value increases by "1", the reproduction ratio of the secondary scanning direction when using the RADF increases by approx. 0.1%. Press the [OK] button. MR-3031 © 2016 - 2018 TOSHIBA TEC CORPORATION All rights reserved ADJUSTMENT 5 - 14... -
Page 77: Radf Separation Roller Pressure Force Adjustment
Remove 2 screws. Lift up the feeder upper guide [2] by sliding it to the right. Notes: Do not pull the harness too strong. Fig.5-31 © 2016 - 2018 TOSHIBA TEC CORPORATION All rights reserved MR-3031 ADJUSTMENT 5 - 15... - Page 78 The upper limit of the movement of the bracket for the adjustment is 1 scale. If the bracket is moved by 2 scales, deterioration of the pressure spring may occur. Tighten the screw [4]. Fig.5-33 MR-3031 © 2016 - 2018 TOSHIBA TEC CORPORATION All rights reserved ADJUSTMENT 5 - 16...
-
Page 79: Platen Sheet
Place the platen sheet on the original glass and align it to the top left corner. Close the RADF gently and open it to check if the platen sheet is attached properly. Fig.5-35 © 2016 - 2018 TOSHIBA TEC CORPORATION All rights reserved MR-3031 ADJUSTMENT... - Page 80 MR-3031 © 2016 - 2018 TOSHIBA TEC CORPORATION All rights reserved ADJUSTMENT 5 - 18...
-
Page 81: Troubleshooting
Width between slides too wide compared to that of original? YES Move the slides so that they contact the edges of the original Check the scanner adjustment © 2016 - 2018 TOSHIBA TEC CORPORATION All rights reserved MR-3031 TROUBLESHOOTING 6 - 1... - Page 82 5. Black streaks appear on copied image ADF original glass is dirty? YES Clean the glass with a dry/squeezed cloth Check the scanner unit MR-3031 © 2016 - 2018 TOSHIBA TEC CORPORATION All rights reserved TROUBLESHOOTING 6 - 2...
-
Page 83: Troubleshooting For Electrical Errors
Replace the sensor or harness Original width detection sensor-2 is ON when there is paper? NO Replace the sensor or harness Check or replace the RADF board © 2016 - 2018 TOSHIBA TEC CORPORATION All rights reserved MR-3031 TROUBLESHOOTING 6 - 3... -
Page 84: Jam
Correct if any. 4. Replace the original exit/reverse sensor 5. Replace the RADF board. 6. Replace the read roller if it is worn out. MR-3031 © 2016 - 2018 TOSHIBA TEC CORPORATION All rights reserved TROUBLESHOOTING 6 - 4... - Page 85 Correct if any. 4. Replace the RADF jam access cover opening/closing switch. 5. Replace the RADF board. © 2016 - 2018 TOSHIBA TEC CORPORATION All rights reserved MR-3031 TROUBLESHOOTING 6 - 5...
- Page 86 3. Check if the connector CN75 on the RADF board is disconnected from the RADF jam access cover sensor or the harnesses are open circuited. Correct if any. 4. Replace the RADF jam access cover sensor. 5. Replace the RADF board. MR-3031 © 2016 - 2018 TOSHIBA TEC CORPORATION All rights reserved TROUBLESHOOTING 6 - 6...
-
Page 87: Maintenance And Rewriting Rom
Make sure properly to remove any dirt adhering to the convex-concave on the roller surface while cleaning it. (See the below figure: e.g. cleaned roller) Fig. 7-2 © 2016 - 2018 TOSHIBA TEC CORPORATION All rights reserved MR-3031 MAINTENANCE AND REWRITING ROM... - Page 88 Reverse registration roller 3-10 Exit/reverse roller 4-25 10 Platen sheet B or A 1-25 Registration roller front Attached sheet on the feeder lower guide MR-3031 © 2016 - 2018 TOSHIBA TEC CORPORATION All rights reserved MAINTENANCE AND REWRITING ROM 7 - 2...
-
Page 89: Rewriting Rom (Firmware Updating)
Rewriting ROM (Firmware Updating) For updating firmware, refer to " FIRMWARE UPDATING" in the Service Manual for MFP. © 2016 - 2018 TOSHIBA TEC CORPORATION All rights reserved MR-3031 MAINTENANCE AND REWRITING ROM 7 - 3... - Page 90 MR-3031 © 2016 - 2018 TOSHIBA TEC CORPORATION All rights reserved MAINTENANCE AND REWRITING ROM 7 - 4...
-
Page 91: Circuit Diagram / Harness Diagram
CIRCUIT DIAGRAM / HARNESS DIAGRAM Circuit Diagram Fig.8-1 © 2016 - 2018 TOSHIBA TEC CORPORATION All rights reserved MR-3031 CIRCUIT DIAGRAM / HARNESS DIAGRAM 8 - 1... -
Page 92: Control Pc Board Circuit
Control PC Board Circuit 8.2.1 MR-3031 Fig.8-2 MR-3031 © 2016 - 2018 TOSHIBA TEC CORPORATION All rights reserved CIRCUIT DIAGRAM / HARNESS DIAGRAM 8 - 2... - Page 93 Fig.8-3 © 2016 - 2018 TOSHIBA TEC CORPORATION All rights reserved MR-3031 CIRCUIT DIAGRAM / HARNESS DIAGRAM 8 - 3...
- Page 94 Fig.8-4 MR-3031 © 2016 - 2018 TOSHIBA TEC CORPORATION All rights reserved CIRCUIT DIAGRAM / HARNESS DIAGRAM 8 - 4...
- Page 95 Fig.8-5 © 2016 - 2018 TOSHIBA TEC CORPORATION All rights reserved MR-3031 CIRCUIT DIAGRAM / HARNESS DIAGRAM 8 - 5...
- Page 96 Fig.8-6 MR-3031 © 2016 - 2018 TOSHIBA TEC CORPORATION All rights reserved CIRCUIT DIAGRAM / HARNESS DIAGRAM 8 - 6...
- Page 97 Fig.8-7 © 2016 - 2018 TOSHIBA TEC CORPORATION All rights reserved MR-3031 CIRCUIT DIAGRAM / HARNESS DIAGRAM 8 - 7...
- Page 98 MR-3031 © 2016 - 2018 TOSHIBA TEC CORPORATION All rights reserved CIRCUIT DIAGRAM / HARNESS DIAGRAM 8 - 8...
-
Page 99: Revision Record
The adjustment procedure “5.7 RADF Separation roller pressure force adjustment” has been added. 5-17 The adjustment procedure “5.8 Platen Sheet” has been added. Ver.00 Ver00<2016.03.29> Page Contents Initial release © 2016 - 2018 TOSHIBA TEC CORPORATION All rights reserved MR-3031 REVISION RECORD... - Page 100 MR-3031 © 2016 - 2018 TOSHIBA TEC CORPORATION All rights reserved REVISION RECORD...
- Page 102 1-11-1, OSAKI, SHINAGAWA-KU, TOKYO, 141-8562, JAPAN...
Need help?
Do you have a question about the MR-3031 and is the answer not in the manual?
Questions and answers