Table of Contents
Advertisement
Quick Links
Advertisement
Table of Contents

Subscribe to Our Youtube Channel
Related Manuals for STIEBEL ELTRON HSBB 10 ACs


Summary of Contents for STIEBEL ELTRON HSBB 10 ACs
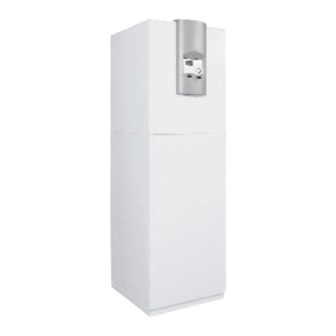
- Page 1 OperatiOn and installatiOn Hydraulic mOdule » HsBB 10 acs...
-
Page 2: Table Of Contents
10.3 Check before commissioning the heat pump manager � 12 10.4 Commissioning the heat pump manager ������������������ 12 10.5 Appliance handover �������������������������������������������� 12 11. Taking the appliance out of use �������������������������� 13 12. Maintenance ������������������������������������������������ 13 12.1 DHW cylinder ���������������������������������������������������� 13 12.2 Replacing the signal anodes���������������������������������� 14 13. Specification ������������������������������������������������ 15 13.1 Dimensions and connections ��������������������������������� 15 13.2 Wiring diagram HSBB 10 ACS �������������������������������� 16 13.3 Data table �������������������������������������������������������� 17 Warranty envirOnment and recycling |HsBB 10 acs www.stieBel-eltrOn.cOm... -
Page 3: General Information
1.2.1 structure of safety instructions KEYWORD Type of risk Here, possible consequences are listed that may result from failure to observe the safety instructions. f Steps to prevent the risk are listed. 1.2.2 symbols, type of risk symbol type of risk Injury Electrocution Burns or scalding 1.2.3 Keywords KeywOrd meaning DAnGER Failure to observe this information will result in serious injury or death. WARnInG Failure to observe this information may result in serious injury or death. CAUTIOn Failure to observe this information may result in non- serious or minor injury. www.stieBel-eltrOn.cOm HsBB 10 acs |... -
Page 4: Safety
- Protect the appliance from dust and dirt ingress during direct heating circuit and one mixer circuit. building work. - The DHW cylinder is at mains water pressure. If no dia- A seven-day heating program is integrated in the heat pump man- phragm expansion vessel is installed, expansion water can ager which you can use to set the times and temperatures for drip from the safety valve during heat-up. heating operation and DHW heating. - notify your contractor if water is still dripping from the safety You can extend the heat pump manager with the following com- valve after the heat-up process. ponents: - Room temperature controllers FE 7 and FEK, for controlling DANGER Injury the direct heating circuit, the mixer circuit and cooling Where children or persons with limited physical, sensory - Mixer module MSM, if connecting a second mixer circuit or mental capabilities are allowed to control this appli- ance, ensure that this will only happen under supervision or after appropriate instruction by a person responsible for their safety. Children must be supervised to ensure that they never play with the appliance. ce designation The CE designation shows that the appliance meets all essential requirements according to the: - Electromagnetic Compatibility Directive - low Voltage Directive |HsBB 10 acs www.stieBel-eltrOn.cOm... -
Page 5: Settings
Montageanweisung beachten! Dichtheit geprüft! Made in Germany 1 number on the type plate 1 Signal anode display Operation is exclusively controlled via the heat pump manager. f Observe the heat pump manager operating and installation instructions. maintenance and care Appliance and system damage Maintenance work, such as checking the electrical safety, must only be carried out by a qualified contractor. A damp cloth is sufficient for cleaning all plastic and sheet steel parts. never use abrasive or corrosive cleaning agents. troubleshooting fault cause f remedy There is no hot water or One or more fuses are Check the fuses/MCBs in the heating system stays faulty. your fuse box. cold. If you cannot remedy the fault, notify your contractor. To facilitate and speed up your enquiry, please provide the serial number from the type plate. www.stieBel-eltrOn.cOm HsBB 10 acs |... -
Page 6: Safety
C 16 A 2.5 mm² WARNING Electrocution 1.5 mm² with only two live cores and routing on a wall or in Only use a permanent connection to the power supply. an electrical conduit on a wall. The appliance must be able to be separated from the power supply by an isolator that disconnects all poles The electrical data is given in the chapter "Specification / Data with at least 3 mm contact separation. This requirement table". can be met by contactors, isolators, fuses etc. Damage to the appliance and environment The specified voltage must match the mains voltage. Ob- serve the type plate. standard delivery Delivered with the appliance: - 1 outside temperature sensor AFS 2 - 4 sliding blocks for the appliance feet - 1 safety assembly with pressure gauge and overpressure valve Further accessories - Remote control for heating and cooling mode - Mixer module - Pressure hoses - Water softener fitting HZEA |HsBB 10 acs www.stieBel-eltrOn.cOm... -
Page 7: Installation
Remove the appliance from the pallet. f If required, use the sliding blocks provided to help you posi- tion the appliance. f Maintain the minimum clearances. f Remove the transport aids. f level the appliance horizontally by adjusting the feet. Opening the appliance f Undo the screws and open the appliance door. 1 Transport tube (on the installation side) 2 Transport aids 3 Appliance foot 4 Sliding block f Undo the four screws from the non-returnable pallet. f Remove the washers. f Undo the screws and remove them. f Remove the appliance feet from the pack. f Remove the lower appliance door. f Tilt the appliance and wind in the appliance feet. www.stieBel-eltrOn.cOm HsBB 10 acs |... -
Page 8: Connecting The Hydraulic Module And Heat Pump
Heating water connection thermal insulation. f Provide thermal insulation in accordance with applicable Damage to the appliance and environment regulations. Carry out all water connection and installation work in f Only use weather-resistant cables. accordance with regulations. f Also protect all supply lines against humidity, damage and The heat pump heating system must be connected by a contractor UV radiation by means of a conduit. in accordance with the water installation drawings, which are part of the technical guides. f Install the safety assembly in the heat pump return. Observe the following information: - Fit the safety assembly at the highest point in the heat pump return line (see diagram "Installation example"). This position ensures that air can collect at the air vent valve in the safety assembly and that the air vent valve is working correctly. f Thoroughly flush the pipework before connecting the heat pump. Debris, such as welding pearls, rust, sand or sealant can impair the operational reliability of the heat pump. f Ensure the heating flow and return are connected correctly (see chapter "Dimensions and connections"). f Provide thermal insulation in accordance with applicable regulations. |HsBB 10 acs www.stieBel-eltrOn.cOm... -
Page 9: Dhw Connection
Size the drain so that water can drain off unimpeded when the safety valve is fully opened. f Ensure that the discharge aperture of the safety valve is open to the outside. f Fit the discharge pipe of the safety assembly with a constant slope. f Flush the pipework thoroughly. electrical connection Only qualified electricians must carry out the installation in ac- cordance with these instructions. DANGER Electrocution Before any work, isolate the appliance from the power 1 Cable entry supply at the control panel. f Route all connecting cables and sensor leads through the cable entry into the appliance. Permission to connect the appliance may need to be obtained from f Route all connecting cables and sensor leads through the gap your local power supply utility. in the centre of the appliance so they reach as far as the PCB. f Observe VDE 0100 [or local regulations] and the regulations f Connect the connecting cables and sensor leads as detailed of your local power supply utility. below. www.stieBel-eltrOn.cOm HsBB 10 acs |... - Page 10 Heating circuit pump T (WW) Temperature sensor DHW ZKP DHW circulation pump Fühler1 X25 Common n Return temperature for heat metering PE Common PE sensor Flow temperature for cooling sensor DHW sensor for solar connection Fühler2 Flow temperature for heat metering sensor Collector sensor for solar connection T(2.WE) Second heat source T(A) Outside temperature sensor T(MK) Mixer circuit temperature sensor Fernb.1 Remote control 1 (FE 7) Fernb.3 Remote control 3 (FE 7) X26 Earth |HsBB 10 acs www.stieBel-eltrOn.cOm...
-
Page 11: Commissioning
Our customer service can assist in the commissioning, which is chargeable. Where this appliance is intended for commercial use, the rules of the relevant Health & Safety at Work Act may be applicable for commissioning. For further details, check your local authorising body. 10.1 Filling the heating system H BUS high l BUS low Water quality BUS ground "+" BUS "+" (only connected in conjunction with Damage to the appliance and environment DCO or FEK) Do not use fully desalinated water or rainwater, as this leads to heavier corrosion. Suitable equipment for soften- ing, or for filling and flushing heating systems, can be hired from our in-house customer service. In order to prevent damage caused by scale formation, you must observe the following when filling the system with heating water: - The total water hardness must be < 1 °dH (0.18 mmol/l alka- line earths). - Soften the water if the above requirements are not met. www.stieBel-eltrOn.cOm HsBB 10 acs |... -
Page 12: Filling The Dhw Cylinder
1 Diaphragm expansion vessel (heating) 2 Drain & fill valve (heating) Explain the appliance function to users and familiarise them with 3 Cap shut-off valve its operation. f Fill the heating system via the drain & fill valve. f After filling the heating system, check the cap shut-off valve Note at the diaphragm expansion vessel for leaks. Hand over these operating and installation instructions f Vent the pipework. to the user for safe-keeping. Always carefully observe all information in these instructions. They provide informa- tion on safety, operation, installation and maintenance 10.2 Filling the dHW cylinder of the unit. 1 Drain & fill valve (DHW cylinder) f Fill the DHW cylinder via the drain & fill valve. f Open all downstream draw-off valves until the appliance has filled up and the pipework is free of air. f Carry out a tightness check. f Check the safety valve located on the installation side. |HsBB 10 acs www.stieBel-eltrOn.cOm... -
Page 13: Taking The Appliance Out Of Use
The system should not be switched off in summer. The heat pump manager has an automatic summer/winter changeover. 12.1 dHW cylinder Appliance and system damage Opening the appliance Observe the temperature application limits and the mini- mum circulation volume on the heat utilisation side (see chapter "Specification / Data table"). If the system is taken out of use, set the heat pump manager to standby. This way the safety functions that protect the system remain enabled, e.g. frost protection. Appliance and system damage If the heat pump and frost protection are completely switched off, drain the system on the water side. Information on draining the DHW cylinder can be found in chapter "Maintenance". f Undo the screws and open the appliance door. f Undo the screws and remove them. f Remove the lower appliance door. www.stieBel-eltrOn.cOm HsBB 10 acs |... -
Page 14: Replacing The Signal Anodes
Drain the DHW cylinder via the drain & fill valve. 1 Operating indicator blue (no function) Some residual water will remain in the bottom of the cylinder. 2 Operating indicator red (status of signal anode) f Replace the signal anode if the red signal indicator on the cleaning and descaling user interface illuminates. Damage to the appliance and environment never use descaling pumps. never use descaling agents to clean the cylinder. 1 Signal anode 2 Pressure switch The pressure switch is activated as soon as the signal anode is consumed. The signal indicator illuminates. 1 Inspection port (threaded signal anode) Note f Remove the signal anode from the appliance. The signal anode must be fitted as shown in the diagram. f Clean the DHW cylinder with a hose that you guide through the inspection port. f Check for tightness when fitting the pressure switch. f Draw the loosened limescale deposits out through the in- spection port. |HsBB 10 acs www.stieBel-eltrOn.cOm... -
Page 15: Specification
13. specification 13.1 dimensions and connections e01 e02 B01 Electrical cable entry c01 Cold water inlet c06 DHW outlet d01 Heat pump (HP) flow d02 HP return e01 Heating flow e02 Heating return www.stieBel-eltrOn.cOm HsBB 10 acs |... -
Page 16: Wiring Diagram Hsbb 10 Acs
Temperature sensor DHW X21 Plug, mixer control WPM II H3 Signal indicator, service anode red X22 10-pole plug,control unit WPM II M2 Motor - pump X23 Earth block connection M3 Motor - diverter valve X24 Earth block control Signal anode pressure switch X25 n - block control unit X1 Terminal X26 Earth - block low voltage X2 lV terminal X4 Control unit terminal X5 BUS terminal X10 Plug, pulse input WPM II X11 10-pole plug WPM II X12 Plug, HP temperature WPM II X13 Plug, mixer circuit temperature WPM II |HsBB 10 acs www.stieBel-eltrOn.cOm... -
Page 17: Data Table
Rated heating flow rate m³/h Heating flow rate (min.) m³/h Total available external pressure differential Electrical data Control unit phases 1/n/PE Fuse protection 1x C16 Power supply 1/n/PE Versions Suitable for WPl 10 ACS IP rating IP20 Dimensions Height 1921 Width Depth Height when tilted 1941 Weights Weight Connections Connection on the heating system side 22 mm Cold water connection 22 mm DHW connection 22 mm Please note that the data for "available external pressure differential" is relative to the maximum pump rate and does not include pres- sure drops from the heat pump flow and return lines. www.stieBel-eltrOn.cOm HsBB 10 acs |... - Page 18 |HsBB 10 acs www.stieBel-eltrOn.cOm...
-
Page 19: Warranty Environment And Recycling
The installation, electrical connection and first operati- on of this appliance should be carried out by a qualified installer. The company does not accept liability for failure of any goods supplied which have not been installed and ope- rated in accordance with the manufacturer‘s instructions. Environment and recycling Please help us to protect the environment by disposing of the packaging in accordance with the national regulations for waste processing. www.stieBel-eltrOn.cOm HsBB 10 acs |... - Page 20 Deutschland Verkauf Tel. 0180 3 700705* | Fax 0180 3 702015* | info-center@stiebel-eltron.de STIEBEL ELTRON GmbH & Co. KG Kundendienst Tel. 0180 3 702020* | Fax 0180 3 702025* | kundendienst@stiebel-eltron.de Dr.-Stiebel-Straße | 37603 Holzminden Tel. 05531 702-90015 Tel. 05531 702-0 | Fax 05531 702-480 Ersatzteilverkauf Tel.
Need help?
Do you have a question about the HSBB 10 ACs and is the answer not in the manual?
Questions and answers