Advertisement
Quick Links
ITEM
QUANTITY
1
1
2
1
3
1
4
1
5
1
6
1
7
1
8
1
9
1
ANTI-SEIZE LUBRICANT MUST BE USED ON ALL STAINLESS STEEL FASTENERS TO PREVENT THREAD DAMAGE AND GALLING
ITEM 1
ITEM 3
Westin Automotive Products, Inc.
320 W. Covina Blvd
San Dimas, Ca. 91773
P.N.: 75-1611295-RevA
ECO #: W24-0077
APPLICATION:
PART NUMBER:
ITEM 4
INSTALLATION INSTRUCTIONS
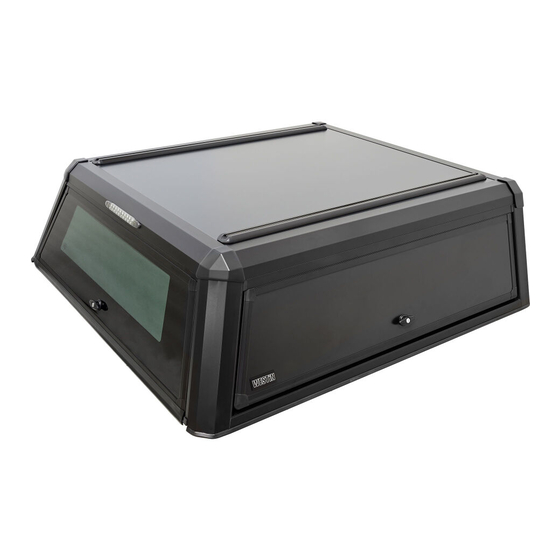
ALUMINUM BED TOPPER
24+ Ranger Crew Cab 5' Bed
16-11295
CONTENT
DESCRIPTION
ROOF PANEL
FRONT PANEL
LEFT SIDE PANEL
RIGHT SIDE PANEL
REAR DOOR
PARTS KIT #1
PARTS KIT #2
PARTS KIT #3
FOAM SPACER
ITEM 2
ITEM 5
ITEM 6
1
Thank you for choosing Westin products
for additional installation assistance please call
Customer Service (800) 793-7846
www.westinautomotive.com
TOOLS NEEDED
13mm SOCKET
12mm SOCKET
10mm SOCKET
RATCHET
TORQUE WRENCH
5MM ALLEN KEY
PHILLIPS SCREW-
DRIVER
T-25 TORX BIT
DATE: 7/23/24
Advertisement

Related Manuals for Westin 16-11295


Summary of Contents for Westin 16-11295
- Page 1 ITEM 1 ITEM 5 ITEM 3 ITEM 4 ITEM 6 Westin Automotive Products, Inc. Thank you for choosing Westin products 320 W. Covina Blvd for additional installation assistance please call San Dimas, Ca. 91773 Customer Service (800) 793-7846 www.westinautomotive.com P.N.: 75-1611295-RevA...
- Page 2 Cross section view A-A shows how the railing system works to attach these components together. (Fig. 2) FIGURE 1 FIGURE 2 Westin Automotive Products, Inc. Thank you for choosing Westin products 320 W. Covina Blvd for additional installation assistance please call San Dimas, Ca. 91773 Customer Service (800) 793-7846 www.westinautomotive.com...
- Page 3 5. While lifting the rear door up, slide the left panel into the railing system. Section view A-A shows how the left panel slides into the roof panel. (Fig. 4) FIGURE 4 Westin Automotive Products, Inc. Thank you for choosing Westin products 320 W. Covina Blvd for additional installation assistance please call San Dimas, Ca. 91773 Customer Service (800) 793-7846 www.westinautomotive.com...
- Page 4 FIGURE 5 7. Next, push the front panel into the roof panel. (Fig. 6) FIGURE 6 Westin Automotive Products, Inc. Thank you for choosing Westin products 320 W. Covina Blvd for additional installation assistance please call San Dimas, Ca. 91773 Customer Service (800) 793-7846 www.westinautomotive.com...
- Page 5 (Fig. 10) FIGURE 8 FIGURE 9 FIGURE 10 Westin Automotive Products, Inc. Thank you for choosing Westin products 320 W. Covina Blvd for additional installation assistance please call San Dimas, Ca. 91773 Customer Service (800) 793-7846 www.westinautomotive.com...
- Page 6 (Fig. 12). Connect the roof panel wire to the rear door connector as shown below. (Fig. 13) FIGURE 12 FIGURE 13 Westin Automotive Products, Inc. Thank you for choosing Westin products 320 W. Covina Blvd for additional installation assistance please call San Dimas, Ca. 91773 Customer Service (800) 793-7846 www.westinautomotive.com...
- Page 7 16) Repeat this step for the other side of the topper. FIGURE 15 FIGURE 16 Westin Automotive Products, Inc. Thank you for choosing Westin products 320 W. Covina Blvd for additional installation assistance please call San Dimas, Ca. 91773 Customer Service (800) 793-7846 www.westinautomotive.com...
- Page 8 Fig. 18 to 10Nm (8ft-lbs). SLOTS FOR ADJUSTABILITY FIGURE 17 FIGURE 18 Westin Automotive Products, Inc. Thank you for choosing Westin products 320 W. Covina Blvd for additional installation assistance please call San Dimas, Ca. 91773 Customer Service (800) 793-7846 www.westinautomotive.com...
- Page 9 16. Repeat the process in Step 14 to install the corner covers on the rear corners of the topper assembly. (Fig. 21) FIGURE 21 Westin Automotive Products, Inc. Thank you for choosing Westin products 320 W. Covina Blvd for additional installation assistance please call San Dimas, Ca.
- Page 10 Make sure to avoid dragging the topper across the truck bed rails. Handle with caution to avoid injury to hands and damage to the topper assembly and vehicle. (Fig. 25) FIGURE 25 Westin Automotive Products, Inc. Thank you for choosing Westin products 320 W. Covina Blvd for additional installation assistance please call San Dimas, Ca. 91773 Customer Service (800) 793-7846 www.westinautomotive.com...
- Page 11 Use a 13mm socket to initially tighten the top clamps, then torque to 5Nm (3.7ft-lbs). The tightened top clamp should re- semble (Fig. 27). FIGURE 26 FIGURE 27 Westin Automotive Products, Inc. Thank you for choosing Westin products 320 W. Covina Blvd for additional installation assistance please call San Dimas, Ca. 91773 Customer Service (800) 793-7846 www.westinautomotive.com...
- Page 12 21. Use the nuts already installed on the end of the gas studs to secure the studs to the rear door using a 12mm socket. (Fig. 29) FIGURE 29 Westin Automotive Products, Inc. Thank you for choosing Westin products 320 W. Covina Blvd for additional installation assistance please call San Dimas, Ca.
- Page 13 26. Reconnect the battery and test that the topper’s brake light turns on with the vehicle’s brake lights. Test that the tailgate and vehicle’s doors lock synchronously. 27. Fully tighten the battery’s connectors and reinstall the vehicle tail light. The installation of your Westin Automotive Bed Topper is complete! FIGURE 30 FIGURE 31 Westin Automotive Products, Inc.
- Page 14 AND SAFETY. DRILLING: Most Westin products do not require drilling for installation. If drilling is defined as required, use caution when drilling a vehicle. FAILURE TO REVIEW AN AREA TO BE DRILLED MAY RESULT IN PERSONAL INJURY AND/OR INJURY TO OTHERS AS WELL AS VEHICLE DAMAGE.
Need help?
Do you have a question about the 16-11295 and is the answer not in the manual?
Questions and answers