Table of Contents
Advertisement
Quick Links
Advertisement
Table of Contents

Related Manuals for InfiRay THERMFOX Finder FL25R


Summary of Contents for InfiRay THERMFOX Finder FL25R
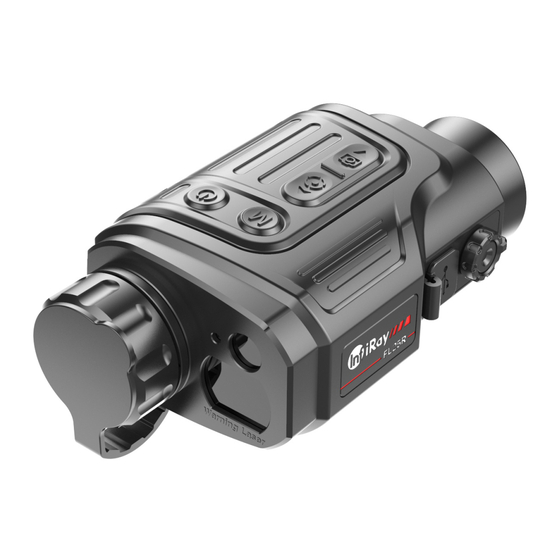
- Page 1 Finder series Thermal imaging monocular Operating Instructions V1.0...
-
Page 2: Contents Of The Package
1. Contents of the package 1) Finder Series Thermal Imager 2) USB cable 3) Power adapter 4) Hand strap 5) Neck strap 6) Optics cleaning cloth 7) Warranty Card 8) User manual 2. Product description The Finder range is lightweight and easy to carry and can be operated with one hand. Thanks to its compact size and light weight, it can be stored in your pocket at any time. -
Page 3: Functions Of The Buttons
4. Functions of the buttons Equipment First short Another Long press Button status/ current press short operating mode press Power The device is Turns on the switched off device button (13) The device is Standby Cancel Shuts down the switched on device mode operati... - Page 4 Laser rangefinder Single measurement He's mode going to leave regime laser rangefinder Quick menu 1 E-zoom switching Quick menu 2 Switching image tuning Main menu Navigation to the top Laser Cursor Shift one pixel up/right Shift 10 pixels Calibration up/right Interface/Flawed Pixel Calibration Interface...
-
Page 5: Security Measures
Video output Digital compass Motion sensor Automatic shutdown of the display Calibration mode Read more Laser cursor calibration Defective pixel calibration Calibrating the compass System information To return to factory settings Return to the main menu Single measurement Continuous measurement Battery charge indicator Batteries and safety The Finder series comes with a rechargeable Li-ion battery that allows you to use the thermal imager for... -
Page 6: Operation
➢ The device is equipped with a short-circuit protection system. However, situations that may lead to a short circuit must be avoided. ➢ The recommended operating temperature of the device is between -10 °C and +50 °C. Do not use the product outside this temperature range -- battery life may be reduced. -
Page 7: Sensor Calibration
The colour of the battery icon represents the current battery level. If the battery icon is displayed red, the battery is low. Charge it in time. Icon Colour Charge level Blue 30%-100% Yellow 20%-30% Less than 10%, must be charged Charging 9. -
Page 8: Video Recording
Video recording ➢ From the home screen, press and hold the Down/Photo button (10) to start recording video. ➢ A tooltip with the recording time (in MM:SS (minutes:seconds) format) appears in the upper right corner of the display. ➢ The red dot in the help flashes while recording. ➢... - Page 9 indicates the position marked by the laser. ➢ Press the UP/Distance button (11) briefly again to switch off the laser marking function. Laser distance measurement ➢ Press and hold the UP/Distance button (11) on the home screen to activate the laser rangefinder function.
-
Page 10: Main Menu Functions
Picture mode- Press the UP button (11) to change the picture mode in the context menu 2. The icons from left to right are white hot, black hot, red hot, color. White hot Black and white palette (cold temperature corresponds to black and warm temperature corresponds to white). - Page 11 ➢ Press the Menu button (12) to set the parameters of the current option or to open a menu item. ➢ For the option short press the Menu button (12) to enter the submenu for further settings. ➢ The control of the submenu buttons is the same as for the main menu. ➢...
- Page 12 Motion Choosing a motion sensor sensor ● Press and hold the Menu button (12) to enter the menu. ● Select "Motion sensor". ● Press the Menu button (12) briefly to switch the motion sensor on/off. ● If enabled, the relevant functions will be displayed on the left side of the panel.
- Page 13 Laser If the position of the laser-target does not match the crosshair position on cursor the display, this function can be used to correct the crosshair position. calibration ● Press the Menu button (12) to open the submenu. ● Select "Laser Cursor Calibration". ●...
- Page 14 Defective When using the device, defective (damaged) pixels may appear on pixel the sensor: i.e., bright or dark spots of constant brightness that are calibratio visible in the image. The Finder series offers the possibility to remove defective pixels on the sensor and also to cancel any removal.
- Page 15 Calibrating Digital compass calibration ● Press the Menu button (12) to open the submenu. ● Use the UP (11) / DOWN (10) buttons to select "Compass Calibration". compass ● Press the Menu button (12) briefly to enter the compass calibration interface.
-
Page 16: Pip Function
Return to Return to the main menu the main ● Press the Menu button (12) to open the submenu. menu ● Select "Return to Main Menu" ● To return to the main menu, briefly press the Menu button (12). 14. Wi-Fi features The device is equipped with wireless communication with external devices (computer, smartphone) via Wi-Fi. -
Page 17: Maintenance
It is recommended to carry out a technical check of the instrument before each use. Check: ➢ External appearance of the device (there should be no cracks on the cover). ➢ Condition of the lens and eyepiece (no cracks, grease spots, dirt or other deposits). ➢... - Page 18 You cannot connect The device password has Delete the network and a smartphone or been changed. reconnect using the device tablet to the device. password. The device is located in an To ensure stable Wi-Fi area with a large number of traffic, move the device to an Wi-Fi networks that may area with fewer Wi-Fi...
-
Page 19: Specifications
20. Specifications Model FL25R FH25R Microbolometer Type Unrefrigerated Unrefrigerated Resolution, Pixels 384x288 640x512 Pixel size, um Frame rate, Hz Optical specifications Lens lens, mm Field of view (H x D), degrees 10.5x7.9 17.5x14.0 Optical magnification, x 2.5~10.0 1.5~6.0 Digital zoom, x x1 x2 x3 x4 x1 x2 x3 x4 Minimum focusing distance, m...
Need help?
Do you have a question about the THERMFOX Finder FL25R and is the answer not in the manual?
Questions and answers