TRENDnet TEW-692GR User Manual
450mbps concurrent dual band wireless n router
Hide thumbs
Also See for TEW-692GR:
- Specifications (2 pages) ,
- Quick installation manual (21 pages) ,
- User manual (107 pages)
Table of Contents
Advertisement
Quick Links
Download this manual
See also:
User Manual
Advertisement
Table of Contents

Related Manuals for TRENDnet TEW-692GR


Summary of Contents for TRENDnet TEW-692GR
- Page 2 Statement This equipment has been tested and found to comply with the limits for a Class B digital device, pursuant to Part 15 of the FCC Rules. These limits are designed to provide reasonable protection against harmful interference in a residential installation. This equipment generates uses and can radiate radio frequency energy and, if not installed and used in accordance with the instructions, may cause harmful interference to radio communications.
- Page 3 Europe – EU Declaration of Conformity This device complies with the essential requirements of the R&TTE Directive 1999/5/EC. The following test methods have been applied in order to prove presumption of conformity with the essential requirements of the R&TTE Directive 1999/5/EC: +A11: 2009 EN60950-1:2006 Safety of Information Technology Equipment...
- Page 4 Hereby, TRENDnet, declares that this TEW-692GR is in compliance with the essential requirements and other relevant provisions of Directive 1999/5/EC. Español Por medio de la presente TRENDnet declara que el TEW-692GR cumple con los [Spanish] requisitos esenciales y cualesquiera otras disposiciones aplicables o exigibles de la Directiva 1999/5/CE.
- Page 5 TRENDnet declara que este TEW-692GR está conforme com os requisitos Português essenciais e outras disposições da Directiva 1999/5/CE. [Portuguese TRENDnet izjavlja, da je ta TEW-692GR v skladu z bistvenimi zahtevami in Slovensko ostalimi relevantnimi določili direktive 1999/5/ES. [Slovenian] TRENDnet týmto vyhlasuje, že TEW-692GR spĺňa základné požiadavky a všetky Slovensky príslušné...
-
Page 6: Table Of Contents
Contents Getting Started ......................8 Package Contents ....................8 Minimum System Requirements ................8 Introduction ....................... 9 Features ......................... 9 Overview ......................... 10 Network Diagram: ....................10 Front Panel LEDs ....................10 Rear panel ......................10 Wireless Performance Considerations ..............11 Using the Configuration Menu ................. - Page 7 Management ......................48 Upload Firmware ....................49 Setting Management .................... 50 Time ........................51 Status ........................52 Help ........................53 Appendix ......................... 54 Wireless LAN Networking ..................54 Glossary ....................... 56 Specification ......................61 Limited Warranty ..................... 62...
-
Page 8: Getting Started
Getting Started Congratulations on purchasing theTEW-692GR This manual provides information for setting up and configuring the TEW-692GR. This manual is intended for both home users and professionals. The following conventions are used in this manual: PACKAGE CONTENTS TEW-692GR CD-ROM (User’s Guide) ... -
Page 9: Introduction
Introduction TRENDnet’s 450Mbps Concurrent Dual Band Wireless N Router, model TEW-692GR, is the first router to support 450Mbps speeds on both the 2.4GHz and 5GHz bands at the same time. This router’s raw horsepower redefines wireless networking as we know it, to easily stream HD video through the home. -
Page 10: Overview
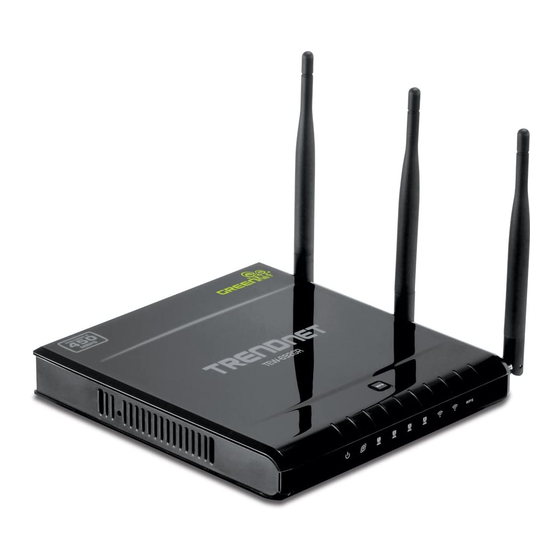
Overview NETWORK DIAGRAM: FRONT PANEL LEDS • PWR • WAN • LAN1 • LAN2 • LAN3 • LAN4 • Wireless • Wireless • WPS • Reserve REAR PANEL • DC-IN • POWER SWITCH( EU) • WAN • LAN1 • LAN2 •... -
Page 11: Wireless Performance Considerations
WIRELESS PERFORMANCE CONSIDERATIONS There are a number of factors that can impact the range of wireless devices. 1. Adjust your wireless devices so that the signal is traveling in a straight path, rather than at an angle. The more material the signal has to pass through the more signal you will lose. 2. -
Page 12: Using The Configuration Menu
Using the Configuration Menu Whenever you want to configure your TEW-692GR, you can access the Configuration Menu through your PC by opening the Web-browser and typing in the IP Address of the TEW-692GR. The TEW-692GR’s default IP Address is http://192.168.10.1 •... -
Page 13: Setup Wizard
Setup Wizard Setup Wizard is an easy way to set up the TEW-692GRstep by step. The Wizard will guide user’s to set up the TEW-692GR in just few steps. To setup the router’s internet connection settings, click ‘Launch Internet Connection Setup Wizard’... -
Page 14: Network
Network WAN SETTING There are several connection types to choose from: Static IP, DHCP, PPPoE, PPTP, L2TP, and Russia PPTP. If you are unsure of your connection method, please contact your Internet Service Provider. WAN Connection Type There are several connection types to choose from: Static IP, DHCP, PPPoE, PPTP, L2TP, and Russia PPTP. - Page 15 PPPoE: Select this option if your ISP requires you to use a PPPoE (Point to Point Protocol over Ethernet) connection. DSL providers typically use this option. This method of connection requires you to enter a Username and Password (provided by your Internet Service Provider) to gain access to the Internet. Reconnect Mode: Typically PPPoE connections are not always on.
- Page 16 Reconnect Mode: Typically PPPoE connections are not always on. The router allows you to set the reconnection mode. The settings are: Always on: A connection to the Internet is always maintained. On demand: A connection to the Internet is made as needed. Manual: You have to open up the Web-based management interface and click the Connect button manually any time that you wish to connect to the Internet.
-
Page 17: Lan Setting
MAC Address button. The WAN interface will then use the MAC address of the network adapter in your computer. LAN SETTING IP Address:The IP address of the this device on the local area network. Assign any unused IP address in the range of IP addresses available for the LAN. Subnet Mask: The subnet mask of the local area network. -
Page 18: Qos
Reservations are helpful for server computers on the local network that are hosting applications such as Web and FTP. Servers on your network should either use a static IP address or use this option. Computer Name: You can assign a name for each computer that is given a reserved IP address. This may help you keep track of which computers are assigned this way. -
Page 19: Dhcp Client List
Upload Bandwidth: Limit bandwidth of upload manually with ‘User Defined’ or set the bandwidth limit via drop-down menu (between 64Mbits ~ 230Mbits) per device on network. DHCP CLIENT LIST This section displays all connected LAN devices currently receiving IP address from the router. -
Page 20: Wireless 2.4Ghz
If you have some devices that use a different transmission mode, choose the appropriate wireless mode. The TEW-692GR supports 2.4GHz wireless networks. There are many different configuration options available to choose from. Use the drop down list to select the wireless mode. - Page 21 802.1x, both feature cannot be used at the same time). Configuring WDS with TEW-692GR: Enable the option for WDS and input the MAC Address of the wireless device that also supports WDS in to the blank fields. You can add up to four additional devices in the spaces provided.
- Page 22 (Note: WDS supports wireless g/n modes. The use multiple Access Point will reduces the overall network throughput to ½ the WRT-893L. HT Physical Mode: In HT (High Throughput) Physical mode setting allow for control of the 802.11n wireless environment. Channel BandWidth: Set channel width of wireless radio.
-
Page 23: Advanced
ADVANCED Beacon Interval: Beacons are packets sent by a wireless router to synchronize wireless devices. Specify a Beacon Period value between 20 and 1000. The default value is set to 100 milliseconds. DTIM: A DTIM is a countdown informing clients of the next window for listening to broadcast and multicast messages. -
Page 24: Security
Short Preamble and Slot: Using a short (400ns) guard interval can increase throughput. However, it can also increase error rate in some installations, due to increased sensitivity to radio-frequency reflections. Select the option that works best for your installation. TX Power: Allows the wireless Router to deliver better throughput in the same period and environment in order to increase speed. - Page 25 easier to remember. The ASCII string is converted to HEX for use over the network. Four keys can be defined so that you can change keys easily. A default key is selected for use on the network. WPA-Personal and WPA-Enterprise: Both of these options select some variant of Wi-Fi Protected Access (WPA) -- security standards published by the Wi-Fi Alliance.
-
Page 26: Wps
Wireless MAC Filtering: Choose the type of MAC filtering needed. Turn MAC Filtering Disable: When "Disable" is selected, MAC addresses are not used to control network access. Add MAC Filtering Rule: Use this section to add MAC addresses to the list below. MAC Address: Enter the MAC address of a computer that you want to control with MAC filtering. -
Page 27: Station List
Enable: Enable the WPS feature. Lock Wireless Security Settings: Locking the wireless security settings prevents the settings from being changed by any new external registrar using its PIN. Devices can still be added to the wireless network using WPS. PIN Settings: A PIN is a unique number that can be used to add the router to an existing network or to create a new network. -
Page 28: Wireless 5Ghz
Wireless 5GHz BASIC Radio On/Off: This indicates the wireless operating status. The wireless can be turned on or off by the slide switch. When the radio is on, the following parameters are in effect. Wireless Mode: If all of the wireless devices you want to connect with this router can connect in the same transmission mode, you can improve performance slightly by choosing the appropriate wireless mode. - Page 29 Wireless Mode options: 5GHz 802.11a only mode - This wireless mode works in the 5GHz frequency range and will allow wireless a client to connect and access the TEW-692GR450Mbps Concurrent Wireless N Gigabit Router at 54Mbps for wireless a only mode. Although the wireless a operates in the 5GHz frequency, this mode will only permit wireless a client devices to work and will exclude any other wireless mode and devices that are not wireless a only.
- Page 30 802.1x, both feature cannot be used at the same time). Configuring WDS with TEW-692GR: Enable the option for WDS and input the MAC Address of the wireless device that also supports WDS in to the blank fields. You can add up to four additional devices in the spaces provided.
-
Page 31: Advanced
ADVANCED Beacon Interval: Beacons are packets sent by a wireless router to synchronize wireless devices. Specify a Beacon Period value between 20 and 1000. The default value is set to 100 milliseconds. DTIM: A DTIM is a countdown informing clients of the next window for listening to broadcast and multicast messages. -
Page 32: Security
Short Preamble and Slot: Using a short (400ns) guard interval can increase throughput. However, it can also increase error rate in some installations, due to increased sensitivity to radio-frequency reflections. Select the option that works best for your installation. SECURITY Security Mode Unless one of these encryption modes is selected, wireless transmissions to and from your wireless network can be easily intercepted and interpreted by unauthorized users. - Page 33 (hexadecimal - using characters 0-9, A-F) or ASCII (American Standard Code for Information Interchange - alphanumeric characters) format. ASCII format is provided so you can enter a string that is easier to remember. The ASCII string is converted to HEX for use over the network. Four keys can be defined so that you can change keys easily.
- Page 34 Wireless MAC Filtering: Choose the type of MAC filtering needed. Turn MAC Filtering Disable: When "Disable" is selected, MAC addresses are not used to control network access. Add MAC Filtering Rule: Use this section to add MAC addresses to the list below. MAC Address: Enter the MAC address of a computer that you want to control with MAC filtering.
-
Page 35: Wps
Enable: Enable the WPS feature. Lock Wireless Security Settings: Locking the wireless security settings prevents the settings from being changed by any new external registrar using its PIN. Devices can still be added to the wireless network using WPS. PIN Settings: A PIN is a unique number that can be used to add the router to an existing network or to create a new network. -
Page 36: Station List
PBC Settings: The push button method can be used to allow wireless clients to connect to the router without entering/remember any encryption keys. The user can use the PBC method by pressing the WPS button on the side of the router or select the PBC option under Wireless/WPS settings page and hit Apply. -
Page 37: Advanced
Advanced DMZ Setting DMZ means "Demilitarized Zone." If an application has trouble working from behind the router, you can expose one computer to the Internet and run the application on that computer. When a LAN host is configured as a DMZ host, it becomes the destination for all incoming packets that do not match some other incoming session or rule. - Page 38 Packets received by the DMZ host have their IP addresses translated from the WAN-side IP address of the router to the LAN-side IP address of the DMZ host. However, port numbers are not translated; so applications on the DMZ host can depend on specific port numbers. The DMZ capability is just one of several means for allowing incoming requests that might appear unsolicited to the NAT.
-
Page 39: Virtual Server
VIRTUAL SERVER Enable: Specifies whether the entry will be active or inactive. Name: Assign a meaningful name to the virtual server, for example Web Server. Several well-known types of virtual server are available from the "Application Name" drop-down list. Selecting one of these entries fills some of the remaining parameters with standard values for that type of server. -
Page 40: Routing
ROUTING Add/Edit Route: Adds a new route to the IP routing table or edits an existing route. Destination IP: The IP address of packets that will take this route. Gateway: Specifies the next hop to be taken if this route is used. A gateway of 0.0.0.0 implies there is no next hop, and the IP address matched is directly connected to the router on the interface specified: LAN or WAN. -
Page 41: Access Control
Routes List: The section shows the current routing table entries. Certain required routes are predefined and cannot be changed. Routes that you add can be changed by clicking the Edit icon or can be deleted by clicking the Delete icon. When you click the Edit icon, the item is highlighted, and the "Edit Route" section is activated for editing. -
Page 42: Alg
ALG (Application level gateway): It allows customized NAT traversal filters to be plugged into the gateway to support address and port translation for certain application layer "control/data" protocols such as FTP, SIP, RTSP, file transfer in IM applications etc. In order for these protocols to work through NAT or a firewall, either the application has to know about an address/port number combination that allows incoming packets, or the NAT has to monitor the control traffic and open up port mappings (firewall pinhole) dynamically as required. -
Page 43: Special Applications
SPECIAL APPLICATIONS Add/Edit Port Trigger Rule Enable: Specifies whether the entry will be active or inactive. Name: Enter a name for the Special Application Rule, for example Game App, which will help you identify the rule in the future. Alternatively, you can select from the Application list of common applications. -
Page 44: Gaming
GAMING Add/Edit Port Range Rule: Use this section to add a Port Range Rule to the following list or to edit a rule already in the list. Rule Enable: Specifies whether the entry will be active or inactive. Rule Name: Give the rule a name that is meaningful to you, for example Game Server. You can also select from a list of popular games, and many of the remaining configuration values will be filled in accordingly. -
Page 45: Inbound Filter
INBOUND FILTER Add/Edit Inbound Filter Rule: Here you can add entries to the Inbound Filter Rules List below, or edit existing entries. Name: Enter a name for the rule that is meaningful to you. Action: The rule can either Allow or Deny messages. Remote IP Range: Define the ranges of Internet addresses this rule applies to. -
Page 46: Schedule
SCHEDULE Add/Edit Schedule Rule: In this section you can add entries to the Schedule Rules List below or edit existing entries. Name: Give the schedule a name that is meaningful to you, such as "Weekday rule". Day(s): Place a checkmark in the boxes for the desired days or select the All Week radio button to select all seven days of the week. -
Page 47: Advanced Network
ADVANCED NETWORK UPnP: By default, the UPnP feature is enabled. Universal Plug and Play (UPnP) is a set of networking protocols for primarily residential networks without enterprise class devices that permits networked devices, such as personal computers, printers, Internet gateways, Wi-Fi access points and mobile devices to seamlessly discover each other's presence on the network and establish functional network services for data sharing, communications, and entertainment. -
Page 48: Administrator
Administrator MANAGEMENT Admin Password: Enter a password for the user "admin", who will have full access to the Web-based management interface. Device Name: The name of the router can be changed here. Enable Dynamic DNS: Enable this option only if you have purchased your own domain name and registered with a dynamic DNS service provider. -
Page 49: Upload Firmware
Password: Enter the password provided by your service provider. If the Dynamic DNS provider supplies only a key, enter that key in all three fields.Enter your host name, fully qualified; for example: myhost.mydomain.net. Account: Enter the account provided by your service provider. If the Dynamic DNS provider supplies only a key, enter that key in all three fields. -
Page 50: Setting Management
SETTING MANAGEMENT Export Settings: This option allows you to export and then save the router's configuration to a file on your computer. Be sure to save the configuration before performing a firmware upgrade. Import Settings: Use this option to restore previously saved router configuration settings. Load Factory Defaults: This option restores all configuration settings back to the settings that were in effect at the time the router was shipped from the factory. -
Page 51: Time
TIME Time Configuration Current Router Time: Displays the time currently maintained by the router. If this is not correct, use the following options to configure the time correctly. Time Zone: Select your local time zone from pull down menu. Automatic Time Configuration Enable NTP Server: Select this option if you want to synchronize the router's clock to a Network Time Server over the Internet. -
Page 52: Status
STATUS The section displays the current status of the router. -
Page 53: Help
Help Help section provides web-based explanations on each configurable field. -
Page 54: Appendix
BE DONE BY AN AUTHORIZED ADMINISTRATOR. Transmission Rate (Transfer Rate) The TEW-692GR provides various transmission (data) rate options for you to select. In most networking scenarios, the factory default Best (automatic) setting proves the most efficient. This setting allows your TEW-692GR to operate at the maximum transmission (data) rate. When the communication quality drops below a certain level, the TEW-692GR automatically switches to a lower transmission (data) rate. - Page 55 When a number of wireless stations are connected using a single access point, you have a Basic Service Set (BSS). In the ESS diagram below, communication is done through the access points, which relay data packets to other wireless stations or devices connected to the wired network. Wireless stations can then access resources, such as a printer, on the wired network.
-
Page 56: Glossary
GLOSSARY 802.11 A family of specifications for wireless local area networks (WLANs) developed by a working group of the Institute of Electrical and Electronics Engineers (IEEE). Access Point - A device that allows wireless-equipped computers and other devices to communicate with a wired network. also used to expand the range of a wireless network. Ad-hoc - A group of wireless devices communicating directly with each other (peer-to-peer) without the use of an access point. - Page 57 Download - To receive a file transmitted over a network. DSL (Digital Subscriber Line) - An always-on broadband connection over traditional phone lines. Dynamic IP Address - A temporary IP address assigned by a DHCP server. EAP (Extensible Authentication Protocol) - A general authentication protocol used to control network access.
- Page 58 MAC (Media Access Control) Address - The unique address that a manufacturer assigns to each networking device. Mbps (MegaBits Per Second) - One million bits per second; a unit of measurement for data transmission. NAT (Network Address Translation) - NAT technology translates IP addresses of a local area network to a different IP address for the Internet.
- Page 59 SPI (Stateful Packet Inspection) Firewall - A technology that inspects incoming packets of information before allowing them to enter the network. SSID (Service Set IDentifier) - Wireless network's name. Static IP Address - A fixed assigned address to a computer or device that is connected to a network.
- Page 60 WLAN (Wireless Local Area Network) - A group of computers and associated devices that communicate with each other wirelessly. WPA (Wi-Fi Protected Access) - a wireless security protocol using TKIP (Temporal Key Integrity Protocol) encryption, which can be used in conjunction with a RADIUS server. xDSL - A generic term for the family of digital subscriber line (DSL) technologies, such as ADSL, HDSL, RADSL, and SDSL.
-
Page 61: Specification
Specification Hardware Wired: IEEE 802.3 (10Base-T), IEEE 802.3u (100Base-TX), IEEE 802.3ab Standards (1000Base-T) Wireless: IEEE 802.11n, 802.11g, 802.11b, 802.11a 4 x 10/100/1000Mbps Auto-MDIX port 1 x 10/100/1000Mbps Auto-MDIX port WPS Button Wi-Fi Protected Setup (WPS) connects with other WPS compliant devices LED Indicator Power, LAN 1-4, WAN, 2.4 GHz Wireless, 5 GHz Wireless, WPS Power Adapter... -
Page 62: Limited Warranty
TRENDnet products. Products that are sent to TRENDnet for RMA service must have the RMA number marked on the outside of return packages and sent to TRENDnet prepaid, insured and packaged appropriately for safe shipment. - Page 63 Download section and look for the desired TRENDnet product to access to the GPL Code or LGPL Code. These codes are distributed WITHOUT WARRANTY and are subject to the copyrights of the developers. TRENDnet does not provide technical support for these codes. Please go to http://www.gnu.org/licenses/gpl.txt...
Need help?
Do you have a question about the TEW-692GR and is the answer not in the manual?
Questions and answers