Table of Contents
Advertisement
Quick Links
Advertisement
Table of Contents
Troubleshooting

Related Manuals for Gewiss JOINON I-ON EVO Series


Summary of Contents for Gewiss JOINON I-ON EVO Series
- Page 1 JOINON I-ON EVO RANGE User and installation manual...
-
Page 2: Table Of Contents
I-ON EVOLUTION CONTENT Introduction ��������������������������������������������������������������������������������������������������������������������4 Features ��������������������������������������������������������������������������������������������������������������������������5 Applications ��������������������������������������������������������������������������������������������������������������������5 1� I-ON EVOUser Interface�����������������������������������������������������������������������������������������������6 2� Specification ���������������������������������������������������������������������������������������������������������������7 2�1 Product Specification - I-ON Column ���������������������������������������������������������� 7 2�2 Product Specification - I-ON EVO wallbox �������������������������������������������������� 10 2�3 General and Country-specific requirements ����������������������������������������������� 12 2�4 I-ON EVO code description ��������������������������������������������������������������������������... - Page 3 6�3 Connection between charging points ��������������������������������������������������������� 42 6�4 Topology 1: “Daisy Chain” �������������������������������������������������������������������������� 42 6�5 Topology 2: star connection ������������������������������������������������������������������������ 44 6�6 Connection of metering devices ������������������������������������������������������������������ 45 6�7 External sensor positioning instructions ���������������������������������������������������� 46 7� Functional Specification �������������������������������������������������������������������������������������������47 7�1 Basic functions �������������������������������������������������������������������������������������������� 47 7�2 Dynamic MultiCP Mode �������������������������������������������������������������������������������...
-
Page 4: Introduction
It is is important to note that the information in this document is subject to change without notice. Please download the latest version from www.gewiss. The JOINON I-ON EVOLUTIONcharging system is the best choice for powering battery electric vehicles (BEVs) and plug-in hybrid electric vehicles (PHEVs). It is... -
Page 5: Features
The document is the user manual for the following charge points Code Description Market Power GWJ1502TK I-ON EVOMulti CP (with auth) T2S 7.4kW M-UK 7.4kW + 7,4kW GWJ1504TK I-ON EVOMulti CP (with auth) T2S 22kW M-UK 22kW + 22kW GWJ2502TK I-ON EVOMulti CP (with auth) T2S 7.4kW M-UK 7.4kW + 7,4kW GWJ2504TK... -
Page 6: 1� I-On Evouser Interface
I-ON EVOLUTION 1. I-ON EVOUser Interface LEDs indication (one per socket) Display* Button to change language* RFID reader* (optional) T2 Socket o Tethered T2 connector (only for I-ON EVO column) Security Keys (x3) Notice: According to EN-17186 requirement, this document lays down harmonized identifiers for power supply for electric road vehicles. -
Page 7: 2� Specification
2. Specification 2.1 Product Specification - I-ON Column Model name GWJ1502TK - GWJ1504TK 230 Vac (±15%) Voltage Rating 400 Vac (±15%) Max Input Current 64 A Max. Input Power 2x 22 kVA INPUT Power Grid System TN / TT Frequency 50/60 Hz Electrical Distribution 1P+N+PE 3P+N+PE... - Page 8 I-ON EVOLUTION Model name GWJ1502TK - GWJ1504TK • Wi-Fi External External • Ethernet 10/100 Communication Internal • 2014/53/EU • 2011/65/EU + 2015/863 Directive • Electromagnetic compatibility EMC classification: B • EN IEC 61851-1 • EN IEC 61851-21-2 • EN IEC 63000 Regulation for EU •...
- Page 9 Model name GWJ1502TK - GWJ1504TK • None • RFID reader (ISO 14443A/B support) User Authorization • Via app User Interface • Via OCPP Charge Status • LED & LCD colour screen for each Information charging point Charging Interface • T2 socket Standby Power •...
-
Page 10: 2�2 Product Specification - I-On Evo Wallbox
I-ON EVOLUTION 2.2 Product Specification - I-ON EVO wallbox Model name GWJ1502TK - GWJ1504TK 230 Vac (±15%) Voltage Rating 400 Vac (±15%) Max Input Current 64 A Max. Input Power 2x 22 kVA INPUT Power Grid System TN / TT Frequency 50/60 Hz Electrical Distribution... - Page 11 Model name GWJ1502TK - GWJ1504TK • 2014/53/EU • 2011/65/EU + 2015/863 Directive • Electromagnetic compatibility EMC classification: B • EN IEC 61851-1 • EN IEC 61851-21-2 • EN IEC 63000 Regulation for EU • ETSI EN 301 489-3 V2.1.1 • ETSI EN 301 489-17 V3.2.4 Standard •...
-
Page 12: 2�3 General And Country-Specific Requirements
I-ON EVOLUTION Model name GWJ1502TK - GWJ1504TK • None User Authorization • RFID • Via app User Interface Charge Status • LED & LCD colour screen for each Information charging point • T2 socket • T2 tethered cable Charging Interface •... -
Page 13: 2�4 I-On Evo Code Description
2.4 I-ON EVO code description I-ON EVO is available in different versions depending on the connector type, power of charge, display availability and other internal devices. The table below describes the meaning of the number and letter. I-ON CODE DESCRIPTION Equipment Socket type Nominal power... -
Page 14: 2�5 Led Indication And Operation Status
I-ON EVOLUTION 2.5 LED Indication and Operation Status The charging station informs the customer of the status and which actions to perform through the use of RGB LEDs. Below the meaning of the various colors is explained. Standby Fault Charging Colour Solid Flashing... -
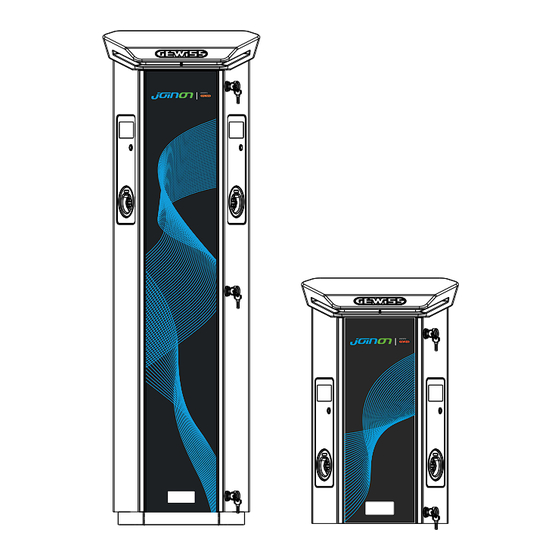
Page 15: 2�6 Dimensions
2.6 Dimensions 2�6�1 Main Size of Charger:(Unit: mm) -
Page 16: 3� Device Delivery And Storage
3.2 Device Identification The serial number of the device identifies it unequivocally. In any communication with Gewiss, reference must be made to this number. The device serial number is indicated on the technical data label (on the right side of the front panel). -
Page 17: 3�5 Device Handling
• Cover the device with a protective breathable material to avoid condensation caused by environmental humidity. • Charging stations kept in a warehouse must not be subjected to climatic conditions other than those indicated below Ambient storage conditions Minimum temperature -40°C Minimum temperature of the surrounding air -40°C... - Page 18 I-ON EVOLUTION 3�5�2 Handling with a forklift At least the following provisions must be observed: 1. Set the stations down (still packaged) in a central position in relation to the forks. 2. Position them as close as possible to the point where the forks are joined to the upright.
- Page 19 To allow the installer to prepare the column fixing area beforehand, the base is inserted in the packaging in such a way that it can be taken out separately from the charging unit. The base can therefore be removed from the packaging and installed on the ground, attached to the tie-rods embedded in the cement or to the anchor plugs already fitted in the ground (as shown below): 3�5�5 Packaging disposal...
-
Page 20: 4� Installation Prerequisites
I-ON EVOLUTION 4. Installation prerequisites 4.1 Before Installation • Read all the instructions before using and installing this product. • Do not use this product if the power cable or charging cable has any damage. • Do not use this product if the enclosure or charging connector is broken or open or if there is damage. -
Page 21: 4�2 Environment
Charging station classification: • Permanently connected • Equipment for locations with no restricted access • Class I equipment 4.2 Environment Position the charging station in a location that can be accessed for installation and maintenance, which permits its use and: •... - Page 22 I-ON EVOLUTION The installation surface must be suitably prepared according to the type of ground, to guarantee that the device is stable during use. You are therefore advised to use the base supplied (column version), fixing it to the ground by means of tie-rods (not supplied) or plugs, or embedded in cement.
-
Page 23: 4�4 Support And Fixing Surface (Wallbox Version)
4.4 Support and fixing surface (wallbox version) Ensure that there is a solid and even surface for anchoring the device, which must be perfectly vertical. The installation surface must be adequately prepared to ensure the stability of the device during use. We therefore recommend using the supplied kit (wallbox version) or pole mount. -
Page 24: 4�6 Grounding And Safety Requirements
I-ON EVOLUTION 4�5�4 Protection against Inclement weather • Secure all scaffoldings, temporary structures, equipment, and lose materials • Check and implement SOP to ensure disconnection of gas supplies, electrical circuits and equipment • Inspect worksites to ensure protection against ingress of water or dust •... - Page 25 1. Requirements for workplace conditions • Set up suitable fencing to isolate the construction area from outside • Close and secure all entrances when the site is unattended • Hang warning notices nearby which show the following information: warning icon and phone number of person in charge •...
- Page 26 I-ON EVOLUTION 4. Protection against high temperatures on the worksite • Erect a sunshade or shed to shelter workers from the heat and sun • Set up cooling equipment, such as exhaust fans • Make water dispensers available • Provide suitable protective clothing such as a hat, sunglasses and long sleeves to protect workers from heat stroke and UV rays 5.
- Page 27 7. For on-site workers • Plan all work • Turn off the power (work with live parts de-energized whenever possible) • LOTO (Lock Out, Tag Out) • Live electrical work permit (input terminals with HV after door open) • Use personal protective equipment (PPE) •...
-
Page 28: 5� Device Installation And Electrical Connection
I-ON EVOLUTION 5. Device installation and Electrical connection Before proceeding with device installation, remove the packaging, paying particular attention to not damage the casing. Make sure there is no condensation inside the packaging. Otherwise, install the device only when it is completely dry. All the installation operations must be carried out in compliance with the directive in force. -
Page 29: 5�1 General Installation Requirements
5.1 General installation requirements • The device must be installed in a suitable environment that satisfies the information described in chapter 4 “Installation prerequisites”. Furthermore, elements used in the rest of the installation must be compatible with the device and compliant with the applicable law. - Page 30 I-ON EVOLUTION • These charging stations have a front access door with key opening to facilitate installation and connections. Open the door using the key supplied. The safety key can only be removed when the door is fully closed. • Couple the fixing base (already fixed to the ground) with the charging station. •...
-
Page 31: 5�3 Connection Procedure
5�2�3 Wiring modes: • I-ON EVOhas been fitted with oversized main power connectors, that can handle cables upto 70mm in diameter. This is done to ease the series connection of 2 or multiple products, avoiding to route big cables thorough all the stations. Clearly it’s important to keep always in mind the maximum power consumption of the system and route adequate cables. - Page 32 Please connect the station with L1,L2 and L3 phases. After that connect N and PE to the respective sockets. WARNING: To ensure earth fault protection, installation of PE cable into designated socket IS MANDATORY, GEWISS is not responsible for issues caused by a wrong installation...
- Page 33 Method for wiring the power supply line using lug...
-
Page 34: 5�4 Device Installation (Wallbox Version)
I-ON EVOLUTION 5.4 Device installation (WallBox version) 5�4�1 Mechanical installation Height installation requirements Whatever the type of installation, it’s important that the socket-outlet is assembled at a height between 70 and 120cm. - Page 35 5�4�2 Product installation on a wall If the product is to be installed on the wall (using the supplied accessory), the procedure is as follows. • Prepare the assembly area by fixing the support bracket to the wall, drilling holes with the centre distances shown below: 189,5 mm 94,75 mm...
- Page 36 I-ON EVOLUTION • Assemble the brackets (supplied) on the back plate of the WallBox; 2,5 Nm • Assemble the WallBox on the bracket that you have already fixed to the wall. After positioning the product, drill the wall using the lower bracket as your centre point, then tighten the locking screw.
- Page 37 5�4�3 Product installation on a pole: If the product is to be installed on a pole (using the accessory GW46551), follow this procedure: • Assemble the support brackets on the back plate of the WallBox, as shown below: • Position the WallBox on the pole and fix it in place by tightening the locking nuts of the two plates as shown in the figure;...
- Page 38 I-ON EVOLUTION • Check that the device is correctly fixed in place; • Remove the protective film from the front panel; 5�4�4 Wiring Wiring requisites The connection must satisfy certain requisites: Connection specifications Type of connection Single-phase Three-phase Number of wires 2P+E 3P+N+E Rated current...
- Page 39 Depending on the charging unit version, the cable glands and caps supplied are as follows: Version Cable glands supplied Caps supplied Single-phase 7.4 kW 2x M25 2x M32 Three-phase 22 kW 2x M32 2x M25 Please follow these rules: I-ON EVOWallbox and Column main power wiring rules are the same, so for graphic reference please check paragraph 5.3.
-
Page 40: 5�5 Phase Rotation
I-ON EVOLUTION 5.5 Phase rotation Phase rotation is a key practice for balancing the electrical load in multiple charging station installations. This process distributes the load between the three phases of the three-phase system to optimise energy efficiency and ensure the stability of the electrical system Procedure: 1) Phase identification: in a three-phase system, identify the three phases as L1, L2... -
Page 41: 6� Multi Cp System Installation
6. Multi CP system installation 6.1 Introduction With the installation of a DLM MultiCP system, up to 30 charging points can be managed, maximizing the use of available energy, avoiding overloads and allowing simultaneous charging of several vehicles. It is based on a Server/Client logic. The server station manages the Client stations. -
Page 42: 6�3 Connection Between Charging Points
I-ON EVOLUTION 6.3 Connection between charging points To allow for greater flexibility and ease of installation, the feature is designed to work with 2 different system topologies, which can be selected by the customer according to their needs. NB: All solutions must use at least one Ethernet cable at least CAT5 with a maximum lenght of 100m. - Page 43 This should result in an plant structure similar to the one shown in the figure: Daisy chain configuration The daisy chain link between 2 systems in the same ION is already done internally during product manufacturing. NB: Please remember that for EACH I-ON EVO there are TWO charging systems.
-
Page 44: 6�5 Topology 2: Star Connection
I-ON EVOLUTION 6.5 Topology 2: star connection Description of the system This topology is designed to achieve a “centralized” link between the various stations. In this case, the installer selects one of the available ethernet port in one of the 2 sides of I-ON EVO and connects it to an Ethernet switch. Clearly, the availability of switch ports will need to be appropriate for the number of stations to be connected When the installation is complete, the system should have a pattern similar to this: Star configuration... -
Page 45: 6�6 Connection Of Metering Devices
Station with information about the system’s consumption, is essential for the use of the load balancing functionality. Currently I-ON EVO MultiCP allows a specific kit of sensors to be fitted. Gewiss CT sensors connected to the server station → GWJ8037: for SINGLE-PHASE systems → GWJ8038 for THREE-PHASE systems... -
Page 46: 6�7 External Sensor Positioning Instructions
I-ON EVOLUTION Gewiss CT sensors This solution is compatible with installations with a current rating of less than 100A. The devices should be connected directly to the designated SERVER station, following the instructions in the KIT. The positioning of the same inside the system is crucial. -
Page 47: 7� Functional Specification
7. Functional Specification I-ON EVO offers several versions, with slight differences in the internal components, depending on your needs. 7.1 Basic functions I-ON EVO allows you to choose between basically 2 main operating modes: • STANDARD: the station will charge the vehicle to a fixed default maximum power, in this case no load balancing dynamics are required. -
Page 48: 7�3 Language Button
I-ON EVOLUTION 7.3 Language button The charging point has a language button on each side. You can press it and select the right language before to start a charge. It’s important to notice that the user can’t change the language during the charge sessions process because this function is disabled. -
Page 49: 8�1 Autostart
8.1 Autostart NOTE: The autostart process method must be set on the web portal available on the charger In this case the user doesn’t need of any kind of identification. This image will be displayed on the I-ON EVO screen: You have to plug the EV charging cable into the socket (or the tethered cable into your EV) and the charger will automatically... -
Page 50: 8�2 Rfid Reader
I-ON EVOLUTION 8.2 RFID reader I-ON EVO is equipped with an internal RFID reader and the identification of the user can be carried out using an RFID tag. Usable RFID tags must comply with IEC 14443 A/B. I-ON EVO enables RFID tag registration and management in 2 modes: •... - Page 51 If the card is accepted, you will see the following blinking screen and subsequently the charger will unlock the socket and wait for plug: You must plug the EV charging cable into the socket and the charger will automatically lock it and start the charge. For the versions with tethered cable only plug the cable on your EV port.
-
Page 52: 9� Charger Setting From The On-Board Portal
I-ON EVOLUTION If you want to stop charging or when the charge is finished you have pass your RFID card to unlock the socket. If recognized the socket will be unlocked and you will be prompt to unplug the cable: Once the cable is disconnected I-ON EVO will display a charge recap: 9. - Page 53 This can be done in 2 ways: • By connecting to the Wi-Fi hotspot of the individual station, identifying the SSID and password on the label provided in the box. To help identification, there is also the reference to the side’s serial number. •...
-
Page 54: 9�2 Basic Structure Of The On-Board Portal
I-ON EVOLUTION 9.2 Basic structure of the On-board Portal Once you have successfully logged in, the On-board Portal will be divided into 4 macro sections: → Configuration → Logs → Charging log → RFID Below is an overview of the individual sections. 9.3 Configuration section •... -
Page 55: 9�4 Logs Section
9.4 Logs section In this section, installers and service personnel will have easy access to the logs of the charging station. At the top right you can select the log file to read and refresh manually to view the new logged lines. When the portal is opened, the platform communication management log is shown, which is often the most useful for initial debugging. - Page 56 I-ON EVOLUTION In selecting the files to be read, you can see that some will have a suffix with a number ( .1, .2 …). This is normal, as the station has a 5-day log retention capability. The prefix means how many days ago the log refers to. For instance, an: iot Manager Out 5 should be opened if you want to read the logs from 5 days before.
-
Page 57: 9�5 Charging Log Section
Each colour change and joinon-led- RGB LED animation of the LED is manager management marked Log of the energy values joinon-meter Metering read by the internal or external meter (MID/TIC). All changes in status of the joinon-socket- charging socket are logged Socket management manager as well as the receipt of... -
Page 58: 10� I-On Evo Configuration As A Single Station
I-ON EVOLUTION 10. I-ON EVO Configuration as a single station I-ON EVO is designed to be installed in systems with multiple interconnected stations. However if a load management is not necessary, you can easily setup I-ON EVO as a standalone station. 10.1 Step 1: Operating parameter setting Once the station has been started, proceed and access the On-board Portal to set, as required:... -
Page 59: 10�2 Step 2: Internet Network Setup
10.2 Step 2: Internet Network Setup I-ON EVO allows connection to the Internet choosing between Ethernet or Wi-Fi connection. 10�2�1 Ethernet connection setup If your plan is to connect I-ON EVO to an ethernet network, the process is straightforward. As the two sides of the charger are already connected by factory with an ethernet cable, you can easily connect both sides by linking your network cable to one of the two ( 1 for each side) free ethernet ports on the side motherboard. - Page 60 I-ON EVOLUTION Save the parameters by selecting the red button in upper right corner. The side will reboot 3. Reconnect to the same side on-board portal and find the “network” section and click on “configure Wi-Fi network”. A window opens asking for network parameters (SSID, Password, and Security).
-
Page 61: 11� Dlm Multicp: Server Configuration
Wi-Fi signal coverage. A strong signal is needed for best performance, especially when there are a large number of Client stations WARNING: Gewiss suggests the use of a Wi-Fi network with an appropriate level of security, such as WPA-WPA2-Personal, and avoid public networks with no level of security. -
Page 62: 11�2 First Steps
I-ON EVOLUTION 11.2 First steps After the installation and connection of the stations, the connection of the external meter, you first need to proceed with the configuration of the station that will assume the role of Server. INFO: For more effective configuration, we recommend that you always start with the Server station configuration. - Page 63 WARNING: Incorrect setting of this parameter could lead to malfunctions or overloads of the system. • Phase rotation → Please select the phase order you wired the charger, as indicated at paragraph 5.5 • functional mode: → select “Dynamic” to enable the DLM algorithm •...
-
Page 64: 11�3 Dlm Multicp: Clients Configuration
I-ON EVOLUTION 11�2�5 Local Server/Client DHCP setting I-ON EVO has a feature that allow one station to connect to Wi-Fi, and share the connection to the other side, without any additional configuration. This is possible because the “Server” side will act as a local DHCP server for the other side. To set it up, please follow the steps at chapter 10.2.2 to enable the functionality The steps at chapter 10.2.2 are intended to enable connection to both sides of a single I-ON EVO. -
Page 65: 12� Uk Market Additional Requirements
I-ON if the problem has disappeared. WARNING: To ensure PEN fault protection, installation of PE cable into designated terminal block IS MANDATORY, GEWISS is not responsible for issues caused by a wrong installation. -
Page 66: 13� Error Encoding And Troubleshooting
I-ON EVOLUTION 13. Error encoding and troubleshooting 13.1 Error code list Here is the list of the error that I-ON EVO can generate. WARNING: The operations described in this manual may only be performed by duly qualified personnel. When this manual refers to qualified personnel, this means personnel complying with all the standards, directives and laws concerning safety, as applicable to the installation and operation of this device. - Page 67 MOTOR BLOCK The shutters are in a different status CLOSED NOK than expected. The motor block system does not MOTOR BLOCK OPEN NOK move to the CLOSED position. Modbus with energy meter communication fault. The errors is ENERGY METER activated after 3 incorrect readings. COMMUNICATION NOK After 1 correct reading, the error is removed.
-
Page 68: 13�2 Troubleshooting For The Installer
I-ON EVOLUTION UNDERVOLTAGE The input voltage is low. The device checks this error state at DC LEAKAGE FAULT start-up of the EVSE. The device does not receive a IoT PROBLEM response for transaction initiation messages that have been sent. The EVSE does not receive any communication packets from the ICT TIC COMMUNICATION device. - Page 69 Check the condition of the plugs of the T2 sockets. If they are opened without a plug, try moving them with the tool. If the error persists, contact support. If this SHUTTERS T2 NOK error occurs while I-ON EVO is charging, remove the plug.
- Page 70 I-ON EVOLUTION WIFI NOK If the error persists, contact support. Check the connection and wiring with the installer according to the instructions EXTERNAL CT NOK in the dedicated user manual. If the error persists, contact support. Try to start another charging session. EV OVERLOAD If the error persists, contact support.
-
Page 71: 14� Assistance
Support Service allows you to come into direct contact with GEWISS technica ficials, to obtain answers to technical questions: plant engineering, regulatory, roduct or design software questions. 14. Assistance The Support Service allows you to come into direct contact with GEWISS technical... - Page 72 GEWISS UK LTD - Unity House, Compass Point Business Park, 9 Stocks Bridge Way, ST IVES GEWISS S.p.A. Via D.Bosatelli, 1 IT-24069 Cenate Sotto (BG) Italy tel: +39 035 946 111 E-mail: qualitymarks@gewiss.com Cambridgeshire, PE27 5JL, United Kingdom tel: +44 1954 712757 E-mail: gewiss-uk@gewiss.com +39 035 946 111 www.gewiss.com...
Need help?
Do you have a question about the JOINON I-ON EVO Series and is the answer not in the manual?
Questions and answers
To connect to internet operation what are the dip switch settings and alternative options as without app or payment ie free to use