Table of Contents
Advertisement
Quick Links
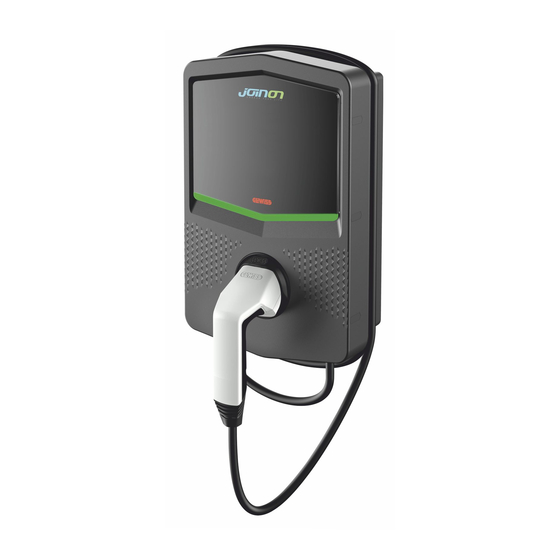
JOINON WALLBOX
I-CON BASIC
UNITÀ DI RICARICA VEICOLI ELETTRICI
JOINON WALLBOX I-CON BASIC - JOINON WALLBOX I-CON BASIC RECHARGING UNIT FOR ELECTRIC
VEHICLES - UNITÉ DE RECHARGE DE VÉHICULES ÉLECTRIQUES JOINON WALLBOX I-CON BASIC -
UNIDAD DE CARGA DE VEHÍCULOS ELÉCTRICOS JOINON WALLBOX I-CON BASIC - LADESTATION FÜR
ELEKTROFAHRZEUGE JOINON WALLBOX I-CON BASIC - UNITATE DE REÎNCĂRCARE VEHICULE
ELECTRICE JOINON WALLBOX I-CON BASIC - JOINON WALLBOX I-CON BASIC ELEKTROMOS JÁRMŰ
TÖLTŐEGYSÉG - OPLAADEENHEID VOOR ELEKTRISCHE VOERTUIGEN JOINON WALLBOX I-CON BASIC
Manuale di utilizzo ed installazione - User and installation manual - Manuel
d'installation et d'exploitation - Manual de uso e instalación - Installations- und
IT
EN
FR
ES
DE
RO
HU
NL
Bedienungsanleitung - Manual de instalare şi instalare -Használati és telepítési
útmutató - Gebruiks- en installatiehandleiding
Advertisement
Table of Contents

Related Manuals for Gewiss I-CON BASIC


Summary of Contents for Gewiss I-CON BASIC
- Page 1 I-CON BASIC UNITÀ DI RICARICA VEICOLI ELETTRICI JOINON WALLBOX I-CON BASIC - JOINON WALLBOX I-CON BASIC RECHARGING UNIT FOR ELECTRIC VEHICLES - UNITÉ DE RECHARGE DE VÉHICULES ÉLECTRIQUES JOINON WALLBOX I-CON BASIC - UNIDAD DE CARGA DE VEHÍCULOS ELÉCTRICOS JOINON WALLBOX I-CON BASIC - LADESTATION FÜR ELEKTROFAHRZEUGE JOINON WALLBOX I-CON BASIC - UNITATE DE REÎNCĂRCARE VEHICULE...
-
Page 2: Table Of Contents
CONTENTS INFORMATION ABOUT THIS MANUAL 1.1. Field of application 1.2. Intended users Symbols REGULATORY ASPECTS 2.1. Fulfilment of regulations 2.2. Degree of protection 2.3. Pollution rating 2.4. Current socket-outlets SAFETY FUNCTION 3.1. Safety conditions 3.2. Personal protective equipment (PPE) DEVICE DELIVERY AND STORAGE 4.1. - Page 3 JOINON WALLBOX I-CON BASIC recharging unit for electric vehicles STATUS INDICATORS CHARGING PROCESS 10.1. AUTOSTART 10.2. PARKING 10.3. CLOUD PARKING FAULTS AND TROUBLESHOOTING UPDATING THE FIRMWARE MODIFYING THE OPERATING PARAMETERS OF THE RECHARGING STATION DISCONNECTING FROM THE MAINS SUPPLY PREVENTIVE MAINTENANCE...
-
Page 4: Information About This Manual
INFORMATION ABOUT THIS MANUAL This manual describes the JOINON I-CON electrical vehicle recharging station and provides the necessary infor- mation for correct delivery, installation, start-up, maintenance and operation. FIELD OF APPLICATION This manual applies for the following charging stations: - GWJ3001A – WB ICON AUTOSTART 4kW T2S IP55 - GWJ3002A –... -
Page 5: Regulatory Aspects
JOINON WALLBOX I-CON BASIC recharging unit for electric vehicles REGULATORY ASPECTS FULFILMENT OF REGULATIONS CE marking CE marking is essential for marketing the products in question within the European Union and the European Eco- nomic Area. The charging stations have CE marking as they comply with the following directives: •... -
Page 6: Safety Function
Gewiss disclaims all liability for any damage caused by inappropriate use of the charging stations. Any operation carried out on these charging stations that involves a change to the original electrical settings must be authorised by Gewiss beforehand. All such proposals must be examined and approved by Gewiss. -
Page 7: Personal Protective Equipment (Ppe)
JOINON WALLBOX I-CON BASIC recharging unit for electric vehicles Potential hazards for the device In order to protect the device, observe the following warnings. Before reconnecting the voltage supply after any duly authorised operation, make sure the device is ready to start working. -
Page 8: Device Delivery And Storage
Keep the device packaged until installation. 4.2. DEVICE IDENTIFICATION The serial number of the device identifies it in an unequivocal manner. In any communication with Gewiss, refer- ence must be made to this number. The device serial number is indicated with a data matrix on the technical data label (on the side of the front panel). -
Page 9: Device Handling
JOINON WALLBOX I-CON BASIC recharging unit for electric vehicles DEVICE HANDLING During transport, the device must be protected against mechanical shocks, vibrations, water spray (rain) and any other product or situation able to damage it or alter its behaviour. Failure to respect these instructions could cause the product warranty to be cancelled without the manufacturer bearing any liability. -
Page 10: Environmental Conditions
6.2. ENVIRONMENTAL CONDITIONS To select the most suitable location, take the environmental operating conditions of the device into consideration. Environmental conditions Minimum temperature -25°C Minimum temperature of the surrounding -25°C Maximum temperature of the surrounding +50°C Maximum relative humidity without con- densation NOTE= if the ambient temperature is higher than 40°C, a cover must be installed to protect the device from direct sunlight. -
Page 11: Opening The Casing
JOINON WALLBOX I-CON BASIC recharging unit for electric vehicles 6.4. OPENING THE CASING To open the casing from the main access, proceed as shown in the following figures. -
Page 12: Closing The Casing
6.5. CLOSING THE CASING xxxx. Xxxxxxxxxx... -
Page 13: Device Installation And Connection
JOINON WALLBOX I-CON BASIC recharging unit for electric vehicles DEVICE INSTALLATION AND CONNECTION Before proceeding with device installation, remove the packaging, paying particular attention to not damage the casing. Make sure there is no condensation inside the packaging. Otherwise, install the device only when it is completely dry. - Page 14 • Fixing with the aid of support brackets on pole GW46551...
- Page 15 JOINON WALLBOX I-CON BASIC recharging unit for electric vehicles • Fixing to the support on the ground: after attaching the support to the ground, fix the column to the plate on the support (using the protruding screw, already installed), then use screws to fix the WB to the plate that includes the threaded rivets Cable inlet on the back of the circled area.
- Page 16 • Fixing the WallBox to the wall (not valid for codes GWJ3001A, GWJ3002A, GWJ3003A, GWJ3004A, GWJ3011A, GWJ3012A, GWJ3013A, GWJ3014A) Eliminate the relevant knockouts on the basis of the cable inlet chosen (A from below, B from the rear), then fix the box in the wall Insert the WallBox in the box...
- Page 17 JOINON WALLBOX I-CON BASIC recharging unit for electric vehicles Fix it to the columns of the flush-mounting box using self-threading screws Ø4 For the cable inlet from the bottom (A), use the cable glands supplied For the cable inlet from the rear (B), prepare the back plate of the WallBox on the basis of your requirements...
-
Page 18: Connection Of The Device Power Supply
7.2.2. CONNECTION OF THE DEVICE POWER SUPPLY Protection devices Each charging station must be protected upstream by circuit breaker protection and residual current devices required by the low voltage electrical system standard. In particular, each individual station must be protected upstream by a Type A residual current circuit breaker 30 mA + miniature circuit breaker (the choice of device must be suitable for the power level and the power supply of the recharging station;... -
Page 19: Operation And Characteristics
JOINON WALLBOX I-CON BASIC recharging unit for electric vehicles 2. Power supply inlet 3. Connect the power supply and signal cables according to the different models L1 L2 L3 N PE ALIMENTAZIONE ELECTRONIC ALIMENTAZIONE MAIN POWER SUPPLY ELETTRONICA POWER SUPPLY PRINCIPALE 4. -
Page 20: Rfid
8.2. RFID RFID mode indicates that the session has to be activated and terminated using the RFID cards supplied by the provider and added to the local station White List beforehand. 8.3. CLOUD OCPP CLOUD mode indicates that the charging station is connected to a control and management platform. Thanks to this platform, the station can be controlled and monitored while it's operating, and the recharging sessions can be saved. -
Page 21: Charging Process
JOINON WALLBOX I-CON BASIC recharging unit for electric vehicles CHARGING PROCESS The steps needed to carry out a recharging session are indicated below (but they may vary according to the operating mode). 10.1. AUTOSTART The recharging station is always accessible and ready to begin a charging session as soon as a vehicle is con- nected. - Page 22 Action to be carried out RGB LED status OPTIONAL During the charging process, the selector can be used to Fixed blue increase or reduce the charging power. The vehicle itself will then decide which power level to absorb From fixed blue or flashing blue To end the charging session, disconnect the recharging cable on the vehicle side to flashing green...
-
Page 23: Parking
Once the command has been executed, the station will return to standby Contact GEWISS SAT customer service for the UID codes of your RFID cards; you will be asked to give the number on the cards. 4-byte or 7-byte cards can be saved, as long as they are compatible with standard ISO/IEC 14443... -
Page 24: Cloud Parking
To delete an RFID card from the local list: Action to be carried out RGB LED status Swipe the MASTER key across the RFID scanner to enable From fixed green to flashing white the storage phase From flashing white Swipe the MASTER key across the RFID scanner again to enable the deletion phase to flashing red Swipe the card that you want to delete across the RFID... -
Page 25: Faults And Troubleshooting
In the case of products connected to the JOINON platform, or if the maintenance package has been purchased, call the FreePhone number 800 123 325 when necessary. In all other cases where technical support is required, call GEWISS SAT customer service. -
Page 26: Updating The Firmware
Insert the microSD card in the specific slot on your PC, to open the folder Paste the update file in the main folder of the microSD card NB: contact GEWISS SAT customer service for the most recent file <(which will also be available on the GEWISS website, using a code search) -
Page 27: Modifying The Operating Parameters Of The Recharging Station
JOINON WALLBOX I-CON BASIC recharging unit for electric vehicles NOTE=The FW update package(s) is/are inserted in the main folder of the microSD as shown in the example below MODIFYING THE OPERATING PARAMETERS OF THE RECHARGING STATION Once the product has been installed, certain station operating parameters can be modified via a text file to be saved on the microSD card inserted in the charging station itself. -
Page 28: Disconnecting From The Mains Supply
DISCONNECTING FROM THE MAINS SUPPLY This section describes the procedure for disconnecting the device from the mains network. If you want to work inside the device (qualified personnel only), interventions must first be made on the protection elements upstream of the line (both for the power level part and the power supply to the electronic board).
Need help?
Do you have a question about the I-CON BASIC and is the answer not in the manual?
Questions and answers