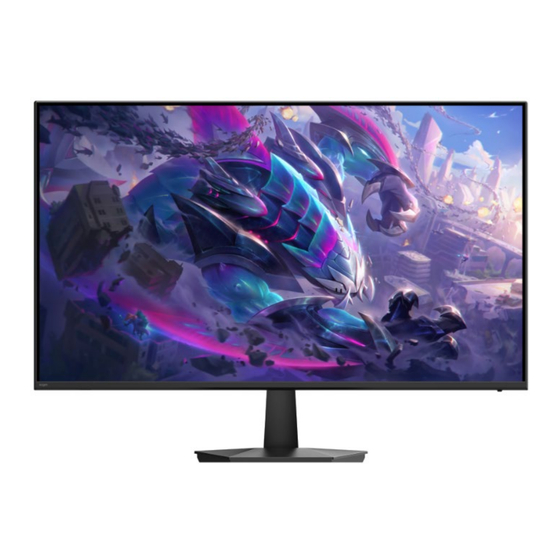
Summary of Contents for Kogan KAMN24F18CVA
- Page 1 24" CURVED FREESYNC GAMING MONITOR FULL HD, 180HZ & 1MS (1920 X 1080) KAMN24F18CVA...
-
Page 3: Safety And Warnings
SAFETY & WARNINGS • Read all instructions and warnings in this user guide before using the monitor. Keep this guide for future reference. • This monitor has ventilation openings on the back. Do not cover or obstruct them. • Keep the monitor away from heaters, stoves, fireplaces, or other sources of heat. •... - Page 4 COMPONENTS Verify that all items are included in your monitor set. If anything is missing, visit help.Kogan.com for assistance. Monitor Stand stem Stand base Power cord and adaptor DP cable User guide...
- Page 5 OVERVIEW Up/Brightness Centre Menu/Confirm Right Decrease/Return/Exit/Input Source Down Down/Volume Left Increase/Contrast Power Power On/Off/Standby...
- Page 6 Ports HDMI OUTPUT (PC) HDMI Cable DP Cable Earphones Power Cord and Adaptor...
- Page 7 ASSEMBLY Gently lay the monitor on the cloth Align the stand base with the stand with the screen facing down. stem, then clip the stand base into the stand stem. Attach the assembled stand to the rear of the monitor. Adjusting the Angle of the Monitor •...
- Page 8 VESA Mount WARNING: If you are not confident in wall mounting this product, consult a licensed trade professional. Ensure the stand base and stand stem are detached from the monitor. Place the monitor face down on a soft cloth to avoid damage. Locate the x4 wall mounting screws on the back of the monitor.
-
Page 9: Operation
OPERATION Note: Ensure the monitor is powered off before connecting any cables. Powering the Monitor Connect the power cord to the monitor's power port. Then connect the adapter to an electrical outlet. Turn the outlet on. Connect the monitor to your computer using an HDMI or DP cable. Press the ‘Power’... - Page 10 HDMI For the monitor to receive HDMI signals to your computer, connect one end of a HDMI cable into the HDMI port on the monitor. Connect the other end into the HDMI port on your computer. HDMI cable (not provided) HDMI OUTPUT (PC) Audio Port (3.5mm)
- Page 11 DisplayPort (DP) Connect one end of the provided DP cable to the DP IN port at the rear of the monitor. Connect the other end to the DP port on your computer. DP cable On-Screen Display (OSD) Menu The OSD menu allows you to adjust various monitor settings. •...
- Page 12 OSD menu settings: Below is a list of the settings available that can be adjusted through the OSD menu. Main Menu Sub-Menu Options Description Brightness 0-100 Adjust display brightness Contrast 0-100 Adjust display contrast Black level 0-10 Picture Setting Sharpness Off/On Turn DCR function off/on Image Ratio...
- Page 13 English/François/ Language Set OSD language Español/Deutsch/ Italiano Adjust the horizontal H.Position 0-100 position V.Position 0-100 Adjust the vertical position Set how long the OSD Timeout 0-60 remains OSD Setting Adjust the OSD Transparency 0-100 transparency value DDC/CI Off/On Auto Off/On shutdown Reset monitor Reset...
- Page 14 FreeSync • To use FreeSync, ensure your hardware supports the feature and that your graphics drivers are fully updated. • After connecting the monitor, you may be prompted to enable FreeSync on your computer. If no prompt appears, you may need to enable it manually through your graphics card settings.
-
Page 15: Cleaning And Care
CLEANING & CARE • Ensure the monitor is turned off and unplugged before cleaning. • Wipe the body with a slightly damp, clean cloth. • Wipe the screen with a dry microfibre cloth. Note: Do not use cleaning alcohol, ammonia-based liquids or other harsh cleaners. -
Page 16: Specifications
SPECIFICATIONS Screen size 24" Aspect ratio 16:9 Backlight E-LED Brightness 300cd/m² Panel Resolution 1920 x 1080 Refresh rate 180Hz Response time 12ms Viewing angle 178° (H) / 178° (V) (typical) Contrast ratio 3000:1 VESA mounting 75 x 75mm Colours 16.7M FreeSync Signal input HDMI 1.4, DP1.2... - Page 17 NOTES...
- Page 20 Need more information? We hope that this user guide has given you the assistance needed for a simple set-up. For the most up-to-date guide for your product, as well as any additional assistance you may require, head online to help.kogan.com...


Need help?
Do you have a question about the KAMN24F18CVA and is the answer not in the manual?
Questions and answers