Table of Contents
Advertisement
Quick Links
Advertisement
Table of Contents

Summary of Contents for Kogan KAMN24F75LB
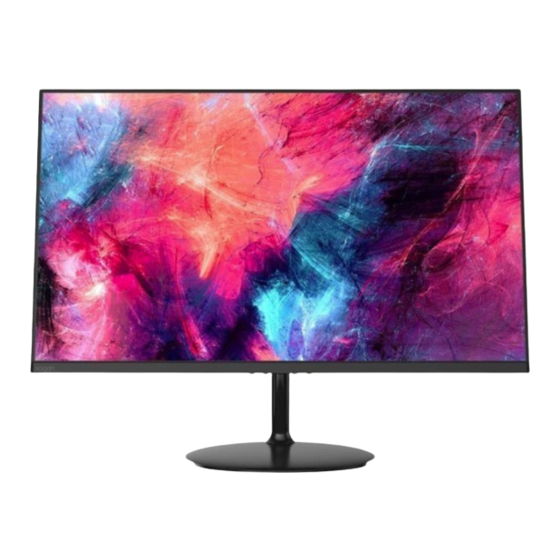
- Page 1 User Guide 24" Full HD IPS 75Hz Frameless Monitor (1920 x 1080) (KAMN24F75LB)
-
Page 2: Table Of Contents
Contents Contents ..................... 02 Components ....................03 Overview ..................... 04 Stand Assembly ..................05 Wall Mounting .................... 07 Connectivity ....................08 Basic Operation ................... 10 Indicator Light ..................... 10 Operation ...................... 11 ECO Modes and Gameplus Switching ............13 Specifications ....................14 Notes ...................... -
Page 3: Components
Components QUICK START GUIDE KOGAN 24” FHD FreeSync Monitor (KAMN24F75LB) A Monitor F 10mm VESA connectors ( x 2 ) B Stand Stem G Power Adapter C Stand Base H HDMI Cable D PM4*12mm Screws ( x 2 ) I User Guide... -
Page 4: Overview
Overview Monitor Controls M Menu Button: Press to display the OSD menu or enter sub-menus. Down Button: Press to move down in the menus. Up Button: Press to move up in the menus. E Exit Button: Press to exit. Power Button: Press to turn the monitor on/off. LED Indicator: Changes colors to indicate status. -
Page 5: Stand Assembly
Stand Assembly Keep the foam underneath the monitor before attaching the stand. Open the package, take out the product with foam still attached, and gently place it on a desktop or table. Stand Stem Stand Base Monitor Foam 2. Turn the bracket on a slight angle and align it with the circular slot of the base. Insert the bracket into the base, and then rotate clockwise to clamp the bracket into the base to complete the installation of the base. - Page 6 4. Complete overall assembly. Note 1: To prevent pinching, please do not place your hand within the gap between the stand and the monitor. Note 2: To prevent falling, please avoid holding monitor by the base or inverting the monitor. Note: Do not invert the machine to prevent falling.
-
Page 7: Wall Mounting
Wall Mounting Take out 4 pieces VESA connector from accessory bag. Monitor VESA Connector Lock the two 26mm VESA connectors in the upper two holes on the rear of the monitor, and the two 10mm connectors in the lower two holes. 3. -
Page 8: Connectivity
Connectivity Power Cable Connect the included power cable to the power connector, and then plug the other end into an wall outlet. Power Cable Earphones Plug in your earphones to receive audio signals from your monitor. If your earphones are connected to the monitor and audio devices are connected to your computer at the same time, the audio devices will not produce sound. - Page 9 HDMI In order for the monitor to receive HDMI signals from the computer, use the HDMI cable the monitor to the computer. to connect HDMI Cable (Included) HDMI OUTPUT...
-
Page 10: Basic Operation
Basic Operation Insert one end of the HDMI cable into your PC’s graphics card. A VGA cable may also be used. A VGA cables is not included. 1. Connect the other end of the cable to the corresponding connector on your monitor. VGA Connector HDMI Connector Connect the power cable to your monitor then connect the other end to your power... -
Page 11: Operation
Operation The On-Screen Display (OSD) Menu may be used to adjust your monitor’s settings M button. and appears on screen a er turning on the monitor and pressing the When using the monitor for the fi rst time, settings will automatically adjust to optimal settings according to your computer’s configuration and parts etc. - Page 12 List of Functions Main Menu Sub-Menu Options Description BRIGHTNESS Brightness 0~100 Adjust display brightness Contrast 0~100 Adjust display contrast Standard, Game, Set visual mode RTS, FPS, Movie, Text Turn on DCR function Off Turn off DCR function IMAGE Aspect Wide, Auto, 4:3 Set aspect ratio COLOR TEMP .
-
Page 13: Eco Modes And Gameplus Switching
ECO Modes and Gameplus Switching M, , , E, ) to activate the navigation window. 1. Press any one of the buttons ( to switch Gameplus modes. According to the needs of your game, 2. Press choose the corresponding game icon. These game icons are primarily designed to optimize your aim during shooting games, though they can be used for other scenarios. -
Page 14: Specifications
Specifications KAMN24F75LB Model 24" Screen Size Aspect Ratio 16:9 Backlight E-LED Brightness 200cd/m² Panel 1920x1080 Resolution 75Hz Refresh Rate Response Time Viewing Angle (H) / 1000:1 Contrast Ratio VESA Mounting 75x75 16.7M Colours AMD FreeSync Signal Inpt VGA*1, HDMI1.4*1 DC 12V 2.5A... -
Page 15: Notes
Notes... - Page 16 Need more information? For full product support and troubleshooting help, head online to help.kogan.com...
- Page 17 108.007.09302 24D2F KAMN24F75LA KOGAN 2021.01.20 140*210mm 80G双胶纸,单色印,骑马钉 feihong 备注:如不够页数,可以在封面封底的内面插入空白页...


Need help?
Do you have a question about the KAMN24F75LB and is the answer not in the manual?
Questions and answers