Advertisement
Quick Links
Advertisement

Summary of Contents for NATHAN JAMES Beacon 71402
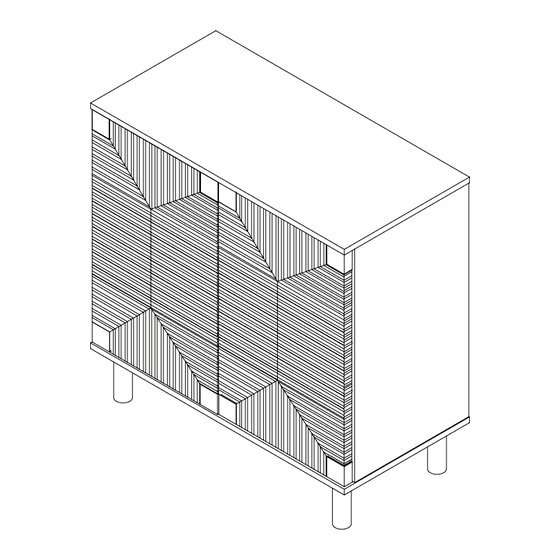
- Page 1 Let’s build the Beacon Storage Unit SKU 71402 Scan me! Free Lifetime Warranty VN- 24-0321...
- Page 2 Ok, let’s What’s included get rolling Description Right Side Panel This should be easy, just follow Upper Back Stretcher our instructions and you will be back to Netflix in no time. Lower Back Stretcher Upper Front Stretcher Estimated time for assembly 60:00 Left Side Panel Bottom Panel...
- Page 3 The goods IMPORTANT 1. Do not tighten bolts / screws completely until all bolts / screws are lined up and inserted into holes. 2. Do not over tighten screws and bolts to avoid stripping.
- Page 4 What’s included Description Magnetic Push Latch Ø8 x 30mm Wooden Dowel Cam Bolt Cam Lock Long Bolt ؼ x 1-3/8 inch Short Bolt ؼ x 1 inch M3x15mm Screw M4x35mm Screw Spring Washer ؼ x 1/2 inch Flat Washer ؼ x 1/2 inch Sleeve Nuts Shelf Support Pin...
- Page 5 The goods...
- Page 6 Step 1 Let’s get this thing fired up! Attach the Magnetic Push Latch (1) to the Upper Front Stretcher (D) using the M3*15mm Screws (7). Next, following the image below, insert the Ø8 x 30mm Wooden Dowels (2) into their cooresponding holes on each stretcher.
- Page 7 Step 3 Now attach the Upper Back Stretcher (B), the Lower Back Stretcher (C), and the Upper Front Stretcher (D) to the Right Side Panel (A). Align the holes 100% with the Cam Bolts you inserted in Step 2, then secure with the Cam Locks (4) and the Allen Key (14).
- Page 8 How to use Did you know? Cam locks are used to join two panels together, cam locks usually the edge of one to the flat side of another. First, your cam bolt (or cam pin) will need to be properly inserted into the flat side of the board. Important Note: Only tighten the cam bolt until it is secure.
- Page 9 Step 5 Attach the Top Panel (N) to the cabinet. Align the holes with the Cam Bolts you inserted in Step 2, then slide the Spring Washer (9) and the Flat Washer (10) on to the Short Bolt (6) and use these parts and the Allen 100% key (14) to secure the panel and cabinet together.
- Page 10 Step 7 Unfold the Back Panel (I) and slide it into place on the cabinet. It should fit smoothly into the grooves. Step 8 Take the Bottom Panel (F) and attach it to the cabinet you have been working on. Use the Long Bolt (5), the Spring Washer (9), and the Flat Washer (10) as well as the Allen Key to secure these components...
- Page 11 Step 9 Now it’s time to attach the Left Door (M) to the cabinet. Make sure the Magnetic Catch Plate faces inside. Use the Sleeves (11) to lock the door into place. Magnetic Catch Plate faces inside cabinet Step 10 Close the Left door and repeat the step for the Right Door (L).
- Page 12 Step 11 The bottom of the cabinet should still be facing upwards. We are going to insert the M4x35mm Screw (8) into its designated holes on the panel. Tighten to 100%. 100% Step 12 Take the Legs (G) and secure into place on the cabinet using the Long Bolt (5), the Spring Washer (9), and the Flat Washer (10).
- Page 13 Step 13 Now grab a friend and turn the cabinet upright. Insert the Shelf Support Pins (13). Then slide the Shelf Panel (K) into the cabinet.
- Page 14 Is your cabinet door looking crooked or unevenly spaced? If you’re still having trouble lining everything up, your next step should be to try to adjust the feet slightly to square up the cabinet and doors. Follow the instructions below: If the right door appears to be hanging low, you can adjust the...
- Page 15 Step 14 And now for the final step! Time to install the tipping restraint hardware. First, use 1/4” drill bit to drill holes in the wall and insert the Plastic Anchors (16) into the wall. Next, attach the Plastic Bracket (15) to the Plastic Anchors (16) using M4x50mm Screws (17).
- Page 16 Step 15 Wobbly or unlevel? Adjust levelers on all of the front legs until stable, and make the leveler of the center leg touch the ground.
- Page 17 No heartburn, when we handle the return Give us a call 1-866-619-1004 or shoot us a message at help@nathanjames.com we will issue you a free replacement with zero hassle. Our way Their way Give us a call Re-package item Replacement Schedule pick up Track package Replacement...
-
Page 18: Proper Use
Any modifications will Nathan James and its parent companies cannot present the risk of creating significant safety issues which NJ will not be responsible for. - Page 19 If you are happy with your product, tell your friends and family about us or even better leave us a review online. Spreading the word gives us the opportunity to make more people happy and keep our prices low for your next purchase. Brooklyn Burdon Founder, Nathan James...


Need help?
Do you have a question about the Beacon 71402 and is the answer not in the manual?
Questions and answers