Table of Contents
Advertisement
Available languages
Available languages
Quick Links
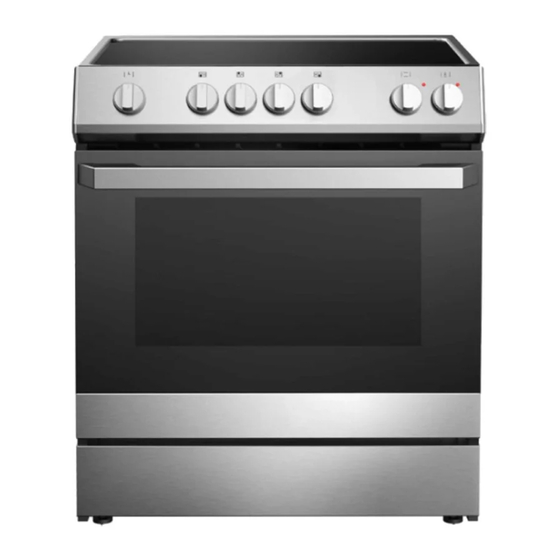
30" ELECTRIC RANGE
Owner's Manual..........................................1 - 25
CUISINIÈRE ÉLECTRIQUE 30"
Manuel du propriétaire...............................26- 50
MODEL • MODÈLE
DRRM300BSSC
DRRM300WC
Danby Products Limited, Guelph, Ontario, Canada N1H 6Z9
Danby Products Inc. Findlay, Ohio, U.S.A. 45840
www.danby.com
Printed in China | Imprimé en Chine | Impreso en China
2024.07.25
Advertisement
Table of Contents

Related Manuals for Danby DRRM300BSSC


Summary of Contents for Danby DRRM300BSSC
- Page 1 CUISINIÈRE ÉLECTRIQUE 30” Manuel du propriétaire.......26- 50 MODEL • MODÈLE DRRM300BSSC DRRM300WC Danby Products Limited, Guelph, Ontario, Canada N1H 6Z9 Danby Products Inc. Findlay, Ohio, U.S.A. 45840 www.danby.com Printed in China | Imprimé en Chine | Impreso en China 2024.07.25...
- Page 2 2. Visit www.Danby.com to access self-service tools, FAQs and much more by searching your model number in the search bar. 3. For the Quickest Customer Service, please fill out the web form at www.danby.com/ support. Your submission will go directly to an expert on your particular appliance.
- Page 3 Important Safety Information READ AND FOLLOW ALL SAFETY INSTRUCTIONS WARNING - TIP OVER HAZARD • A child or adult can tip the appliance and be killed. • Verify the anti-tip bracket has been properly installed to the floor or wall. •...
- Page 4 Important Safety Information READ AND FOLLOW ALL SAFETY INSTRUCTIONS NOTICE - BEFORE FIRST TIME USE OVEN Before use of this oven for the first time, the heating elements have a protective coating, which must be burned off before use. To do this: •...
- Page 5 Important Safety Information READ AND FOLLOW ALL SAFETY INSTRUCTIONS DO NOT TOUCH HEATING ELEMENTS OR DANGER - FIRE RISK AREAS NEAR THEM • It is recommended that this appliance be Heating elements on the surface or in the interior connected to a separate circuit that is not of the appliance may be hot even though they are shared with any other appliance.
-
Page 6: General Safety Requirements
Important Safety Information READ AND FOLLOW ALL SAFETY INSTRUCTIONS GENERAL SAFETY REQUIREMENTS Ensure the appliance is properly installed and grounded by a qualified technician. Children should not be left alone or unattended in the area where the appliance is in use. Children should never be allowed to sit or stand on any part of the appliance. - Page 7 Important Safety Information READ AND FOLLOW ALL SAFETY INSTRUCTIONS COOKTOP SAFETY REQUIREMENTS OVEN SAFETY REQUIREMENTS • Use the proper pan size. This appliance is • Use care when opening the door. Allow hot air equipped with four burners of different sizes. or steam to escape before removing or replacing Select utensils that have flat bottoms large food.
-
Page 8: Grounding Instructions
Important Safety Information READ AND FOLLOW ALL SAFETY INSTRUCTIONS GROUNDING INSTRUCTIONS This appliance must be grounded. Grounding reduces the risk of electrical shock by providing an escape wire for the electrical current. This appliance has a power cord that has a grounding wire with a 4-prong plug. The power cord must be plugged into an outlet that is properly grounded. -
Page 9: Installation Instructions
INSTALLATION INSTRUCTIONS Installation Measurements Power Supply NOTE: Range can be raised approximately 1 inch (2.5 cm) by adjusting the leveling legs. The front of door and drawer may extend farther forward depending on styling. A: Access Panel to Electrical Supply Cord B: Power Cord Opening C: Recessed Area NOTE: To connect to an outlet in the wall, the... -
Page 10: Required Tools
INSTALLATION INSTRUCTIONS Gather the required tools and parts before starting Temperature installation. • The range should be located for convenient use REQUIRED TOOLS in the kitchen. • Recessed installations must provide complete Tape Measure enclosure of the sides and rear of the range. Flat Blade Screwdriver •... -
Page 11: Anti-Tip Bracket
INSTALLATION INSTRUCTIONS ANTI-TIP BRACKET An anti-tip bracket kit is provided with the range. WARNING: Tip Over Hazard • A child or adult can tip the range and be seriously injured. • Connect the anti-tip bracket to the rear foot of the range. •... - Page 12 INSTALLATION INSTRUCTIONS Securing Bracket The bracket must be screwed to either the FLOOR or REAR WALL. Floor Installation • Wood Floor: use the screws provided to secure the bracket using the pair of marked holes (either Loc A or B). •...
- Page 13 INSTALLATION INSTRUCTIONS INSTALLING RANGE NOTE: If the range is moved to adjust the leveling legs, ensure that when the range is moved back into the final location that the anti-tip bracket is engaged by repeating steps 1 through 9. 1. Slide range into final location, making sure rear leveling leg slides into ant-tip bracket.
- Page 14 OPERATING INSTRUCTIONS ACCESSORIES 1. Backsplash 2. M4*8 Screw for backsplash installation x5 3. Racks x2 4. Anti-Tip Bracket 5. M5*45 Screw for anti-tip bracket x2...
-
Page 15: Leveling Instructions
OPERATING INSTRUCTIONS DIMENSIONS The dimensions of this appliance are: A. 37.9 ~ 37.12 inches (96.3 ~ 94.3 cm) from the floor to the top of the cooktop (with backsplash installed). B. 27.6 inches (70 cm) deep C. 29.9 inches (76 cm) wide It is the installer’s responsibility to comply with installation clearances specified in the manual. -
Page 16: Exterior Parts
OPERATING INSTRUCTIONS EXTERIOR PARTS INTERIOR PARTS... -
Page 17: Control Panel
OPERATING INSTRUCTIONS CONTROL PANEL Timer Knob 1. Oven Power Front Left Burner 2. Light Rear Left Burner 3. Broil Rear Right Burner 4. Bake Front Right Burner 5. Roast Oven Settings Temperature Light Indicator Operation of Oven • Ensure that the shelves are inserted at the correct height. •... - Page 18 OPERATING INSTRUCTIONS OVEN OPERATIONAL MODES This oven combines the functions of traditional oven modes with the functions of modern, fan-assisted convection modes in a single oven. Use the Oven Settings knob to select the oven mode. NOTE: To maintain oven temperature, limit door openings during cooking. Timer The timer will need to be set when you use the unit for the first time, otherwise the oven will not work.
- Page 19 OPERATING INSTRUCTIONS PREHEATING 1. Turn the cooking functions knob to the desired function. 2. Rotate the Temperature knob to the desired temperature. NOTE: The higher the temperature selected, the longer it will take to preheat. The actual oven temperature will go higher than your set temperature to offset the heat lost when you open the oven door to place the food on the rack.
- Page 20 OPERATING INSTRUCTIONS ROAST When roasting set the desired temperature as shown below. Only the lower element is used. The oven can be preheated before placing the food into the oven. 1. Turn the cooking functions knob to Roast. 2. Rotate the temperature dial to the desired temperature. 3.
- Page 21 OPERATING INSTRUCTIONS COOKTOP Cooking Rings The general rule of thumb with cookware, the diameter of the cookware should match the diameter of the elements that are being used. If the cookware is small than the element by 1 inch (2.5cm), it will still be effective.
- Page 22 CARE & MAINTENANCE Ceramic Glass Cooktop CLEANING Before cleaning, make sure all controls are turned To avoid damaging the cooktop, do not use steel off, and the oven and cooktop are cool. Always wool, abrasive powder cleansers, chlorine bleach, follow label instruction on cleaning products. It is rust remover or ammonia.
-
Page 23: Care And Maintenance
CARE & MAINTENANCE Oven Cavity Door removal Food spills should be cleaned when oven cools. At 1. Open the oven door completely. high temperatures, foods react with porcelain so 2. Lift up the hinge latch on each side. staining, etching, pitting or faint white spots can result. - Page 24 CARE & MAINTENANCE Door Reinstallation Replacing Oven Light 1. Insert both hanger arms into the hinge receivers The oven light is a standard 25-watt (G) appliance in the door frame. bulb. 2. Slowly open the oven door and you will feel the door set into place.
-
Page 25: Troubleshooting
TROUBLESHOOTING No power • A fuse may be blown or the circuit breaker tripped • Plug not fully inserted into the wall outlet Cooktop elements not working properly • Improper cookware is being used • No power • Heating elements cycle off even when turned to highest setting: temperature limiters are temporarily shutting off the elements due to exceding the maximum allowable temperature •... - Page 26 Nothing within this warranty shall imply that Danby will be responsible or liable for any spoilage or damage to food or other c...
- Page 27 1. Lisez votre manuel du propriétaire pour obtenir de l’aide à l’installation, au dépannage et à la maintenance. 2. Visitez www.Danby.com pour accéder aux outils en libre-service, aux FAQ et bien plus encore en recherchant votre numéro de modèle dans la barre de recherche.
- Page 28 Informations de sécurité importantes LISEZ ET SUIVEZ TOUTES LES INSTRUCTIONS DE SÉCURITÉ AVERTISSEMENT - RISQUE DE BASCULEMENT • Un enfant ou un adulte peut faire basculer l’appareil et être tué. • Vérifiez que le support anti-basculement a été correctement installé au sol ou mur. •...
- Page 29 Informations de sécurité importantes LISEZ ET SUIVEZ TOUTES LES INSTRUCTIONS DE SÉCURITÉ AVIS - AVANT LA PREMIÈRE UTILISATION DU FOUR Avant la première utilisation de ce four, les éléments chauffants sont recouverts d’une couche protectrice, qui doit être brûlée avant l’utilisation. Pour ce faire, il faut: •...
- Page 30 Informations de sécurité importantes LISEZ ET SUIVEZ TOUTES LES INSTRUCTIONS DE SÉCURITÉ NE PAS TOUCHER LES ÉLÉMENTS PELIGRO - RIESGO DE INCENDIO CHAUFFANTS OU LES ZONES À PROXIMITÉ • Il est recommandé que cet appareil soit connecté à un circuit séparé qui n’est partagé Les éléments chauffants à...
- Page 31 Informations de sécurité importantes LISEZ ET SUIVEZ TOUTES LES INSTRUCTIONS DE SÉCURITÉ EXIGENCES GÉNÉRALES DE SÉCURITÉ Assurez-vous que l’appareil est correctement installé et mis à la terre par un technicien qualifié. Les enfants ne doivent pas être laissés seuls ou sans surveillance dans la zone où l’appareil est utilisé. Les enfants ne doivent jamais être autorisés à...
- Page 32 Informations de sécurité importantes LISEZ ET SUIVEZ TOUTES LES INSTRUCTIONS DE SÉCURITÉ EXIGENCES DE SÉCURITÉ DE LA TABLE DE sont appliqués sur une surface chaude. CUISSON EXIGENCES DE SÉCURITÉ DE LA TABLE DE • Utilisez la taille de casserole appropriée. Cet CUISSON appareil est équipé...
-
Page 33: Instructions De Mise À La Terre
Informations de sécurité importantes LISEZ ET SUIVEZ TOUTES LES INSTRUCTIONS DE SÉCURITÉ INSTRUCTIONS DE MISE À LA TERRE Cet appareil doit être mis à la terre. La mise à la terre réduit le risque de choc électrique en fournissant un fil d’échappement pour le courant électrique. -
Page 34: Instructions D'installation
INSTRUCTIONS D’INSTALLATION Mesures d’installation Alimentation électrique REMARQUE: La cuisinière peut être surélevée d’environ 2,5 cm en réglant les pieds de nivellement. L’avant de la porte et du tiroir peut s’étendre plus loin vers l’avant en fonction du style. A: Panneau d’accès au cordon électrique B: Ouverture du cordon d’alimentation C: Espace en retrait INSTALLATION DU DALLAGE ARRIÈRE :... -
Page 35: Outils Requis
INSTRUCTIONS D’INSTALLATION Rassemblez les outils et les pièces nécessaires avant Température de commencer l’installation. • La cuisinière doit être placée de manière à OUTILS REQUIS pouvoir être utilisée facilement dans la cuisine. • Les installations encastrées doivent assurer une Ruban à mesurer fermeture complète des côtés et de l’arrière de la Tournevis à... -
Page 36: Support Anti-Basculement
INSTRUCTIONS D’INSTALLATION SUPPORT ANTI-BASCULEMENT Un ensemble de supports anti-basculement est fourni avec le four. AVERTISSEMENT: Risque de basculement • Un enfant ou un adulte peut faire basculer la cuisinière et se blesser gravement. • Connecter le support anti-basculement au pied arrière de la cuisinière. •... - Page 37 INSTRUCTIONS D’INSTALLATION Support d’attache Le support doit être vissé au SOL ou au MUR ARRIÈRE. Installation du sol • Plancher en bois : utilisez les vis fournies pour fixer le support en utilisant la paire de trous marqués (Loc A ou B). •...
- Page 38 INSTRUCTIONS D’INSTALLATION L’INSTALLATION DE LA CUISINIÈRE REMARQUE: Si la cuisinière est déplacée pour régler les pieds de nivellement, assurez-vous que le support anti-basculement est engagé lorsque la cuisinière est replacée à son emplacement définitif en répétant les étapes 1 à 9. 1.
- Page 39 INSTRUCTIONS D’INSTALLATION ACCESSORIES 1. Dosseret 2. M4*8 Vis pour l’installation du dosseret x5 3. Grilles x2 4. Support antibasculement 5. M5*45 Vis pour support antibasculement x2...
-
Page 40: Instructions D'utilisation
INSTRUCTIONS D’UTILISATION DIMENSIONS Les dimensions de cet appareil sont : A. 37.9 ~ 37.12 pouces (96.3 ~ 94.3 cm) du sol au dessus de la table de cuisson (avec dosseret installé). B. 27.6 pouces (70 cm) de profondeur C. 29,9 pouces (76 cm) de large Il incombe à... - Page 41 INSTRUCTIONS D’UTILISATION PIÈCES D’EXTÉRIEUR PIÈCES D’INTÉRIEUR...
-
Page 42: Panneau De Commande
INSTRUCTIONS D’UTILISATION PANNEAU DE COMMANDE Manette de la minuterie 1. Puissance du four Brûleur avant gauche 2. Lumière Brûleur arrière gauche 3. Griller Brûleur arrière droit 4. Rôti Brûleur avant droit 5. Cuisson Réglages du four Température Indicateur lumineux Fonctionnement du four •... - Page 43 INSTRUCTIONS D’UTILISATION MODES OPÉRATIONNELS DU FOUR Ce four combine les fonctions des modes de cuisson traditionnels et les fonctions des modes de convection modernes assistés par ventilateur dans un seul et même four. Utilisez la manette de réglage du four pour sélectionner le mode de cuisson.
-
Page 44: Bake (Cuisson)
INSTRUCTIONS D’UTILISATION PRÉCHAUFFAGE 1. Tournez la manette des fonctions de cuisson sur la fonction souhaitée. 2. Tournez la manette de température sur la température souhaitée. REMARQUE: Plus la température sélectionnée est élevée, plus le préchauffage est long. La température réelle du four sera supérieure à la température réglée pour compenser la perte de chaleur lorsque vous ouvrez la porte du four pour placer les aliments sur la grille. - Page 45 INSTRUCTIONS D’UTILISATION ROAST (RÔTIR) Pour le rôtissage, réglez la température souhaitée comme indiqué ci-dessous. Seul l’élément inférieur est utilisé. Le four peut être préchauffé avant d’y placer les aliments. 1. Tournez la manette des fonctions de cuisson sur Rôtir. 2. Tournez la manette de température jusqu’à la température souhaitée. 3.
- Page 46 INSTRUCTIONS D’UTILISATION TABLE DE CUISSON Anneaux de cuisson La règle générale en matière d’ustensiles de cuisine est que le diamètre de l’ustensile doit correspondre au diamètre des éléments utilisés. Si l’ustensile est plus petit que l’élément de 2,5 cm, il sera toujours efficace. Tout ustensile dont le diamètre est supérieur à...
-
Page 47: Entretien Et Maintenance
ENTRETIEN ET MAINTENANCE NETTOYAGE Table de cuisson en vitrocéramique Avant de procéder au nettoyage, assurez-vous que Pour éviter d’endommager la table de cuisson, toutes les commandes sont éteintes et que le four n’utilisez pas de laine d’acier, de nettoyants en et la table de cuisson sont froids. - Page 48 ENTRETIEN ET MAINTENANCE Manettes de commande de la table de cuisson Démontage de la porte du four Utilisez de l’eau et du savon ou du détergent pour Pour une utilisation normale du four, il n’est pas lave-vaisselle. nécessaire de retirer la porte du four. Toutefois, si cela s’avère nécessaire, veuillez suivre les •...
- Page 49 ENTRETIEN ET MAINTENANCE Remplacement de l’ampoule du four Réinstallation de la porte La lampe du four est une ampoule standard de 25 1. Insérer les deux bras de suspension dans les watts (G) pour appareils électroménagers. récepteurs de charnière du cadre de la porte. 2.
-
Page 50: Dépannage
DÉPANNAGE Pas d’électricité • Un fusible peut avoir sauté ou le disjoncteur s’être déclenché • La prise n’est pas complètement insérée dans la prise murale Les éléments de la table de cuisson ne fonctionnent pas correctement • Utilisation d’ustensiles de cuisine inappropriés •... - Page 51 Aucune partie de la garantie ne prévoit implicitement que le fabricant sera tenu responsable des dommages subis par les aliments ou Nothing within this warranty shall imply that Danby will be responsible or liable for any spoilage or damage to food or other c ontents of this appliance, whether due d’autres types de contenu, qu’ils soient causés par la défectuosité...
- Page 52 Danby Products Limited, Guelph, Ontario, Canada N1H 6Z9 Danby Products Inc. Findlay, Ohio, U.S.A. 45840 www.danby.com Printed in China | Imprimé en Chine | Impreso en China...
Need help?
Do you have a question about the DRRM300BSSC and is the answer not in the manual?
Questions and answers