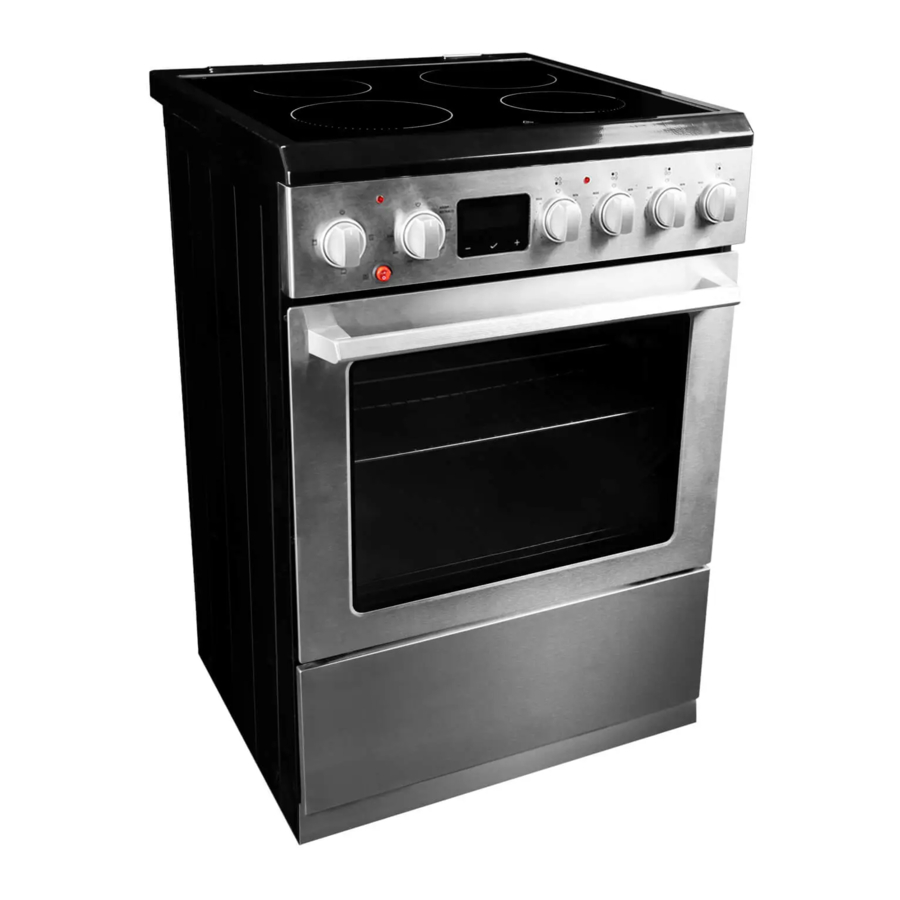
Danby DRCA240BSS, DRCA240BSSC - 24 in. Smooth Top Electric Range Manual
- Owner's manual (69 pages)
Advertisement
- 1 Important Safety Information
- 2 INSTALLATION INSTRUCTIONS
-
3
OPERATING INSTRUCTIONS
- 3.1 ACCESSORIES
- 3.2 AIR FRY RACK HOLDER
- 3.3 DIMENSIONS
- 3.4 LEVELING INSTRUCTIONS
- 3.5 BEFORE BEGINNING
- 3.6 SURFACE COOKING CONTROLS
- 3.7 SURFACE COOKING KNOB
- 3.8 OVEN COOKING CONTROLS
- 3.9 OVEN BAKING AND ROASTING
- 3.10 BAKING AND ROASTING TIPS
- 3.11 OVEN BROILING
- 3.12 BROILING TIPS
- 3.13 AIR FRYING
- 3.14 AIR FRY COOKING CHART
- 3.15 AIR FRYING TIPS
- 3.16 DIGITAL CLOCK
- 3.17 TIMER
- 3.18 OVEN SHELVES
- 3.19 SHELF POSITIONS
-
4
CARE & MAINTENANCE
- 4.1 Cooktop Maintenance
- 4.2 For a burned-on residue
- 4.3 For a heavy burned on residue
- 4.4 Porcelain oven interior
- 4.5 Cautions about using spray-on oven cleaners
- 4.6 Oven shelves
- 4.7 Air fry rack and holder
- 4.8 Oven heating elements
- 4.9 Control knobs
- 4.10 Painted surfaces
- 4.11 REMOVABLE OVEN DOOR
- 4.12 REMOVABLE STORAGE DRAWER
- 4.13 OVEN LIGHT REPLACEMENT
- 4.14 GLASS DOOR WINDOW
- 4.15 DRIP TRAY
- 5 TROUBLESHOOTING
- 6 Documents / Resources
Important Safety Information
 READ AND FOLLOW ALL SAFETY INSTRUCTIONS

TIP OVER HAZARD
- A child or adult can tip the appliance and be killed.
- Verify the anti-tip bracket has been properly installed to the floor.
- Ensure the anti-tip bracket is re-engaged when the range is moved.
- Do not operate the range without the anti-tip bracket in place and engaged.
- Failure to follow these instructions can result in death or serious burns to children or adults.
ANTI-TIP DEVICE
To reduce the risk of the range tipping by abnormal usage or improper door loading, the range must be secured by installing an anti-tip device. There are two difference anti-tip devices included with this appliance.
Note: If the range is ever relocated the anti-tip bracket must be removed and installed at the new location.
BRACKET
The anti-tip bracket can be installed on either the left or the right rear leg by following the instructions below.
- Place the anti-tip bracket on the floor where the range will be installed.
- Mark the locations of the two holes in the anti-tip bracket.
- Use a 5/16" drill bit to drill a hole in the floor and insert the provided plastic anchor.
- Secure the bracket to the floor using the provided screws.
- Slide the range into position, ensuring that the anti-tip bracket is positioned over the rear foot of the appliance as per the below images.


CHAIN
There are two anti-tip chains that should be installed on both sides of the appliance.
- Screw the chains into the walls on either side of where the appliance will be located.
- Attach the other ends of the chains to the sides of the appliance using a screw and locking nut.


SUFFOCATION AND RISK OF CHILD ENTRAPMENT
To avoid the possibility of child entrapment please take the following precautions before throwing out the appliance:
- Remove the oven door completely
- Never allow children to operate, play with or crawl inside the electric range
NOTICE - BEFORE FIRST TIME USE
Before use of this range for the first time, the heating elements have a protective coating, which must be burned off before use. To do this:
- Open the oven door and set the temperature control knob to 450°F.
- Turn the function selector to the bake element and the broil element separately for approximately 15 minutes.
- It is important to ensure adequate ventilation during this period.
DO NOT TOUCH HEATING ELEMENTS OR AREAS NEAR THEM
Heating elements on the surface or in the interior of the appliance may be hot even though they are dark in colour. Areas near the heating elements may become hot enough to cause burns. During and after use do not touch or let clothing or other flammable materials contact the heating elements or areas near them until they have had sufficient time to cool. Surfaces of the appliance may become hot enough to cause burns, among them are the oven vent openings and surfaces near these openings, oven doors and oven windows.

GREASE FIRES
In the event of a fire, never pick up a flaming pot or pan. Turn the burner off if it is safe to do so. Extinguish the fire with a dry chemical or foamtype extinguisher. Do not use water on grease fires. Water will spread the grease and will not extinguish the fire. Smother the fire with a tight fitting pot lid, cookie sheet or flat tray or use dry chemical or foam-type extinguisher. If there is a fire in the oven during baking, smother the fire by closing the oven door and turning the oven off or use dry chemical or foamtype extinguisher.
FIRE RISK
- It is recommended that this appliance be connected to a separate circuit that is not shared with any other appliance.
- Never clean appliance parts with flammable fluids. These fumes can create a fire hazard or explosion. Never use or store gasoline or other flammable vapors or liquids inside or in the proximity of this appliance, failing to do so may result in a fire hazard or explosion.
- Before cleaning or servicing this appliance, unplug the appliance completely from the electrical outlet or disconnect the range power supply at the household distribution panel by removing the fuse or switching off the circuit breaker. Failure to do so can result in electrical shock or death.
- Do not attempt to repair or replace any part of your appliance unless it is specifically recommended in this manual. All other servicing should be referred to a qualified service technician.
- For your safety, this appliance should never be used as a source of heat or as a space heater. The stove top elements should not be operated without proper cookware.
- All openings in the wall behind the appliance and the floor under the appliance shall be
- Keep the area around the appliance clear and free from combustible materials, gasoline and other flammable vapors. Always keep combustible wall coverings, curtains or drapes a safe distance from the range.
- Do not obstruct the flow of air around the appliance.
- Always disconnect the electrical supply to the appliance before servicing.
- Never use your appliance for warming or heating the room.
- Storage in or on the appliance: flammable materials should not be stored in an oven or near surface burners.
GENERAL SAFETY REQUIREMENTS
Ensure the appliance is properly installed and grounded by a qualified technician.
Children should not be left alone or unattended in the area where the appliance is in use. Children should never be allowed to sit or stand on any part of the appliance.
Do not store items of interest to children in cabinets above a range or on the back guard of a range. Children climbing on the range to reach items could be seriously injured.
To eliminate the risk of burns or fire by reaching over heated surface units, cabinet storage space located above the surface units should be avoided. If cabinet storage is to be provided, the risk can be reduced by installing a range hood that projects horizontally a minimum of 5 inches (12.7 cm) beyond the bottom of the cabinets.
Loose fitting or hanging garments should never be worn while using the appliance.
Use only dry pot holders. Moist or damp pot holders on hot surfaces may result in burns from steam. Do not let the pot holder touch hot heating elements. Do not use a towel or other bulky cloth.
If power is lost to an electric cooktop while a surface element is ON, the surface element will turn back on as soon as power is restored. In the event of power loss, failure to turn all surface element knobs to the OFF position may result in ignition of items on or near the cooktop, leading to serious injury or death.
To avoid the possibility of a burn or an electric shock, always be certain that the controls for all surface elements are at the OFF position, and that all coils are cool before attempting to lift or remove a coil cooking element.
This range is designed and manufactured solely for the cooking of domestic (household) food and is not suitable for any non domestic application and therefore should not be used in a commercial environment. The range warranty will be void if the range is used within a non domestic environment.
To reduce the risk of burns, do not move this appliance while it is hot. To reduce the risk of injury due to tipping of the appliance, verify the re-installation of this appliance into the anti-tipping device provided after returning the appliance to the original installed position.
The manufacturer declines all liability for injury to persons or damage to property cause by incorrect or improper use of the range.
COOK TOP SAFETY REQUIREMENTS
Use the proper pan size. This appliance is equipped with four burners of different sizes. Select utensils that have flat bottoms large enough to cover the surface of the heating element. The use of undersized utensils will expose a portion of the heating element to direct contact and may result in ignition of clothing. Proper relationship of utensil to burner will also improve efficiency.
Never leave the appliance unattended while in use. Boil over causes smoking and greasy spills can ignite.
Never leave oil unattended while frying. If allowed to heat beyond its smoking point, oil may ignite resulting in fire that may spread to surrounding cabinets. Use a deep fat thermometer whenever possible to monitor oil temperature.
To avoid oil spillover and fire, use a minimum amount of oil when shallow pan-frying and avoid cooking frozen foods with excessive amounts of ice.
Only certain types of glass, ceramic, earthenware or other glazed utensils are suitable for range top service without breaking due to sudden change in temperature.
To reduce risk of burns, ignition of flammable materials and spillage due to unintentional contact, the handle of a utensil should be positioned so that it is turned inward and does not extend over adjacent burners.
Do not cook on broken cooktop. If the cooktop should break, cleaning solutions and spill overs may penetrate the broken cooktop and create a risk of electric shock. Contact a qualified technician immediately.
Do not use a griddle or long pan on more than one burner at once.
OVEN SAFETY REQUIREMENTS
Use care when opening the door. Allow hot air or steam to escape before removing or replacing food.
Do not heat unopened food containers. Build up of pressure may cause the container to burst and result in injury.
Keep oven vents unobstructed.
Always place oven racks in the desired location while the oven is cool. If the rack must be moved while the oven is hot, do not let the pot holder contact the hot heating element in the oven.
Do not use the oven if a heating element develops a glowing spot during use or shows other signs of damage. A glowing spot indicates the heating element may fail and present a potential burn, fire, or shock hazard. Turn the oven off immediately and have the heating element replaced by a qualified service technician.
Do not line the oven walls, racks or burner bowls with aluminum foil.
Do not place shelves, pans, baking trays, broil trays or other cooking utensils in the bottom of the oven chamber. Always place on an oven shelf.
Never clean the oven with any high pressure steam cleaning devices.
Do not leave anything on the top of the oven vent. Never cover the oven vent opening with aluminum foil or any other material.
GROUNDING INSTRUCTIONS
For models sold in Canada only: DRCA240BSSC
This appliance must be grounded. Grounding reduces the risk of electrical shock by providing an escape wire for the electrical current.
This appliance has a power cord that has a grounding wire with a 4-prong plug. The power cord must be plugged into an outlet that is properly grounded. If the outlet is is not a 4-prong plug, it must be replaced with a properly grounded 4-prong wall outlet. The rating plate indicates the voltage and frequency the appliance is designed for.
Improper use of the grounding plug can result in a risk of electric shock. Consult a qualified electrician if the grounding instructions are not completely understood, or if doubt exists as to whether the appliance is properly grounded.
Do not connect the appliance to extension cords, adapters or together with another appliance in the same wall outlet.
Do not splice the power cord. Do not under any circumstances cut or remove the ground prong from the power cord.
If the power supply cord is damaged, it must be replaced by the manufacturer, its service agent or similar qualified person in order to avoid hazard.
Note: Turning the appliance off does not disconnect the appliance from the power supply.
It is recommended that the power cord and the plug be placed parallel with the floor so that the cord runs parallel with the floor.
ELECTRICAL CONNECTION
For models sold in the US only: DRCA240BSS
- Installation of this appliance requires basic mechanical skills and roughly 1 to 3 hours of time.
- Proper installation is the responsibility of the installer. Product failure due to improper installation is not covered under the warranty.
- Switch power off at the service panel and lock the service disconnecting means before beginning to prevent power from being switched on accidentally. If the service disconnecting means cannot be locked, securely fasten a warning device such as a tag to the service panel.
- Remove the house fuse or open circuit breaker before beginning the installation.
- This appliance must be properly installed and grounded by a qualified technician in accordance with local regulations and the ANSI National Electrical Code/NFPA 70 in the United States or the Canadian Electrical Code, Part I in Canada (CSA standard C22.1). Installation should be done by a licensed electrician.
- The range may be connected by means of permanent hard wiring or by the addition of a power cord. The power cord is not supplied but can be purchased at a local hardware store.
- Use only 3-conductor or 4-conductor UL listed range cord rated at 40 amps, 8AWG with 208/240V minimum voltage range. These cords may be provided with ring terminals on wire and a strain relief device. You must install the power cord with strain relief.
- ALL NEW BRANCH-CIRCUIT CONSTRUCTIONS, MOBILE HOMES, RECREATIONAL VEHICLES AND INSTALLATIONS WHERE LOCAL CODES DO NOT ALLOW GROUNDING THROUGH NEUTRAL, REQUIRE A 4-CONDUCTOR UL-LISTED RANGE CORD.
- The appliance must be connected to the proper electric voltage and frequency as specified on the rating label.
- The appliance can be connected directly to the fused disconnect or the circuit breaker box through flexible, armored or non-metallic sheathed, copper cable with a grounding wire. Allow 2 to 3 feet of slack in the line so that the appliance can be moved if cleaning or servicing is required.
- Do not repair or replace any parts of the appliance on your own. Installation and servicing should be completed by a qualified technician.
- Have the installer show you the location of the circit breaker or fuse. Mark it for easy reference.
SAVE THESE INSTRUCTIONS!
INSTALLATION INSTRUCTIONS

For models sold in the United States only: DRCA240BSS. This model does not include a pre-installed power cord. Use the following instructions for wiring before using the range. The power cord is not provided. Follow all local and national wiring standards and codes.
3-WIRE POWER CORD INSTALLATION
- Remove the terminal block access plate on the back of the appliance.
- Loosen the screws securing the strain relief bracket.
- Insert 3 power wires (L1, L2, Grounding) passing through the bracket. The neutral or ground wire of the power cord must be connected to the ground nut. The power leads must be connected to L1 and L2.
- Loosen the 2 power leads terminal (L1, L2) nuts and washers on the terminal block.
- Plug the 2 wire terminals into the terminal block as shown and then tighten the nuts.
- Loosen the ground nut and plug the grounding wire terminal into the nut as shown and then tighten the nut.
- Tighten the screws of the bracket when all cords are plugged and secured.
- Replace the terminal block access plate.

- Terminal block
- Power wire
- Bracket
- Ground wire
For models sold in the United States only: DRCA240BSS. This model does not include a pre-installed power cord. Use the following instructions for wiring before using the range. The power cord is not provided. Follow all local and national wiring standards and codes.
4-WIRE POWER CORD INSTALLATION
- Remove the terminal block access plate on the back of the appliance.
- Loosen the screws securing the strain relief bracket.
- Insert 4 power wires (L1, L2, N, Grounding) passing through the bracket. The neutral wire of the power cord must be connected to the center of the terminal block. The ground wire of the power cord must be attached to the frame using the green coloured grounding screw. The power leads must be connected to L1 and L2.
- Loosen the 3 power leads terminal (L1, L2, N) nuts and washers on the terminal block.
- Plug the 3 wire terminals into the terminal block as shown and then tighten the nuts.
- Loosen the ground nut and plug the grounding wire terminal into the nut as shown and then tighten the nut.
- Tighten the screws of the bracket when all cords are plugged and secured.
- Replace the terminal block access plate.

- Terminal block
- Power wire
- Neutral wire
- Bracket
- Ground wire
OPERATING INSTRUCTIONS
ACCESSORIES

- Anti-tip bracket (1 set)
- Anti-tip chain (2 sets)
- Screws (x7)
- Air fry rack holder
- Air fry rack
- Oven racks (x2)
AIR FRY RACK HOLDER
The air fry rack holder can be used to place or remove the air fry rack and the oven racks by hooking it onto the edge of the rack.
Please be very careful when positioning or moving the air fry rack as it can be very hot. Use an oven mitt or towel to protect your hands.

DIMENSIONS
This dimensions of this appliance are:

- 36 ~ 36.4 inches (91.5 ~ 92.5 cm) from the floor to the top of the cooktop.
- 25.4 inches (64.5 cm) deep
- 23.4 inches (59.5 cm) wide
It is the installer's responsibility to comply with installation clearances specified in the manual. The minimum cabinet opening dimensions and clearances must be used. The minimum spacings must be maintained between the appliance cooking surface and the horizontal surface above the cooktop.
30 inches (65 cm) is the minimum clearance between the top of the cooking surface and the bottom of an unprotected wood or metal cabinet.
LEVELING INSTRUCTIONS
The appliance must be level to operate safely and properly. There are four leveling legs located at the corners of the bottom of the appliance. Adjust the leveling legs until the appliance is level. Use a carpenter's level to confirm.

BEFORE BEGINNING
Carefully unpack the appliance and ensure there is no damage to the oven, cooktop or structure and that the oven door opens and closes properly. Remove all packing materials such as plastic bags, polystyrene foam, packing straps, etc. Keep packing materials out of reach of children at all times to prevent possible serious injury. The range has been thoroughly tested for safe and efficient operation. However, as with any appliance, there are specific installation and safety precautions that must be followed to ensure safe and satisfactory operation.
Make sure the handles of cookware do not stick out over the edge of the range to avoid being knocked over by accident. This also makes it more difficult for children to reach hot cookware and possibly injure themselves.
SURFACE COOKING CONTROLS
- The surface heating elements of the appliance are designed for a variety of heat settings. MAX indicates the highest setting. MIN indicates the lowest setting.
- Changing to a higher heat setting will happen faster than changing to a lower heat setting as it will take time for the heat to dissipate.
- To use the surface burner, push the control knob in and turn to the desired setting. The knob only needs to be pushed in when moving out of the "OFF" position. When the knob is in any position other than "OFF", it can be turned without pushing in.
- Use medium or heavyweight cookware. Aluminum cookware conducts heat faster than other metals. Cast-iron and coated cast-iron cookware is slow to absorb heat, but generally cooks evenly at low or medium heat settings. Steel pans may cook unevenly if not combined with other metals.
- Do not overfill cookware with fat that may spill over when adding food. Frosty foods bubble vigorously. Watch foods frying at high temperatures. Keep range and hood clean from accumulated grease.
- To conserve the most cooking energy, pans should be flat on the bottom, have straight sides and tight- fitting lids. Match the size of the saucepan to the size of the surface element. A pan that extends more than an inch beyond the edge of the drip pan traps heat, which causes "crazing" (fine hairline cracks) on porcelain, and discoloration ranging from blue to dark gray on chrome drip pans.
- Only certain types of glass, ceramic, earthenware or other glazed utensils are suitable for use on the cooktop. Use low or medium heat when using this type of cookware.
- Wipe spills with a damp cloth as soon as they cool down. Be sure the control knob is set to OFF.
- Never leave an empty pot or one that has boiled dry on a hot surface element. The pot could overheat and damage the pot or the surface of the appliance. Always be sure that all control knobs are turned to OFF and that the indicator lights are off when the appliance is not in use.
- Ensure that the element is turned off when cooking is finished. An indicator light will glow when any heating element is turned on.
SURFACE COOKING KNOB

Never leave food unattended while cooking. Boil overs cause smoking. Greasy spill overs may catch fire.
Note that the icon above the knob indicates which burner the knob controls.
OVEN COOKING CONTROLS
The oven has three available functions that can be set using the function selector knob.

- Off
- Broil
- Bake
- Air fry
- Light control
The oven knob is used to choose the oven cooking temperature and is marked in 50 degree increments, from 200°F to 450°F.

To use the oven, turn the function selector knob to bake and turn the oven temperature knob to the desired cooking temperature.
| Temperature Conversions | |||||||||||||||||
| Fahrenheit | 140 | 150 | 170 | 200 | 250 | 275 | 300 | 325 | 350 | 375 | 400 | 425 | 450 | 475 | 500 | 525 | 550 |
| Celsius | 60 | 65 | 75 | 95 | 120 | 135 | 150 | 160 | 175 | 190 | 205 | 220 | 230 | 245 | 260 | 275 | 290 |
OVEN BAKING AND ROASTING
- Position the shelves in the oven. If cooking on two shelves at the same time, stagger the pans for the best heat circulation.

- Close the oven door. Turn the function selector knob to bake. Turn oven temperature knob to the desired temperature.
- Allow the oven to preheat if required.
- Place the food on the center of the oven shelf. Allow at least 2 inches between the end of the pan and the oven wall or any adjacent pans.
- Check the food regularly. Remove once done and ensure the oven is turned off.

BAKING AND ROASTING TIPS
- Follow a tested recipe and measure the ingredients carefully. If you are using a package mix, follow label directions.
- Do not open the oven door while baking or roasting. Heat will be lost and the cook time might need to be extended. If you must open the door, open it partially and close it as quickly as possible.
- Roasting is cooking by dry heat. Tender meat or poultry can be roasted uncovered. Roasting temperatures, which should be low and steady, keep spattering to a minimum. When roasting, it is not necessary to sear, baste, cover, or add water to the meat.
- Frozen roasts of meat can be cooked without thawing, but allow 10 to 25 minutes of additional time per pound of meat (10 minutes per pound for roasts under 5 pounds, more time for larger roasts).
- Thaw frozen poultry before roasting to ensure even cooking. Some commercial frozen poultry can be cooked successfully without thawing. Follow directions given on package label.
OVEN BROILING
Broiling involves cooking food by intense radiant heat from the upper element in the oven. Most fish and tender cuts of meat can be broiled. Follow these steps to keep spattering and smoking to a minimum.
- If the meat has fat or gristle around the edge, cut vertical slashes through both about 2" apart. If desired, fat may be trimmed, leaving a layer about 1/8" thick.
- Place the meat on a broiler grid in a broiler pan designed for broiling. Always use the grid so the fat drips into the broiler pan; otherwise the juices may become hot enough to catch fire.
- Place the shelf in one of the top two positions for most broiling.
- Place the food in the oven and close the door. Always broil with the door closed.
- Turn the oven function selector knob to broil.
- Turn the oven temperature knob to the desired cooking temperature.
- Food can be turned during broiling if necessary. Be cautious of hot air or steam when opening the oven door.
- Make sure to turn the oven temperature knob to OFF once broiling is complete.
BROILING TIPS
- If desired, marinate meats or chicken before broiling or brush with barbecue sauce in the last 5 - 10 minutes of cooking.
- When arranging food on a pan, do not let fatty edges hang over the sides as the dripping fat will soil the oven as it cooks.
AIR FRYING
Air frying is designed to simulate deep frying without submerging the food in oil. A fan circulates hot air at high speed, producing a crisp outer layer on the food.
- Arrange the food in the air fry basket and position it on the oven rack in the middle rack position. Place a baking pan on the rack below the air fry basket to catch any drips.
- Set function selector knob to air fry.
- Use the oven knob to set the desired temperature.
Cooked food, the air fry basket, the baking pan and the door can be very hot.
NOTE: Baking pan is not provided; image is for illustration purposes only.

AIR FRY COOKING CHART
Cook times are estimates and may vary based on food type and preparation. It is normal for steam or condensation to escape from the door, especially when cooking frozen foods.
Loose items such as fries, chicken wings or chicken strips should be turned halfway through cooking to ensure even browning.
| Food | Quantity (pieces) | Weight (g) | Temperature (°F) | Time (mins) |
| Frozen fries | 45 - 50 | ~190 | 425 | 18 - 20 |
| Fresh fries | 45 - 50 | ~520 | 425 | 18 - 28 |
| Frozen chicken wings | 15 - 20 | ~780 | 425 | 25 - 30 |
| Fresh chicken wings | 15 - 20 | ~745 | 425 | 25 - 30 |
| Frozen chicken nuggets | 10 - 15 | ~235 | 425 | 25 - 30 |
| Frozen chicken strips | 8 - 10 | ~235 | 425 | 25 - 30 |
AIR FRYING TIPS
The top heating elements will cycle on and off to maintain the desired temperature.
The oven does not need to be pre-heated for air frying.
Large quantities of food can benefit from being tossed halfway through cooking to ensure even browning.
Not all foods benefit from being tossed in oil prior to being air fried. Frozen foods and foods with a high fat content such as chicken wings or bacon do not require oil.
To achieve browned results on fresh foods such as hand-cut fries or vegetables, evenly coat food with a small amount of oil.
DIGITAL CLOCK

When the range is plugged in, the display will show "12:00" and the clock icon will flash. Press the up and down buttons to set the current time. Press and hold the up and down buttons to quickly advance the time. Wait 5 seconds and the clock will confirm automatically.
To adjust the current time, press the mode button until the clock icon flashes and then use the instructions above to set the desired time.
To change between a 12 hour and a 24 hour clock first press the up and down buttons at the same time and then press the down button to choose a 12 hour clock and press the up button to choose a 24 hour clock.
TIMER

Set the oven controls as desired. Press the mode button until the timer icon flashes. Press the up and down buttons to set the desired time. Wait 5 seconds and the timer will automatically confirm the setting. The timer icon will remain illuminated while the display counts down the remaining time. An alarm will sound once the timer runs out. Press any button on the display to silence the alarm.
The digital timer is not connected to the oven and will not turn the oven off. Ensure that you turn the oven off when cooking is complete.
Quick Cancel Timer: To quickly cancel a timer setting, press and hold the up button for 3 seconds.
OVEN SHELVES
To remove the shelves from the oven, pull the shelf outward, tilt the front end upward and pull it out.

To replace the shelves, place the shelf on the support with the stop locks facing up and toward the back of the oven. Tilt up the front and push the shelf toward the back of the oven until it goes past the bump on the shelf support, then lower the front of the shelf and push it all the way into the oven.
The oven has three different shelf support positions to accommodate different cooking requirements.
SHELF POSITIONS
- Most baking is done on the second or third shelf position from the bottom of the oven.
- When baking multiple items, use two shelves positioned on the second and third shelf supports from the bottom of the oven.
- Bake angel food cakes on the first shelf position from the bottom of the oven.
- Roasting is usually done on the bottom shelf position.
- Be very careful when positioning or moving shelves as they can be very hot.
CARE & MAINTENANCE
Cooktop Maintenance
For everyday cleaning of marks, fingerprints and non- sugary spillovers, apply a ceramic cooktop cleaning product. Rinse and wipe dry with a clean cloth or paper towel.
For boil overs, melts and hot sugary spills on the cooktop, remove the spill or food item immediately with a ceramic cooktop razor but beware hot cooking surfaces. Hold the razer at a 45-degree angle and scrape the spilled food to a cool area of the cooktop, then clean it up with a dish cloth or paper towel. Large spills should be removed immediately to ensure they do not bake onto the surface of the cooktop.
The control knobs are removable and can be cleaned with a soft cloth and warm water.
For a burned-on residue
Let the cooktop cool, then, spread a few drops of ceramic cooktop cleaning product on all the burned residue area. Rub this area with a non-scratching cleaning pad and if some residue remains, repeat these steps.
For a heavy burned on residue
Let the cooktop cool, then use a ceramic cooktop razor at a 45-degree angle and scrape to remove the residue. After scraping the heavy residue, spread a few drops of ceramic cooktop cleaning product on all the burned residue area. Rub this area with a non-scratching cleaning pad.
Porcelain oven interior
With proper care, the porcelain enamel interior will retain its finish for many years.
Soap and water can be used to clean the interior. Heavy splattering or spills may require cleaning with a mild abrasive cleaner.
Do not allow spills with high acid content such as milk, tomatoes, fruit juices or pie filling, to remain on the surface. They may cause dull spots even after cleaning.
Household ammonia may make cleaning easier. Place 1/2 cup of ammonia in a shallow glass pan and leave in a cold oven over night. The ammonia fumes will help loosen burned on grease and food.
Cautions about using spray-on oven cleaners
Do not spray oven cleaner on the electrical controls and switches as it could cause a short circuit and result in sparking or fire.
Do not spray oven cleaner directly onto the oven heating elements.
Do not allow a film from the oven cleaner to remain on the temperature sensor as it could cause the oven to heat improperly. The sensor is located on the rear of the oven. Carefully wipe the bulb clean after each oven cleaning, being careful not to move the sensor since a change in its position could affect how the oven bakes.
Do not spray oven cleaner on the outside of the oven door, handles or any exterior surface of the oven, cabinet or painted surfaces. The cleaner can damage these surfaces.
Oven shelves
Clean the shelves with an abrasive cleaner or steel wool. After cleaning, rinse the shelves with clean water and dry with a clean cloth. Do not place the shelves in a dishwasher.
Air fry rack and holder
The air fry rack and the air fry rack holder can be cleaned with warm soapy water and a soft cloth. Do not place the air fry rack or the air fry rack holder in a dishwasher.
Oven heating elements
Do not clean the bake element or the broil element. Any food residue will burn off when the elements are heated.
Control knobs
The control knobs may be removed for easier cleaning. Make sure the knobs are in the "OFF" position and then pull straight off the stems for cleaning.
The knobs can be cleaned by hand. Make sure the insides of the knobs are dry before replacing on the appliance.
Painted surfaces
The painted surfaces include the sides, the control panel and the door. Clean these with soap and water or a vinegar and water solution.
Do not use commercial oven cleaners, cleansing powders, steel wool or harsh abrasives on any painted surface.
REMOVABLE OVEN DOOR
The oven door is removable but it is heavy. It is recommended that at least two people work together to remove it.
To remove the door:
- Open the door to the full open position.
- Pull the hinge locks up over the hinge hooks on both sides.
- Grasp the door firmly on both sides, lift slightly and pull it straight out and away from the oven.
To replace the door:
- Firmly grasp both sides of the door at the top.
- Insert and seat the upper and lower hinge arms into the oven slots.
- Push the hinge locks down from the hinge hooks.
- Close the oven door and make sure it is working properly. If it seems uneven or does not close completely, remove it again and repeat the steps to replace it.
Note: Do not attempt to close the door until it is properly installed. The hinges could be damaged.
REMOVABLE STORAGE DRAWER
To clean the lower storage drawer, pull it out until it cannot be pulled any further and then lift upwards.
To replace the storage drawer in the appliance, place the shelf on the side rails and push inward.
Do not store flammable materials in the drawer. This includes paper, plastic and cloth items, such as cookbooks, plastic ware and towels as well as flammable liquids, explosives and aerosol cans.
When the oven is in use, the drawer may become hot. Do not touch the hot surface between the bottom of the oven door and the top of the drawer on the front of the oven or the upper surface of the drawer cavity to avoid burns or injury.
OVEN LIGHT REPLACEMENT
Before replacing the oven light bulb, make sure the electrical power is disconnected from the appliance. Failure to do so may result in electric shock or burn.
Be sure to let the light cover and bulb cool completely before replacing.
Removing the oven door can make this process easier.
To replace the light bulb:
- Remove the protective light cover. Do not remove any screws to remove the light cover.
- Do not touch the light bulb with a wet cloth. Replace the light bulb with an appliance light bulb suitable for high temperature and having the same specifications: 230V, 60Hz, 25W, G9.
- Replace the protective cover.
GLASS DOOR WINDOW
To clean the outside of the glass door window, use a glass cleaner. Rinse and polish with a dry cloth.
Avoid scratching or impacting the glass window. Doing so may cause the glass to break.
DRIP TRAY
There is a drip tray located in the bottom of the oven that should be cleaned regularly.
Remove any solids with a scraper or paper towel. Wash the drip tray with warm soapy water and a soft cloth. Do not place the drip tray in a dishwasher. Ensure the drip tray is completly dry before replacing in the oven.
TROUBLESHOOTING
No power
- A fuse may be blown or the circuit breaker tripped
- Plug not fully inserted into the wall outlet
- If the timer was previously used and the control knobs were not returned to the "off" position, the oven will not heat; return the knobs to the "off" position, wait 30 seconds and then reset the control knobs
Surface elements not working properly
- The elements are not properly installed
- The controls are not set correctly
Food does not broil properly
- Oven temperature is not properly set
- Shelf position is too low
- Cookware is not suited for broiling
- Aluminum foil is being used and is blocking air flow
Food does not bake or roast properly
- Oven temperature is not properly set
- Shelf position is incorrect
- Oven was not pre-heated
- Cookware is not suited for baking or roasting
Oven light does not work
- Light bulb is loose
- Light switch is not operating correctly

DANBY PRODUCTS LIMITED, ONTARIO, CANADA N1H 6Z9
DANBY PRODUCTS INC., FINDLAY, OHIO, USA 45840
*Trademarks of Danby Products Limited and/or its subsidiaries
Printed in China

Documents / Resources
References
Download manual
Here you can download full pdf version of manual, it may contain additional safety instructions, warranty information, FCC rules, etc.
Download Danby DRCA240BSS, DRCA240BSSC - 24 in. Smooth Top Electric Range Manual
Advertisement


Need help?
Do you have a question about the DRCA240BSS and is the answer not in the manual?
Questions and answers