Table of Contents
Advertisement
Available languages
Available languages
Quick Links
www.Danby.com
*Trademarks of Danby Products Limited and/or its subsidiaries
* Marques de commerce de Danby Products Limited et / ou de ses filiales
* Marcas comerciales de Danby Products Limited y / o sus subsidiarias
*
*
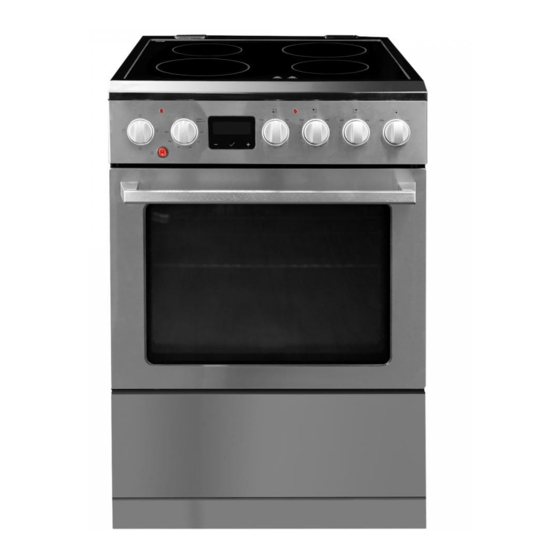
24" SMOOTH TOP ELECTRIC RANGE
Owner's Manual..........................................1 - 22
CUISINIÈRE ÉLECTRIQUE À DESSUS LISSE DE 24"
Manuel du propriétaire...............................23 - 44
ESTUFA ELÉCTRICA DE SUPERFICIE LISA DE 24"
Manual del propietario...............................45 - 66
MODEL • MODÈLE • MODELO
DANBY PRODUCTS LIMITED, ONTARIO, CANADA N1H 6Z9
DANBY PRODUCTS INC., FINDLAY, OHIO, USA 45840
OWNER'S MANUAL
MANUEL DU PROPRIÉTAIRE
MANUAL DEL PROPIETARIO
DRCA240BSS
DRCA240BSSC
2022.06.13
Printed in China
Imprimé en Chine
Impreso en China
Advertisement
Table of Contents

Related Manuals for Danby DRCA240BSS


Summary of Contents for Danby DRCA240BSS
- Page 1 *Trademarks of Danby Products Limited and/or its subsidiaries Printed in China * Marques de commerce de Danby Products Limited et / ou de ses filiales Imprimé en Chine * Marcas comerciales de Danby Products Limited y / o sus subsidiarias...
- Page 2 2. Visit www.Danby.com to access self-service tools, FAQs and much more by searching your model number in the search bar. 3. For the Quickest Customer Service, please fi ll out the web form at www.danby.com/ support. Your submission will go directly to an expert on your particular appliance.
-
Page 3: Read And Follow All Safety Instructions
Important Safety Information READ AND FOLLOW ALL SAFETY INSTRUCTIONS WARNING - TIP OVER HAZARD • A child or adult can tip the appliance and be killed. • Verify the anti-tip bracket has been properly installed to the fl oor. • Ensure the anti-tip bracket is re-engaged when the range is moved. •... - Page 4 Important Safety Information READ AND FOLLOW ALL SAFETY INSTRUCTIONS NOTICE - BEFORE FIRST TIME USE DANGER - FIRE RISK Before use of this range for the fi rst time, the • It is recommended that this appliance be heating elements have a protective coating, which connected to a separate circuit that is not must be burned off before use.
-
Page 5: General Safety Requirements
Important Safety Information READ AND FOLLOW ALL SAFETY INSTRUCTIONS GENERAL SAFETY REQUIREMENTS Ensure the appliance is properly installed and grounded by a qualifi ed technician. Children should not be left alone or unattended in the area where the appliance is in use. Children should never be allowed to sit or stand on any part of the appliance. - Page 6 Important Safety Information READ AND FOLLOW ALL SAFETY INSTRUCTIONS COOK TOP SAFETY REQUIREMENTS OVEN SAFETY REQUIREMENTS Use the proper pan size. This appliance is equipped Use care when opening the door. Allow hot air or with four burners of different sizes. Select utensils steam to escape before removing or replacing food.
-
Page 7: Grounding Instructions
Important Safety Information READ AND FOLLOW ALL SAFETY INSTRUCTIONS GROUNDING INSTRUCTIONS For models sold in Canada only: DRCA240BSSC This appliance must be grounded. Grounding reduces the risk of electrical shock by providing an escape wire for the electrical current. This appliance has a power cord that has a grounding wire with a 4-prong plug. The power cord must be plugged into an outlet that is properly grounded. -
Page 8: Electrical Connection
READ AND FOLLOW ALL SAFETY INSTRUCTIONS ELECTRICAL CONNECTION For models sold in the US only: DRCA240BSS • Installation of this appliance requires basic mechanical skills and roughly 1 to 3 hours of time. • Proper installation is the responsibility of the installer. Product failure due to improper installation is not covered under the warranty. -
Page 9: Installation Instructions
INSTALLATION INSTRUCTIONS IMPORTANT For models sold in the United States only: DRCA240BSS. This model does not include a pre-installed power cord. Use the following instructions for wiring before using the range. The power cord is not provided. Follow all local and national wiring standards and codes. - Page 10 INSTALLATION INSTRUCTIONS IMPORTANT For models sold in the United States only: DRCA240BSS. This model does not include a pre-installed power cord. Use the following instructions for wiring before using the range. The power cord is not provided. Follow all local and national wiring standards and codes.
- Page 11 OPERATING INSTRUCTIONS ACCESSORIES 1. Anti-tip bracket (1 set) 2. Anti-tip chain (2 sets) 3. Screws (x7) 4. Air fry rack holder 5. Air fry rack 6. Oven racks (x2) AIR FRY RACK HOLDER The air fry rack holder can be used to place or remove the air fry rack and the oven racks by hooking it onto the edge of the rack.
-
Page 12: Leveling Instructions
OPERATING INSTRUCTIONS DIMENSIONS This dimensions of this appliance are: A. 36 ~ 36.4 inches (91.5 ~ 92.5 cm) from the fl oor to the top of the cooktop. B. 25.4 inches (64.5 cm) deep C. 23.4 inches (59.5 cm) wide It is the installer’s responsibility to comply with installation clearances specifi... -
Page 13: Before Beginning
OPERATING INSTRUCTIONS BEFORE BEGINNING Carefully unpack the appliance and ensure there is no damage to the oven, cooktop or structure and that the oven door opens and closes properly. WARNING Remove all packing materials such as plastic bags, Make sure the handles of cookware do not stick polystyrene foam, packing straps, etc. - Page 14 OPERATING INSTRUCTIONS SURFACE COOKING KNOB Never leave food unattended while cooking. Boil overs cause smoking. Greasy spill overs may catch fi re. Note that the icon above the knob indicates which burner the knob controls. OVEN COOKING CONTROLS The oven has three available functions that can be set using the function selector knob.
- Page 15 OPERATING INSTRUCTIONS OVEN BAKING AND ROASTING BAKING AND ROASTING TIPS 1. Position the shelves in the oven. If cooking on • Follow a tested recipe and measure the two shelves at the same time, stagger the pans ingredients carefully. If you are using a package for the best heat circulation.
-
Page 16: Oven Broiling
OPERATING INSTRUCTIONS OVEN BROILING AIR FRYING Broiling involves cooking food by intense radiant Air frying is designed to simulate deep frying heat from the upper element in the oven. Most fi sh without submerging the food in oil. A fan circulates and tender cuts of meat can be broiled. - Page 17 OPERATING INSTRUCTIONS AIR FRY COOKING CHART Cook times are estimates and may vary based on food type and preparation. It is normal for steam or condensation to escape from the door, especially when cooking frozen foods. Loose items such as fries, chicken wings or chicken strips should be turned halfway through cooking to ensure even browning.
-
Page 18: Digital Clock
OPERATING INSTRUCTIONS DIGITAL CLOCK TIMER When the range is plugged in, the display will show Set the oven controls as desired. Press the mode “12:00” and the clock icon will fl ash. Press the up button until the timer icon fl ashes. Press the up and down buttons to set the current time. -
Page 19: Oven Shelves
OPERATING INSTRUCTIONS OVEN SHELVES To remove the shelves from the oven, pull the shelf outward, tilt the front end upward and pull it out. To replace the shelves, place the shelf on the support with the stop locks facing up and toward the back of the oven. -
Page 20: Care And Maintenance
CARE & MAINTENANCE Cooktop Maintenance Porcelain oven interior For everyday cleaning of marks, fi ngerprints and With proper care, the porcelain enamel interior will non- sugary spillovers, apply a ceramic cooktop retain its fi nish for many years. cleaning product. Rinse and wipe dry with a clean cloth or paper towel. -
Page 21: Removable Oven Door
CARE & MAINTENANCE Oven shelves REMOVABLE OVEN DOOR The oven door is removable but it is heavy. It Clean the shelves with an abrasive cleaner or steel is recommended that at least two people work wool. After cleaning, rinse the shelves with clean together to remove it. -
Page 22: Troubleshooting
CARE & MAINTENANCE TROUBLESHOOTING OVEN LIGHT REPLACEMENT No power Important: Before replacing the oven light bulb, • A fuse may be blown or the circuit breaker make sure the electrical power is disconnected from tripped the appliance. Failure to do so may result in electric •... - Page 23 Nothing within this warranty shall imply that Danby will be responsible or liable for any spoilage or damage to food or other c...
- Page 24 1. Lisez votre manuel du propriétaire pour obtenir de l’aide à l’installation, au dépannage et à la maintenance. 2. Visitez www.Danby.com pour accéder aux outils en libre-service, aux FAQ et bien plus encore en recherchant votre numéro de modèle dans la barre de recherche.
-
Page 25: Dispositif Anti-Basculement
Informations de sécurité importantes LISEZ ET SUIVEZ TOUTES LES INSTRUCTIONS DE SÉCURITÉ AVERTISSEMENT - RISQUE DE BASCULEMENT • Un enfant ou un adulte peut faire basculer l’appareil et être tué. • Vérifi ez que le support anti-basculement a été correctement installé au sol. •... - Page 26 Informations de sécurité importantes LISEZ ET SUIVEZ TOUTES LES INSTRUCTIONS DE SÉCURITÉ AVIS - AVANT LA PREMIÈRE UTILISATION DANGER - RISQUE D’INCENDIE Avant la première utilisation de cette cuisinière, les • Il est recommandé que cet appareil soit éléments chauffants ont un revêtement protecteur connecté...
- Page 27 Informations de sécurité importantes LISEZ ET SUIVEZ TOUTES LES INSTRUCTIONS DE SÉCURITÉ EXIGENCES GÉNÉRALES DE SÉCURITÉ Assurez-vous que l’appareil est correctement installé et mis à la terre par un technicien qualifi é. Les enfants ne doivent pas être laissés seuls ou sans surveillance dans la zone où l’appareil est utilisé. Les enfants ne doivent jamais être autorisés à...
- Page 28 Informations de sécurité importantes LISEZ ET SUIVEZ TOUTES LES INSTRUCTIONS DE SÉCURITÉ EXIGENCES DE SÉCURITÉ SUR LA PLAQUE EXIGENCES DE SÉCURITÉ DU FOUR DE CUISSON Soyez prudent lorsque vous ouvrez la porte. Laissez l’air chaud ou la vapeur s’échapper avant de retirer Utilisez la bonne taille de casserole.
-
Page 29: Instructions De Mise À La Terre
Informations de sécurité importantes LISEZ ET SUIVEZ TOUTES LES INSTRUCTIONS DE SÉCURITÉ INSTRUCTIONS DE MISE À LA TERRE Pour les modèles vendus au Canada seulement : DRCA240BSSC Cet appareil doit être mis à la terre. La mise à la terre réduit le risque de choc électrique en fournissant un fi... -
Page 30: Connexion Électrique
Informations de sécurité importantes LISEZ ET SUIVEZ TOUTES LES INSTRUCTIONS DE SÉCURITÉ CONNEXION ÉLECTRIQUE Pour les modèles vendus aux États-Unis uniquement : DRCA240BSS • L’installation de cet appareil nécessite des compétences mécaniques de base et environ 1 à 3 heures de temps. -
Page 31: Instructions D'installation
INSTRUCTIONS D’INSTALLATION IMPORTANT Pour les modèles vendus aux États-Unis uniquement : DRCA240BSS. Ce modèle n’inclut pas de cordon d’alimentation préinstallé. Utilisez les instructions suivantes pour le câblage avant d’utiliser la cuisinière. Le cordon d’alimentation n’est pas fourni. Respectez toutes les normes et tous les codes de câblage locaux et nationaux. - Page 32 INSTRUCTIONS D’INSTALLATION IMPORTANT Pour les modèles vendus aux États-Unis uniquement : DRCA240BSS. Ce modèle n’inclut pas de cordon d’alimentation préinstallé. Utilisez les instructions suivantes pour le câblage avant d’utiliser la cuisinière. Le cordon d’alimentation n’est pas fourni. Respectez toutes les normes et tous les codes de câblage locaux et nationaux.
-
Page 33: Instructions D'utilisation
INSTRUCTIONS D’UTILISATION ACCESSOIRES 1. Support anti-basculement (1 jeu) 2. Chaîne anti-basculement (2 jeux) 3. Vis (x7) 4. Support de grille à frire à l’air 5. Grille de friture à l’air 6. Grilles de four (x2) SUPPORT DE GRILLE À FRITURE À L’AIR Le support de grille de friture à... -
Page 34: Instructions De Mise À Niveau
INSTRUCTIONS D’UTILISATION DIMENSIONS Les dimensions de cet appareil sont : A. 36 ~ 36,4 pouces (91,5 ~ 92,5 cm) du sol au dessus de la table de cuisson. B. 25,4 pouces (64,5 cm) de profondeur C. 23,4 pouces (59,5 cm) de large Il est de la responsabilité... -
Page 35: Avant De Commencer
INSTRUCTIONS D’UTILISATION AVANT DE COMMENCER Déballez soigneusement l’appareil et assurez- vous que le four, la table de cuisson ou la structure ne sont pas endommagés et que la porte du ATTENTION four s’ouvre et se ferme correctement. Retirez tous les matériaux d’emballage tels que les Assurez-vous que les poignées des ustensiles de sacs en plastique, la mousse de polystyrène, les cuisine ne dépassent pas du bord de la cuisinière... - Page 36 INSTRUCTIONS D’UTILISATION BOUTON DE CUISSON EN SURFACE Ne laissez jamais les aliments sans surveillance pendant la cuisson. Les débordements provoquent de la fumée. Les déversements graisseux peuvent s’enfl ammer. Notez que l’icône au-dessus du bouton indique quel brûleur le bouton contrôle. COMMANDES DE CUISSON AU FOUR Le four dispose de trois fonctions disponibles qui peuvent être réglées à...
- Page 37 INSTRUCTIONS D’UTILISATION CUISSON ET RÔTISSAGE AU FOUR CONSEILS DE CUISSON ET DE RÔTISSAGE 1. Positionnez les grilles dans le four. Si vous • Suivez une recette testée et mesurez cuisinez sur deux grilles en même temps, soigneusement les ingrédients. Si vous utilisez décalez les casseroles pour une meilleure un mélange d’emballages, suivez les instructions circulation de la chaleur.
-
Page 38: Cuisson Au Four
INSTRUCTIONS D’UTILISATION CUISSON AU FOUR FRITURE À L’AIR La cuisson au gril implique la cuisson des aliments La friture à l’air est conçue pour simuler la friture par une chaleur rayonnante intense de l’élément sans immerger les aliments dans l’huile. Un supérieur du four. - Page 39 INSTRUCTIONS D’UTILISATION TABLEAU DE CUISSON DU FRITURE À L’AIR Les temps de cuisson sont des estimations et peuvent varier en fonction du type d’aliment et de la préparation. Il est normal que de la vapeur ou de la condensation s’échappent de la porte, surtout lors de la cuisson d’aliments surgelés.
- Page 40 INSTRUCTIONS D’UTILISATION HORLOGE DIGITALE MINUTEUR Lorsque la cuisinière est branchée, l’écran affi che « Réglez les commandes du four comme vous le 12:00 » et l’icône de l’horloge clignote. Appuyez souhaitez. Appuyez sur le bouton de mode jusqu’à sur les boutons haut et bas pour régler l’heure ce que l’icône de la minuterie clignote.
-
Page 41: Grilles Du Four
INSTRUCTIONS D’UTILISATION GRILLES DU FOUR Pour retirer les grilles du four, tirez la grille vers l’extérieur, inclinez l’extrémité avant vers le haut et tirez-la vers l’extérieur. Pour replacer les clayettes, placez la clayette sur le support avec les butées vers le haut et vers l’arrière du four. -
Page 42: Entretien Et Maintenance
ENTRETIEN ET MAINTENANCE Entretien de la table de cuisson Intérieur du four en porcelaine Pour le nettoyage quotidien des marques, des Avec des soins appropriés, l’intérieur en porcelaine empreintes digitales et des éclaboussures non émaillée conservera sa fi nition pendant de sucrées, appliquez un produit nettoyant pour table nombreuses années. - Page 43 ENTRETIEN ET MAINTENANCE Grilles de four PORTE DU FOUR AMOVIBLE La porte du four est amovible mais elle est lourde. Nettoyez les étagères avec un nettoyant abrasif ou Il est recommandé qu’au moins deux personnes de la laine d’acier. Après le nettoyage, rincez les travaillent ensemble pour le retirer.
-
Page 44: Dépannage
ENTRETIEN ET MAINTENANCE DÉPANNAGE REMPLACEMENT DE L’ÉCLAIRAGE DU FOUR Aucune puissance Important : Avant de remplacer l’ampoule du • Un fusible peut être grillé ou le disjoncteur s’est four, assurez-vous que l’alimentation électrique est déclenché débranchée de l’appareil. Le non-respect de cette •... - Page 45 Aucune partie de la garantie ne prévoit implicitement que le fabricant sera tenu responsable des dommages subis par les aliments ou Nothing within this warranty shall imply that Danby will be responsible or liable for any spoilage or damage to food or other c ontents of this appliance, whether due d’autres types de contenu, qu’ils soient causés par la défectuosité...
- Page 46 3. Para obtener el servicio al cliente más rápido, complete el formulario web en www. danby.com/support. Su envío irá directamente a un experto en su dispositivo en particular. Nuestros tiempos de respuesta promedio son entre 20 minutos y 2 horas, durante el horario comercial EST.
-
Page 47: Dispositivo Antivuelco
Informacion de Seguridad Importante LEA Y SIGA TODAS LAS INSTRUCCIONES DE SEGURIDAD ADVERTENCIA - PELIGRO DE VUELCO • Un niño o un adulto puede volcar el aparato y morir. • Verifi que que el soporte antivuelco se haya instalado correctamente en el piso. •... - Page 48 Informacion de Seguridad Importante LEA Y SIGA TODAS LAS INSTRUCCIONES DE SEGURIDAD AVISO - ANTES DEL PRIMER USO PELIGRO - RIESGO DE INCENDIO Antes de usar esta cocina por primera vez, • Se recomienda que este electrodoméstico se los elementos calefactores tienen una capa conecte a un circuito separado que no se protectora, que debe quemarse antes de usar.
- Page 49 Informacion de Seguridad Importante LEA Y SIGA TODAS LAS INSTRUCCIONES DE SEGURIDAD REQUISITOS GENERALES DE SEGURIDAD Asegúrese de que el aparato esté correctamente instalado y conectado a tierra por un técnico califi cado. No se debe dejar a los niños solos o desatendidos en el área donde se usa el aparato. Nunca se debe permitir que los niños se sienten o se paren en ninguna parte del aparato.
- Page 50 Informacion de Seguridad Importante LEA Y SIGA TODAS LAS INSTRUCCIONES DE SEGURIDAD REQUISITOS DE SEGURIDAD DE LA REQUISITOS DE SEGURIDAD DEL HORNO SUPERFICIE DE COCCIÓN Tenga cuidado al abrir la puerta. Permita que el Use el tamaño de sartén adecuado. Este aparato aire caliente o el vapor escapen antes de retirar o está...
-
Page 51: Instrucciones De Puesta A Tierra
Informacion de Seguridad Importante LEA Y SIGA TODAS LAS INSTRUCCIONES DE SEGURIDAD INSTRUCCIONES DE PUESTA A TIERRA Solo para modelos vendidos en Canadá: DRCA240BSSC Este aparato debe estar conectado a tierra. La conexión a tierra reduce el riesgo de descarga eléctrica al proporcionar un cable de escape para la corriente eléctrica. -
Page 52: Conexión Eléctrica
Informacion de Seguridad Importante LEA Y SIGA TODAS LAS INSTRUCCIONES DE SEGURIDAD CONEXIÓN ELÉCTRICA Solo para modelos vendidos en los Estados Unidos : DRCA240BSS • La instalación de este aparato requiere habilidades mecánicas básicas y aproximadamente de 1 a 3 horas de tiempo. -
Page 53: Instrucciones De Instalación
INSTRUCCIONES DE INSTALACIÓN IMPORTANTE Solo para modelos vendidos en los Estados Unidos: DRCA240BSS. Este modelo no incluye un cable de alimentación preinstalado. Use las siguientes instrucciones para el cableado antes de usar la cocina. El cable de alimentación no se proporciona. Siga todos los códigos y normas de cableado locales y nacionales. - Page 54 INSTRUCCIONES DE INSTALACIÓN IMPORTANTE Solo para modelos vendidos en los Estados Unidos: DRCA240BSS. Este modelo no incluye un cable de alimentación preinstalado. Use las siguientes instrucciones para el cableado antes de usar la cocina. El cable de alimentación no se proporciona. Siga todos los códigos y normas de cableado locales y nacionales.
-
Page 55: Instrucciones De Operación
INSTRUCCIONES DE OPERACIÓN ACCESSORIES 1. Soporte antivuelco (1 juego) 2. Cadena antivuelco (2 juegos) 3. Tornillos (x7) 4. Soporte para rejilla para freír aire 5. Rejilla para freír al aire 6. Parrillas de horno (x2) SOPORTE DE LA PARRILLA PARA FRITAS DE AIRE El soporte de la rejilla para freír con aire se puede usar para colocar o quitar la rejilla para freír con aire y las rejillas del horno enganchándolo en el borde de la rejilla. - Page 56 INSTRUCCIONES DE OPERACIÓN DIMENSIONES Las dimensiones de este aparato son: A. 36 ~ 36,4 pulgadas (91,5 ~ 92,5 cm) desde el piso hasta la parte superior de la estufa. B. 25,4 pulgadas (64,5 cm) de profundidad C. 23,4 pulgadas (59,5 cm) de ancho Es responsabilidad del instalador cumplir con los espacios libres de instalación especifi...
-
Page 57: Antes De Comenzar
INSTRUCCIONES DE OPERACIÓN ANTES DE COMENZAR Desembale con cuidado el aparato y asegúrese de que no haya daños en el horno, la superfi cie de cocción o la estructura y que la puerta del horno ADVERTENCIA se abra y cierre correctamente. Retire todos los materiales de embalaje, como bolsas de plástico, Asegúrese de que los mangos de los utensilios espuma de poliestireno, correas de embalaje, etc. - Page 58 INSTRUCCIONES DE OPERACIÓN PERILLA DE COCCIÓN DE SUPERFICIE Nunca deje alimentos desatendidos mientras cocina. Los hervores provocan humo. Los derrames grasientos pueden incendiarse. Tenga en cuenta que el icono sobre la perilla indica qué quemador controla la perilla. CONTROLES DE COCCIÓN DEL HORNO El horno tiene tres funciones disponibles que se pueden confi...
- Page 59 INSTRUCCIONES DE OPERACIÓN HORNO Y TOSTADO CONSEJOS PARA HORNEADO Y ASADO 1. Coloque los estantes en el horno. Si cocina • Siga una receta probada y mida los en dos estantes al mismo tiempo, escalone las ingredientes cuidadosamente. Si está utilizando bandejas para lograr la mejor circulación del una mezcla de paquete, siga las instrucciones calor.
-
Page 60: Consejos Para Asar
INSTRUCCIONES DE OPERACIÓN HORNO A LA PARRILLA FREIDO AL AIRE Asar a la parrilla consiste en cocinar alimentos La fritura al aire está diseñada para simular una mediante el intenso calor radiante del elemento fritura profunda sin sumergir los alimentos en superior del horno. - Page 61 INSTRUCCIONES DE OPERACIÓN TABLA DE COCCIÓN AIR FRY Los tiempos de cocción son estimados y pueden variar según el tipo de alimento y la preparación. Es normal que salga vapor o condensación por la puerta, especialmente cuando se cocinan alimentos congelados.
-
Page 62: Reloj Digital
INSTRUCCIONES DE OPERACIÓN RELOJ DIGITAL TEMPORIZADOR Cuando la cocina esté enchufada, la pantalla Ajuste los controles del horno como desee. Pulse el mostrará “12:00” y el icono del reloj parpadeará. botón de modo hasta que el icono del temporizador Pulse los botones arriba y abajo para confi gurar parpadee. -
Page 63: Parrillas Del Horno
INSTRUCCIONES DE OPERACIÓN PARRILLAS DEL HORNO Para quitar los estantes del horno, tire del estante hacia afuera, incline el extremo delantero hacia arriba y tire hacia afuera. Para volver a colocar los estantes, coloque el estante en el soporte con los seguros de tope hacia arriba y hacia la parte posterior del horno. -
Page 64: Cuidado Y Mantenimiento
CUIDADO Y MANTENIMIENTO Mantenimiento de la estufa Interior del horno de porcelana Para la limpieza diaria de marcas, huellas Con el cuidado adecuado, el interior de porcelana dactilares y derrames sin azúcar, aplique un esmaltada conservará su acabado durante muchos producto de limpieza para estufas de cerámica. - Page 65 CUIDADO Y MANTENIMIENTO Estantes del horno PUERTA DEL HORNO REMOVIBLE Limpie los estantes con un limpiador abrasivo o La puerta del horno es desmontable pero es pesada. lana de acero. Después de limpiar, enjuague los Se recomienda que al menos dos personas trabajen estantes con agua limpia y séquelos con un paño juntas para eliminarlo.
-
Page 66: Solución De Problemas
CUIDADO Y MANTENIMIENTO SOLUCIÓN DE PROBLEMAS REEMPLAZO DE LA LUZ DEL HORNO Ningún poder Importante: Antes de reemplazar la bombilla del • Es posible que se haya quemado un fusible o horno, asegúrese de que la energía eléctrica esté que se haya disparado el disyuntor desconectada del aparato. - Page 67 Los cargos por transporte desde y hacia el lugar en que se efectúe el servicio técnico no están cubiertos por esta garantía y son de responsabilidad del comprador. Nothing within this warranty shall imply that Danby will be responsible or liable for any spoilage or damage to food or other c ontents of this appliance, whether due Nada dentro de esta garantía implica que Danby será...
- Page 68 NOTES / REMARQUES / NOTAS : __________________________________________________________________________________________ __________________________________________________________________________________________ __________________________________________________________________________________________ __________________________________________________________________________________________ __________________________________________________________________________________________ __________________________________________________________________________________________ __________________________________________________________________________________________ __________________________________________________________________________________________ __________________________________________________________________________________________ __________________________________________________________________________________________ __________________________________________________________________________________________ __________________________________________________________________________________________ __________________________________________________________________________________________ __________________________________________________________________________________________ __________________________________________________________________________________________ __________________________________________________________________________________________ __________________________________________________________________________________________ __________________________________________________________________________________________ __________________________________________________________________________________________ __________________________________________________________________________________________ __________________________________________________________________________________________ __________________________________________________________________________________________...
Need help?
Do you have a question about the DRCA240BSS and is the answer not in the manual?
Questions and answers