Table of Contents
Advertisement
Available languages
Available languages
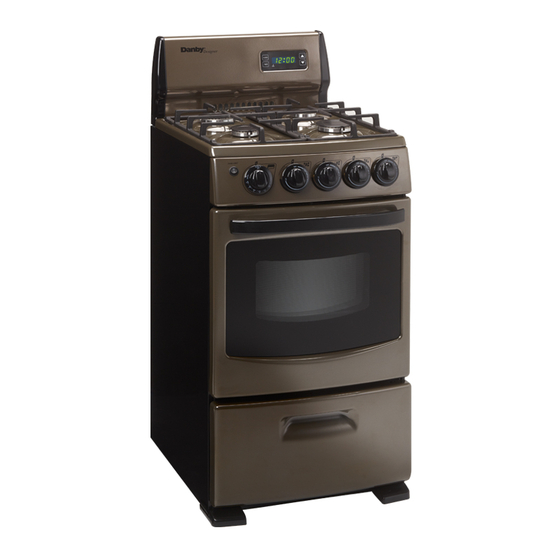
GAS RANGE
Important Safety Information
Installation Instructions
Operating Instructions
Care and Cleaning
Troubleshooting
Warranty
. . . . . . . . . . . . . . . . . . . . . . . . . . . . . . . . . . . . . . . . . . . . . . . . . . . . . . . 11
CUISINIÈRE DE GAZ
Consignes de Sécurité Importantes
Instructions d'installation
Consignes d'utilisation
Soins et Entretien
Dépannage
. . . . . . . . . . . . . . . . . . . . . . . . . . . . . . . . . . . . . . . . . . . . . . . . . . . . . . . 21
Garantie
. . . . . . . . . . . . . . . . . . . . . . . . . . . . . . . . . . . . . . . . . . . . . . . . . . . . . . . 22
COCINA DE GAS
Informacion Importantes de Seguridad
Instrucciones de Instalación
Instrucciones Operadoras
Cuidados y Limpieza
Antes de Llamar al Servicio Técnico
Garantia
. . . . . . . . . . . . . . . . . . . . . . . . . . . . . . . . . . . . . . . . . . . . . . . . . . . . . . . 33
Danby Products Limited, Guelph Ontario Canada N1H 6Z9
Danby Products Inc., Findlay, Ohio USA 45839-0669
Owner's Use and Care Guide
Guide d'utiliser et soin de propriétaire
Guía para utilizar y cuidar de a propietario
Model • Modèle • Modelo
CAUTION:
Read and follow
all safety rules and
operating
instructions before
first use of this
product.
. . . . . . . . . . . . . . . . . . . . . . . . . . . . . . . . . . . . . . . . 2
. . . . . . . . . . . . . . . . . . . . . . . . . . . . . . . . . . . . . . . . . . . . . 5
. . . . . . . . . . . . . . . . . . . . . . . . . . . . . . . . . . . . . . . . . . . . . 6
. . . . . . . . . . . . . . . . . . . . . . . . . . . . . . . . . . . . . . . . . . . . . . . . . . . 8
. . . . . . . . . . . . . . . . . . . . . . . . . . . . . . . . . . . . . . . . . . . . . . . . . . 10
. . . . . . . . . . . . . . . . . . . . . . . . . . . . . . . . . . 13
. . . . . . . . . . . . . . . . . . . . . . . . . . . . . . . . . . . . . . . . . . . . 16
. . . . . . . . . . . . . . . . . . . . . . . . . . . . . . . . . . . . . . . . . . . . 17
. . . . . . . . . . . . . . . . . . . . . . . . . . . . . . . . . . . . . . . . . . . . . . . . . . 19
. . . . . . . . . . . . . . . . . . . . . . . . . . . . . . . . . . 24
. . . . . . . . . . . . . . . . . . . . . . . . . . . . . . . . . . . . . . . 27
. . . . . . . . . . . . . . . . . . . . . . . . . . . . . . . . . . . . . . . . . . . . 28
. . . . . . . . . . . . . . . . . . . . . . . . . . . . . . . . . . . . . . . . . . . . 30
. . . . . . . . . . . . . . . . . . . . . . . . . . . . . . . . . . 32
DR299BLSGLP
MISE EN GARDE:
Veuillez lire
attentivement les
consignes de
sécurité et les
instructions
d'utilisation avant
l'utilisation initiale de
ce produit.
El CUIDADO:
Lea y siga todas
reglas de seguridad
e instrucciones
operadoras antes de
primero uso de este
producto.
V. 1. 2.09 JF
Advertisement
Table of Contents

Related Manuals for Danby Designer DR299BLSGLP


Summary of Contents for Danby Designer DR299BLSGLP
- Page 1 ............33 Danby Products Limited, Guelph Ontario Canada N1H 6Z9 Danby Products Inc., Findlay, Ohio USA 45839-0669...
- Page 2 WELCOME Thank you for choosing a Danby Gas Range. Record in the space provided below the Model Number and Serial Number of this appliance. These numbers are found on the serial plate located below the lift-up cooktop. Model No.: Type No.: Serial No.:...
-
Page 3: Important Safety Information
IMPORTANT SAFETY INFORMATION Do not store or use gasoline or other flammable vapors and liquids in the vicinity of this, or any other appliance. WHAT TO DO IF YOU SMELL GAS: • Do not try to light any appliance. • Do not touch any electrical switch; do not use any phone in your building. •... -
Page 4: Important Safegaurds
IMPORTANT SAFETY INFORMATION (cont’d) • Storage in or on appliance: Flammable materials • Do not allow children to climb or play around the should not be stored in an oven, near surface burners, range. The weight of a child on an open oven door may or in the broiler section. -
Page 5: Energy Saving Tips
IMPORTANT SAFETY INFORMATION (cont’d) IMPORTANT SAFEGAURDS • Do not use the broiler pan without its insert. The broiler pan and its insert allow dripping fat or grease to drain and be kept away from the high heat of the broiler. Do not cover the insert with foil. Exposed fat or grease could ignite. -
Page 6: Installation Instructions
INSTALLATION INSTRUCTIONS Be sure the appliance is properly installed and grounded by a qualified technician. It is the responsibility of the technician to be certain that your range is properly installed. Situations caused by improper installation are not covered under the warranty. Any expenses incurred due to such situations will not be paid by the manufacturer of the appliance. -
Page 7: Using Your Range
OPERATING INSTRUCTIONS Recommended Rack Positions for USING YOUR Broiling, Baking, and Roasting RANGE RACK FOOD Broiling meats, chicken or fish Top Burner Operation: Note- When boiling food, the highest temperature that can be 1 or 2 Cookies, cakes, pies, biscuits and muffins reached is the boiling point. - Page 8 OPERATING INSTRUCTIONS (cont’d) Economy Broiler: USING YOUR Your range may be equipped with this optional broiler. RANGE (cont’d) The outward appearance of the range will be the same. To Removable Oven Bottom: open the broiler door, lift handle up slightly to release the First remove the racks from the oven.
-
Page 9: Setting The Clock And Timer
OPERATING INSTRUCTIONS (cont’d) SETTING THE CLOCK & TIMER To Set the 4-Button Time-of-Day Clock When the range is first plugged in, or when the power supply to the range has been interrupted, “12:00” will flash in the display window. • Push and hold the CLOCK pad. •... - Page 10 CARE AND CLEANING (cont’d) CLEANING THE CONTOURED WELL AREAS, Oven Cavity: BURNER CAPS, AND BURNER HEADS • Do not use oven cleaners, cleaning powders, steel The contoured well areas, burner caps and burner wool pads, synthetic fiber pads, or any other heads should be routinely cleaned.
-
Page 11: Troubleshooting
TROUBLESHOOTING Before you call for service, review this list of troubleshooting solutions. If none of the below suggestions rectify the problem, contact the Danby customer service department TOLL FREE: 1-800-26- PROBLEM POSSIBLE CAUSE SOLUTION • Surface Control knob has not been •... -
Page 12: Limited Warranty
This quality product is warranted to be free from manufacturer’s defects in material and workmanship, provided that the unit is used under the normal operating conditions intended by the manufacturer. This warranty is available only to the person to whom the unit was originally sold by Danby or by an authorized distributor of Danby, and is non-transferable. TERMS OF WARRANTY Plastic parts, are warranted for thirty (30) days only from purchase date, with no extensions provided. - Page 13 BIENVENIDA Gracias por elegir la cocina eléctrica Danby. En el espacio que sigue, escriba el número del modelo y el número de serie de este aparato. Dichos números se indican en la placa del número de serie, ubicada debajo de la tapa superior levadiza de la cocina.
- Page 14 INFORMACION IMPORTANTES DE SEGURIDAD No almacene ni utilice gasolina ni otros líquidos o gases inflamables alrededor de este o cualquier otro aparato. QUÉ HACER SI HUELE A GAS: • No intente encender ningún aparato. • No toque ningún interruptor eléctrico; no utilice ningún teléfono de la casa. •...
-
Page 15: Medidas De Protección Importantes
INFORMACION IMPORTANTES DE SEGURIDAD (cont’d) • Almacenamiento dentro o encima del aparato: no se • No permita a los niños trepar a la cocina ni jugar deben guardar materiales inflamables en el interior del alrededor de la misma. El peso de un niño sobre la puerta horno, en el cajón de calentamiento ni cerca de los abierta del horno puede provocar que la cocina se vuelque quemadores. -
Page 16: Consejos Para Ahorrar Energía
INFORMACION IMPORTANTES DE SEGURIDAD (cont’d) MEDIDAS DE PROTECCIÓN IMPORTANTES • No use la bandeja del asador sin su base. La bandeja del asador y su base permiten escurrir el aceite o la grasa, e impiden que éstos queden expuestos a las altas temperaturas del asador. No cubra la base con papel de aluminio. -
Page 17: Instrucciones De Instalación
INSTRUCCIONES DE INSTALACIÓN Haga instalar y conectar correctamente a tierra el aparato por un técnico calificado. El técnico tiene la responsabilidad de garantizar que su cocina quede bien instalada. Las situaciones que se presenten debido a una mala instalación no son amparadas por la garantía. -
Page 18: Instrucciones Operadoras
INSTRUCCIONES OPERADORAS CÓMO USAR LA COCINA Posiciones recomendadas de las bandejas para gratinar, cocer al horno y asar Funcionamiento de los quemadores: Nota: Al hervir los alimentos, la mayor temperatura que se puede BANDEJA ALIMENTO alcanzar es el punto de ebullición. Cuando el líquido comience a Gratinar carnes, pollo o pescado hervir, baje la intensidad de la llama hasta dejar la mínima temperatura necesaria para mantener la ebullición. - Page 19 INSTRUCCIONES OPERADORAS (cont’d) Parrilla de bajo consumo: CÓMO USAR LA Es posible que su cocina venga equipada con esta parrilla opcional. COCINA (continuación) La apariencia exterior de la cocina será la misma. Para abrir la Fondo desmontable del horno: puerta de la parrilla, levante ligeramente el asa, para liberar el Primero, quite la rejillas del horno.
-
Page 20: Cuidados Y Limpieza
INSTRUCCIONES OPERADORAS (cont’d) AJUSTE DEL RELOJ Y EL TEMPORIZADOR (en algunos modelos) Para ajustar el reloj de hora de 4 botones: Al enchufar por primera vez la cocina, o si se interrumpe la corriente eléctrica, parpadeará en el visor la hora “12:00”. •... - Page 21 CUIDADOS Y LIMPIEZA (cont’d) LIMPIEZA DE LOS CONTORNOS, LAS TAPAS Y Quitar la puerta del horno: LOS DIFUSORES DE LOS QUEMADORES La puerta del horno se puede quitar para su limpieza. Los contornos, las tapas y los difusores de los quemadores deben limpiarse con frecuencia.
-
Page 22: Antes De Llamar Al Servicio Técnico
Antes de llamar al centro de reparaciones, revise la siguiente lista de fallas y sus soluciones. Si ninguna de estas sugerencias resuelve el problema , llame a la LÍNEA GRATUITA del servicio de atención al cliente de Danby: 1-800-26- PROBLEMA POSIBLE CAUSA SOLUCIÓN... - Page 23 Nada dentro de esta garantía implica que Danby será responsable por cualquier daño que hayan sufrido los alimentos u otros contenidos de este aparato, ya sea debido a un defecto del aparato, o su uso, adecuado o inadecuado.
- Page 24 BIENVENUE Merci de choisir une Culinière gaz de Danby. Enregistrez dans l'espace fourni au-dessous du numéro de type et du numéro de série de cet appareil. Ces nombres sont trouvés du plat périodique situé au-dessous du cooktop. Numéro de Modèle: Numéro de Type...
-
Page 25: Consignes De Sécurité Importantes
CONSIGNES DE SÉCURITÉ IMPORTANTES Ne conservez et n’utilisez ni essence, ni vapeurs ou substances liquides inflammables à proximité de cet appareil ou de tout autre appareil. QUE FAIRE SI VOUS DÉTECTEZ UNE ODEUR DE GAZ DANS L’AIR : • Ne mettez aucun appareil en marche, quel qu’il soit. •... - Page 26 CONSIGNES DE SÉCURITÉ IMPORTANTES (suite) Ceci comprend les articles en papier, en plastique et en tissu, • Ne permettez pas aux enfants de grimper sur la cuisinière ou de jouer à proximité. Le poids d’un enfant sur la porte du four tels que les livres de recettes, les ustensiles en plastique et les ouverte peut faire basculer la cuisinière, entraînant ainsi de serviettes, ainsi que les substances liquides inflammables.
- Page 27 CONSIGNES DE SÉCURITÉ IMPORTANTES (suite) NOTES IMPORTANTES DE SÉCURITÉ • Les poignées de la batterie de cuisine doivent être tournées vers l’intérieur et ne pas approcher des éléments chauffants afin de réduire le risque de brûlures, d’embrasement des matériaux inflammables, et de déversement en raison d’un contact accidentel.
-
Page 28: Instructions D'installation
INSTRUCTIONS D'INSTALLATION Veillez à ce que l’appareil soit correctement installé et mis à la terre par un technicien agréé. Il incombe à ce dernier de s’assurer que votre cuisinière est correctement installée. Les problèmes causés par une installation incorrecte ne sont pas couverts par la garantie. -
Page 29: Consignes D'utilisation
CONSIGNES D’UTILISATION UTIILISATION DE OSITIONS RECOMMANDÉES DE LA GRILLE POUR LA VOTRE CUISINIÈRE CUISSON AU GRILLOIR LA CUISSON ET LE RÔTISSAGE GRILLE ALIMENTS Exploitation du brûleur supérieur : Viandes, poulet ou poisson cuits au grilloir Remarque – Lorsqu’on utilise la cuisson par ébullition, la température la plus élevée est celle du point d’ébullition. - Page 30 CONSIGNES D’UTILISATION (suite) UTIILISATION DE VOTRE Quand vous voulez griller, prenez un des supports de four et CUISINIÈRE (suite) insérez-le dans la position de guide de support. Après, placez la Le fond détachable de four: casserole de grilleur et le gril sur le support de four pour la Premièrement enlever les grilles du four.
-
Page 31: Réglage De L'horloge Et De La Minuterie
CONSIGNES D’UTILISATION RÉGLAGE DE L’HORLOGE ET DE LA MINUTERIE Réglage de l’horloge à 4 boutons (à l’heure) Quand la cuisinière est branchée pour la toute première fois, ou que son alimentation électrique est interrompue, la fenêtre affiche « 12:00 ». •... - Page 32 CARE AND CLEANING (cont’d) NETTOYAGE DES ZONES DE CONTOUR DES Cavité de four: CUPULES, DES CUVETTES ET DES TÊTES DE • N'employez pas les décapants de four, les poudres de BRÛLEUR. nettoyage, les garnitures de laines en acier, les garnitures Les zones de contour des cupules, des cuvettes et des têtes de fibre synthétique, ou tout autre matériaux qui peuvent de brûleur doivent faire l’objet d’un nettoyage régulier.
-
Page 33: Dépannage
De temps en temps, un problème peut se poser qui est mineur, et une intervention peut nepas être nécessaire. Employez ce guide de dépannage pour une solution possible. Si l'unitécontinue à fonctionner incorrectement, demandez un dépôt autorisé de service ou le numérode appel sans frais Danby pour l'aide à: 1-800-26-... - Page 34 à des fins commerciales, toutes les obligations de Danby en vertu de cette garantie seront nulles et non avenues. Cette garantie indique en aucun temps la responsabilité de Danby de l’avarie ou dommage de la nourriture ou autre contenu, soit par les vices de l’appareil, ou soit par l’utilisation convenable ou inexacte.
-
Page 35: Model • Modèle • Modelo
Servicios más cercano o llame al: • Tipo de Producto • Número de Modelo 1-800-26- (1-800-263-2629) para que le recomienden un Departamento de Servicios en su zona. Danby Products Limited, Guelph Ontario Canada N1H 6Z9 Danby Products Inc., Findlay, Ohio USA 45839-0669... -
Page 36: Gas Ranges
INSTALLATION INSTRUCTIONS GAS RANGES READ AND SAVE THESE INSTRUCTIONS INSTALLATION AND SERVICE MUST BE PERFORMED BY A QUALIFIED INSTALLER IMPORTANT: Save these instructions for the local electrical inspector’s use. WARNING: • If the information in this manual is not followed exactly, a fire or explosion may result causing property damage, personal injury or death. -
Page 37: Important Notes
TYPICAL CABINET INSTALLATION • Location – Check location where the range will be installed. Check for proper electrical and gas supply, and the stability of the floor. • Dimensions that are shown must be used. Given dimensions provide minimum clearance. Contact surface must be solid and level. -
Page 38: Important Safety Instructions
IMPORTANT SAFETY INSTRUCTIONS Installation of this range must conform to local codes or, in the absence of local codes, with the National Fuel Gas Code ANSI Z223.1 – lasted edition when installed in the United States. This range has been design certified by CSA International. As with any appliance using gas and generating heat, there are certain safety precautions you should follow. -
Page 39: Before Starting
NORMAL INSTALLATION STEPS 1. Before Starting PARTS INCLUDED TOOLS YOU WILL NEED • Anti-Tip bracket For leveling legs and Anti-tip bracket: • • Anchor sleeves Adjustable wrench or channel lock pliers • • Bolts Electric or hand drill • Wood floors: 3/16” drill bit •... -
Page 40: Anti-Tip Bracket Installation Instructions
2. Anti-Tip Bracket Installation Instructions • To reduce the risk of tipping of the range, the range must be secured to the floor by properly installed anti-tip bracket and screws packed with the range. Failure to install the anti-tip bracket will allow the range to tip over if excessive weight is place on an open door or if a child climbs upon it. -
Page 41: Provide An Adequate Gas Supply
3. Level and Position Range Level range by adjusting the 2 leveling legs with a wrench. Note: A minimum clearance of 1/8” is required between the bottom of the range and the leveling leg to allow room for bracket. Use a spirit level to check your adjustments. Slide range back into position. Check that rear-leveling leg is inserted into and fully secured by the Anti-tip bracket by grasping the top rear edge of the range and carefully attempt to tilt it forward. - Page 42 Service Manual Flare Flexible Flare in ON position Shutoff Union Appliance Union Valve Conduit Pressure Regulator BE SURE LEVER IS IN THE ON POSITION WHEN INSTALLATION IS COMPLETE Install an external manual gas shut-off valve to gas supply line in an easily accessible location outside of the range. Be sure you know and where to shut-off the gas supply to the range.
-
Page 43: Installation Of Burner Cap Assembly
Extension Cord Precautions: Because of potential safety hazards under certain conditions, we strongly recommend against the use of any extension cord. However, if you still elect to use an extension cord, it is absolutely necessary that it be a UL listed 3-wire grounding type appliance extension cord and that the current carrying rating of the cord in amperes be equivalent to or greater than the branch circuit rating. -
Page 44: Electric Ignition Surface Burners
9. Electric Ignition Surface Burners Burner Flame Size 5/8" Operation of electric igniters should be checked after range supply line connectors have been carefully checked for leaks and range has been connected to electric power. To check for proper lighting, push in and turn a surface burner knob counter-clockwise to the LITE position. -
Page 45: Air Shutter-Oven Burner
Set oven to BAKE at 300°F. See Use & Care Manual for operating instructions. b. Within 60 seconds the oven burner should ignite. Check for proper flame, and allow the burner to cycle once. Reset controls to OFF. 12. Air Shutter-Oven Burner The approximate flame length of the oven burner is 1 inch (distinct inner, blue flame) To determinate if the oven burner flame is proper, remove the... -
Page 46: Make Sure Range Is Level
13. Make sure Range is level Level the range by placing a level horizontally on an oven rack. Check diagonally from front to back; then level the range by either adjusting the leveling legs or by placing shims under the corners of the range as needed. 14. -
Page 47: Care, Cleaning And Maintenance
OVEN BURNER CONVERSION • Remove oven bottom. To remove oven bottom, slide it back into place to disengage front of oven bottom from oven front frame, and pull the oven bottom out of the oven. • Using ½” wrench, adjust oven burner spud as follows. For Natural to LP/Propane conversion tighten spud down clockwise until snug (approximately 2-1/2 turns).
Need help?
Do you have a question about the Designer DR299BLSGLP and is the answer not in the manual?
Questions and answers