Table of Contents
Advertisement
Available languages
Available languages
Quick Links
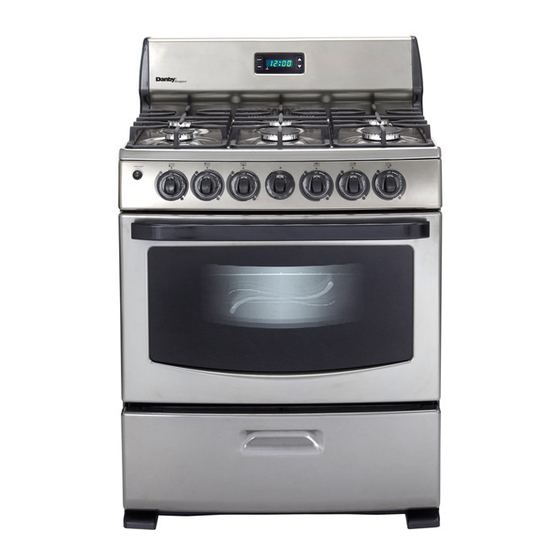
GAS RANGE
Important Safety Information
Installation Instructions
Operating Instructions
Care and Cleaning
Troubleshooting
Warranty
. . . . . . . . . . . . . . . . . . . . . . . . . . . . . . . . . . . . . . . . . . . . . . . . . . . . . . . 11
CUISINIÈRE DE GAZ
Consignes de Sécurité Importantes
Instructions d'installation
Consignes d'utilisation
Soins et Entretien
Dépannage
. . . . . . . . . . . . . . . . . . . . . . . . . . . . . . . . . . . . . . . . . . . . . . . . . . . . . . . 21
Garantie
. . . . . . . . . . . . . . . . . . . . . . . . . . . . . . . . . . . . . . . . . . . . . . . . . . . . . . . 22
COCINA DE GAS
Informacion Importantes de Seguridad
Instrucciones de Instalación
Instrucciones Operadoras
Cuidados y Limpieza
Antes de Llamar al Servicio Técnico
Garantia
. . . . . . . . . . . . . . . . . . . . . . . . . . . . . . . . . . . . . . . . . . . . . . . . . . . . . . . 33
Danby Products Limited, Guelph Ontario Canada N1H 6Z9
Danby Products Inc., Findlay, Ohio USA 45839-0669
Owner's Use and Care Guide
Guide d'utiliser et soin de propriétaire
Guía para utilizar y cuidar de a propietario
Model • Modèle • Modelo
CAUTION:
Read and follow
all safety rules and
operating
instructions before
first use of this
product.
. . . . . . . . . . . . . . . . . . . . . . . . . . . . . . . . . . . . . . . . 2
. . . . . . . . . . . . . . . . . . . . . . . . . . . . . . . . . . . . . . . . . . . . . 5
. . . . . . . . . . . . . . . . . . . . . . . . . . . . . . . . . . . . . . . . . . . . . 6
. . . . . . . . . . . . . . . . . . . . . . . . . . . . . . . . . . . . . . . . . . . . . . . . . . . 8
. . . . . . . . . . . . . . . . . . . . . . . . . . . . . . . . . . . . . . . . . . . . . . . . . . 10
. . . . . . . . . . . . . . . . . . . . . . . . . . . . . . . . . . 13
. . . . . . . . . . . . . . . . . . . . . . . . . . . . . . . . . . . . . . . . . . . . 16
. . . . . . . . . . . . . . . . . . . . . . . . . . . . . . . . . . . . . . . . . . . . 17
. . . . . . . . . . . . . . . . . . . . . . . . . . . . . . . . . . . . . . . . . . . . . . . . . . 19
. . . . . . . . . . . . . . . . . . . . . . . . . . . . . . . . . . 24
. . . . . . . . . . . . . . . . . . . . . . . . . . . . . . . . . . . . . . . 27
. . . . . . . . . . . . . . . . . . . . . . . . . . . . . . . . . . . . . . . . . . . . 28
. . . . . . . . . . . . . . . . . . . . . . . . . . . . . . . . . . . . . . . . . . . . 30
. . . . . . . . . . . . . . . . . . . . . . . . . . . . . . . . . . 32
DR399BLSGLP
MISE EN GARDE:
Veuillez lire
attentivement les
consignes de
sécurité et les
instructions
d'utilisation avant
l'utilisation initiale de
ce produit.
El CUIDADO:
Lea y siga todas
reglas de seguridad
e instrucciones
operadoras antes de
primero uso de este
producto.
V. 1. 2.09 JF
Advertisement
Table of Contents

Subscribe to Our Youtube Channel
Related Manuals for Danby Designer DR399BLSGLP


Summary of Contents for Danby Designer DR399BLSGLP
- Page 1 ............33 Danby Products Limited, Guelph Ontario Canada N1H 6Z9 Danby Products Inc., Findlay, Ohio USA 45839-0669...
- Page 2 Thank you for choosing a Danby Gas Range. Record in the space provided below the Model Number and Serial Number of this appliance. These numbers are found on the serial plate located below the lift-up cooktop. Model No.: Serial No.: Record these numbers for future use.
-
Page 3: Important Safety Information
Never leave the oven door open when the range is unattended. • Do not store items of interest to children in the cabinets above a range or on the backgaurd of a range. Children climbing on the range to reach items could be seriously injured. -
Page 4: Important Safegaurds
IMPORTANT SAFETY INFORMATION (cont’d) • Do not allow children to climb or play around the range. The weight of a child on an open oven door may cause the range to tip, resulting in serious burns or other injury. • USER SERVICING: Do not repair or replace any part of the appliance unless specifically recommended in this owner’s guide. -
Page 5: Energy Saving Tips
• Do not place plastic salt and pepper shakers, spoon holders, or plastic wrappings on top of the range. These items could melt or ignite. Potholders, towels, or wooden spoons could catch fire if placed too close to the flame. -
Page 6: Installation Instructions
If the backgaurd of the range has a clock or light, connect the cord from the backgaurd into the special terminal block located at the top of the main back directly under the backgaurd supply cord.The appliance... -
Page 7: Operating Instructions
This will not speed up cooking. It can cause the oven to cycle slower and cause the temperature to vary so that cooking results may be unsatisfactory. Your oven has a temperature range of 250°F ~ 500°F. Baking: When baking, follow the recipe instructions. Use correct ingredients, measure them carefully, and use the correct type and size cookware suggested in the recipe. - Page 8 Economy Broiler: Your range may be equipped with this optional broiler. The outward appearance of the range will be the same. To open the broiler door, lift handle up slightly to release the door catch and then lower the door. In the broiler section there are two positions of stamped-in oven rack guides and a broiler pan and grill.
-
Page 9: Setting The Clock And Timer
CLOCK & TIMER To Set the 4-Button Time-of-Day Clock When the range is first plugged in, or when the power supply to the range has been interrupted, “12:00” will flash in the display window. • Push and hold the CLOCK pad. - Page 10 Keep pulling the bottom of the door toward you while rotating the top of the door toward the range to completely disengage hinge levers. To replace: reverse the process above. Cleaning the Inner Door: •...
-
Page 11: Troubleshooting
Before you call for service, review this list of troubleshooting solutions. If none of the below suggestions rectify the problem, contact the Danby customer service department TOLL FREE: 1-800-26- PROBLEM • Surface Control knob has not been completely turned. Surface burners do •... -
Page 12: Limited Warranty
This warranty is available only to the person to whom the unit was originally sold by Danby or by an authorized distributor of Danby, and is non-transferable. Plastic parts, are warranted for thirty (30) days only from purchase date, with no extensions provided. - Page 13 Gracias por elegir la cocina eléctrica Danby. En el espacio que sigue, escriba el número del modelo y el número de serie de este aparato. Dichos números se indican en la placa del número de serie, ubicada debajo de la tapa superior levadiza de la cocina.
- Page 14 INFORMACION IMPORTANTES DE SEGURIDAD No almacene ni utilice gasolina ni otros líquidos o gases inflamables alrededor de este o cualquier otro aparato. QUÉ HACER SI HUELE A GAS: • No intente encender ningún aparato. • No toque ningún interruptor eléctrico; no utilice ningún teléfono de la casa. •...
-
Page 15: Medidas De Protección Importantes
INFORMACION IMPORTANTES DE SEGURIDAD (cont’d) • No permita a los niños trepar a la cocina ni jugar alrededor de la misma. El peso de un niño sobre la puerta abierta del horno puede provocar que la cocina se vuelque y se produzcan quemaduras o lesiones graves. •... -
Page 16: Consejos Para Ahorrar Energía
INFORMACION IMPORTANTES DE SEGURIDAD (cont’d) MEDIDAS DE PROTECCIÓN IMPORTANTES • No use la bandeja del asador sin su base. La bandeja del asador y su base permiten escurrir el aceite o la grasa, e impiden que éstos queden expuestos a las altas temperaturas del asador. No cubra la base con papel de aluminio. -
Page 17: Instrucciones De Instalación
INSTRUCCIONES DE INSTALACIÓN Haga instalar y conectar correctamente a tierra el aparato por un técnico calificado. El técnico tiene la responsabilidad de garantizar que su cocina quede bien instalada. Las situaciones que se presenten debido a una mala instalación no son amparadas por la garantía. -
Page 18: Instrucciones Operadoras
INSTRUCCIONES OPERADORAS CÓMO USAR LA COCINA Funcionamiento de los quemadores: Nota: Al hervir los alimentos, la mayor temperatura que se puede alcanzar es el punto de ebullición. Cuando el líquido comience a hervir, baje la intensidad de la llama hasta dejar la mínima temperatura necesaria para mantener la ebullición. - Page 19 INSTRUCCIONES OPERADORAS (cont’d) CÓMO USAR LA COCINA (continuación) Fondo desmontable del horno: Primero, quite la rejillas del horno. El fondo del horno se levanta desde la parte posterior. Agarre cada lado del fondo del horno y levántelo desde la parte trasera, hasta que quede separado.
-
Page 20: Cuidados Y Limpieza
INSTRUCCIONES OPERADORAS (cont’d) AJUSTE DEL RELOJ Y EL TEMPORIZADOR Para ajustar el reloj de hora de 4 botones: Al enchufar por primera vez la cocina, o si se interrumpe la corriente eléctrica, parpadeará en el visor la hora “12:00”. • Presione y mantenga presionado el botón del RELOJ. •... - Page 21 CUIDADOS Y LIMPIEZA (cont’d) LIMPIEZA DE LOS CONTORNOS, LAS TAPAS Y LOS DIFUSORES DE LOS QUEMADORES Los contornos, las tapas y los difusores de los quemadores deben limpiarse con frecuencia. Si mantiene limpias las conexiones de los quemadores, evitará una ignición inadecuada y una llama no uniforme.
-
Page 22: Antes De Llamar Al Servicio Técnico
Antes de llamar al centro de reparaciones, revise la siguiente lista de fallas y sus soluciones. Si ninguna de estas sugerencias resuelve el problema , llame a la LÍNEA GRATUITA del servicio de atención al cliente de Danby: 1-800-26- PROBLEMA •El mando de control del quemador no se... - Page 23 Nada dentro de esta garantía implica que Danby será responsable por cualquier daño que hayan sufrido los alimentos u otros contenidos de este aparato, ya sea debido a un defecto del aparato, o su uso, adecuado o inadecuado.
- Page 24 Merci de choisir une Culinière gaz de Danby. Enregistrez dans l'espace fourni au-dessous du numéro de type et du numéro de série de cet appareil. Ces nombres sont trouvés du plat périodique situé au-dessous du cooktop. Numéro de Modèle: Numéro de Serie: Enregistrez ces nombres pour le futur usage.
-
Page 25: Consignes De Sécurité Importantes
CONSIGNES DE SÉCURITÉ IMPORTANTES Ne conservez et n’utilisez ni essence, ni vapeurs ou substances liquides inflammables à proximité de cet appareil ou de tout autre appareil. QUE FAIRE SI VOUS DÉTECTEZ UNE ODEUR DE GAZ DANS L’AIR : • Ne mettez aucun appareil en marche, quel qu’il soit. •... - Page 26 CONSIGNES DE SÉCURITÉ IMPORTANTES (suite) • Ne permettez pas aux enfants de grimper sur la cuisinière ou de jouer à proximité. Le poids d’un enfant sur la porte du four ouverte peut faire basculer la cuisinière, entraînant ainsi de graves brûlures ou d’autres blessures. •...
- Page 27 CONSIGNES DE SÉCURITÉ IMPORTANTES (suite) NOTES IMPORTANTES DE SÉCURITÉ • Évitez de toucher à une ampoule chaude dans le four car cela pourrait l’abîmer. Débranchez le cordon électrique ou coupez l’alimentation au four avant de retirer ou de replacer l’ampoule. •...
-
Page 28: Instructions D'installation
INSTRUCTIONS D'INSTALLATION Veillez à ce que l’appareil soit correctement installé et mis à la terre par un technicien agréé. Il incombe à ce dernier de s’assurer que votre cuisinière est correctement installée. Les problèmes causés par une installation incorrecte ne sont pas couverts par la garantie. -
Page 29: Consignes D'utilisation
UTIILISATION DE VOTRE CUISINIÈRE Exploitation du brûleur supérieur : Remarque – Lorsqu’on utilise la cuisson par ébullition, la température la plus élevée est celle du point d’ébullition. Quand le liquide commence à bouillir, diminuez la hauteur de la flamme jusqu’à atteindre la hauteur minimale qui permet de maintenir l’ébullition. - Page 30 CONSIGNES D’UTILISATION (suite) UTIILISATION DE VOTRE CUISINIÈRE (suite) Le fond détachable de four: Premièrement enlever les grilles du four. Le fond de four soulève de l'arrière. Saisir chaque côté du fond de four et l'ascenseur en haut de l'arrière jusqu'à ce que le fond est clair. Soulevez-le pour enlever de l'avant.
-
Page 31: Réglage De L'horloge Et De La Minuterie
RÉGLAGE DE L’HORLOGE ET DE LA MINUTERIE Réglage de l’horloge à 4 boutons (à l’heure) Quand la cuisinière est branchée pour la toute première fois, ou que son alimentation électrique est interrompue, la fenêtre affiche « 12:00 ». • Appuyez sur la touche HORLOGE et maintenez-la. •... - Page 32 CARE AND CLEANING (cont’d) NETTOYAGE DES ZONES DE CONTOUR DES CUPULES, DES CUVETTES ET DES TÊTES DE BRÛLEUR. Les zones de contour des cupules, des cuvettes et des têtes de brûleur doivent faire l’objet d’un nettoyage régulier. Le fait de garder les orifices de combustion des brûleurs propres empêche les défaillances de l’allumage et la formation d’une flamme inégale.Pour nettoyer les zones renfoncées et de contour du dessus de la cuisinière :...
-
Page 33: Dépannage
De temps en temps, un problème peut se poser qui est mineur, et une intervention peut nepas être nécessaire. Employez ce guide de dépannage pour une solution possible. Si l'unitécontinue à fonctionner incorrectement, demandez un dépôt autorisé de service ou le numérode appel sans frais Danby pour l'aide à: PROBLEM •... - Page 34 à des fins commerciales, toutes les obligations de Danby en vertu de cette garantie seront nulles et non avenues. Cette garantie indique en aucun temps la responsabilité de Danby de l’avarie ou dommage de la nourriture ou autre contenu, soit par les vices de l’appareil, ou soit par l’utilisation convenable ou inexacte.
- Page 35 1-800-26- (1-800-263-2629) para que le recomienden un Departamento de Servicios en su zona. Danby Products Limited, Guelph Ontario Canada N1H 6Z9 Danby Products Inc., Findlay, Ohio USA 45839-0669 Model • Modèle • Modelo DR399BLSGLP GAS RANGE The model number of your Range is found on the serial plate.
Need help?
Do you have a question about the Designer DR399BLSGLP and is the answer not in the manual?
Questions and answers