Table of Contents
Advertisement
Quick Links
Advertisement
Table of Contents

Subscribe to Our Youtube Channel
Related Manuals for Grandstream Networks GWN7710R


Summary of Contents for Grandstream Networks GWN7710R
- Page 1 Grandstream Networks, Inc. GWN771x Series GWN771X – User Manual...
-
Page 2: Product Overview
IP phones and cameras. Easy management options include local web interface and GWN.Cloud, suitable for hotels, home offices, and small-to-medium businesses. The GWN7710R is a 6-Port (5GE+1SFP) Outdoor Lite Managed PoE Switch with IP66-rated shell for harsh weather conditions. It builds scalable, secure, high-performance networks in scenic locations like hotels and restaurants. It supports VLAN segmentation, various QoS management modes, bandwidth control, and Storm Control for enhanced performance. - Page 3 Power ● IEEE 802.3 at/af or 24V /48V DC passive PoE out, Up to 30W on each port GWN7710R GWN7710R Features at a glance GWN7711/P Technical Specifications GWN7711 GWN7711P Network Protocol IPv4, IEEE 802.3i, IEEE 802.3u, IEEE 802.3ab, IEEE 802.3x, IEEE 802.1p, IEEE 802.3af, IEEE Network Protocol 802.3at...
- Page 4 Total non-blocking 8Gbps throughput Switching 16Gbps Capability Jumbo Frame 2K/3K/4K/5K/6K/7K/8//9K/12K/15K Forwarding Rate 11.9Mpps 8K MAC address capacity ● 4K VLANs VLAN ● Port-based VLAN, 802.1Q VLAN Multicast IGMP Snooping, Report Message Suppression ● Auto prioritization of the incoming port of the packet ●...
- Page 5 Package Content 1x Switch, 1x QIG, 1x Power Adapter Compliance FCC, CE, RCM, IC GWN7711(P) Technical Specifications GWN7710R Technical Specifications IPv4, IEEE 802.3i, IEEE 802.3u, IEEE 802.3ab, IEEE 802.3x, IEEE 802.1p, IEEE 802.3af, Network Protocol IEEE 802.3at • 5*Gigabit Ethernet Ports Communication Ports •...
- Page 6 Package: 466 x 286 x 258mm Unit: 0.75KG Weight Entire Package :1.35KG 1x Switch, Rack-mounting Standard Brackets , 1x QIG,4x assembled screw, 4x expansion Package Content screw ,2 x Metal straps,1x Phoenix connector Compliance FCC, CE, RCM, IC GWN7710R Technical Specifications...
-
Page 7: Installation
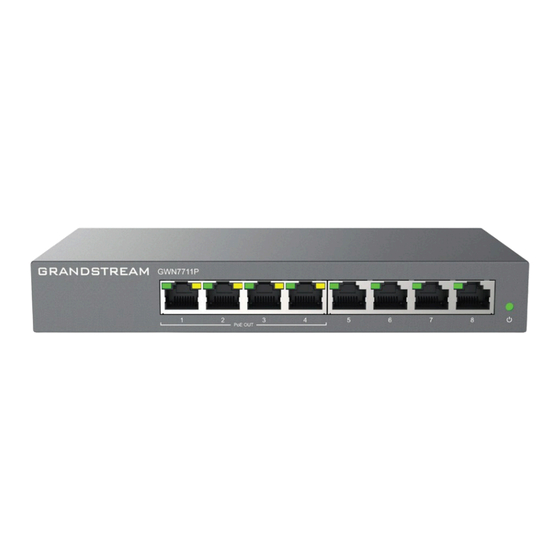
Before deploying and configuring the GWN771x switch, the device needs to be properly powered up and connected to the network. This section describes detailed information on the installation, connection, and warranty policy of the GWN771x switch. Package Contents GWN7711(P) GWN7711(P) package contents GWN7710R GWN7710R Package Content Port Description GWN7711(P) - Page 8 ● Port 2-4 (up to 15W): 24V 0.65A pins 4,5 (+) 7,8 (-). Auxiliary Port 1x Reset Pinhole Power Outlet DC 53.5V Grounding Terminal Safely divert electrical surges and reduce interference Physical security lock to stop theft and unauthorized movement of Kensington Lock the unit GWN7711(P) Ports GWN7710R...
- Page 9 Passive 24VDC or 48VDC output Mode (Configured via UI) Auxiliary Port 1x Reset Pinhole GWN7710R Ports Grounding and Accessing GWN771x Grounding the GWN7711/P Switch 1. Remove the ground screw from the back of the switch, and connect one end of the ground cable to the wiring terminal of the switch.
- Page 10 RMA (Return Materials Authorization) number before the product is returned. Grandstream reserves the right to remedy the warranty policy without prior notification. Grounding the GWN7710R Switch 1. Remove the ground screw from the back of the device, and connect one end of the ground cable to the wiring terminal of the device.
-
Page 11: Pole Mount
GWN7710R Grounding Terminal Mounting methods for the GWN7710R Pole Mount 1. Attach the bracket to the back of the unit using the assembled screws. 2. Open the metal straps by turning the locking mechanism counter-clockwise. You can loosen it by hand or use a flathead screwdriver. -
Page 12: Wall Mount
2. Drill four holes on the wall referring to the positions of the ones on the bracket. Then, fix an expansion screw in each hole. 3. Attach the device by securing the bracket with the expansion screws on the wall. GWN7710R Wall Mount DIN-Rail Mount 1. - Page 13 Solar DC + Fiber Optic Cable This deployment involves installing GWN7710R powered by solar direct current (DC) energy and connected via fiber optic cables outdoors. This setup is ideal for remote locations or areas without reliable power sources, where traditional electrical wiring is impractical.
- Page 14 Solar Cable Installation PoE++ RJ45 Power and Data This set up is using Power over Ethernet (PoE++) technology to provide both power and data connectivity to outdoor devices via RJ45 connections. This setup eliminates the need for separate power sources for each device, simplifying installation and maintenance.
-
Page 15: Getting Started
802.Q VLAN Trunk for Multi-Dedicated SIP Trunking PoE & VLAN Isolation for IP Camera Use VLAN to isolate the IP Camera/Internet/IPTV traffic. Use link aggregation to increase upstream bandwidth. Port 1: 24V/48V 4 Pair Passive PoE Camera Port 2: 24V 2 Pair Passive PoE Camera Port 3: 802.3af PoE IP Video Intercom System Port 4: Wireless 802.3af PoE AP Port 5: Network Equipment PC, printer, etc. - Page 16 PoE power supply anomaly (Port Overload / 24V Flashing yellow Throttling / PSE Throttling). GWN7711(P) LED Indicators Below is LED Indicator for GWN7710R: LED Indicator Status Description Power off Green Power System power on Low temperature starting Link Green Flashing Active 48VDC PoE output;...
-
Page 17: Webui Configuration
3. Type the switch’s management IP address http:// in the browser, and enter username and password to log in. (The default administrator username is “admin” and the default random password can be found at the sticker on the GWN771x switch). GWN771x login page Configure using GWN.Cloud/GWN Manager Type https://www.gwn.cloud (https://<gwn_manager_IP>... - Page 18 Search Language To change the language on the GWN771x switch interface: Navigate to the top right corner of the interface where the username is displayed. Click on the drop-down menu next to the username. Select “Language” from the drop-down options. After selecting the language, the interface will switch to the chosen language.
-
Page 19: Change Password
Change Password To change the password on your GWN771x switch: Navigate to the top right corner of the interface where the username is displayed. Click on the drop-down menu next to the username. Select “Change Password” from the drop-down options. A “Change Password”... -
Page 20: System Info
logout OVERVIEW The overview is the first section that displays System information on the first page “System Info” and Port status on the second page “Port Info”. This section provides the user with a general and global view of the GWN771x system and port status for easy monitoring. - Page 21 Port Info page The following table explains the color code and the symbols used: Grey: Linkdown White: shutdown Green: 1000 Mbps speed Light green: 100 Mbps/10 Mbps speed Red: ErrDisable Symbol: PoE Power is enabled. Ports Labels and Color code Note: a PoE symbol and color code combination is also possible.
-
Page 22: Management Vlan
SYSTEM IP Setting The IP Setting page allows users to configure the switch’s IP address and management VLAN. The user can assign a Management VLAN, choose between DHCP or Static for IP configuration, and manually set DNS servers when necessary. These settings are essential for ensuring network management and connectivity. -
Page 23: Management Platform
Field Name Description Selects the VLAN used to access the management interface. Only ports in this VLAN can access the web UI. Management VLAN Note: Management VLAN is only valid for 802.1Q VLAN, default VLAN1, that is, only ports under VLAN1 can access the Web page. - Page 24 Management platform For more details, refer to this table: Field Description Notes Allow DHCP Option 43 to If enabled, the server address assigned by DHCP Enable or disable the DHCP Option 43 override. Override Option 43 will be preferred. Only one platform can be connected at a time, as Select the management platform type.
-
Page 25: Port Settings
SWITCHING The switching section covers Ports and LAG (Link Aggregation Group) configurations. Port Settings On this page, you can configure the basic parameters for GWN771x Switch ports, like disabling or enabling the port, adding a Description, specifying the speed, Duplex mode, and Flow Control. To configure a port, please navigate to Switching →... -
Page 26: Jumbo Frame
Set the rate of the interface: Speed ● Ethernet port: the options are {10Mbps, 100Mbps, 1000Mbps}, The default is 1000Mbps. Set the duplex mode of the interface. The options are {full-duplex, half-duplex}. The default is Duplex. Duplex Mode ● Duplex: the interface send and receive data packets. ●... -
Page 27: Mac Address Search
Edit LAG Member Port Click on ports to be part of this LAG group. It is used to configure the information description for this LAG , which can be a description of usage, etc., with a Description maximum of 32 characters, and the characters limited to input are numbers 0-9 , letters az / AZ and special characters. -
Page 28: Spanning Tree
MAC Address Search Note: The GWN771x supports pasting a MAC address that is separated by hyphens (‘-‘) into the MAC field. For example, you can enter the MAC address in this format: 00-0B-82-8C-4D-F8. The system will recognize and process it accordingly, eliminating the need to manually remove or replace the hyphens. - Page 29 Note: Short uses the IEEE 802.1D standard while Long supports larger path costs for higher-speed links. The lower the value the higher the chance of this switch becoming the root Range 0-61440, must be Bridge Priority bridge. a multiple of 4096 Note: Adjust this based on network topology.
- Page 30 Spanning Tree – Port Settings To configure Spanning Tree on specific ports: 1. Navigate to Switching > Spanning Tree > Port Settings. 2. Select the port you wish to configure and click Edit. 3. Configure the following fields: Spanning Tree – Port Settings Field Name Description Range...
- Page 31 Specifies whether the port operates as a point-to-point Point-to-Point link. Auto allows detection of the link type. Spanning Tree – Port Settings Port Status This section provides real-time information about the selected port’s spanning tree status. Spanning Tree – Port Status Field Name Description Port Status...
- Page 32 Port VLAN Click the “Edit” icon under the Operation column to edit a VLAN, then select which ports this VLAN will be allowed on. Port VLAN – Edit VLAN 802.1Q VLAN For more flexibility and control over VLAN configuration, the user can enable 802.1Q VLAN, and this case the user is not only restricted to VLANs from 1 to 8.
- Page 33 802.1Q VLAN – add/edit VLAN 802.1Q PVID Settings If the 802.1Q VLAN is enabled, the user can select the PVID (Port VLAN ID) or native VLAN when there is more than one VLAN on a port. Click on the “Edit” icon under operation to modify the PVID on a specific port. 802.1Q PVID Settings Under PVID, select the VLAN from the drop-down list as shown below: 802.1Q PVID Settings –...
-
Page 34: Igmp Snooping
IGMP SNOOPING The GWN771x switches support IGMP snooping, which is an IPv4 Layer 2 multicast protocol that optimizes the handling of multicast traffic in a network by intelligently forwarding traffic only to the ports where interested hosts are located, based on the monitoring of IGMP messages. -
Page 35: Qos Basic Settings
QoS Basic Settings On this page, the user can edit the port priority for each port, supported modes are: Port-Based 802.1P-Based DSCP-Based Please navigate to QoS → QoS Basic Settings page: QoS Basic Settings Select one or multiple ports, then click on the “Edit” button to modify the ports’ priority. The priority range is from 0 to 7, a larger value indicates a higher priority, and value 0 is the default value. -
Page 36: Queue Scheduling
Priority Mapping – 802.1p Mapping DSCP Mapping On this tab, the user can map between CoS and DSCP (Differentiated Services Code Point), in this case, 802.1p and CoS mapping must be configured first. (it’s recommended to keep the default settings to keep the consistency between all switches only if it’s necessary or the network requires it) Priority Mapping –... -
Page 37: Rate Limit
bandwidth that each flow should occupy at the egress according to the flow priority (Precedence). The smaller the priority value is, the less bandwidth is obtained; otherwise, the more bandwidth is obtained. Select one or multiple ports, then click on the “Edit” button to modify the ports Queuing Algorithm. The default algorithm is set to Strict Priority (SP). -
Page 38: Storm Control
Rate Limit page Enable the Ingress (incoming traffic to the switch) and then set the rate limit (in Kbps), and then enable Egress (outgoing traffic) and set the rate limit (in Kbps). Note: CIR is the average rate at which traffic can pass. If both Ingress and Storm Control are enabled, the smaller value between them takes effect. - Page 39 Storm Control main page Select one or multiple ports then click on the “Edit” button or icon under column operation to edit the selected port(s). Please refer to the figure and table below: Storm Control – Edit a port Select Unit: Unit ●...
-
Page 40: Dhcp Snooping
Note: The valid range is 1-1000000, and it is automatically converted to an approximation of the port fit. Storm Control DHCP Snooping DHCP Snooping is a security feature that protects against rogue DHCP servers. It allows network administrators to specify trusted and untrusted ports, ensuring that only legitimate DHCP servers can provide IP addresses. - Page 41 DHCP Snooping Edit port Field Description Note Port The interface where DHCP Snooping is configured. Available for all ports. Note: Trusted ports accept DHCP packets from legitimate DHCP Trust Mode Specifies whether the port is trusted or untrusted. servers and untrusted ports drop DHCP server packets.
-
Page 42: Power Supply Setting
Power Supply Info Power Supply Setting On this page, the user can configure the total power input and configure PoE on each port that supports PoE. e.g, on the GWN7711P switch model, the ports 1-4 support PoE/PoE+. Total Power Input: Configure proper power based on the selected power supply. For instance, if the user sets the Total Power Input to 15 watts, this amount of power is insufficient to power both the switch and more than two access points simultaneously using PoE. - Page 43 Total Power Input prompt To reset the PSE, click on “PSE Reset” button as shown below: Total Power Input prompt When resetting the Power Sourcing Equipment (PSE) on the GWN7711P switch, a confirmation dialog appears, warning that this action will power off and restart all connected Powered Devices (PDs). The user must acknowledge the risk by selecting the checkbox and clicking “Ok”...
-
Page 44: Port Statistics
operation of critical devices like IP cameras, access points, or VoIP phones. PoE Watchdog Steps to Configure PoE Watchdog 1. Navigate to PoE > PoE Watchdog from the web interface. 2. Click on the edit icon next to the port you want to configure. 3. -
Page 45: Port Mirror
To refresh the statistics, click on the “Refresh” button, and to clear all the statistics click on the “Clear All” button. To clear the data for a specific port click on the “clear icon” under the operation column. Port Statistics For more details, click on the “Exclamation mark icon”... -
Page 46: Cable Test
Port Mirror To start mirroring a port, first select the Ingress (incoming traffic to the switch) Mirroring port, then select the Egress (outgoing traffic) Mirroring port, and then select from the drop-down list the Monitor port (Monitor port cannot be the same as the Mirroring port), please refer to the figure below: Port Mirror –... -
Page 47: Maintenance
Please note that if Spanning Tree Protocol (STP) is enabled on a port, the loop detection function for that port will not work properly. Configuration: 1. Navigate to Monitoring → Loopback Detection on the GWN771x switch’s web UI. 2. Toggle Loopback Detection on or off. 3. -
Page 48: Backup And Restore
Upgrade Backup & Restore On this page, the user can back up the configuration, restore from a previously saved configuration file or factory reset the GWN771x. Backup: The current switch configuration can be exported and saved to your computer. In the future, if you need to restore this configuration, you can simply import the backup file. - Page 49 Ping SNMP The Simple Network Management Protocol (SNMP) feature allows network administrators to monitor and manage devices within the network. The SNMP feature can be configured to send notifications and traps to an SNMP manager, helping to ensure efficient network operations. Global Settings –...
-
Page 50: Trap Event
The Notification Management tab allows configuration of the SNMP trap server and port. To configure the trap server: 1. Navigate to Maintenance > SNMP > Notification Management. 2. Set the following fields: Server Address: Specify the IP address of the SNMP trap server. UDP Port: Enter the port used for SNMP trap communication (default is 162). -
Page 51: Global Settings
SNMP – Trap Event LLDP The Link Layer Discovery Protocol (LLDP) allows the switch to advertise its identity, capabilities, and status to neighboring devices in the network. LLDP helps administrators efficiently monitor and manage network devices by providing detailed information about devices connected to the network. Global Settings To access LLDP Global Settings: 1. - Page 52 LLDP Global settings – Disabled Field Name Description Range If LLDP is disabled stops LLDP packets at the device, using LLDP only for local neighbor Filter information. forwards LLDP packets to other devices, enabling broader network Bridge discovery. If LLDP is enabled Defines the interval (in seconds) at which LLDP advertisements are sent to TLV Advertise Interval (s) 5 - 32767...
-
Page 53: Neighbor Info
LLDP Edit port Field Name Description Port Specifies the port being configured. Select whether the port should ● Transmit (Tx) Working Mode ● Receive (Rx) ● Transmit and Receive (Tx&Rx) ● Disable LLDP on that port Select which Type-Length-Value (TLV) elements to advertise. LLDP Port Settings Field Descriptions Neighbor Info The Neighbor Info tab provides detailed information about the devices connected to the switch via LLDP. -
Page 54: Led Indicators
Added support for MAC address input with hyphen-separated format in the MAC fields. [MAC Address Search] Added support for latest GDMS Networking features. [Management Platform] Added support for latest GWN Manager features. [Management Platform] GWN7710R added support for configuring all LED lights ON or OFF through webpage. [LED Indicators]... - Page 55 Added Loop Detection status to the Loop Detection list, and changed the status of the table header to Port Status. [Loopback Detection] Firmware Version 1.0.1.25 Product name: GWN7711, GWN7711P, GWN7710R No major changes. This is the initial version for GWN7710R. Firmware Version 1.0.1.22 Product name: GWN7711, GWN7711P Added support for GDMS Networking and GWN Manager. [Manager Settings] Added the cloud connection status icon.
Need help?
Do you have a question about the GWN7710R and is the answer not in the manual?
Questions and answers