Table of Contents
Advertisement
Quick Links
Advertisement
Table of Contents

Subscribe to Our Youtube Channel
Related Manuals for TRENDnet TE100-MFP1


Summary of Contents for TRENDnet TE100-MFP1
- Page 1 Cover Page TRENDnet User’s Guide...
-
Page 2: Table Of Contents
Utility Main Window ...................... 6 Configure Server ......................7 Connect .......................... 8 Disconnect ........................8 Sending a Request to Connect ..................9 Connect to a Printer..................... 10 Auto-Connect Printer ....................10 Connect to a Scanner ....................11 Advance Configuration ..............12 Access the management page .................. -
Page 3: Product Overview
Scan, fax, and print functionality from any networked workstation. Integrated Wireless N provides greater installation flexibility. An Ethernet port facilitates optional wired networking. Wi-Fi Protected Setup (WPS) streamlines the process of connecting to a wireless network. This compact device fits into the smallest spaces. •... -
Page 4: Product Hardware Features
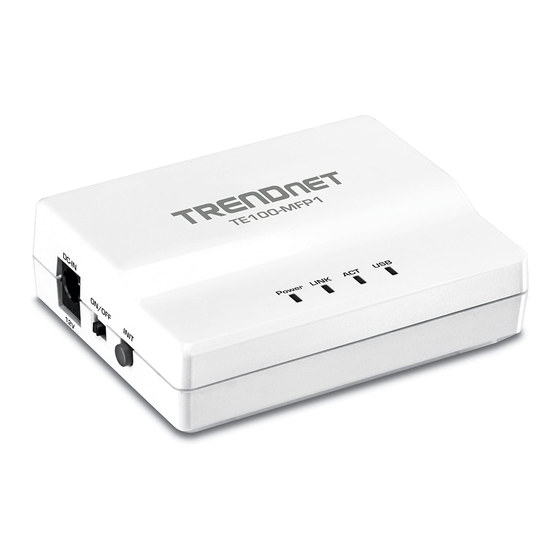
Otherwise if this LED indicator is off, there is no power to your router. • USB Port – The USB 2.0 port allows you to connect USB printers and storage devices to your network and share access to these devices to computers on •... -
Page 5: Application Diagram
• Reset Button – Push and hold this button for 15 seconds and release to reset through a network. It is typically placed in the same location of your printer or multi- the device to its factory default setting. function printer. In addition to its print server functionality the TE100-MFP1 can also allow you to share USB storage devices over the network. -
Page 6: Network Installation
TRENDnet USB Control Center utility is required to be installed on each computer that Verify that any software that is required to operate your printer or multi-function requires access to the print server or to the devices connected to it. Please refer to the printer is installed before installing the TE100-MFP1. -
Page 7: Mac Os X Installation
3. Double-click the file in the window. 4. You will be prompted to install the utility. Click Install to start the installation. MAC OS X Installation 1. For each computer that requires access to the print server, insert the Utility CD-ROM into your computer's CD-ROM Drive. -
Page 8: Using The Utility
If the utility is already running and you attempt to close the window, it will continue to run in the background and you will find the icon in your notification area if the utility is still running. To close and exit the utility and exit the application, you can right-click the notification icon and select Exit or click System >... -
Page 9: Configure Server
Auto-Connect Printer List – Provides a list of printers installed on your computer. Select the printer you would like to assign to the Auto-Connect printer list. If you would like to delete printers from this listing, select the printer in the list and click Delete. Click Close to close the window. -
Page 10: Connect
Windows OS MAC OS X To verify if you are connected to the USB device, a message will appear next to the USB If another computer is currently connected to the USB device you are trying to connect device displaying a message that the USB device is “Manually connected by <your your computer to, you will not be able to connect to it. -
Page 11: Sending A Request To Connect
TE100-MFP1 TRENDnet User’s Guide To send t a request to connect to a USB device, click the Request to Connect button. Windows OS MAC OS X Sending a Request to Connect The local computer sending the request will show the status message below. -
Page 12: Connect To A Printer
TRENDnet User’s Guide connect your computer to the printer using the USB utility first. Some printers may require that the printer is directly connected to the computer in order to complete the driver installation. Once the printer drivers are installed properly on your computer, 1. -
Page 13: Connect To A Scanner
Please ensure the scanner drivers are installed. If the scanner 2. Select the assigned printer to use as the auto connect printer by checking the box. drivers are not installed, please refer to your printer manufacturer website or 3. -
Page 14: Advance Configuration
IP address from your network. However you can statically assign an IP address to the device. Note: The IP address must be in the same subnet as your network. Incorrect settings may cause issues. Log into the management page (see “Access the management page”... -
Page 15: Change Device Information
Change Device Information General Change Language In most cases, you do not need to change the device information and the default General settings are just fine. However you can customize these settings to match your network. The device supports multiple languages of the management page. Currently the These settings help you determine or find the device from features like Windows languages offered are;... -
Page 16: Change User Account Setting
Administrator Maintenance A user account does not have the ability to make changes to the device settings. You can A device restart is similar to power cycling the unit using but using the management assign a user account’s password information by following the steps below. You can add screen. -
Page 17: Reset Device
Maintenance 5. Download and save .zip firmware file to our computer A device reset will set the device back to factory default settings. This can be a useful 6. Unzip the downloaded file into your computer tool when troubleshooting your network. There are two ways on how to reset the 7. -
Page 18: Network Status
TRENDnet User’s Guide 3. Select System Status tab Network Status Status The network status page provides network information of your unit. This information can be used when troubleshooting your network. • Name: Device name • Access Mode: Device mode set •... -
Page 19: Management
Signal Strength Administrator Password Security • User Account List User account username User account password User account Permission Maintenance • Restart • Reset to Factory Default • Download new Firmware • Upgrade Firmware © Copyright 2011 TRENDnet. All Rights Reserved. -
Page 20: Technical Specifications
TE100-MFP1 TRENDnet User’s Guide Technical Specifications Dimensions (LxWxH) 75 x 58 x 24 mm (3 x 2.3 x 1 in.) Hardware Weight 62 g ( 2.2 oz.) IEEE 802.11b, IEEE 802.11g, Based on IEEE Storage: -10 ~ 60°C (13.9~139 °F) -
Page 21: Troubleshooting
2. Verify that your computer is properly connected to your network. message says “The page cannot be displayed.” How can I access the printer server’s 2. Make sure that the print server is turned on and is connected to your network management page? 3. -
Page 22: Appendix
2. Double-click on Terminal to launch the command prompt. b. Click Manage Network Connections, right-click the Local Area Connection 3. In the command prompt, type ipconfig getifaddr <en0 or en1> to display the wired icon and click Properties. or wireless IP address settings. - Page 23 In MAC 10.6, from the Configure drop-down list, select Using DHCP and click the Apply button. f. Restart your computer. Note: If you are experiencing difficulties, please contact your computer or operating system manufacturer for assistance. © Copyright 2011 TRENDnet. All Rights Reserved.
- Page 24 Download section limited to, duty, tax, and other fees. and look for the desired TRENDnet product to access to the GPL Code or LGPL Code. These codes are distributed WITHOUT WARRANTY and are subject to the copyrights of WARRANTIES EXCLUSIVE: IF THE TRENDNET PRODUCT DOES NOT OPERATE AS the developers.
Need help?
Do you have a question about the TE100-MFP1 and is the answer not in the manual?
Questions and answers