Advertisement
Quick Links
Advertisement

Related Manuals for Furniture of America CM-DK6384


Summary of Contents for Furniture of America CM-DK6384
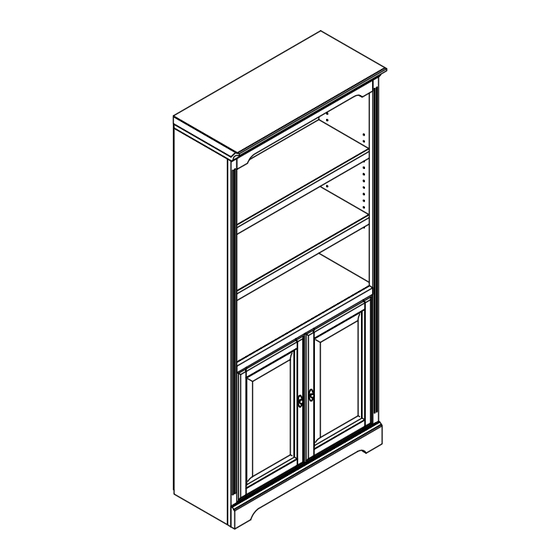
- Page 1 Rev: 17-03-08...
- Page 5 Align hinges (#A) to the holes of the left door (#12) and right door (#13), then secure with screws (#M).Align left door hinges (#12) to the holes of the left side panel (#2), then secure with screws (#M).Align right door hinges (#13) to the holes of the right side panel (#3), then secure with screws (#M). #A x 4pcs #M x 24pcs (1): To adjust the door forward or backward...
- Page 6 1) Prepare 18 bolts assembly by inserting washer (#F) onto bolts (#B). Align top stretcher (#9,10), fixed shelf (#5) and back stretchers (#7,8) to the holes of the left side panel (#2). Secure with bolts (#B). 2) Align right side panel (#3) to the holes of the top stretcher (#9,10), fixed shelf (#5) and back stretchers (#7,8).
- Page 7 1) Prepare 2 bolts assembly by inserting washer (#F) onto bolts (#C). Align back panel (#11) to the back of the cabinet. Secure the top 2 corner holes with bolts (#C). Secure back panel (#11) with screws (#E). Place shelf pin (#G) to the desired height of the shelves (#4), then rest shelves (#4) onto the shelf pins (#G).
- Page 8 #N x 2pcs #O x 2pcs #P x 2pcs #Q x 2pcs OPTIONAL: Create hole in the wall, then insert wall anchor (#Q) to the hole in the wall. Screw wall strap (#N) to the cabinet by using screws (#P), then screw wall strap (#N) to the wall anchor (#Q) with screws (#O).
Need help?
Do you have a question about the CM-DK6384 and is the answer not in the manual?
Questions and answers