Table of Contents
Advertisement
Quick Links
USER MANUAL
iQool-C2MSC3SPM
1 x 18,000 BTU and 1 x 12,000 BTU Cassette units
iQool-C3MSC5SPM
2 x 18,000 BTU and 1 x 12,000 BTU Cassette units
SMART WiFi CONTROLLED CEILING MOUNTED
MULTI CASSETTE AIR CONDITIONER
Thank you for choosing an electriQ Air Conditioner
Please read this user manual before using this innovative
Air Conditioner and keep it safe for future reference.
Advertisement
Table of Contents

Related Manuals for ElectrIQ iQool-C2MSC3SPM


Summary of Contents for ElectrIQ iQool-C2MSC3SPM
- Page 1 2 x 18,000 BTU and 1 x 12,000 BTU Cassette units SMART WiFi CONTROLLED CEILING MOUNTED MULTI CASSETTE AIR CONDITIONER Thank you for choosing an electriQ Air Conditioner Please read this user manual before using this innovative Air Conditioner and keep it safe for future reference.
-
Page 3: Table Of Contents
CONTENTS SAFETY WARNINGS ENERGY SAVING AND UNIT SAFETY PROTECTION TIPS HOW SPLIT AIR CONDITIONERS WORK SYSTEM DIAGRAM PARTS LIST INSTALLATION INFORMATION HOW TO OPERATE YOUR AIR CONDITIONER THE DISPLAY EMERGENCY BUTTON SETTING UP THE REMOTE QUICK START GUIDE REMOTE CONTROL UNDERSTANDING THE FUNCTIONS IMPORTANT INFORMATION SETTING UP THE WiFi APP... -
Page 4: Safety Warnings
SAFETY WARNINGS IMPORTANT! such naked flames and sources of ignition • should be kept a safe distance from the unit. Carefully read the instructions before If you are in any doubt about the suitability operating the unit • of your electrical supply have it checked and, This appliance comprises of multiple indoor if necessary, modified by a qualified cassette units and an outdoor unit. -
Page 5: Energy Saving And Unit Safety Protection Tips
SAFETY WARNINGS heating a room to a suitable level for human remote control. • comfort, and should not be used for any The indoor unit should not be installed in other purpose such as cooling food. laundry or wet rooms. •... -
Page 6: How Split Air Conditioners Work
HOW SPLIT AIR CONDITIONERS WORK COOLING MODE The compressor (6) in the external unit compresses the refrigerant into a high-temperature, high-pressure gas. When this gas flows along the cooling fins of the condenser (7), heat is exuded and the gas condenses into a liquid, which is then led to the evaporator (1) in the indoor unit. -
Page 7: System Diagram
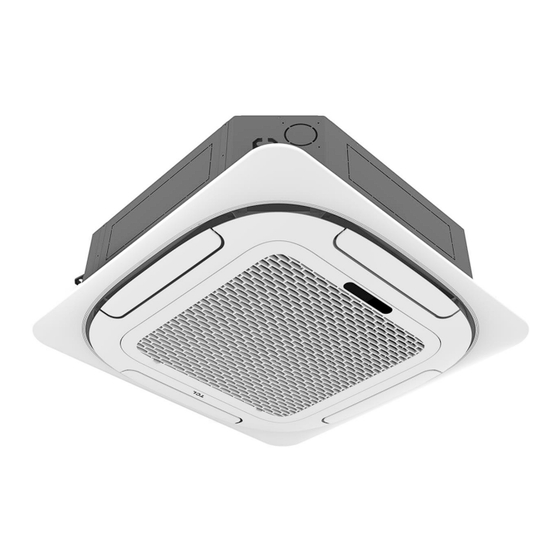
SYSTEM DIAGRAM INDOOR UNIT Air Outlet Refrigerant pipes Uplift Pump (Integrated) Drainage Pipe Air Return Filter Remote Control Louvre for airflow Refrigerant pipes 10 Interconnecting Cable 11 Wall Controller (Optional) OUTDOOR UNIT NOTE: DIAGRAMS FOR ILLUSTRATIVE PURPOSES ONLY THERE IS A SET OF VALVES FOR EACH INDOOR UNIT... - Page 8 SYSTEM DIAGRAM Panel Louvre Infrared Receiver Display Panel Air Inlet Do not block the air inlets / outlets on the cassette, as this will reduce performance and may lead to damage.
-
Page 9: Parts List
PARTS LIST OUTDOOR UNIT: Outdoor Unit x 1 Installation Manual x 1 User Manual x 1 Drain Connector x 1 Rubber Feet Pads x 4 Drainage pipe x 1 WITH EACH CASSETTE INDOOR UNIT: Cassette Unit x 1 Remote Control x 1 PVC Wrap x 1 Panel x 1 Bolts x 4... -
Page 10: Installation Information
INSTALLATION INFORMATION This air conditioner must be installed by qualified personnel following the requirements of the installation and service manual. Installation and servicing of the appliance must only be conducted by individuals possessing adequate backgrounds and qualifications in electrical, electronic, refrigerant and mechanical fields. Any attempt to install or repair the appliance may result in personal injury and property damage. -
Page 11: How To Operate Your Air Conditioner
HOW TO OPERATE YOUR AIR CONDITIONER THE DISPLAY POWER Used to manually turn the unit on and off BUTTON OPERATION Illuminated when the appliance is running LIGHT DISPLAY Shows the desired room temperature / Fault codes PANEL TIMER Illuminated when the timer is set LIGHT DEFROST Illuminated when the appliance is in defrost mode... -
Page 12: Quick Start Guide
HOW TO OPERATE YOUR AIR CONDITIONER QUICK START GUIDE With the remote control pointed at the indoor cassette unit, turn the appliance on using the ON/OFF button on the remote control. Repeatedly press the MODE button to select the desired mode. The display on the remote will show the symbol to indicate the currently selected mode: Auto Mode... -
Page 13: Remote Control
HOW TO OPERATE YOUR AIR CONDITIONER THE REMOTE CONTROL DISPLAY SYMBOL MEANING Battery indicator Auto Mode Cooling Mode Dry Mode Fan only Mode Heating Mode ECO Mode Timer Temperature indicator Fan speed: Auto/low/low-mid/mid/mid-high/high Mute function TURBO function Vertical auto swing Horizontal auto swing SLEEP function Health function (Not Applicable to these models) - Page 14 HOW TO OPERATE YOUR AIR CONDITIONER BUTTONS SYMBOL FUNCTION Press to turn the air conditioner on and off Press to increase the desired temperature, or set the Timer. Press to decrease the desired temperature, or set the Timer. Press to stop or start vertical swing. Used to set the vertical airflow direction.
-
Page 15: Understanding The Functions
UNDERSTANDING THE FUNCTIONS Cools the room when the room temperature is above the desired COOLING temperature set. It will also help reduce humidity at the same time. 1. Press the MODE button until the COOL indicator appears. 2. Set the desired room temperature using the buttons (16 - 31°C) 3. - Page 16 UNDERSTANDING THE FUNCTIONS The outer flap on the unit will slowly move up and down to alter the VERTICAL vertical direction of the airflow. 1. Press the button to start the vertical swing. 2. Press the button again to stop the flap in its current position. The inner louvres on the unit will slowly twist left and right to alter the HORIZONTAL horizontal direction of the airflow.
- Page 17 UNDERSTANDING THE FUNCTIONS Locks the buttons on the remote to prevent the accidental alteration of CHILD LOCK settings. 1. Press the MODE and TIMER buttons together to activate the function 2. Press them again to cancel the function. Operates with the flap on the indoor unit closed, to provide a gentle GENTLE BREEZE breeze into the room.
-
Page 18: Important Information
UNDERSTANDING THE FUNCTIONS IMPORTANT INFORMATION HEATING MODE When the air conditioner is placed in heating mode, the indoor unit will appear to be inactive while it follows its pre-heat procedure to heat the evaporator coils. Once the coils have heated, the indoor fan will start to run. -
Page 19: Setting Up The Wifi App
SETTING UP THE WiFi APP BEFORE YOU START • Ensure your router provides a standard 2.4ghz connection. • If your router is dual band ensure that both networks have different network names (SSID). The provider of your router / Internet service provider will be able to provide advice specific to your router. -
Page 20: Connection Methods Available For Setup
SETTING UP THE WiFi APP CONNECTION METHODS AVAILABLE FOR SETUP The air conditioner has two different setup modes, Quick Connection and AP (Access Point). The quick connection is a quick and simple way to set the unit up. The AP connection uses a direct local WiFi connection between your phone and the air conditioner to upload the network details. -
Page 21: Register The App
SETTING UP THE WiFi APP REGISTER THE APP Upon the first use, an account will need to be registered which can be done as below: Change the country (If required) before entering A verification code will be Press the Sign Up button at your email address, ticking sent to your email address. - Page 22 SETTING UP THE WiFi APP CONNECTING USING QUICK CONNECTION MODE Before initiating the connection, make sure the unit is in standby mode, with the display on the indoor unit showing CF. If not follow the instructions for changing the connection mode. You should also ensure your phone is connected to the WiFi network.
- Page 23 SETTING UP THE WiFi APP CONNECTING USING ACCESS POINT (AP) MODE Before initiating the connection, make sure the unit is in standby mode, with the display on the indoor unit showing AP. If not follow the instructions for changing the connection mode. You should also ensure your phone is connected to the WiFi network.
-
Page 24: Using The Wifi App
USING THE WiFi APP THE HOME SCREEN Add Device: Add a device to the app, and go through the setup process. Voice Control: Use to give verbal instructions Your Device: Press to the app. to enter the device screen. Home: Return to this screen when within the Smart or profile tabs. - Page 25 USING THE WiFi APP THE DEVICE SCREEN Turn Indoor unit on and Increase desired Decrease desired room temperature room temperature Change Set an off or on timer. between Auto, Adjust the Cool Heat, Dry fan speed. and Fan modes. Activate additional functions such as Swing, Turbo, Sleep and Eco Mode...
- Page 26 USING THE WiFi APP SMART SCENES Smart Scenes is a powerful tool providing the option to customise the operation of the air conditioner based both on conditions within the room and outside influences. This gives the user the option of specifying much more intelligent actions. These are split into two categories Scene and Automation.
- Page 27 USING THE WiFi APP AUTOMATION Automation allows an automatic action to be set up for the device. This can be triggered by the Time, indoor temperature, humidity of the room, weather conditions, and a range of other influences. Press Automation to Press the Smart Scene tab at create a new Automation Press the + in the top right...
-
Page 28: Profile Tab
USING THE WiFi APP PROFILE TAB The profile tab gives you the option to edit both your detail, and use the added features of the unit, such as setting up room management, where appliances can be grouped by rooms. This will also show you the third party support offered on the app, for linking the product up with Google Home and Amazon Alexa. -
Page 29: Cleaning And Maintenance
CLEANING AND MAINTENANCE • Before cleaning, you must turn off the air conditioner and disconnect the power supply for at least 5 minutes. • Under no circumstances should the air conditioner be flushed with water. • Volatile liquid (e.g. thinner or gasoline) will damage the air conditioner, so only use soft dry cloth or wet cloth dipped with neutral detergent to clean the air conditioner. -
Page 30: End Of Season Maintenance
CLEANING AND MAINTENANCE END OF SEASON MAINTENANCE If the air conditioner is not going to be used for an extended period: • Use the Self-Clean mode or set the air conditioner to fan mode on a slightly warm day so that the inside of the appliance dries out. -
Page 31: Troubleshooting And Self Diagnosis
TROUBLESHOOTING AND SELF DIAGNOSIS MALFUNCTION POSSIBLE CAUSE Power failure Damaged indoor/outdoor unit fan motor Faulty compressor thermomagnetic circuit breaker Faulty protective device or fuses The appliance Loose connections does not operate Self-protection in adverse conditions Voltage higher / lower than the voltage range Active TIMER-ON function Damaged electronic control board Strange odour... - Page 32 TROUBLESHOOTING AND SELF DIAGNOSIS ERROR SIGNALS ON THE DISPLAY In case of error, the display on the indoor unit shown the following error codes: Error Code Failure type Communication error between indoor unit and wired controller Indoor and outdoor communication failure Outdoor communication failure Indoor room temperature sensor Indoor coil temperature sensor...
- Page 33 TROUBLESHOOTING AND SELF DIAGNOSIS OUTDOOR UNIT FAULT CODES The outdoor unit has an LED on the power board. This LED will be illuminated when the compressor is running and blink 1s on and 1s off when the compressor is in standby. If there is a fault on the outdoor unit, it will blink on and off for half a second at a time, followed by a 3s gap.
-
Page 34: Technical Specification
TECHNICAL SPECIFICATION Model iQool-C2MSC3SPM iQool-C3MSC5SPM Rated voltage and frequency (Ph-V-Hz) 220-240V~/50HZ 220-240V~/50HZ Fuse Required Mode Cooling Heating Cooling Heating 7900 7960 12200 12200 Rated capacity (W) (2800~8800) (2450~8800) (3300~13100) (3300~13100) 2445 2145 3812 3686 Power input (W) (350~2850) (420~2850) (730~5400) (800~5400) 11.7... -
Page 35: Support
UK DECLARATION OF CONFORMITY Hereby, electriQ declares that these air conditioners are in compliance with Radio Equipment Regulations 2017. The full text of the UK declaration of conformity is available at the following internet addresses: https://www.electriq.co.uk/DOC/UK/iQool-C2MSC3SPM.pdf https://www.electriq.co.uk/DOC/UK/iQool-C3MSC5PMS.pdf... - Page 36 This warranty is in addition to, and does not affect, your statutory rights. * A replacement may be offered where electriQ deem a repair not to be viable. We recommend that you note the details of your purchase below and retain your original proof of purchase receipt with this manual.
Need help?
Do you have a question about the iQool-C2MSC3SPM and is the answer not in the manual?
Questions and answers