Table of Contents
Advertisement
USER MANUAL
electriQ WALL MOUNTED AIR CONDITIONER
WITH HEAT PUMP AND WIFI SMART APP
IQOOL-SMART12HP
Thank you for choosing electriQ
Please read this user manual before using this innovative Air Conditioner and keep it safe for future
reference.
Visit our page www.electriQ.co.uk for our entire range of Intelligent Electricals
Advertisement
Table of Contents

Related Manuals for ElectrIQ IQOOL-SMART12HP


Summary of Contents for ElectrIQ IQOOL-SMART12HP
- Page 1 WITH HEAT PUMP AND WIFI SMART APP IQOOL-SMART12HP Thank you for choosing electriQ Please read this user manual before using this innovative Air Conditioner and keep it safe for future reference. Visit our page www.electriQ.co.uk for our entire range of Intelligent Electricals...
-
Page 2: Table Of Contents
CONTENTS SAFETY INSTRUCTIONS PRODUCT OVERVIEW PRODUCT DIAGRAM FEATURES WHATS INCLUDED INSTALLATION TOOLS REQUIRED INSTALLATION OPERATION CONTROL PANEL REMOTE CONTROL FUNCTIONS WIFI SETUP AND SMART FEATURES SETUP CONTROLLING YOUR DEVICE THROUGH THE APP SMART SCENES / AUTOMATION TROUBLESHOOTING TROUBLESHOOTING ERROR CODES TECHNICAL DATA UK SUPPORT... -
Page 3: Safety Instructions
SAFETY INSTRUCTIONS IMPORTANT! AIR CONDITIONERS MUST ALWAYS BE STORED AND TRANSPORTED UPRIGHT, OTHERWISE IRREPARABLE DAMAGE MAY BE CAUSED TO THE COMPRESSOR; IF IN DOUBT WE SUGGEST WAITING AT LEAST 24 HOURS FOLLOWING INSTALLTION BEFORE STARTING THE UNIT. • Carefully read the instructions before installing and/or operating the unit •... - Page 4 flames, an operating gas appliance or an operating electric heater). • The unit must be installed on a solid vertical wall by a competent person. The electricity supply must only be connected after installation is complete. • R290 refrigerant gas complies with European environmental directives. •...
-
Page 5: Product Overview
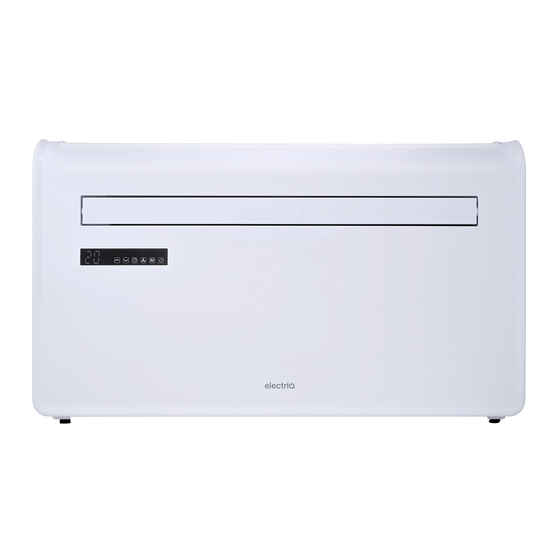
PRODUCT OVERVIEW PRODUCT DIAGRAM FRONT AIR INLET LOUVRE CONTROL PANEL FRONT PANEL BACK WALL HANGING MOUNTS BACK PANEL VENT VENT DRAINAGE PIPE... -
Page 6: Features
FEATURES • Simple operation • High and low installation options for added versatility • Self-evaporative function with energy saving technology • Sleek design that seamlessly fits into any style home • Bright LED screen - Indicates temperature and current mode •... -
Page 7: Installation
INSTALLATION TOOLS REQUIRED SPIRIT LEVEL DRILL 180mm CORE DRILL TAPE MEASURE 8mm MASONRY DRILL BIT SHARP KNIFE 20mm MASONRY DRILL BIT PENCIL BEFORE STARTING INSTALLATION, PLEASE ENSURE YOU HAVE ALL SUITABLE EQUIPMENT AVAILABLE AND UNDERSTAND THE STEPS INVOLVED IN INSTALLATION. IF IN ANY DOUBT, PROFESSIONAL ADVICE SHOULD BE SOUGHT. -
Page 8: Installation
INSTALLATION This unit must be installed on an external wall, as it vents directly out of its rear. Only install the unit on a flat, solid and reliable wall. Ensure that there are no cables, pipes, steel bars or other obstructions behind the wall. - Page 9 Roll the plastic vent sheets into a tube and feed them from the inside into the holes previously made. Ensure the tubes sit flush to the interior wall. Go outside and trim off the excess vent tube using a sharp knife, keeping the edge as neat as possible.
- Page 10 Once the chains are fitted and secure, any excess chain should be removed by cutting the chain. Lift the unit onto the wall, align the hanging holes with the hooks on the hanging rail and gently rest the unit into place. At the same time, slide the drain pipe through the drainage hole.
-
Page 11: Operation
OPERATION CONTROL PANEL REMOTE CONTROL The air conditioner can be controlled with the remote control. Two AAA-batteries are required. NOTE: Further details of the functions can be found on the following page. Press the POWER button to turn the machine POWER on or off. -
Page 12: Functions
FUNCTIONS Press “POWER” to turn the unit On or Off POWER Press to change between the 4 different modes. The display will show the symbol for the mode currently selected. Cooling mode defaults to 22°C and will cool the air while sending warm air outside. The desired temperature can be adjusted using the increase and decrease button between 16°C and 30°C. -
Page 13: Wifi Setup And Smart Features
WIFI SETUP AND SMART FEATURES WIFI SETUP BEFORE YOU START • Ensure your router provides a standard 2.4ghz connection. • If your router is dual band ensure that both networks have different network names (SSID). The provider of your router / Internet service provider will be able to provide advice specific to your router. •... - Page 14 REGISTER THE APP 1. Press on the register button Read the Privacy policy 3. Enter your email address or at the bottom of the screen. and press the Agree phone number and press Button. continue to register. 4. A verification code will be 5.
- Page 15 SETTING UP YOUR HOME WITHIN THE APP TUYA is designed so it can work with a large number of compatible smart devices within your home. It can also be set up to work with multiple devices within different houses As such during the setup process, the app requires that different areas are created and named to allow easy management of all your devices.
- Page 16 CONNECTING USING QUICK CONNECTION Before initiating the connection, make sure the unit is in standby mode, with the WIFI light flashing twice per second. If not follow the instructions for changing the connection mode. Also ensure your phone is connected to the wifi network. (We advise turning mobile data off during setup) 1.
- Page 17 CONNECTING USING AP MODE (ALTERNATIVE METHOD) Before initiating the connection, make sure the unit is in standby mode, with the wifi light flashing once per second. If not follow the instructions for changing the wifi connection mode. Also ensure your phone is connected to the wifi network. (We advise turning mobile data off during setup) 1.
-
Page 18: Controlling Your Device Through The App
CONTROLLING YOUR DEVICE THROUGH THE APP THE HOME SCREEN Add Device: Add a device to the app, and go through the setup process. Change Home: If you have a number of units at Room Management: different houses, you can Allows rooms to be added, change between them removed or renamed. - Page 19 DEVICE SCREEN The device screen is the main control screen for the air conditioner, providing access to the controls to amend the functions and settings Edit Name: Use to Back: Returns to the change the name of the Home Screen air conditioner.
-
Page 20: Smart Scenes / Automation
SMART SCENES Smart Scenes is a powerful tool providing the option to customise the operation of the air conditioner based both on conditions within the room and outside influences. This gives the user the option of specifying much more intelligent actions. These are split into two catagories Scene and Automation. SCENE Scene allows for a one touch button to be added to the Home screen. - Page 21 AUTOMATION Automation allows an automatic action to be set up for the device. This can be triggered by the Time, indoor temperature, humidity of the room, weather conditions, and a range of other influences. 2. Press on the Plus in the top 3.
- Page 22 PROFILE TAB The profile tab gives you the option to edit both your detail, and use the added features of the unit. CHANGING THE NAME OF YOUR DEVICE When in any of the device screens further settings for the device can be accessed, by pressing on the three dots in the top right hand corner.
-
Page 23: Troubleshooting
TROUBLESHOOTING Do not repair or disassemble the air conditioning. Unqualified repair will invalidate the warranty and may lead to failure, causing injuries and property damage. Only use it as directed in this user manual and only perform operations advised here. Problem Reasons Solutions... -
Page 24: Error Codes
ERROR CODES Fault Fault Fault Description Fault Description Code Code Compressor IPM error EE error(outdoor) Return air sensor temperature abnormal PFC/IPM error protection Compressor start error Over-heat protection on top of compressor Compressor running out of step Abnormal refrigerant circulation Location detection loop failure Exhaust temperature protection Phase current overcurrent... -
Page 25: Technical Data
TECHNICAL DATA MODEL IQOOL-SMART12HP Capacity Cooling/Heating 2.93 / 2.35KW Rated Input Cooling / Heating 1120W / 745 W 6.0A Running Current Cooling/Heating Air Flow 500 m EER rate Compressor Rotary, 260g R290 gas Noise 58dB (A) Thermostat 16 - 30°C... -
Page 26: Support
Lowfields Way, Elland West Yorkshire, HX5 9DA DECLARATION OF CONFORMITY Hereby, electriQ declares that this Portable air conditioner is in compliance with Directive 2014/53/EU. The full text of the EU declaration of conformity is available at the following internet address: https://www.electriQ.co.uk/content/declaration-of-conformity...
Need help?
Do you have a question about the IQOOL-SMART12HP and is the answer not in the manual?
Questions and answers