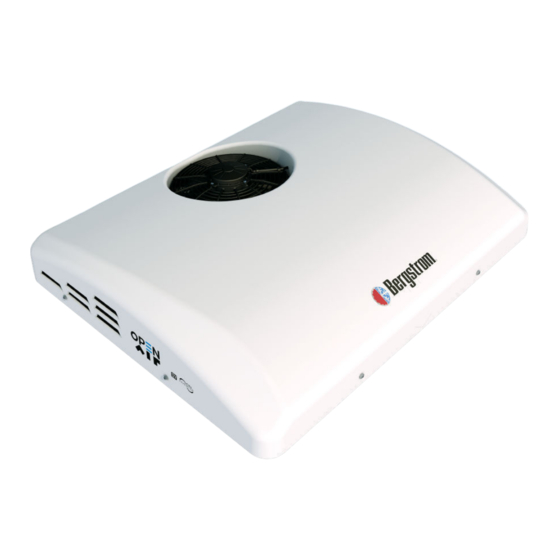
Summary of Contents for Bergstrom Adventure Series
- Page 1 AIRE ACONDICIONADO 12V | 2000W | FULL INVERTER TU ESPACIO DE VIDA CONFORTABLE OpenAir Referencia: 1003613951 INSTRUCCIONES DE MONTAJE MOUNTING INSTRUCTIONS INSTRUCTIONS DE MONTAGE MONTAGEANWEISUNGEN ISTRUZIONI DI MONTAGGIO...
- Page 2 Dirna • Damage to the product due to mechanical Bergstrom for use in mobile homes and other recreational influences and surges. vehicles, with or without the engine running.
- Page 3 - Quick guide: 1003303110 - User manual: 1003303114 - List of spare parts: 1003303116 - Troubleshooting: 1003303115 Dirna Bergstrom uses excellence assurance processes in accordance with international quality management standards ISO 9001, Automotive Quality IATF 16949, and Environmental Management ISO 14001 to ensure the highest quality of its products.
-
Page 4: Assembly Options
OPENAIR ASSEMBLY OPTIONS Attention: To ensure proper ventilation of the equipment and avoid poor operation, a space of at least 10 cm must be kept clear along the back of the unit. 10 cm TU ESPACIO DE VIDA CONFORTABLE... - Page 5 OPENAIR OPERATIONS BEFORE INSTALLING OPENAIR IN VEHICLES WITH NO ROOF HATCH Take the cutting template from the OPENAIR equipment box and place it on the roof of the vehicle to mark the position where the unit will be installed. Caution: Check that the marking on the outside does not interfere with any element inside the vehicle when mounting the interior console.
- Page 6 OPENAIR REQUIREMENTS TO INSTALL OPENAIR IN VEHICLES WITH A ROOF HATCH Caution: OPENAIR can only be installed in vehicles with a hatch that are equipped with: - 400 x 400 mm roof opening - Roof 30 to 60 mm thick Remove the hatch and the frame of the vehicle where the OPENAIR unit will be installed.
- Page 7 OPENAIR 15 mm HOW TO CUT EPDM GASKET TO AVOID WATER FILTRATION INTO THE CABIN A- Glue gasket, keeping 100 mm of protection paper at each side. B- Remove the two pieces of paper. C- Glue by pressing both ends. Gasket Gasket Gasket...
- Page 8 OPENAIR Place the unit on the roof by aligning it from inside, ensuring that the (4) fastening brackets on the base of the unit are aligned in the hole in the roof. Mount (4) studs in the fastening points on the base of the unit, choosing their length based on the thickness of the vehicle’s roof.
- Page 9 OPENAIR Fasten the (4) studs to the base on the unit Wide-rimmed washer with (1) wide-rimmed washer, (1) grower washer and (1) nut on each one. Grower washer Mount (1) nut and (1) wide-rimmed washer on each stud at the following approximate distances from the base of the unit: - 30 mm thick: Between 32 and 35 mm - 40 mm thick: Between 42 and 45 mm...
- Page 10 OPENAIR Place fastening brackets on the studs on the base of the unit and fasten the brackets with (1) wide-rimmed washer and (1) self-locking nut on each stud. Caution: The assembly brackets should be installed longitudinally in the vehicle’s direction of travel, such that the air outlet faces the front and rear of the vehicle when the console is installed.
- Page 11 OPENAIR Attach the duct system to the base of the unit, taking the marks on the base as a reference. Important: Make sure the blower’s air outlets face the duct system’s inlets. Air outlet Air outlet Depending on the thickness of the vehicle’s roof, add a supplementary seal by attaching it aligned on the duct system: Thickness:...
- Page 12 OPENAIR Tighten the fixing nuts M8/125 of the support brackets, taking into account that the fixing studs must not protrude below the bottom of the support brackets. Correct position of Incorrect position of the stud without the stud protruding protruding below from the bottom of the the bottom of the bracket.
-
Page 13: Assembly Drawings
OPENAIR ASSEMBLY DRAWINGS 30 mm thick 25 mm EPDM seal, compressed 19-22 mm (8) Wide-rimmed flat washer Ø8 (4) Grower washer Ø8 (8) M/125 nut Roof 30 mm (4) Wide-rimmed flat washer Ø8 (4) Self-locking M8/125 nut (4) 85 mm studs Duct system (4) M5x10 screw 40 mm thick... - Page 14 OPENAIR ASSEMBLY DRAWINGS 50 mm thick 25 mm EPDM seal, compressed 19-22 mm (8) Wide-rimmed flat washer Ø8 (4) Grower washer Ø8 (8) M/125 nut Roof 50 mm (4) Wide-rimmed flat washer Ø8 (4) Self-locking M8/125 nut (4) 95 mm studs Duct system Supplementary seal (4) M5x10 screw...
-
Page 15: Installation Options
OPENAIR POWER AND BATTERY SIGNAL CABLE ASSEMBLY Caution: OPENAIR does NOT include a battery power cable. Bergstrom has several installation options as optional products sold separately. INSTALLATION OPTIONS If none of these options are purchased, the recommended battery power and signal wiring... - Page 16 OPENAIR The installer will choose the best way to route the cable to the battery. Important: A 100 A fuse must be installed in the power supply cable next to the battery. Connect the power and signal (positive) cables to the battery. Important: To ensure proper operation of the equipment, the power cable and signal cable must be connected directly to the battery.
-
Page 17: Wiring Diagram
OPENAIR WIRING DIAGRAM COLOURS Return air sensor Yellow Blue White Orange Black Connector Green Brown Condenser Connection Compressor control U V W Blower Compressor Anti-freeze sensor Battery TU ESPACIO DE VIDA CONFORTABLE... - Page 18 OPENAIR NOTAS TU ESPACIO DE VIDA CONFORTABLE...
- Page 19 OPENAIR NOTAS TU ESPACIO DE VIDA CONFORTABLE...
- Page 20 TU ESPACIO DE VIDA CONFORTABLE Madrid, España T. + 34 - 918-775-840 E. ventas@dirna.bergstrominc.com W. www.bergstromspain.com F-4236-00 E: 19/02/2024 - v0 R: 06/03/2024 - v1...


Need help?
Do you have a question about the Adventure Series and is the answer not in the manual?
Questions and answers