Table of Contents
Advertisement
Quick Links
Advertisement
Table of Contents

Subscribe to Our Youtube Channel
Related Manuals for Technika Professional TO6005MX


Summary of Contents for Technika Professional TO6005MX
- Page 1 TO6005MX 60cm Built-in Oven USER MANUAL technika.com.au...
-
Page 2: Installation
THANK YOU FOR YOUR PURCHASE Dear Customer, Congratulations on the purchase of your new product from Technika. We recommend you please take some time to read the instruction manual thoroughly to familiarise yourself with the functionality and operations to ensure optimum performance of your new appliance. -
Page 3: Table Of Contents
CONTENTS Before You Begin Maintenance & Cleaning 22 - 24 Explanation of Symbols How to Remove the Oven Door How to Dismantle the Oven Door for For Your Safety 5 - 7 Cleaning Replacing the Oven Lamp General Safety Warnings Technical Specifications Environmental Protection Manufacturers Guarantee... -
Page 4: Before You Begin
1. SAFETY INSTRUCTIONS 1.1 General Safety Warnings 1. SAFETY INSTRUCTIONS 1.1 General Safety Warnings 1. SAFETY INSTRUCTIONS BEFORE YOU BEGIN 1.1 General Safety Warnings 1. SAFETY INSTRUCTIONS 1. SAFETY INSTRUCTIONS 1.1 General Safety Warnings 1. SAFETY INSTRUCTIONS WARNING: 1.1 General Safety Warnings 1. -
Page 5: For Your Safety
FOR YOUR SAFETY 1. SAFETY INSTRUCTIONS 1.1 General Safety Warnings We recommend that you read the instructions in this owner’s manual carefully 1. SAFETY INSTRUCTIONS before use for the best performance and to extend the life of your appliance. It will provide you with all the information you need to ensure its safe installation, use and maintenance. - Page 6 FOR YOUR SAFETY Packaging items such as plastic bags, polystyrene, nails, etc. are potentially dangerous, and therefore appropriate measures must be taken to prevent children and the disabled from coming into contact with them. Avoid the following: • Touching the appliance with wet parts of the body. •...
-
Page 7: 1.1 General Safety Warnings
1. SAFETY INSTRUCTIONS 1.1 General Safety Warnings 1. SAFETY INSTRUCTIONS 1.1 General Safety Warnings 1. SAFETY INSTRUCTIONS 1.1 General Safety Warnings 1. SAFETY INSTRUCTIONS WARNING: 1. SAFETY INSTRUCTIONS 1.1 General Safety Warnings 1. SAFETY INSTRUCTIONS WARNING: 1. SAFETY INSTRUCTIONS 1.1 General Safety Warnings FOR YOUR SAFETY 1.1 General Safety Warnings 1. -
Page 8: Installation
INSTALLATION Cabinet Details • In order to ensure that the built-in appliance functions properly, the cabinet containing it must be appropriate. The figure on page 9 gives the dimensions of the cut-out for installation under the counter or in a wall cabinet unit. •... - Page 9 INSTALLATION *Ventilation Provide cut out at rear for wall oven installation only 450 - 500 (W) x min 45 (D) A - Fixing Cleet 596 (H) x 180 (W) x 15 (D) B - Ventilation Cut-out (Cavity Base) 400 - 500 (W) x min 45 (D) in all cases IMPORTANT! Installation, assembly and electrical connections must be carried out by authorised personnel.
- Page 10 INSTALLATION Before making the connection • Check that the switch, wiring and electrical system can support the appliance load (see data plate); • Check the power supply system has an efficient earthing connection which complies with the provisions of current regulations; •...
-
Page 11: Operation
OPERATION Product Overview 1. Top panel 5. Fan and element cover 9. Grill insert 2. Control panel 6. Side racks 10. Door seal 3. Side Panel 7. Chrome wire shelf 11. Oven door 4. Element 8. Baking tray 12. Oven door handle Note: Above picture is for reference only. -
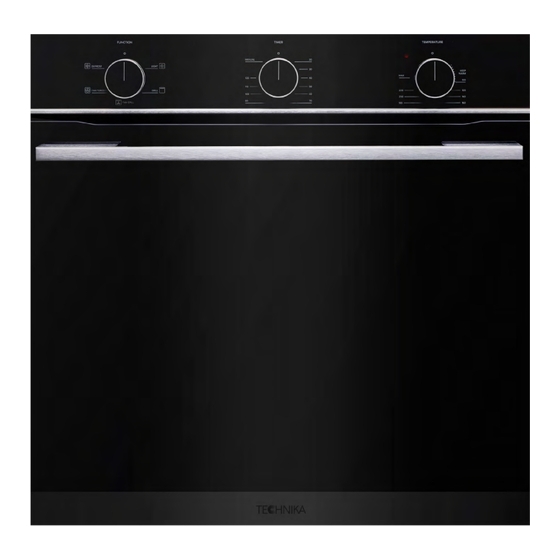
Page 12: Controls
OPERATION Controls 1. Cooking mode selection knob 2. Timer / manual mode selection knob 3. Cooking temperature selection knob Oven and Accessories There are five shelf positions in the oven. The oven is supplied with: 1. 2x chrome wire shelf supports 2. -
Page 13: Positioning The Oven Trays And Shelves
OPERATION Positioning the Oven Trays and Shelves • The grill tray or oven shelf can be located in any of the five height positionsin the oven. Refer to the cooking guide table for the recommended shelf position. When fitting the trays or shelves, ensure they are fitted between the two wires that are closest together as shown below. -
Page 14: Cooking Modes
OPERATION Cooking Modes Mode Description Directs radiant heat from the powerful upper element onto the food.The grill function is best suited for cooking different cuts of meat such as steak, chops, sausages and fish, or for making Grill toasted sandwiches andother quick-cooking foods. For the best results, allow the grill to preheat for3 minutes before placing food inside. -
Page 15: How To Use Your Oven
OPERATION How to Use Your Oven This fan forced oven is an extremely versatile appliance that allows you to choose easily and safely between different cooking modes. The various cooking modes are selected by means of a cooking mode selection knob, located on the control panel. To operate the oven •... - Page 16 OPERATION Mechanical timer 1. The mechanical timer automatically controls when the oven turns off. It cannot automatically switch the oven on, only off. To ensure tension is kept on the spring, turn the timer knob to 120min setting and then back to the required cooking time. 2.
-
Page 17: Cooling Ventilation
OPERATION Cooling ventilation • In order to cool down the exterior of the appliance, this model is equipped with a cooling fan,which switches on automatically. • When the cooling fan is on, you will notice a flow of air exiting between the oven door and thecontrol panel. Note: When cooking is finished, the cooling fan continues to operate until the oven cools down and then switches off automatically. - Page 18 OPERATION Using fan grill • Use fan grill mode with the oven door closed. This mode is very useful for grilling foods rapidly, as the distribution of heat by the fan makes it possible not only to brown the surface, but also to cook the bottom of the food. •...
- Page 19 OPERATION Cooking pizza • For best results when cooking pizza, use the fan forced mode • Preheat the oven for at least 10 minutes. • Use a light aluminum pizza pan, placing it on the shelf supplied with the oven. Don’t use the dripping pan since this will extend the cooking time, making it difficult to get a crispy crust.
-
Page 20: Cooking Guide
OPERATION Cooking Guide Weight Cooking Preheat time Temp. Cooking time Foods (kg) position* (min) setting (min) Defrost All frozen food Grill Soles & cuttlefish 8 - 10 Squid & 6 - 8 prawn kebabs Cod fish Grilled 10 - 15 vegetables Veal steak 15 - 20... - Page 21 OPERATION Weight Cooking Preheat time Temp. Cooking time Foods (kg) position* (min) setting (min) Fan Forced Tarts 20 - 30 Fruit cakes 40 - 45 Fruit cake 40 - 50 Sponge cake 25 - 30 Stuffed pancakes 2 - 4 30 - 35 (on 2 shelves) Small cakes...
-
Page 22: Maintenance & Cleaning
MAINTENANCE & CLEANING • Clean the oven thoroughly before using for the first time. Do not use sharp or abrasive cleaning materials. These could damage the oven. • Before cleaning your oven or performing maintenance, make sure that the cooking mode selection knob is set to off and the cooking temperature selection knob is set to off. -
Page 23: How To Remove The Oven Door
MAINTENANCE & CLEANING How to Remove the Oven Door You can remove the oven door for better access to the oven when cleaning. Proceed as follows to remove the door: 1. Open the door fully. 2. Lift up and turn the latch A situated on each of the two hinges. 3. -
Page 24: Replacing The Oven Lamp
1.1 General Safety Warnings 1. SAFETY INSTRUCTIONS WARNING: 1.1 General Safety Warnings MAINTENANCE & CLEANING Icon Type Meaning WARNING: Icon Type Meaning WARNING Serious injury or death risk WARNING Serious injury or death risk WARNING: RISK OF ELECTRIC SHOCK Dangerous voltage risk RISK OF ELECTRIC SHOCK Dangerous voltage risk Replacing the Oven Lamp... -
Page 25: Technical Specifications
TECHNICAL SPECIFICATIONS TO6005MX Voltage and frequency 220 - 240V ~ 50 - 60Hz Usable volume (L) Total volume (L) Output power 1700 - 2000W Net weight (Kg) 32.0 Gross weight (Kg) 36.5 Product dimensions (W x H x D) 594mm x 595mm x 554mm Cutout dimensions (W x H x D) 596mm x 596mm x 572mm... -
Page 26: Manufacturers Guarantee
MANUFACTURER GUARANTEE This warranty is provided in Australia by Glen Dimplex Australia Pty Limited ABN 69 118 275 460 (Phone number 1300 556 816) in respect of the Technika product. 1. Technika Express Warranty Subject to the exclusions below, we warrant that the product... - Page 27 MANUFACTURER GUARANTEE 3. Consumer Guarantees Our goods come with guarantees that cannot be excluded under the Australian Consumer Law. You are entitled to a replacement or refund for a major failure and for compensation for any other reasonably foreseeable loss or damage. You are also entitled to have the goods repaired or replaced if the goods fail to be of acceptable quality and the failure does not amount to a major failure.
- Page 28 NOTES...
- Page 29 NOTES...
- Page 30 NOTES...
- Page 31 READ THE INSTRUCTION BOOKLET BEFORE INSTALLING AND USING THE APPLIANCE. The manufacturer will not be responsible for any damage to property or to persons caused by incorrect installation or improper use of the appliance. The manufacturer is not responsible for any inaccuracies, due to printing or transcription errors, contained in this manual.
- Page 32 technika.com.au...
Need help?
Do you have a question about the Professional TO6005MX and is the answer not in the manual?
Questions and answers