
Related Manuals for Technika TGO910TBK


Summary of Contents for Technika TGO910TBK
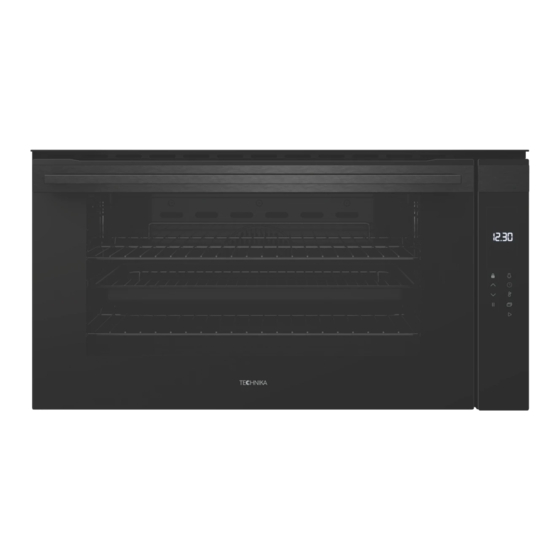
- Page 1 M U L T I F U N C T I O N 9 0 C M O V E N S E N S O R T O U C H C O N T R O L S T G O 9 1 0 T B K TECHNIKA.COM.AU...
-
Page 3: Table Of Contents
CONTENTS TABLE Safety Instructions Disposal Use and Care Oven and accessories How to use your oven Positioning the oven trays & shelves Before using the first time Using the Controls Oven Functions Rotisserie (selected models only) Practical cooking advice Cooking guide Cleaning and maintenance How to remove the oven door Replacing the oven lamp... -
Page 4: Safety Instructions
FOR YOUR SAFETY Using this manual This Owner’s Manual contains important information on safety and instructions intended to assist you in the operation and maintenance of your appliance. Please take the time to read this Owner’s Manual before using your oven and keep this book for future reference. Safety Instructions Installation of this oven must be performed only by a licensed electrician. - Page 5 FOR YOUR SAFETY Safety during operation (Continued) • When cooking dishes that contain alcohol, the alcohol may evaporate due to the high temperatures and the vapour can catch fire if it comes into contact with a hot part of the oven. •...
- Page 6 FOR YOUR SAFETY Cleaning safety WARNING • Make sure the oven is cool before cleaning. We recommend turning the oven off prior to cleaning • Clean and user maintenance shall not be made by children without supervision Do not clean the appliance while it is still hot.
-
Page 7: Disposal
FOR YOUR SAFETY Disposal Disposal Instructions Disposing of the packaging material • The material used to package this appliance is recyclable. • Dispose of the packaging materials in the appropriate container at your local waste disposal facility Disposing of old appliances WARNING: Before disposing of old appliances, make them inoperable so that they cannot be a source of danger. -
Page 8: Use And Care
USE AND CARE Oven and accesories Control Panel Oven Rack Guides for sliding the racks or baking pan in and out Baking Pan / Drip Tray How to use your oven This multi-function oven combines the advantages of traditional conventional ovens with those of the more modern fan assisted models in a single appliance. -
Page 9: Positioning The Oven Trays & Shelves
Positioning the oven trays & shelves The Baking Pan or Oven Shelf can be located in any of the four height positions in the oven. Refer to the ‘Cooking Guide Table’ for the recommended shelf position. When fitting the trays or shelves, ensure they are fitted between the two wires that are closest together as shown below. -
Page 10: Before Using The First Time
USE AND CARE Controls Before using for the first time Setting and changing the current time The oven only operates when the time has been set. When the appliance is connected to the electrical supply or when there has been a power cut, the symbol for Time flashes automatically. - Page 11 USE AND CARE General Instructions • When the selected function is lit, the oven begins to heat up or the time set begins to count down. • The oven light is switched on as long as an oven function has started. •...
- Page 12 USE AND CARE Clock functions Countdown To set a countdown. A signal sounds after the time has elapsed. This function does not affect the operation of the oven. Cook time To set how long the oven is to be in use. End time To set when the oven is to switch off.
- Page 13 USE AND CARE End time Select an oven function and using buttons, select the temperature. Press the Clock Functions button repeatedly until the symbol for End time flashes. Using the buttons, set the desired switch-off (End)time. The symbols for End time and Cook time light up.
-
Page 14: Oven Functions
USE AND CARE Oven functions Conventional mode The top and bottom heating elements come on. This is the classic ,traditional type of oven which has been perfected, with exceptional heat distribution and reduced energy consumption. The conventional oven is still unequalled when it comes to cooking dishes made up of several ingredients, e. - Page 15 USE AND CARE Pizza Mode The bottom and circle heating elements, as well as the fan ,will come on. This combination rapidly heats the oven due to the large amounts of power used by the appliance, which results in the production of considerable heat coming prevalently from the bottom. The pizza mode is ideal for foods requiring high temperaturesto cook, like pizzas and large roasts.
-
Page 16: Rotisserie (Selected Models Only)
USE AND CARE The rotisserie (selected modes only) The rotisserie (only available on certain models) To start the turnspit, proceed as follows: • Insert the rotisserie rod “A” into the drive unit and groove “B” into bend “C”; • Turn the plastiv handle “D” anti clockwise and slide the rack into the oven runners ensuring that the rod “E”... -
Page 17: Practical Cooking Advice
USE AND CARE Practical Cooking Advice Practical Cooking Advice The oven offers a wide range of alternatives which allow you to cook any type of food in the best possible way. With time you will learn to make the best use of this versatile cooking appliance and the following directions are only a guideline which may be varied according to your own personal experience. - Page 18 USE AND CARE Setting “fan assisted grill”, is extremely useful for grilling foods rapidly ,as the distribution of heat makes it possible not only to brown the surface ,but also to cook the bottom part. Moreover, it can also be used for browning foods at the end of the cooking process, such as adding that gratin finish to pasta bakes, for example.
- Page 19 USE AND CARE Cooking Fish and Meat When cooking white meat ,fowl and fish ,use temperature setting from 180°C to 200°C. For red meat that should be well done on the outside while tender and juicy in the inside ,it is a good idea to start with a high temperature setting (200°C-220°C)for a short time, then turn the oven down afterwards.
-
Page 20: Cooking Guide
USE AND CARE Cooking Guide Selector knob Food to be cooked Weight Cooking rack Preheating Thermostat Cooking setting (in kg ) position from time knob time bottom (Minutes) setting (Minutes) 1 Conventional Duck 65-75 Roast veal or beef 70-75 Pork roast 70-80 Biscuits (short pastry) 15-20... - Page 21 USE AND CARE Frozen food 7 Fan Assist Pizza Courgette and prawn pie Country style spinach pie 30-35 Turnovers Lasagne Golden Rolls 25-30 Chicken morseis 15-20 Pre-cooked food Golden chicken wings 20-25 Fresh Food Biscuits(short pastry) 15-18 Fruitcake Cheese puffs 10-12 8 Pizza Pizza...
-
Page 22: Cleaning And Maintenance
USE AND CARE Cleaning and maintenance Before cleaning your oven, or performing maintenance, disconnect it from the power supply. To extend the life of your oven, it must be cleaned frequently, keeping in mind that: • The enameled or stainless steel parts should be washed with luke warm water without using any abrasive powders or corrosive substances which could ruin them;... -
Page 23: Installation
USE AND CARE Installation Only a qualified persons in compliance with the instructions provided must install the appliance. Appliances are fully assembled as in normal operation without any parts removed. The manufacturer declines all responsibility for improper installation, which may harm persons and animals and damage property. -
Page 24: Technical Data
If the supply cord or plug is damaged, it must be replaced by the manufacturer or its service agent or a similarly qualified person in order to avoid hazard. Technical Data Model TGO910TBK Voltage & Frequency of Power Supply 220-240V ~ 50-60Hz Volume (usable capacity) -
Page 25: Warranty
Subject to the exclusions below, we warrant that the product will not have any electrical or mechanical breakdowns within: a) In the case of Technika Professional products used for personal, domestic or household purposes, a period of 2 years from the date the product is purchased as a brand-new product from a retailer located in Australia / New Zealand. - Page 26 MANUFACTURER GUARANTEE The product requires repairs due to damage resulting from accident, misuse, incorrect installation, insect or vermin infestation, improper liquid spillage, cleaning or maintenance, unauthorised modification, use on an incorrect voltage, power surges and dips, voltage supply problems, tampering or unauthorised repairs by any persons, use of defective or incompatible accessories or exposure to abnormally corrosive conditions, events independent of human control which occurred after the goods left the control of Glen Dimplex;...
- Page 27 MANUFACTURER GUARANTEE Warranty claims If you make a valid claim under this warranty and none of the exclusions set out in section 2 apply, we will, at our election, either repair the product or replace the product with a product of identical specification (or where the product is superseded or no longer in stock, with a product of as close a specification as possible).
- Page 28 NOTES PG 28...
- Page 29 NOTES PG 29...
- Page 30 MANUFACTURER GUARANTEE READ THE INSTRUCTION BOOKLET BEFORE INSTALLING AND USING THE APPLIANCE. The manufacturer will not be responsible for any damage to property or to persons caused by incorrect installation or improper use of the appliance. The manufacturer is not responsible for any inaccuracies, due to printing or transcription errors, contained in this manual.
Need help?
Do you have a question about the TGO910TBK and is the answer not in the manual?
Questions and answers