Advertisement
Quick Links
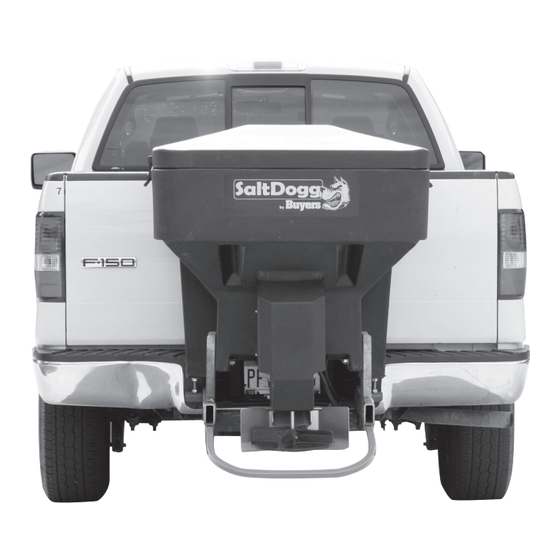
TGS03 Salt Spreader
TGS03RED Salt Spreader
TGS03YEL Salt Spreader
US PATENT 8,888,025; 9,562,333
other PATENTS PENDING
Safety Precautions
WARNING
Observe the following Safety Precautions before,
during and after operating this spreader. By following these
precautions and common sense, possible injury
to persons and potential damage to this machine may be
avoided.
1. Read this entire Installation Instruction before oper-
ating this spreader.
2. Read all safety decals on the spreader before
operating.
3. Verify that all personnel are clear of the
spreader spray area before starting or operating this
spreader.
4. Do not adjust, clean, lubricate or unclog material
jams without first turning off the spreader.
5. Make sure the spreader is securely fastened to the
vehicle in accordance with this manual.
6. Do not operate a spreader that is in need of mainte-
nance or repairs.
7. Always disconnect the battery before removing or
replacing electrical components.
Installation Instructions
Spreader Assembly
Check contents of box against parts list to make sure
all components are included. When ordering replace-
ment or spare parts refer to parts list for part numbers.
—continued inside
Advertisement

Subscribe to Our Youtube Channel
Summary of Contents for Buyers SaltDogg TGS03
- Page 1 Installation Instructions TGS03 Salt Spreader TGS03RED Salt Spreader TGS03YEL Salt Spreader US PATENT 8,888,025; 9,562,333 other PATENTS PENDING Safety Precautions WARNING Observe the following Safety Precautions before, during and after operating this spreader. By following these precautions and common sense, possible injury to persons and potential damage to this machine may be avoided.
- Page 2 1. Slide frame #3019400 into hitch receiver. Fig. 1. Fig. 1 2. Slide hopper assembly #3019372 between frame uprights with front portion rested on the truck’s bumper. Fig. 2. Fig. 2...
- Page 3 3. Align holes in rear portion of the hopper with slots in 5. Assembly ½-13 x 6.0 screws as shown in Fig.5. Make frame uprights. Use slots which will position spreader with sure that nuts located between hopper flange and frame a slight upward tilt.
- Page 4 7. Attach shield #3015707 to trough bracket as shown 9. Attach spinner disk to gear motor shaft as shown in Fig.9. in Fig.7 Secure disk on shaft using clevis pin and cotter pin. Fig. 7 Fig. 9 SCREW 3/8-16 X 1.0 WASHER FLAT 3/8 SPINNER DISK 3019561 NUT NYLOCK 3/8-16...
- Page 5 THIS IS WIRE GROUND ELECTRICAL SYSTEM! CAUTION NO CONNECTIONS TO TRUCK’S FRAME OR BODY DO NOT MOUNT CONTROLLER IN THE WAY OF AIR BAG ALLOWED! DEPLOYMENT! NOTE: Always disconnect battery before attempting to install electrical components on your vehicle. Mount the controller in a convenient location in the truck cab.
-
Page 6: Maintenance Instructions
Spreader Operation. Controller Warnings. 1. Due to the rate at which materials absorb moisture dif- Check controller instruction sheet for latest controller ferently, some materials may not perform as desired. updates, troubleshooting codes. Controller instruction sheet Therefore, the substitution of an alternative material may is inside controller shipping box. - Page 7 TGS03 Tailgate Auger Bill of Materials ITEM PART NO. QTY. DESCRIPTION 3019372 HOPPER ASSEMBLY 3026555 HOPPER ASSEMBLY, RED 3026557 HOPPER ASSEMBLY, YELLOW 3019400 FRAME TGS03 3019410 LID TGS03 3026564 LID TGS03, RED 3026565 LID TGS03, YELLOW 3019561 SPINNER, 12 IN TGS 3015707 SHIELD TGS07 3018923...
- Page 8 TGS03 Trough Assembly Bill of Materials ITEM PART NO. QTY. DESCRIPTION 3015377 GEAR MOTOR DUAL SHAFT .5 HP 12 VDC 3015381 TROUGH WELDMENT, TGS07 3015382 AUGER TGS07 1411000 BEARING, 2-HOLE FLANGED 1" FWF031075006SS 4 WASHER, 5/16 SAE SST 3006721 SCREW, HEX HD, 5/16-18 X 3/4 GR5 SS FPY031000150 PIN, CLEVIS, 5/16 X 1-1/2, W/...


Need help?
Do you have a question about the SaltDogg TGS03 and is the answer not in the manual?
Questions and answers