Table of Contents
Advertisement
Available languages
Available languages
Advertisement
Chapters
Table of Contents

Related Manuals for Bissell CROSSWAVE 2211 Series


Summary of Contents for Bissell CROSSWAVE 2211 Series
- Page 1 CROSSWAVE ® _______________ USER GUIDE 2211 SERIES...
-
Page 2: Safety Instructions
3-prong grounded plug. » Do not put any object into » Use only BISSELL® cleaning » Do not leave appliance when it is openings. Do not use with any products intended for use plugged in. -
Page 3: Table Of Contents
Thanks for buying a BISSELL® CrossWave® We love to clean and we’re excited to share one of our innovative products with you. We want to make sure your multi-surface cleaner works as well in two years as it does today, so this guide has tips on using, maintaining, and if there is a problem, troubleshooting. -
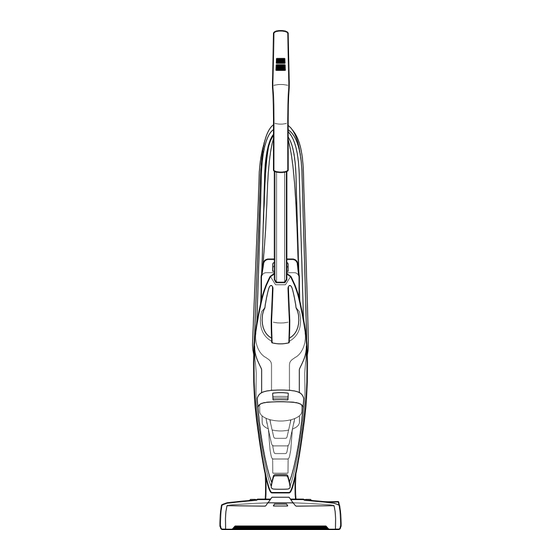
Page 4: Product View
10 Clean Water Tank Integrated Carry Handle Lower Cord Wrap Dirty Water Tank Easy Clean Storage Tray Your BISSELL® CrossWave® machine comes • Handle in three easy-to-assemble components and • Body does not require any tools to assemble. • Clean Water Tank The machine also comes with a two-piece •... -
Page 5: Assembly
Cleaning Formulas WARNING To reduce the risk of fire and electric shock due to internal component damage, use only BISSELL® cleaning formulas intended for use with the hard floor device. CROSSWAVE® FORMULAS Keep plenty of CrossWave® formulas on hand so you can clean your hard floors and area rugs whenever it fits your schedule. -
Page 6: Operations
Screw the cap back onto the tank. A few notes about fi lling the Clean Water Tank: • Fill with warm (140°F/60°C MAX) tap water and add the appropriate BISSELL® formula. DO NOT USE BOILING WATER. DO NOT HEAT WATER OR TANK IN MICROWAVE. www.BISSELL.com... - Page 7 TIP: For overly challenging and stuck-on messes on your hard fl oors, activate the RUG mode and hold your CrossWave® over the mess. Using short passes while holding the trigger allows the multi-surface brush to go to work. www.BISSELL.com...
- Page 8 TIP: For the most thorough clean, make 4 wet passes and 4 dry passes using overlapping passes over each area you clean on your rugs. ATTENTION Do not overwet carpet. Be careful not to run over loose objects or edges of area rugs. Stalling the brush may result in premature belt failure. www.BISSELL.com...
-
Page 9: Maintenance & Care
Remove the filter from the top of the inside of the Dirty Water Tank. tank by pulling it up. Hand wash the vacuum filter and screen Rinse the float located at the bottom with warm water and mild detergent. of the top of the tank. www.BISSELL.com... - Page 10 Angle the Dirty Water Tank back into Once parts are dry, reassemble and body of machine inserting bottom replace the top of tank. first. Tilt the top of the tank toward the machine and push into place until you hear a “click”. www.BISSELL.com...
- Page 11 Then, the edges of the Foot. Then press the lock the pull tab into place by pressing window back into place until you hear downward. a “click”. www.BISSELL.com...
- Page 12 Repeat as needed. the front of the window and pull upward to remove. Pull Brush Roll out by grabbing the Place the Brush Roll upright in the Brush brush roll tab and pulling upward. Roll Drying Tray to dry. www.BISSELL.com...
- Page 13 Store cleaner in a protected, dry area. Since this product uses water, it must not be stored where there is a danger of freezing. Freezing will damage internal components and will void the warranty. NOTE: Any solution remaining in the Clean Water Tank should be emptied prior to machine storage. www.BISSELL.com...
-
Page 14: Troubleshooting
Remove the handle and re-insert into body of machine the body of the machine making sure to push down until you hear a “click” Machine is Cap of Clean Water Tank is not Remove the tank and re-apply the cap leaking closed properly www.BISSELL.com... -
Page 15: Warranty
Subject to the *Exceptions and Exclusions from the Terms of the Limited Warranty, upon *Exceptions and Exclusions from the receipt of the product BISSELL will repair or Terms of the Limited Warranty replace (with new, refurbished, lightly used, or This warranty is exclusive and in lieu of remanufactured components or products), at any other warranties, either oral or written. -
Page 16: Product Registration
Visit BISSELL.com/registration! Parts & Supplies For Parts and Supplies, go to www.BISSELL.com and enter your model number in the search field. We’re Waggin’ Our Tails! BISSELL® proudly supports BISSELL Pet Foundation® and its mission to help save homeless pets. When you buy a BISSELL product, you help save pets, too. - Page 17 CROSSWAVE ® _______________ GUÍA DEL USUARIO SERIE 2211...
-
Page 18: Instrucciones De Seguridad
» Utilice solo los productos de limpieza uso y antes de repararlo. » No lo utilice si hay aberturas BISSELL formulados para usarse con » Solo para uso en interiores. bloqueadas. Mantenga las aberturas este electrodoméstico con el fin de »... - Page 19 Gracias por comprar un producto BISSELL CrossWave® Nos encanta limpiar y estamos ansiosos por compartir uno de nuestros innovadores productos con usted. Queremos asegurarnos de que dentro de dos años el limpiador de múltiples superficies funcione igual que hoy, por eso, esta guía presenta sugerencias sobre el uso, el mantenimiento y, si hay algún problema, la guía de...
-
Page 20: Vista Del Producto
Abrazadera para cable inferior Tanque de agua sucia Bandeja de almacenamiento de limpieza fácil • Manija La máquina BISSELL CrossWave® viene con tres componentes para ensamblar fácil- • Cuerpo mente y no es necesario utilizar ninguna • Tanque de agua limpia herramienta. -
Page 21: Ensamblaje
ADVERTENCIA Para reducir el riesgo de incendio y descarga eléctrica causado por el daño de los componentes internos, utilice solo los líquidos de limpieza BISSELL diseñados para utilizarse con el dispositivo para pisos duros. FÓRMULAS CROSSWAVE® Tenga a mano una buena cantidad de las fórmulas CrossWave®... -
Page 22: Funcionamiento
Algunas consideraciones sobre el llenado del tanque de agua limpia: • Llénelo con agua tibia de grifo (140 ºF/60 ºC, como máximo) y agregue la solución BISSELL adecuad. NO UTILICE AGUA HIRVIENDO. NO CALIENTE EL AGUA NI EL TANQUE EN EL MICROONDAS. - Page 23 CONSEJO: Para pisos más difíciles y con suciedad pegada, active el modo RUG (tapete) y sostenga la CrossWave® sobre la suciedad. Al realizar pasadas cortas cuando mantiene presionado el gatillo, permite que el cepillo para múltiples superfi cies funcione. www.BISSELL.com...
- Page 24 área que va a limpiar de los tapetes. ATENCIÓN No humedezca demasiado la alfombra. Tenga cuidado de no pasar por encima de objetos sueltos o los bordes de los tapetes de interiores. El estancamiento del cepillo puede ocasionar el fallo prematuro de la correa. www.BISSELL.com...
-
Page 25: Mantenimiento Y Cuidado
Lave a mano el filtro y la ventana de la aspiradora Enjuague el flotante que se ubica al fondo de la con agua tibia y detergente suave. tapa del tanque de agua sucia. www.BISSELL.com... - Page 26 Una vez que las partes estén secas, reensamble y cuerpo de la máquina insertando, primero, la parte vuelva a colocar la tapa del tanque de agua sucia. inferior. Luego, incline la tapa del tanque hacia la máquina y presione en el lugar hasta que haga un “clic”. www.BISSELL.com...
- Page 27 Luego, ventana del cepillo con los bordes del pie. Luego, trabe la lengüeta en su lugar al presionar hacia abajo. presione la ventana en su lugar hasta escuchar un “clic”. www.BISSELL.com...
- Page 28 Repita según sea necesario. Retire el rodillo del cepillo agarrando la Coloque el rodillo del cepillo de forma vertical en lengüeta del cepillo y jalando hacia arriba. la bandeja de secado del rodillo del cepillo para secar. www.BISSELL.com...
- Page 29 área protegida y seca. Debido a que este producto utiliza agua, no debe almacenarse donde exista peligro de congelación. La congelación dañará los componentes internos y anulará la garantía. NOTA: Cualquier solución que permanezca en el tanque de agua limpia debe vaciarse antes del almacenamiento de la máquina. www.BISSELL.com...
-
Page 30: Solución De Problemas
“clic”. Hay una filtración La tapa del tanque de agua limpia no está cerra- Retire el tanque de agua limpia y vuelva a colocar en la máquina da correctamente. la tapa. www.BISSELL.com... -
Page 31: Garantía
Esta garantía es exclusiva y reemplaza cualquier nuevos, remanufacturados, ligeramente usados o otra garantía oral o escrita. Cualquier garantía renovados) a opción de BISSELL, gratis, a partir implícita que pueda surgir conforme a derecho, de la fecha de compra del comprador original, incluyendo garantías implícitas de aptitud e... -
Page 32: Registro Del Producto
¡Visite www.BISSELL.com/registration ahora mismo! Piezas y suministros Por piezas y suministros vaya a BISSELL.com e ingrese el número de su modelo en el campo de búsqueda. ¡Estamos moviendo nuestras colas! BISSELL® orgullosamente apoya a la BISSELL Pet Foundation®...
Need help?
Do you have a question about the CROSSWAVE 2211 Series and is the answer not in the manual?
Questions and answers
How can we purchase a new filter ?
You can purchase a new filter for the Bissell CROSSWAVE 2211 Series by visiting the BISSELL website (www.BISSELL.com) and entering your model number in the search field under the "Parts & Supplies" section.
This answer is automatically generated
How do you change the brush on my crosswave 2211w
To change the brush on a Bissell CrossWave 2211 Series, follow these steps:
1. Turn off the machine and unplug it from the electrical outlet.
2. Grasp the brush window at the front and pull it upward to remove it.
3. Pull the brush roll out by grabbing the tab and pulling upward.
4. Insert the new brush roll by aligning the end with the right side of the foot.
5. Lock the pull tab into place by pressing downward.
6. Replace the brush window by lining up both tabs with the edges of the foot.
7. Press the window back into place until you hear a "click."
This ensures the brush is securely installed and ready for use.
This answer is automatically generated
Solution is not leaving tank because valve is not opening.
The provided context does not mention a valve issue specifically for the Bissell CROSSWAVE 2211 Series. However, if the solution is not leaving the Clean Water Tank, you can try the following troubleshooting steps:
1. Refill the Clean Water Tank – Ensure the tank is not empty.
2. Reseat the Clean Water Tank – Turn off the machine, remove the tank, and place it back securely until you hear a "click."
3. Prime the System – Hold the trigger for 10 to 15 seconds to ensure the solution flows to the spray tips.
4. Check the Brush Window – Turn off the machine, unplug it, and make sure the brush window is latched properly.
5. Clean the Spray Tips – Use a pin to clear any clogs in the spray tips under the brush window.
6. Ensure Tanks are Properly Seated – Turn off the machine, remove both tanks, and reseat them correctly.
If the issue persists, further inspection of the valve may be needed, but no specific instructions for valve repair are provided in the context.
This answer is automatically generated
Can i vacuum up food with this model 2211W