
Subscribe to Our Youtube Channel
Related Manuals for Bissell PowerGlide 2215 series


Summary of Contents for Bissell PowerGlide 2215 series
-
Page 1: User Guide
POWERGLIDE ® Vacuum ___________ USER GUIDE 2215 SERIES More of a video person? Look for this icon and go online for an instructional how-to video at www.BISSELL.com... -
Page 2: Important Safety Instructions
This plug will fit in a polarized outlet only one way. If the plug does not fit fully in the outlet, reverse the plug. If it still does not fit, contact a qualified electrician to install a proper outlet. Do not change the plug in any way. www.BISSELL.com... - Page 3 Thanks for buying a BISSELL vacuum! We love to clean and we’re excited to share one of our innovative products with you. We want to make sure your vacuum works as well as it does today for years to come, so this guide has tips on using (pages 6-7), maintaining (pages 8-9), and if there is a problem, troubleshooting (page 12).
-
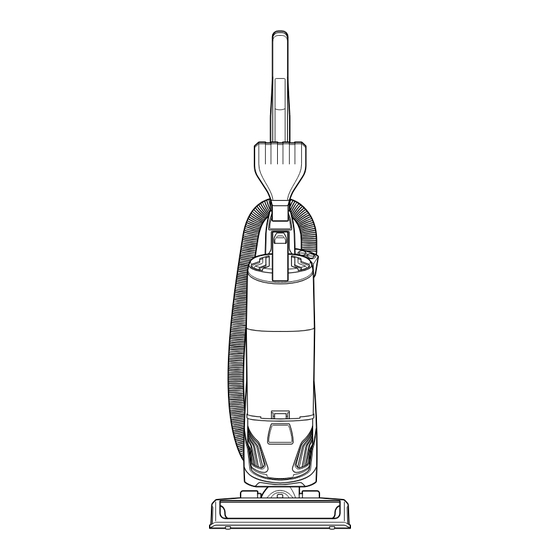
Page 4: Product View
Tool with Tool Holder Carry Handle Cord Release Variable Filters Cord Suction Control Extension Dirt Wand Container Stretch (Crevice Tool stored inside) Hose Post-Motor Filter Brush Roll Cord Release and Storage Twist Cord Release down to quickly remove cord www.BISSELL.com... - Page 5 TurboEraser® Tool into tool holder. Remove the pre-motor filter and replace with the Febreze™ Filter. Place top back on tank, line arrow with the unlock graphic and twist left to lock in place. www.BISSELL.com...
- Page 6 Locate the Variable Suction Control Valve counterclockwise. on the Hose Wand Base. NOTE: The vacuum will come with the Variable Suction Valve closed for full suction power. www.BISSELL.com...
-
Page 7: Emptying The Dirt Tank
Close bottom of container and place back on the vacuum. Be sure you place the Holding dirt container over a trash front of the tank first and push back to bin, press tank empty button. “click” into place. www.BISSELL.com... -
Page 8: Cleaning The Filters
Replace the filter cover door. dirt (do not wash filter). Parts & Supplies For Parts and Supplies, go to www.BISSELL.com and enter your model number in the search field. www.BISSELL.com... - Page 9 To put faceplate belt on and pop back back on, align the into place. tabs in the top of Replace brush roll the cover and place with belt, making sure it down to “click” all parts are aligned into place. correctly. www.BISSELL.com...
-
Page 10: Troubleshooting
Dirt Container. Insert the bottom first and pivot the Dirt Container towards the vacuum. Listen for a “click” sound, indicating that it snapped into place. Parts & Supplies For Parts and Supplies, go to www.BISSELL.com and enter your model number in the search field. www.BISSELL.com... -
Page 11: Please Do Not Return This Product To The Store
Service If your BISSELL product should require service: Contact BISSELL Consumer Care to locate a BISSELL Authorized Service Center in your area. If you need information about repairs or replacement parts, or if you have questions about your warranty, contact BISSELL Consumer Care. - Page 12 Visit www.BISSELL.com/registration! Visit the BISSELL website: www.BISSELL.com When contacting BISSELL, have model number of cleaner available. Please record your Model Number: ___________________ Please record your Purchase Date: ___________________ NOTE: Please keep your original sales receipt. It provides proof of purchase date in the event of a warranty claim.
Need help?
Do you have a question about the PowerGlide 2215 series and is the answer not in the manual?
Questions and answers