Table of Contents
Advertisement
Available languages
Available languages
Quick Links
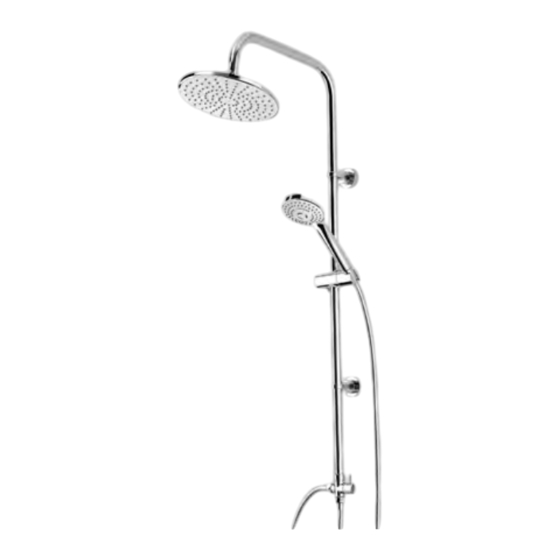
OVERHEAD SHOWER KIT WITH ANTI-DRIP SYSTEM
OVERHEAD SHOWER KIT WITH
ANTI-DRIP SYSTEM
Assembly, operating and safety instructions
HOOFDDOUCHESET MET
ANTI-DRUP SYSTEEM
Montage-, bedienings- en veiligheidsinstructies
IAN 360514_2007
COLONNE DE DOUCHE AVEC
SYSTÈME ANTI-GOUTTE
Instructions de montage, d'utilisation et consignes de
sécurité
ÜBERKOPFBRAUSESET MIT
ANTI-TROPF-SYSTEM
Montage-, Bedienungs- und Sicherheitshinweise
Advertisement
Chapters
Table of Contents

Related Manuals for Miomare 360514 2007


Summary of Contents for Miomare 360514 2007
- Page 1 OVERHEAD SHOWER KIT WITH ANTI-DRIP SYSTEM OVERHEAD SHOWER KIT WITH COLONNE DE DOUCHE AVEC ANTI-DRIP SYSTEM SYSTÈME ANTI-GOUTTE Assembly, operating and safety instructions Instructions de montage, d‘utilisation et consignes de sécurité HOOFDDOUCHESET MET ÜBERKOPFBRAUSESET MIT ANTI-DRUP SYSTEEM ANTI-TROPF-SYSTEM Montage-, bedienings- en veiligheidsinstructies Montage-, Bedienungs- und Sicherheitshinweise IAN 360514_2007...
- Page 2 Before reading, unfold both pages containing illustrations and familiarise yourself with all functions of the device. Avant de lire le mode d‘emploi, ouvrez les deux pages contenant les illustrations et familiarisez-vous ensuite avec toutes les fonctions de l‘appareil. Vouw vóór het lezen de beide pagina‘s met de afbeeldingen open en maak u vertrouwd met alle functies van het apparaat.
- Page 3 You need · Il vous faut U hebt nodig · Sie benötigen: variabel variable / variabel...
-
Page 5: Table Of Contents
List of pictograms used ......................Page 6 Introduction ...........................Page 6 Intended use ............................Page 6 Parts description ..........................Page 6 Technical data .............................Page 6 Scope of delivery ..........................Page 7 Safety notes ..........................Page 7 Installation .............................Page 8 ................................Page 9 Cleaning and care ........................Page 9 Maintenance ..........................Page 9 Disassembly... -
Page 6: List Of Pictograms Used
List of pictograms used Read the installation instructions and Danger to life and risk of accidents instructions for use! for infants and children Observe the warnings and safety Warning - risk of electric shock! instructions! Danger to life! Overhead Shower Kit with Parts description Anti-Drip System Shower bar... -
Page 7: Scope Of Delivery
Scope of delivery BEWARE OF ELECTRIC SHOCK! Before drilling, ensure that there are Note: Check that the delivery is complete and that no electrical cables where you intend the product and all its parts are in perfect condition to drill. immediately after unpacking. -
Page 8: Installation
Installation Mark the drill holes using the holes in the instal- lation plates intended for the fixing screws Please familiarise yourself with the product prior as a guide (approx. Ø 6 mm). to installation. Carefully read the following in- Now drill the mounting holes and then guide the stallation instructions and safety advice. -
Page 9: Use
Disassembly You can use the diverter to switch between Shut off the water supply before disassembling the overhead shower head and the hand- the product. held shower head Watch for residual water draining from the The angle of the overhead shower head product. -
Page 10: Warranty And Service
during pregnancy. Lead dissolves in drinking IAN 360514_2007 water and is particularly damaging to the health of babies and young children. Please have your receipt and the item number (IAN 123456_7890) ready as your proof of purchase when enquiring about your product. Warranty and service The product has been manufactured to strict quality guidelines and meticulously examined before deliv-... - Page 11 Légende des pictogrammes utilisés ................Page 12 Introduction ...........................Page 12 Utilisation conforme ..........................Page 12 Descriptif des pièces ...........................Page 12 Caractéristiques techniques ........................Page 12 Contenu de la livraison ........................Page 13 Consignes de sécurité ......................Page 13 Montage ............................Page 14 Utilisation ............................Page 15 Nettoyage et entretien ......................Page 15 Maintenance ..........................Page 15...
-
Page 12: Légende Des Pictogrammes Utilisés
Légende des pictogrammes utilisés Veuillez lire la notice de montage et Danger de mort et risque d'accident le mode d'emploi! pour les nourrissons et les enfants Respectez les avertissements et les Attention au risque d'électrocution ! consignes de sécurité ! Danger de mort ! Colonne de douche avec système matériels. -
Page 13: Contenu De La Livraison
Contenu de la livraison PRENEZ GARDE AU RISQUE D‘ÉLECTROCUTION ! Avant de Remarque : Immédiatement après le déballage, percer, vérifiez qu‘aucune ligne veuillez contrôler que le contenu de la livraison est électrique n‘est encastrée dans la zone du complet et que le produit et toutes les pièces sont perçage. -
Page 14: Montage
Utilisez uniquement le produit dans des pièces Alignez les distances des deux supports mu- dont la température ambiante est supérieure à raux à droite et à gauche du support pour 0°C. Coupez l‘arrivée d‘eau en cas de gel et douchette sur la barre de douche et vis- vidangez le produit. -
Page 15: Utilisation
Maintenance Placez maintenant le joint dans la douche fixe et vissez l‘articulation à rotule ainsi que l‘écrou-raccord dans le sens horaire sur Vérifiez à intervalles réguliers tous les raccords la douche fixe (voir Fig. T et U). et branchements quant à leur étanchéité ou à Fixez la douche fixe sur la barre de douche la présence de dommages visibles. -
Page 16: Garantie Et Service
des composants fragiles, comme des interrupteurs, des fins de préparation des aliments pour nour- rissons. Autrement, des risques pour la santé des batteries ou des éléments fabriqués en verre. peuvent survenir. L’eau du robinet est bonne lorsqu’elle est nettement plus fraîche au goût Service client que l’eau stagnante. - Page 17 Legenda van de gebruikte pictogrammen ............. Pagina 18 Inleiding ............................Pagina 18 Correct en doelmatig gebruik ......................Pagina 18 Beschrijving van de onderdelen ..................... Pagina 18 Technische gegevens ........................Pagina 18 Omvang van de levering ........................ Pagina 19 Veiligheidsinstructies ......................Pagina 19 Montage ............................
-
Page 18: Legenda Van De Gebruikte Pictogrammen
Legenda van de gebruikte pictogrammen Lees de montagehandleiding en Levensgevaar en kans op ongevallen gebruiksaanwijzing! voor kleuters en kinderen Neem de waarschuwingen en veilig- Waarschuwing voor een elektrische heidsinstructies in acht! schok! Levensgevaar! Hoofddoucheset met anti-drup Beschrijving van de onderdelen systeem Douchestang Wartelmoer... -
Page 19: Omvang Van De Levering
Omvang van de levering leidingen op de plek van het te boren gat be- vinden. Opmerking: controleer de levering direct na het PAS OP! LETSELGEVAAR! Con- uitpakken op volledigheid en op de optimale staat troleer of alle onderdelen onbescha- van het product en alle onderdelen. Gebruik het pro- digd en correct gemonteerd zijn. -
Page 20: Montage
Montage Markeer de boorgaten met behulp van de ga- ten in de montageplaten die voor de beves- Maak u voor de montage met het product ver- tigingsschroeven zijn bestemd (ca. Ø 6 mm). trouwd. Lees hiervoor aandachtig de volgende Boor vervolgens de bevestigingsgaten en plaats montagehandleiding en de veiligheidsinstructies. -
Page 21: Bediening
Bediening meteen door een vakman worden gecontro- leerd resp. worden vervangen. Met de omsteller kunt u kiezen tussen de hoofddouche en de handdouche Demontage De hoek van de hoofddouche is apart in- stelbaar. U kunt uit 5 soorten waterstralen kiezen voor Sluit de watertoevoer af voor de demontage de handdouche van het product. -
Page 22: Garantie En Service
Tel.: +49 202 24750 430 / 431 / 432 nikkel. Dergelijk water kan sterk nikkelhoudend zijn en een allergische reactie veroorzaken. (gesprekskosten overeenkomstig het Gebruik geen drinkwater uit loden leidingen vastnet-tarief van uw telefoonaanbieder) voor de bereiding van voeding voor zuigelin- Tel.: +800 34 99 67 53 (vanuit het buitenland) gen en / of voor de bereiding van levensmidde-... - Page 23 Legende der verwendeten Piktogramme ............Seite Einleitung ............................. Seite Bestimmungsgemäße Verwendung ....................Seite Teilebeschreibung ........................... Seite Technische Daten ..........................Seite Lieferumfang ............................ Seite Sicherheitshinweise ......................Seite Montage ............................Seite Bedienung ..........................Seite Reinigung und Pflege ......................Seite Wartung ............................Seite Demontage ..........................
-
Page 24: Legende Der Verwendeten Piktogramme
Legende der verwendeten Piktogramme Lesen Sie die Montage- Lebens- und Unfallgefahr für und Bedienungsanleitung! Kleinkinder und Kinder Beachten Sie die Warn- Warnung vor elektrischem Schlag! und Sicherheitshinweise! Lebensgefahr! Überkopfbrauseset mit Anti-Tropf- Teilebeschreibung System Brausestange Überwurfmutter Einleitung Dichtung (Überkopfbrause) Kugelgelenk Wir beglückwünschen Sie zum Kauf Ihres Überkopfbrause neuen Produkts. -
Page 25: Lieferumfang
Lieferumfang VORSICHT VOR ELEKTRISCHEM SCHLAG! Vergewissern Sie sich vor Hinweis: Kontrollieren Sie unmittelbar nach dem dem Bohren, dass sich keine elektri- Auspacken den Lieferumfang auf Vollständigkeit so- schen Leitungen an der Bohrstelle befinden. wie den einwandfreien Zustand des Produkts und VORSICHT! VERLETZUNGSGE- aller Teile. -
Page 26: Montage
Montage Schlitzschraubendreher (nicht im Lieferumfang enthalten) an der Brausestange fest, um die Machen Sie sich vor der Montage mit dem Pro- Wandhalterungen zu befestigen (siehe dukt vertraut. Lesen Sie hierzu aufmerksam die Abb. H und I). nachfolgende Montageanleitung und die Sicher- Markieren Sie die Bohrlöcher mithilfe der in heitshinweise. -
Page 27: Bedienung
Wartung Setzen Sie die Dichtung in die Überkopf- brause und schrauben Sie das Kugelgelenk zusammen mit der Überwurfmutter Prüfen Sie in regelmäßigen Abständen alle An- Uhrzeigersinn auf die Überkopfbrause schlüsse und Verbindungen auf Dichtheit oder (siehe Abb. T und U). sichtbare Beschädigungen. -
Page 28: Garantie Und Service
Kundenservice können gesundheitliche Beschwerden auftreten. Frisches Wasser können Sie daran erkennen, Conmetall Meister GmbH dass es spürbar kühler die Leitung verlässt, als Oberkamper Str. 39 Stagnationswasser. 42349 Wuppertal Verwenden Sie kein Stagnationswasser aus DEUTSCHLAND verchromten Leitungen zur Ernährung und / oder Tel. - Page 29 50 cm 50 cm 150 cm 150 cm...
- Page 31 Conmetall Meister GmbH Oberkamper Str. 39 42349 Wuppertal GERMANY Art.-No. WU6823511-8 Last Information Update · Version des informations Stand van de informatie · Stand der Informationen: 11 / 2020 · Ident.-No.: WU6823511-8112020-IE / NI /BE /NL IAN 360514_2007...
Need help?
Do you have a question about the 360514 2007 and is the answer not in the manual?
Questions and answers