Advertisement
Quick Links
INSTALLATION AND OPERATING
INSTRUCTIONS
MECHANICAL ROOM
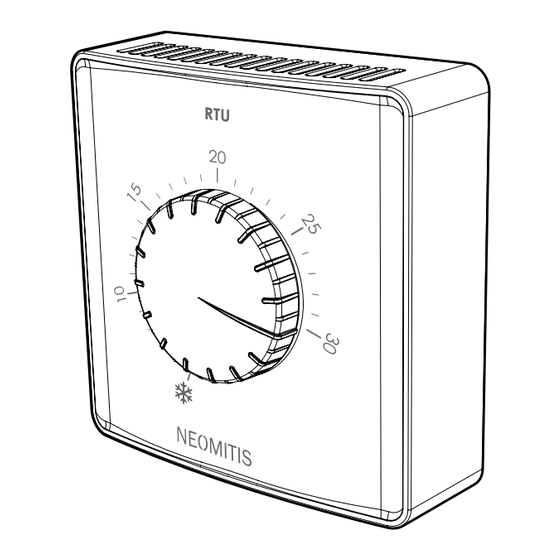
THERMOSTAT
TABLE OF CONTENTS
Overview................................................................................................................. 1
.............................................................................................................. 1
................................................................................................................. 1
......................................................................................................................................... 1
....................................................................................................... 2
................................................................................................................ 2
............................................................................................................. 2
................................................................................................................ 2
...................................................................................................... 2
........................................................................................... 2
...................................................................................... 2
OVERVIEW
Thank you for choosing to purchase our product.
This wired mechanical room thermostat is extremely
design. It was designed to make your life easier and
cooling circuit which is connected to it.
INSTALLATION
To ensure that your thermos-
tat provides accurate readings
-
direct sunshine and any other
sources of heat or cold such as
RTUA NEO ENG FP V01 13 08 2024
RTUa
MOUNTING OF THE BASE
1- Remove the main control dial.
3- Remove the front cover.
4-
5- Use the two opened areas in order to pass the
WIRING
Please verify that the total start up load of any actuators connected to the
1
Live In
2- Loosen the screw in the front face of
the unit.
x2
2
Switched Live out
10 mm max.
16 mm max.
-
areas
-
-
Heating
load*
Earth
1
Advertisement

Related Manuals for Neomitis RTUa


Summary of Contents for Neomitis RTUa
- Page 1 Switched Live out To ensure that your thermos- Heating tat provides accurate readings load* 10 mm max. direct sunshine and any other sources of heat or cold such as 16 mm max. Earth RTUA NEO ENG FP V01 13 08 2024...
- Page 2 MOUNTING OF THE FRONT COVER 1- Replace the front cover of thermostat locking screw in front of product and declares that RTUa is in compliance with OPERATING SETTING THE TEMPERATURE the control dial. 5°C and 30°C. is on. FROST PROTECTION MODE WHAT IS A ROOM THERMOSTAT ning a minimum temperature of 5°C in it at all...
Need help?
Do you have a question about the RTUa and is the answer not in the manual?
Questions and answers