Table of Contents
Advertisement
Quick Links
INSTALLATION
TMR7
7 DAY SINGLE CHANNEL DIGITAL TIMER
Pack contains ............................................................................................1
Installation ................................................................................................1
Mounting of wall mouting plate .......................................................................................1
Wiring ...............................................................................................................................1
Mounting of the timer .......................................................................................................2
Installer settings ........................................................................................2
Advanced installer setting .................................................................................................2
Technical specifications .............................................................................3
PACK CONTAINS
x1
Timer
x2
Screw Anchor
TMR7 NEO ENG CP V08 06 04 2021
TMR7a
INSTRUCTIONS
x1
Standard wall plate
x2
Screws
INSTALLATION
MOUNTING OF WALL MOUTING PLATE
The digital timer is fixed on the wall with the wall plate which is supplied with the
product.
1- Unscrew the 2 screws under the timer.
2- Remove the wall plate from the timer.
3- Secure the wall plate with the two
screws provided using the horizontal
and vertical holes.
4- In case of surface mounting, a knock
out area is provided on the wall plate
and on the corresponding area of the
timer.
WIRING
All electrical installation work should be carried out by a suitably qualified
Electrician or other competent person. If you are not sure how to install
this timer consult either with a qualified electrician or heating Engineer.
Do not remove or refit the appliance onto the backplate without the mains
supply to the system being isolated.
All wiring must be in accordance with IEE regulations. This product is for fixed wiring
only.
x2
1
Advertisement
Table of Contents

Related Manuals for Neomitis TMR7


Summary of Contents for Neomitis TMR7
-
Page 1: Table Of Contents
Do not remove or refit the appliance onto the backplate without the mains supply to the system being isolated. All wiring must be in accordance with IEE regulations. This product is for fixed wiring Screw Anchor Screws only. TMR7 NEO ENG CP V08 06 04 2021... -
Page 2: Mounting Of The Timer
• Internal wiring 2- Secure the timer by screwing both locking screws under the timer. N = Neutral IN L = Live IN 1 = Voltage free contact Feed IN 1 2 = Voltage free contact Feed IN 2 3 = Voltage free contact N.O. switching. out 1 4 = Voltage free contact N.O. -
Page 3: Technical Specifications
- 2012 n°3032 (ROHS): EN IEC 63000:2018 pressing Neomitis Ltd: 16 Great Queen Street, Covent Garden, London, WC2B 5AH UNITED KINGDOM - contactuk@neomitis.com EU declaration of conformity: We, Imhotep Creation, hereby declare... -
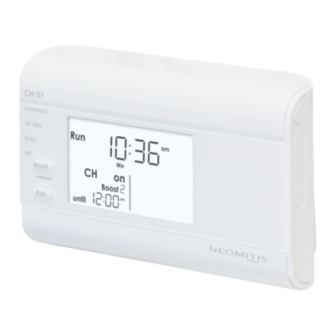
Page 4: Overview
OVERVIEW be changed. Timer battery access Thank you for purchasing our TMR7, 7 day single channel digital timer. It is by listening to your requirements we have created and designed our products to be easy to operate and install. -
Page 5: Programming
PROGRAMMING OPERATING MODE SELECTION AND DESCRIPTION Note : The unit is already set with correct date and time. Should timer need reseting for any reasons, please see instructions on page Mode slider sequences for CH/Z1: Constant all day auto SET THE CH/Z1 PROGRAMMING Constant: Permanent ON mode. -
Page 6: Holiday
HOLIDAY SET DATE AND CLOCK Holiday: Holiday mode allows to switch off the heating (or Z1) for a specified number of days, 1- Move the Programming slider to 2- To select the current year, press , to adjustable between 1 and 99 days. position increment the year. -
Page 7: Troubleshooting
At the end of this service due soon period, the unit will go to Service Due OFF at which point only the 1hour boost will operate on TMR7 and PRG7, if the unit is a thermostat RT1/RT7, it will operate at 20°C during this hour.
Need help?
Do you have a question about the TMR7 and is the answer not in the manual?
Questions and answers