Table of Contents
Advertisement
Available languages
Available languages
Quick Links
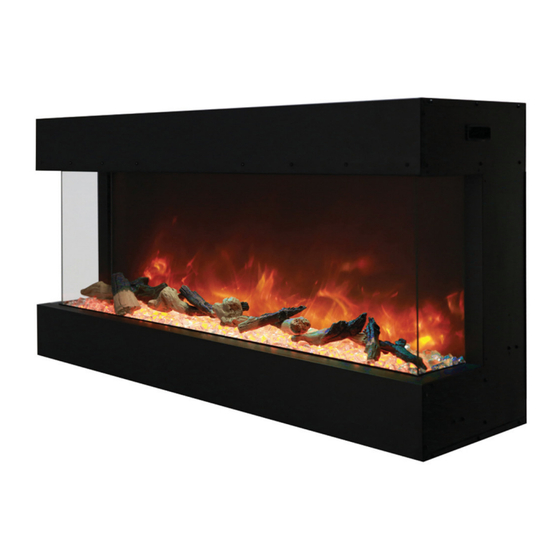
ELEKTRYCZNY GRZEJNIK
KOMINKOWY SERII TF-EF
Model: TF-EF-3S-1050, TF-EF-3S-1500, TF-EF-3S-2032, TF-EF-3S-840,
TF-EF-1S-1050, TF-EF-1S-1500, TF-EF-1S-2032
PL
ENG
Uwaga: Przed rozpoczęciem instalacji przeczytaj instrukcję!
Note: Please read the instructions before starting the installation!
Instrukcja montażu
Installation manual
Advertisement
Chapters
Table of Contents

Related Manuals for TERMOFOL TF-EF Series


Summary of Contents for TERMOFOL TF-EF Series
- Page 1 ELEKTRYCZNY GRZEJNIK KOMINKOWY SERII TF-EF Model: TF-EF-3S-1050, TF-EF-3S-1500, TF-EF-3S-2032, TF-EF-3S-840, TF-EF-1S-1050, TF-EF-1S-1500, TF-EF-1S-2032 Instrukcja montażu Installation manual Uwaga: Przed rozpoczęciem instalacji przeczytaj instrukcję! Note: Please read the instructions before starting the installation!
-
Page 2: Table Of Contents
Przeczytaj ze zrozumieniem całą instrukcję obsługi. Zapoznaj się infor- macjami dotyczące bezpieczeństwa, przed podłączeniem i użyciem tego produktu. Niezastosowanie się do tego zalecenia może spowodować pożar, porażenie prądem elektrycznym lub poważne obrażenia ciała. Zachowaj niniejszą instrukcję obsługi na przyszłość. Jeśli sprzedajesz lub oddajesz ten produkt, upewnij się, że niniejsza instrukcja jest do niego dołączona. - Page 3 WAŻNE INFORMACJE DOTYCZĄCE BEZPIECZEŃSTWA • TEN KOMINEK JEST GORĄCY PODCZAS PRACY I MOŻE SPOWODOWAĆ POWAŻ- NE POPARZENIA • Nie uruchamiaj kominka przed przeczytaniem instrukcji obsługi. Niewłaściwa obsługa kominka może spowodować pożar lub obrażenia ciała. • Przed przystąpieniem do czynności serwisowych, wyłącz zasilanie kominka i pozostaw kominek do ostygnięcia.
-
Page 4: Rysunki Wymiarowe
Rysunki wymiarowe 89mm 179mm TF-EF- TF-EF- TF-EF- -3S-1050 -1S-2032 -1S-1500 TF-EF- Model TF-EF- TF-EF- TF-EF- -3S-840 -1S-1050 -3S-2032 -3S-1500 Długość kominka 1050mm 2032mm 1500mm 840mm Wysokość kominka 460mm 460mm 460mm 460mm Szerokość kominka 179mm 179mm 179mm 179mm Wymiary ramy TF-EF- TF-EF- TF-EF- -3S-1050... -
Page 5: Wymagane Narzędzia
Wymagane narzędzia • Śrubokręt krzyżakowy • Poziomica • Taśma miernicza • Wiertarka elektryczna Rozpakowanie i konfiguracja Wyjmij wszystkie części i kominek z kartonu i umieść je na czystej, miękkiej i suchej powierzchni. Sprawdź listę elementów, aby upewnić się, że nie brakuje żadnej czę- ści. -
Page 6: Okablowanie
Okablowanie Kominki z serii TF-EF można podłączyć do uziemionego 3-bolcowego gniazdka. Test kominka przed instalacją • Przed zainstalowaniem kominka należy go przetestować, aby upewnić się, że działa prawidłowo. • Podłącz kominek do odpowiedniego gniazdka i uruchom. Po przetestowaniu ko- minka kontynuuj instalację. •... -
Page 7: Wybór Miejsca Instalacji
Wybór miejsca instalacji • Zmierz miejsce na ścianie, aby upewnić się, że kominek będzie pasował do żąda- nego miejsca na ścianie. • Minimalne prześwity: Dół kominka do podłogi: 150 mm Góra kominka: 200 mm do gzymsu Boki kominka: 0 mm Góra kominka: 200 mm do telewizora Tył... -
Page 8: Instalacja Kominka W Ścianie
Instalacja kominka w ścianie • Ze względu na wiele różnych materiałów wykończeniowych stosowanych na ścianach, zaleca się skonsultowanie z lokalnym wykonawcą przed zainstalowaniem kominka w ścianie. • Wybierz miejsce, które nie jest podatne na wilgoć i znajduje się co najmniej 100 cm od materiałów palnych, takich jak zasłony, firany, meble, pościel lub inne. -
Page 9: Instalacja Trójstronna
Instalacja dwustronna: • Szkło eksponowane z przodu oraz z lewej lub prawej strony. • Kominek jest całkowicie wpuszczony w ścianę z otwartą jedną stroną. Instalacja jednostronna: • Szkło wyeksponowane z przodu kominka. • Kominek jest całkowicie wpuszczony w ścianę. Częściowa instalacja we wnęce: •... - Page 10 Instalacja trójstronna: Instalacja dwustronna: 1. Wykonaj kroki 1 i 2 z instrukcji instalacji trójstronnej. 2. Usuń odpowiednie ograniczniki do płyt kartonowo-gipsowych zgodnie z instalacją (w przykładzie ograniczniki do płyt kartonowo-gipsowych po lewej stronie zostaną usunięte). 3. Zainstaluj szybę boczną, a następnie odpowiednią osłonę boczną zgodnie z instalacją (szybę...
-
Page 11: Montaż Kryształów Oraz Sztucznego Drewna
Montaż we wnęce częściowej Postępuj zgodnie ze wskazówkami zawartymi w instrukcji producenta Montaż szafki wsuwanej Postępuj zgodnie ze wskazówkami dołączonymi szafki wsuwanej Montaż kryształów oraz sztucznego drewna Aby zamontować zestaw składający się ze sztucznego drewna i kryształów należy odkręcić przednią szybę. Ostrożnie umieść... -
Page 12: Bezprzewodowy Pilot Zdalnego Sterowania
Panel sterowania Bezprzewodowy pilot zdalnego sterowania Funkcje panelu sterowania PRZYCISK FUNKCJA DZIAŁANIE WŁ.: Włącza funkcje panelu stero- 1. Naciśnij raz. Włącza się lampka wania i zdalne sterowanie. Włącza kontrolna. Włącza się zasilanie. efekt płomienia. Wszystkie funkcje włączone. WYŁ.: Wyłącza funkcje panelu 2. -
Page 13: Funkcje Bezprzewodowego Pilota Zdalnego Sterowania
PRZYCISK FUNKCJA DZIAŁANIE Przycisk koloru płomienia: zmie- 1. Naciśnij raz, aby zmienić kolor nia kolor efektu płomienia. płomienia. UWAGA: Efekt koloru pozostaje 2. Naciśnij ponownie, aż do włączony do momentu wyłącze- osiągnięcia żądanego ustawienia. nia przycisku zasilania. UWAGA: Istnieje łącznie 8 różnych kombi- Kominek zapamiętuje ostatnio nacji kolorów płomienia. -
Page 14: Czyszczenie
Pozwala włączyć/wyłączyć Przycisk zasilania kominek Kolorowy Służy do zmiany kolorów pierścień Suwak Regulowana jasność Po naciśnięciu tego przuci- Przycisk wyboru sku możesz dostosować ko- płomienia lor, jasność i tryb płomienia Przycisk wyboru Po wybraniu możesz oświetlenia dostosować kolor światła otoczenia otoczenia, jasność... -
Page 15: Konserwacja
Metal: • Czyść miękką lekko zwilżoną ściereczką. • NIE używaj środków do polerowania mosiądzu ani domowych środków czyszczą- cych, ponieważ te produkty uszkodzą metalowe wykończenie. Szkło: • Użyj dobrej jakości środka do czyszczenia szkła .Użyj miękkiej ściereczki. Dokład- nie osusz papierowym ręcznikiem lub niestrzępiącą się ściereczką. •... - Page 16 Niniejsza gwarancja nie obejmuje stłuczenia szyby kominkowej. Nie ponosimy odpowiedzialności za instalację, robociznę ani żadne inne wydatki związane z ponowną instalacją części objętej gwarancją, a takie wydatki nie są objęte gwarancją. Przyklej tutaj etykietę z numerem seryjnym www.termofol.pl biuro@termofol.pl +48 (12) 376 86 00...
- Page 17 KARTA GWARANCYJNA MIEJSCE INSTALACJI DANE INSTALATORA Nazwa firmy Imię i Nazwisko Adres (ulica, nr) Miejscowość Telefon Data Podpis instalatora Pieczątka instalatora www.termofol.pl biuro@termofol.pl +48 (12) 376 86 00...
- Page 18 ELECTRIC HEATER FIREPLACE SERIES TF-EF Model: TF-EF-3S-1050, TF-EF-3S-1500, TF-EF-3S-2032, TF-EF-3S-840, TF-EF-1S-1050, TF-EF-1S-1500, TF-EF-1S-2032 Installation manual Note: Please read the instructions before starting the installation!
- Page 19 Read and understand the entire instruction manual. Please read the safety information before connecting and using this product. Failure to do so may result in fire, electric shock, or serious injury. Keep this instruction manual for future reference. If you are selling or giving away this product, make sure this manual is included with it.
- Page 20 IMPORTANT SAFETY INFORMATION • THIS FIREPLACE IS HOT IN OPERATION AND CAN CAUSE SERIOUS BURNS • Do not start the fireplace before reading the instruction manual. Improper handling of the fireplace can cause fire or personal injury. • Before servicing, turn off the power to the fireplace and allow the fireplace to cool down.
-
Page 21: Dimensional Drawings
Dimensional drawings 89mm 179mm TF-EF- TF-EF- TF-EF- -3S-1050 -1S-2032 -1S-1500 TF-EF- Model TF-EF- TF-EF- TF-EF- -3S-840 -1S-1050 -3S-2032 -3S-1500 The length of the 1050mm 2032mm 1500mm 840mm fireplace The height of the 460mm 460mm 460mm 460mm fireplace The width of the 179mm 179mm 179mm... -
Page 22: Required Tools
Tools required • Cross screwdriver • Spirit level • Tape measure • Electric drill Unpacking and setup Take all parts and the fireplace out of the carton and place them on a clean, soft and dry surface. Check the parts list to make sure no parts are missing. If parts are missing, please contact your dealer for replacement parts. -
Page 23: Wiring
Wiring TF-EF series fireplaces can be connected to a grounded 3-pin socket. Fireplace test before installation • Before installing the fireplace, test it to make sure it is working properly. • Plug the fireplace into a suitable socket and turn it on. After testing the fireplace, proceed with the installation. -
Page 24: Selecting The Installation Location
Choosing an installation location • Measure the space on the wall to ensure that the fireplace will fit in the desired space on the wall. • Minimum clearances: The bottom of the fireplace to the Top of the fireplace: 200 mm to the cor- floor: 150 mm nice Fireplace sides: 0 mm... -
Page 25: Installing The Fireplace In The Wall
Installing a fireplace in the wall • Due to the many different finishing materials used on walls, it is recommended that a local contractor be consulted before installing the fireplace into the wall. • Choose a location that is not susceptible to moisture and is at least 100 cm away from combustible materials such as curtains, drapes, furniture, bedding, or others. -
Page 26: Partial Recess Installation
Two-sided installation: • Glass exposed to the front and to the left or right. • The fireplace is completely recessed into the wall with one side open. One-sided installation: • Glass exposed in front of the fireplace. • The fireplace is completely recessed into the wall. - Page 27 Three-way installation: Two-sided installation: 1. Follow steps 1 and 2 of the 3-way installation instructions. 2. Remove the appropriate drywall stops according to the installation (in the example, the drywall stops on the left will be removed). 3. Install the side glass and then the appropriate side cover according to the installation (the side glass must be installed before the metal side cover).
-
Page 28: Installation Of Crystals And Artificial Wood
Installation in a partial recess Follow the instructions in the manufacturer’s instructions Installation of a sliding cabinet Follow the instructions that came with the slide-in cabinet Installation of crystals and artificial wood To install the set consisting of artificial wood and crystal, the windshield must be unscrewed. -
Page 29: Wireless Remote Control
Control panel Wireless remote control Control panel features BUTTON FUNCTION ACTION ON: Enables the control panel 1. Press once. The indicator light and remote control functions. comes on. The power turns on. Enables the flame effect. All features enabled. OFF: Disables the control panel 2. -
Page 30: Functions Of The Wireless Remote Control
BUTTON FUNCTION ACTION Flame Color Button: Changes the 1. Press once to change flame color of the flame effect. color. NOTE: The color effect remains 2. Press again until the desired on until you turn off the power setting is reached. There are a button. -
Page 31: Cleaning
Allows you to turn on/off Power button the fireplace Colorful ring Used to change colors ZIP fastener Adjustable brightness When you press this button, Flame selection you can adjust the color, button brightness and flame mode Once selected, you can ad- Ambient light just the ambient light color, selection button... -
Page 32: Maintenance
• Store the fireplace in a clean, dry place when not in use. Guarantee TF-EF series electric fireplaces are covered by a 24-month warranty from the date of purchase. Electrical components such as fan motor, heater motor, control board, remote control and control panel are under warranty The warranty does not cover damage caused by third parties. - Page 33 We are not responsible for installation, labor, or any other expenses associated with reinstalling a warranted part, and such expenses are not covered by the war- ranty. Stick the label here with serial number www.termofol.pl biuro@termofol.com +48 (12) 376 86 00...
- Page 34 WARRANTY CARD PLACE OF INSTALLATION FITTER’S DETAILS Name of company Forename and surname Address (street, no.) Postal Locality code Tel. Date Fitter’s signature Fitter’s stamp www.termofol.com biuro@termofol.pl +48 (12) 376 86 00...
Need help?
Do you have a question about the TF-EF Series and is the answer not in the manual?
Questions and answers